 07-25-2020, 02:52 PM
|
#1
|
|
Who's askin'?
Join Date: Mar 2018
Location: Utah
Posts: 2,448
|
I LOVE this thread!
Well done sir!
Sent from my SM-G970U using Tapatalk
|

|

|
|
07-26-2020, 08:57 AM
|
#2
|
|
Registered User
Join Date: Oct 2018
Location: North Cali
Posts: 858
|
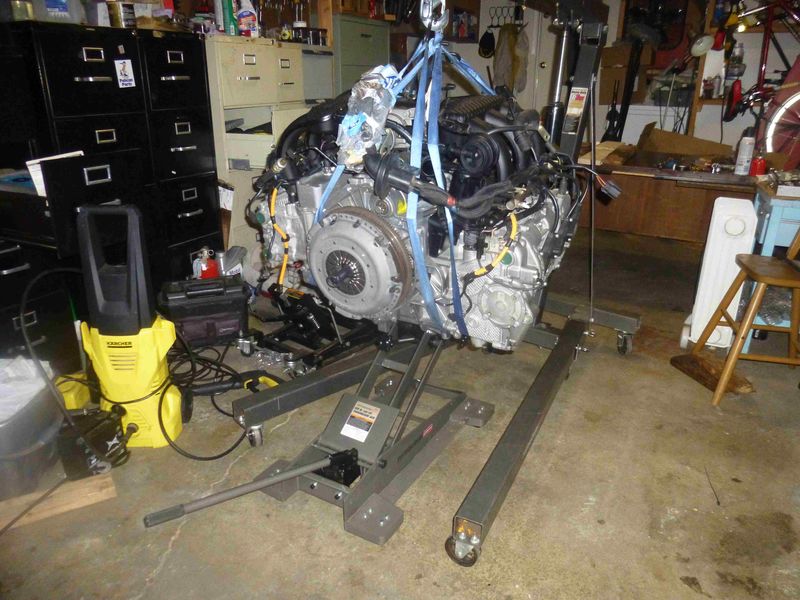
Thanks, Guys. Yeah, it`s coming along nicely, I think I`ll be able to put the engine back in the chassis in a couple weeks. There`s still a lot to do though. For instance, I just realized that several parts of the secondary air injection system (SAI) have to be replaced. Looks like everything that has an abbreviated name (SAI, AOS, RMS, IMS, DMF) in this car needs attention at least after 100k miles. Or conversely, they are abbreviated because they frequently fail?  Next time before I buy a car, I`ll look into the forums and if I see too many acronyms I`ll just walk away 
|
|
|
|
|
07-27-2020, 10:40 PM
|
#3
|
|
Registered User
Join Date: Oct 2018
Location: North Cali
Posts: 858
|
Sai
Ok, so I made the same mistake again, for some reason I thought that the car had been running fine before the timing failed, so everything else should be ok. I was wrong, of course.
Luckily I borrowed a Mityvac vacuum tester for some other purpose from a friend, and I thought I check the components of the secondary air injection system, or SAI, just in case. The vacuum reservoir tested out fine, it holds the vacuum perfectly.

The change-over valve failed though.. Vacuum should open a diaphragm inside which opens a valve for the air flow. This one here does nothing.

It looks surprisingly clean inside.
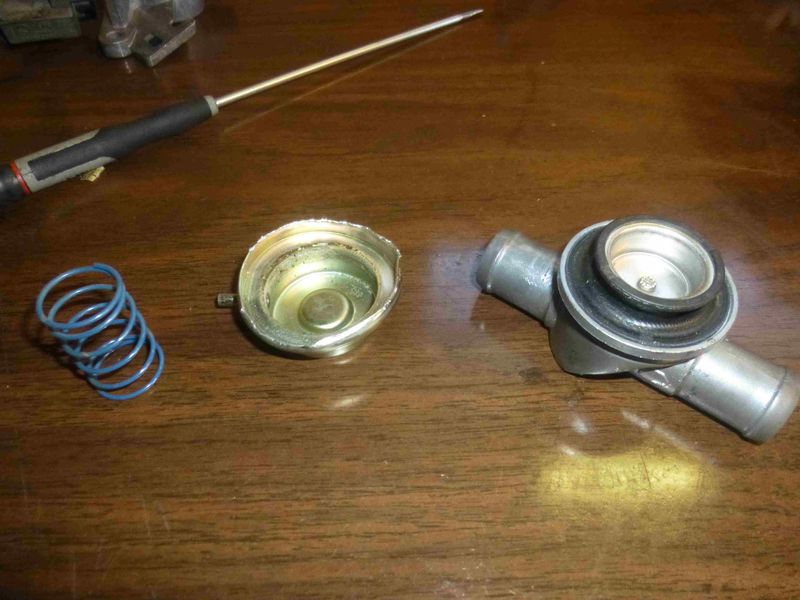
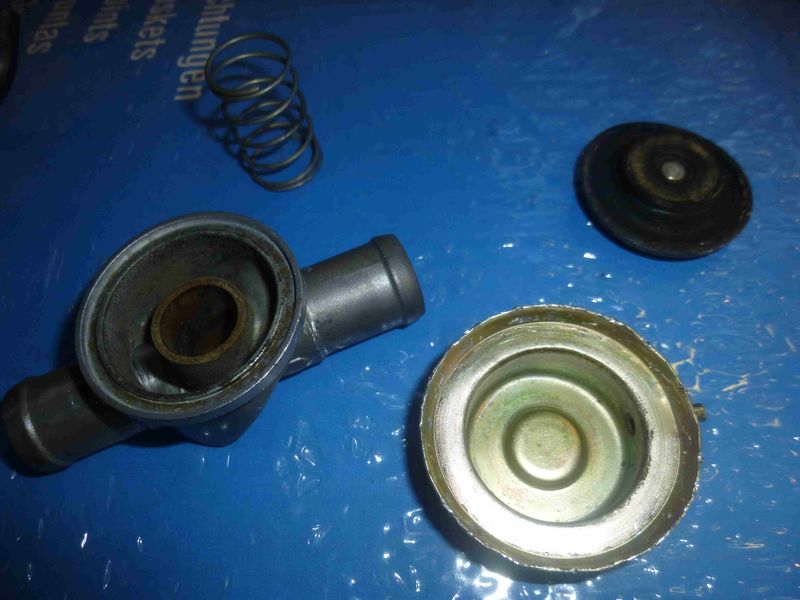
Ok, this is where the vacuum escaped..
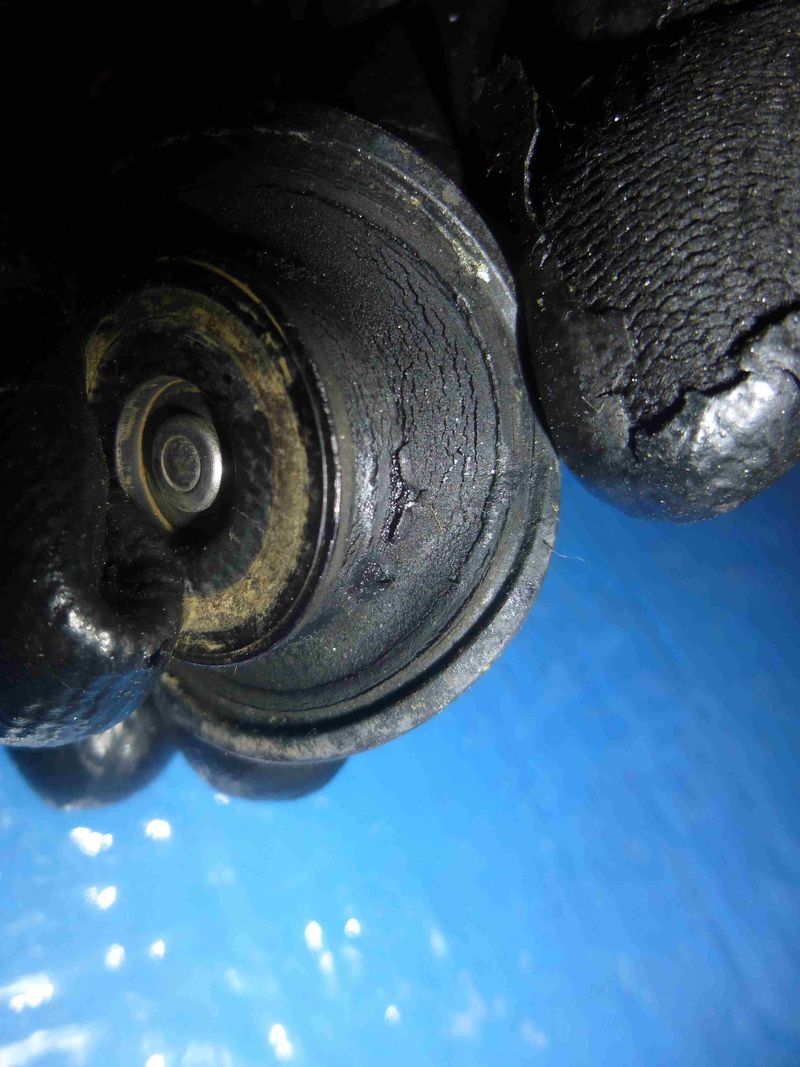
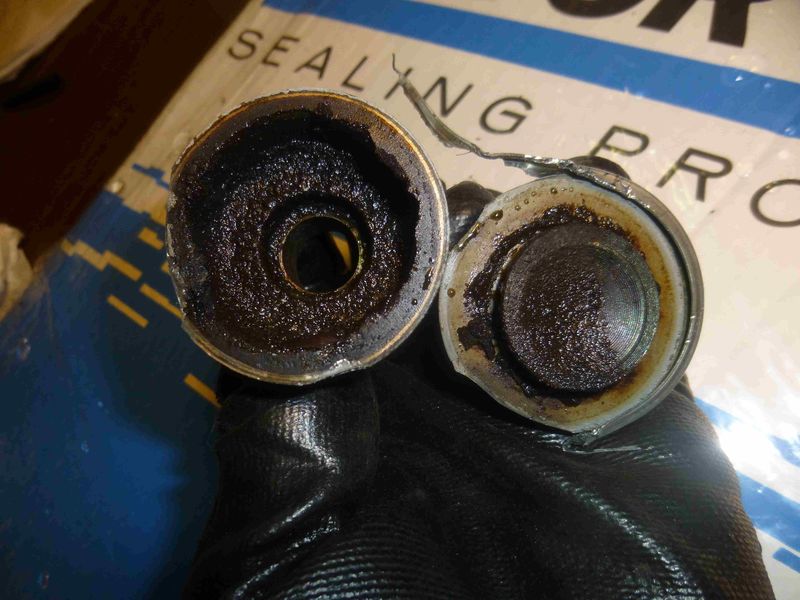
The next component in the system is the check valve. It`s a simple rectifying valve that won`t let the exhaust gas going backwards toward the check valve. I blew some air in it, went through freely from both sides. Not a good sign.
Inside. Not too healthy.

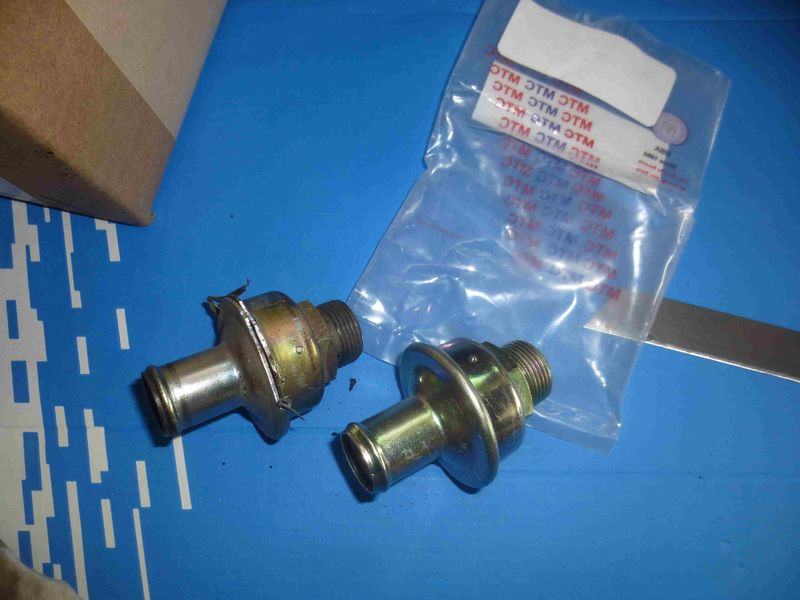
Both the check valve and the change over valve cost over $100 each. Great... After some digging, I found an old thread with some excellent info about the Mercedes SAI being very similar to the Boxster`s. After subtracting the Porsche tax, they came out much cheaper.
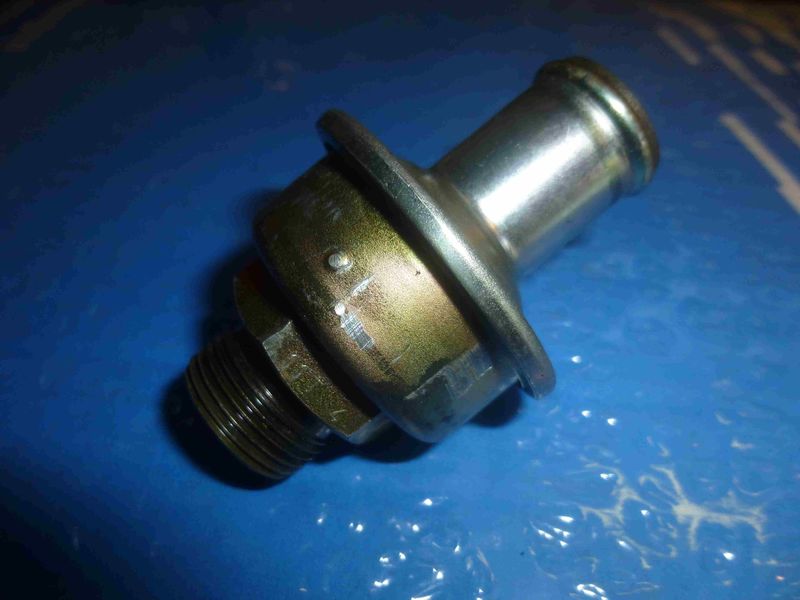
Check valve, porsche vs. Mercedes. They look identical.
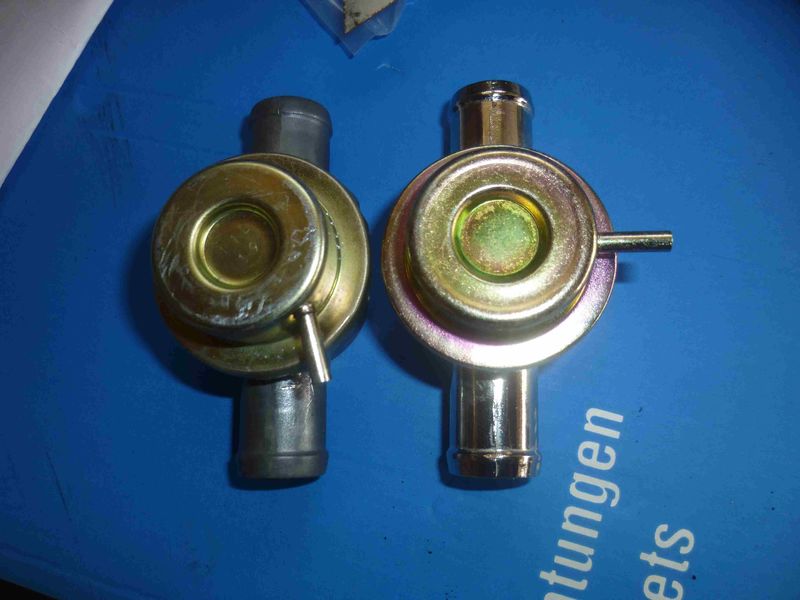
Change over valve, Porsche (left, destroyed) vs Mercedes. The vacuum line inlet is rotated 90 degrees and the housing is plastic instead of aluminum, but it`s made for the same purpose in a German car, so it should work. Thanks, Particlewave, for the tip!
|
|
|
|
|
07-28-2020, 05:23 PM
|
#4
|
|
Registered User
Join Date: Jan 2014
Location: New Jersey
Posts: 1,631
|
Nice work! I'm surprised a Mercedes part is significantly cheaper than a Porsche part!
__________________
Current: 2022 718 Cayman GT4, PDK bone stock (the dark side).
Former: 2003 S, 3.6 LN Nickies, ARP rod bolts, under-drive pulley, Fabspeed sport headers, Softronic tune, 987 airbox 987 motor mount, Function-First Sport motor mount insert, Ben's short shifter, Nine8Six projector headlights & center caps, ROW M030, stainless flexible brake lines, B-K rollbar extension & fire extinguisher mount, hardtop
|
|
|
|
|
07-28-2020, 10:41 PM
|
#5
|
|
Registered User
Join Date: Oct 2018
Location: North Cali
Posts: 858
|
Quote:
Originally Posted by PaulE

Nice work! I'm surprised a Mercedes part is significantly cheaper than a Porsche part!
|
Thank you! Well, the original parts are made by Denso, and the replacements are MTC, which is a cheaper brand, hence the big difference (3-4 times). But the genuine Mercedes vs. Porsche part pricing seems to be significantly different too for the same part.
|
|
|
|
|
07-28-2020, 10:47 PM
|
#6
|
|
Registered User
Join Date: Jul 2019
Location: Finland
Posts: 356
|
Quote:
Originally Posted by Homeoboxter
Thank you! Well, the original parts are made by Denso, and the replacements are MTC, which is a cheaper brand, hence the big difference (3-4 times). But the genuine Mercedes vs. Porsche part pricing seems to be significantly different too for the same part.
|
Could you post the MB part numbers (check valve and change over valve) you used instead of Porsche? I'm lookin to swap these parts during next winter.
__________________
2001 996 C2 Manual
|

|
|
|
07-29-2020, 06:08 PM
|
#7
|
|
Registered User
Join Date: Oct 2018
Location: North Cali
Posts: 858
|
|
|
|
|
|
07-29-2020, 09:50 PM
|
#8
|
|
Registered User
Join Date: Jul 2019
Location: Finland
Posts: 356
|
Quote:
Originally Posted by Homeoboxter
|
Fantastic, thanks 
__________________
2001 996 C2 Manual
|
|
|
|
|
09-21-2020, 07:21 AM
|
#9
|
|
Registered User
Join Date: Jun 2012
Location: Bedford, TX
Posts: 2,755
|
Very nice
__________________
______________________________________________
2001 Boxster S Lapis Blue
TS Cat Bypass Pipes and exhaust
iPad Mini Dash Install
DEPO Tail Lights
|
|
|
|
|
09-23-2020, 10:04 PM
|
#10
|
|
Registered User
Join Date: Oct 2018
Location: North Cali
Posts: 858
|
Thanks!
My engine mount was cracked so I got a new Lemforder insert and took the whole stuff to the nearest shop to get them swapped. They were willing to press it out and press the new one in for $60. I still can`t get used to the Bay Area prices. So I decided to do it myself. It was a huge pain and I spent way more time on it than it`s worth, so probably that was not the best decision, but hindsight is always 20/20.
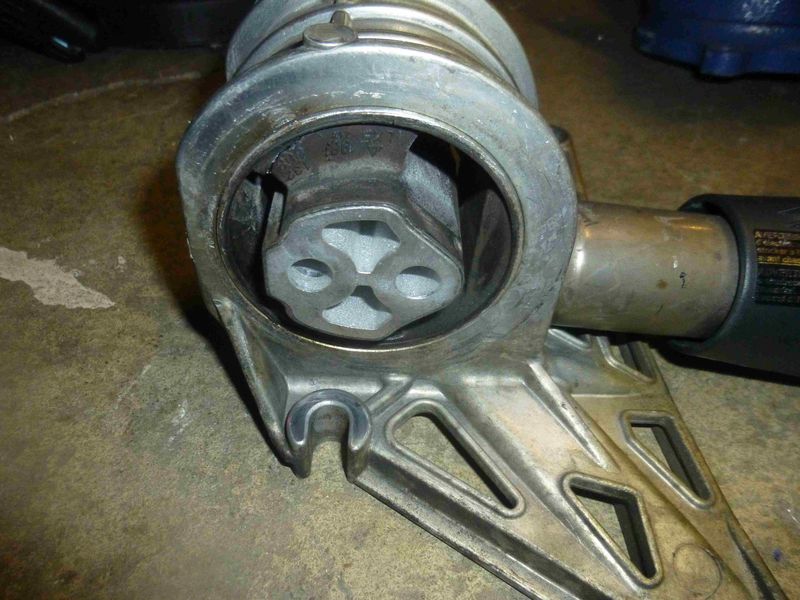
Heating up the aluminum housing as if it made a difference.

This is my setup: I went to autozone and rented a wheel bearing puller set that I combined with my vise.
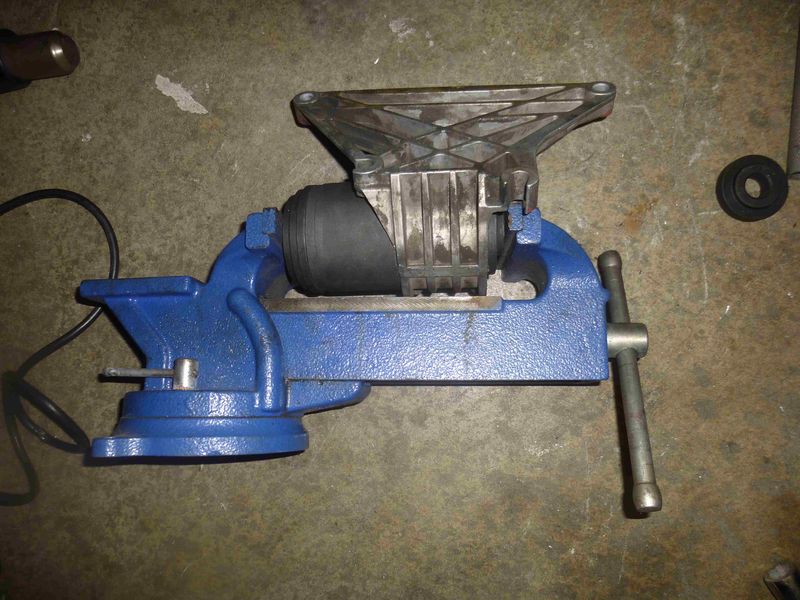
There was a great chance that I would break the vise using this meter long extension, but actually it survived.

Everything is possible, just have to force it.

I`m stronger, told you...

For assembling I was gonna save some manpower and dropped the insert in the freezer overnight and heated the housing in the oven before the action.
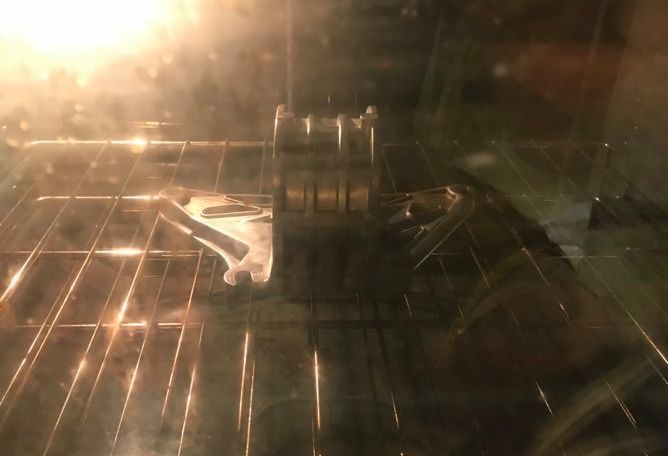
It helped, it was definitely easier, still a hassle though.
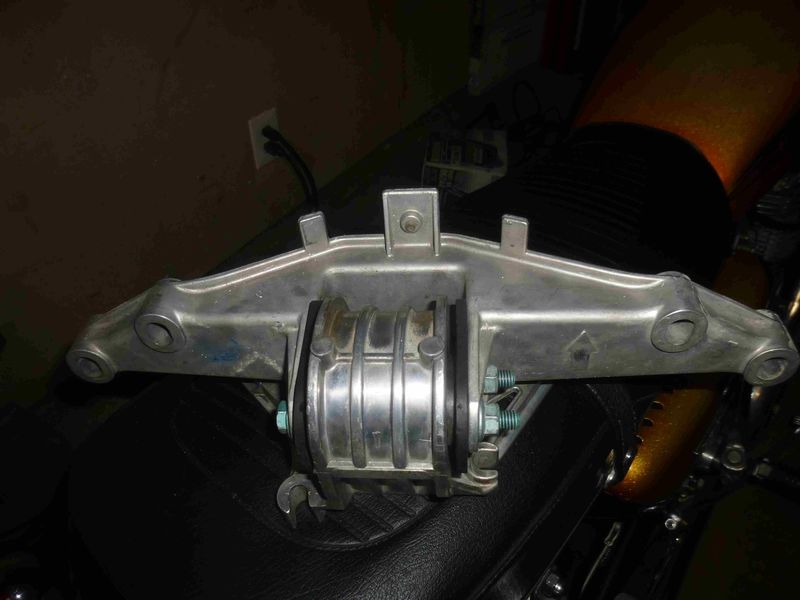
Time to give it some vibration 

|
|
|
|
|
09-26-2020, 06:19 PM
|
#11
|
|
Registered User
Join Date: Jul 2019
Location: Charleston
Posts: 561
|
I think you are supposed to bolt that vise to a work bench... I could be wrong. LOL
I typically burn the old bushings out in this type of scenario.
__________________
'99 supercharged 4.3 chevy Boxsterado
'98 PP13B powered "RX986"
This hairdresser only cuts mullets
|
|
|
|
|
09-26-2020, 10:43 PM
|
#12
|
|
Registered User
Join Date: Oct 2018
Location: North Cali
Posts: 858
|
Quote:
Originally Posted by Qingdao
I think you are supposed to bolt that vise to a work bench... I could be wrong. LOL
I typically burn the old bushings out in this type of scenario.
|
Yeah, that vise has been like that since I moved here from my previous place... Maybe once the Porsche engine is off the bench!
If I burned out the bushing I`d end up with a steel cyilinder in an aluminum bore that I still would have to press out.
|
|
|
|
|
09-27-2020, 02:23 PM
|
#13
|
|
Registered User
Join Date: Jul 2019
Location: Charleston
Posts: 561
|
Quote:
Originally Posted by Homeoboxter
Yeah, that vise has been like that since I moved here from my previous place... Maybe once the Porsche engine is off the bench!
If I burned out the bushing I`d end up with a steel cyilinder in an aluminum bore that I still would have to press out.
|
Ah, Why didn't you get the mount thats already in the aluminium housing? I just replaced one on a customer's car.
__________________
'99 supercharged 4.3 chevy Boxsterado
'98 PP13B powered "RX986"
This hairdresser only cuts mullets
|
|
|
|
|
10-02-2020, 05:47 PM
|
#14
|
|
Registered User
Join Date: Sep 2008
Location: Florida
Posts: 2,497
|
Quote:
Originally Posted by Homeoboxter
Yeah, that vise has been like that since I moved here from my previous place... Maybe once the Porsche engine is off the bench!
If I burned out the bushing I`d end up with a steel cyilinder in an aluminum bore that I still would have to press out.
|
For next time, mount insert removal is easy if you cut the rubber out and then use a hack saw on the remaining aluminum. saw a couple of cuts and the aluminum comes out in a couple of pieces. About 30 minutes total.
|
|
|
|
|
10-13-2020, 03:45 PM
|
#15
|
|
Registered User
Join Date: Jan 2014
Location: New Jersey
Posts: 1,631
|
Nice work you could put a 987 airbox in there before you put the engine back in!
__________________
Current: 2022 718 Cayman GT4, PDK bone stock (the dark side).
Former: 2003 S, 3.6 LN Nickies, ARP rod bolts, under-drive pulley, Fabspeed sport headers, Softronic tune, 987 airbox 987 motor mount, Function-First Sport motor mount insert, Ben's short shifter, Nine8Six projector headlights & center caps, ROW M030, stainless flexible brake lines, B-K rollbar extension & fire extinguisher mount, hardtop
|
|
|
|
|
10-13-2020, 05:40 PM
|
#16
|
|
Registered User
Join Date: Mar 2018
Location: Fort Langley
Posts: 253
|
I think the Porsche design for the coolant tank is terrible, especially considering that these fail. I had to change the tank (like many others) with the engine in the car and I can say without hesitation that I would rather redo my entire suspension that do the coolant tank again.
I think you might benefit by installing barbed quick connections at the bulkhead to allow for simple future tank replacement. Certainly you have the a ability to do so now pretty easily.
__________________
----------------------------
98 Boxster - Ocean Blue metallic. Bringing it back to life and having fun doing it!
20 Harley Streetbob -
|
|
|
|
|
10-13-2020, 09:37 PM
|
#17
|
|
Registered User
Join Date: Oct 2018
Location: North Cali
Posts: 858
|
Quote:
Originally Posted by Zzorro
I think the Porsche design for the coolant tank is terrible, especially considering that these fail. I had to change the tank (like many others) with the engine in the car and I can say without hesitation that I would rather redo my entire suspension that do the coolant tank again.
I think you might benefit by installing barbed quick connections at the bulkhead to allow for simple future tank replacement. Certainly you have the a ability to do so now pretty easily.
|
I was thinking about doing that, but then I didn`t bother. It`s replaced already, so it should be ok for a while. Or maybe not... we`ll see! Too late now, the engine is back in the car..
|
|
|
|
|
10-13-2020, 09:39 PM
|
#18
|
|
Registered User
Join Date: Oct 2018
Location: North Cali
Posts: 858
|
Quote:
Originally Posted by PaulE
Nice work you could put a 987 airbox in there before you put the engine back in!
|
Hi, thanks, but it`s too late, the engine is back in the chassis :ah: Why is the 987 airbox better than the 986?
|
|
|
|
|
10-14-2020, 05:11 PM
|
#19
|
|
Registered User
Join Date: Jan 2014
Location: New Jersey
Posts: 1,631
|
Quote:
Originally Posted by Homeoboxter
Hi, thanks, but it`s too late, the engine is back in the chassis :ah: Why is the 987 airbox better than the 986?
|
Better airflow, the 987 air filter is about twice the size of the 986 filter. Porsche started putting it in the 2004 986 550 S edition. You work fast!
__________________
Current: 2022 718 Cayman GT4, PDK bone stock (the dark side).
Former: 2003 S, 3.6 LN Nickies, ARP rod bolts, under-drive pulley, Fabspeed sport headers, Softronic tune, 987 airbox 987 motor mount, Function-First Sport motor mount insert, Ben's short shifter, Nine8Six projector headlights & center caps, ROW M030, stainless flexible brake lines, B-K rollbar extension & fire extinguisher mount, hardtop
|
|
|
|
|
10-14-2020, 11:03 PM
|
#20
|
|
Registered User
Join Date: Oct 2018
Location: North Cali
Posts: 858
|
Last edited by Homeoboxter; 10-14-2020 at 11:08 PM.
|
|
|
|
 Posting Rules
|
You may not post new threads
You may not post replies
You may not post attachments
You may not edit your posts
HTML code is Off
|
|
|
All times are GMT -8. The time now is 05:16 PM.
| |


 Boxster
 2001 Boxster S


 Hybrid Mode


