 03-04-2020, 10:49 PM
|
#1
|
|
Registered User
Join Date: Oct 2018
Location: North Cali
Posts: 857
|
Thanks for the interest and encouragement!
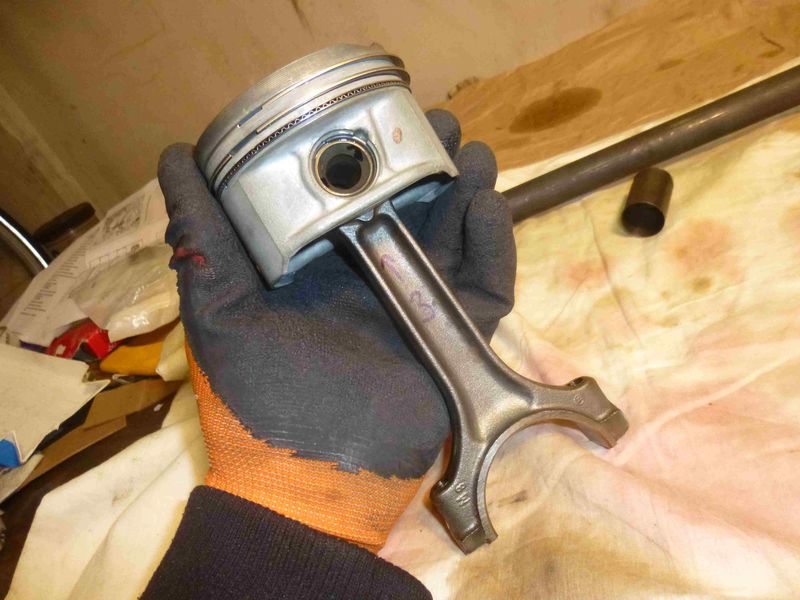
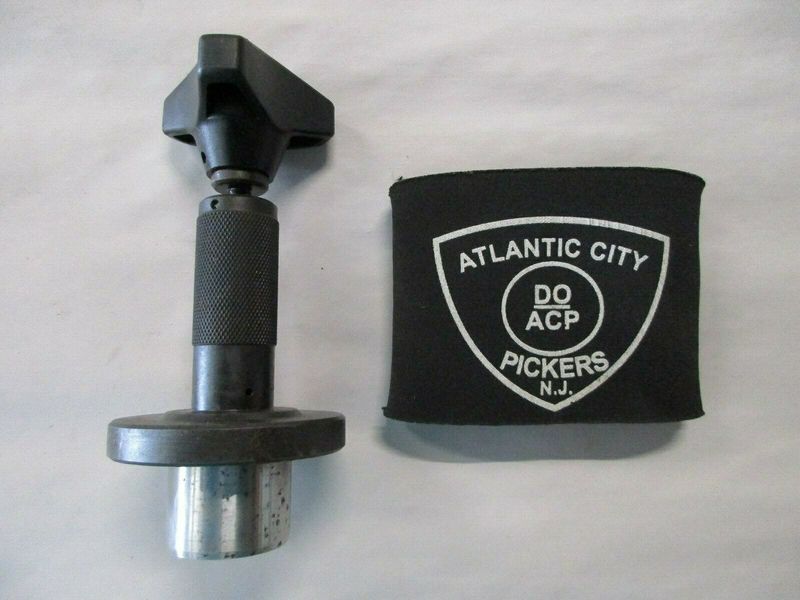
For pistons 1-2-3 I could have used some conventional tool as they go into the cylinders like on any average engine. But, since I already have the Porsche-specific toolset for pistons 4-5-6, I just used that.
Here`s what it looks like:
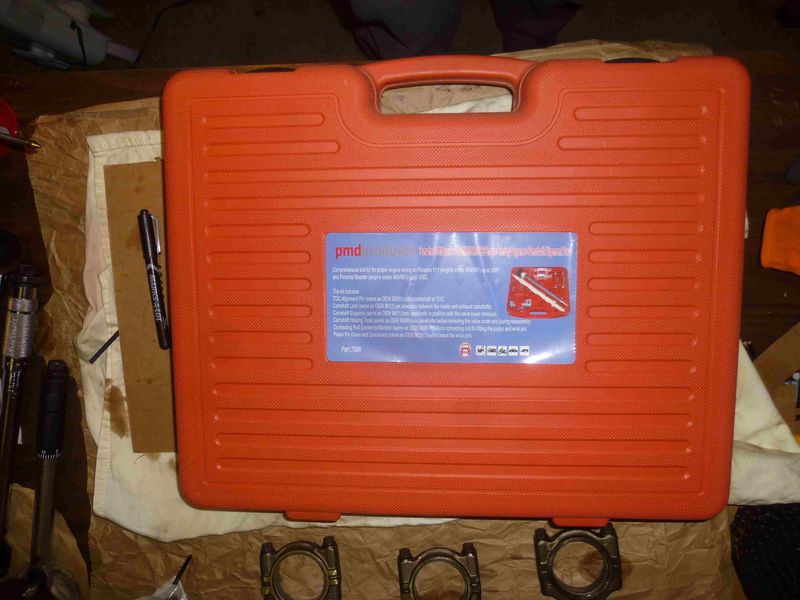
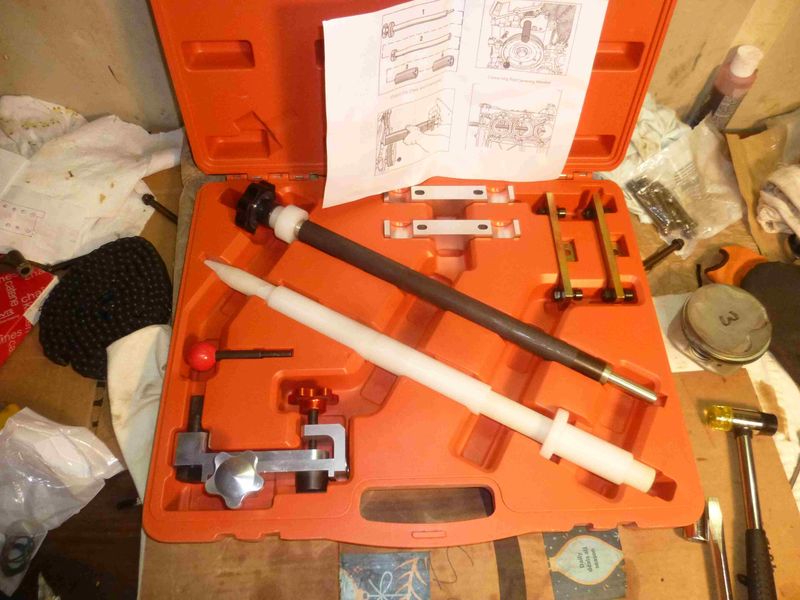
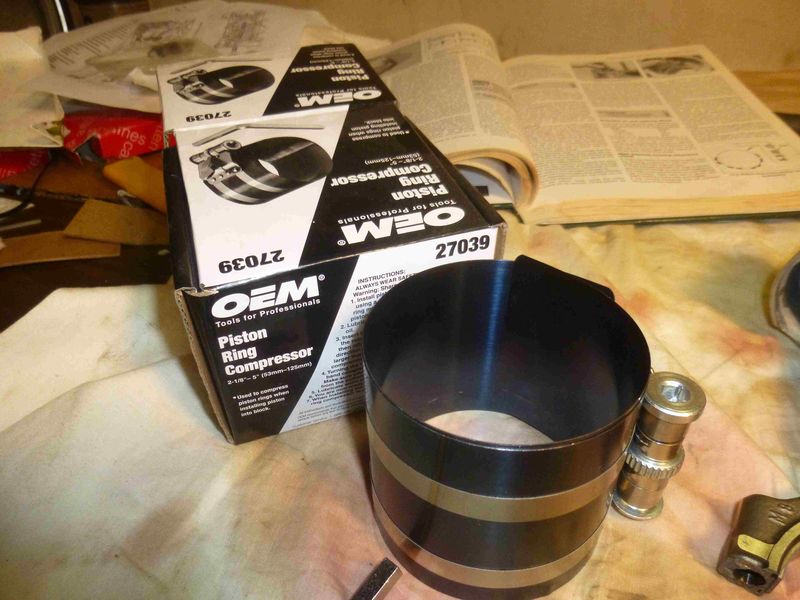
It was something like $80 on Amazon and probably it`s made in China 
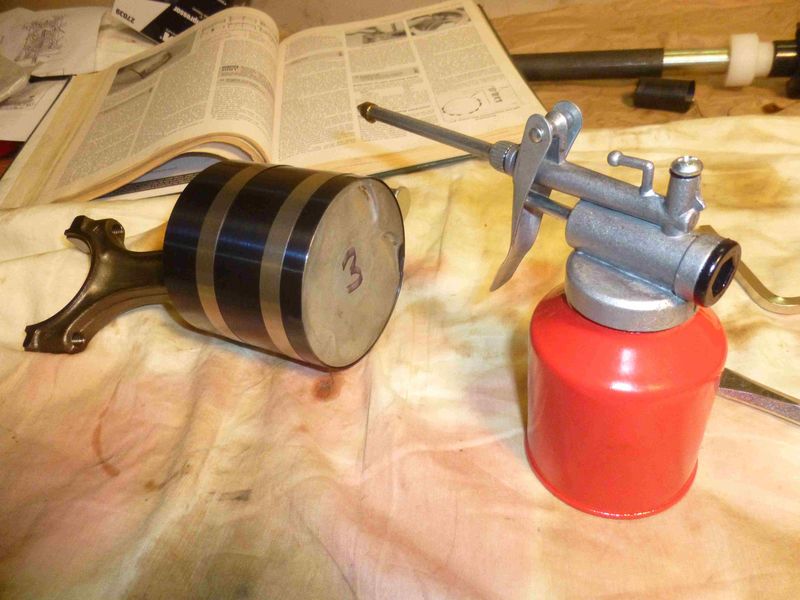
Everything prepared for the procedure:

Circlip inserted into the tool. Some builders use an extra tool to compress the ring so they can insert it into the tool, I just forced it in with my fingers.
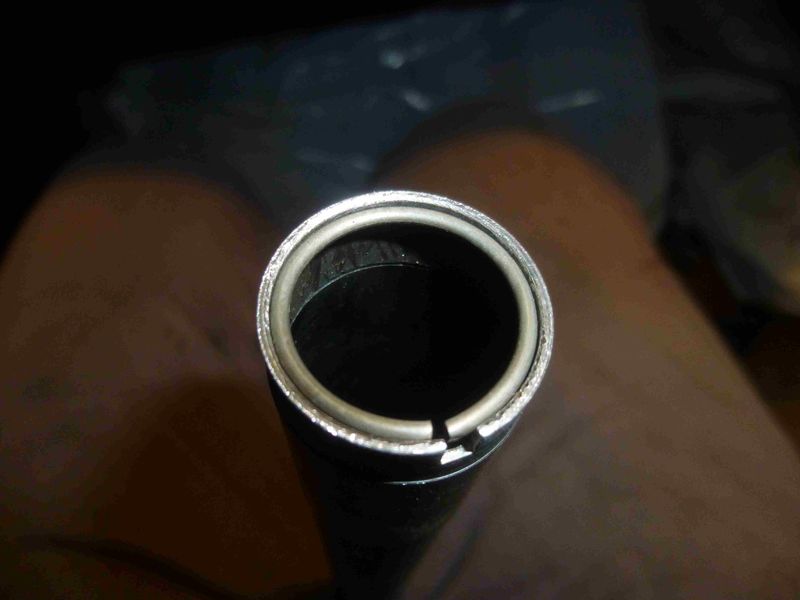
It`s in. I didn`t make pictures of the failed attempts, there were many though. Then I realized I have to hit the slider in the tube quite strongly to smash the circlip into the groove.
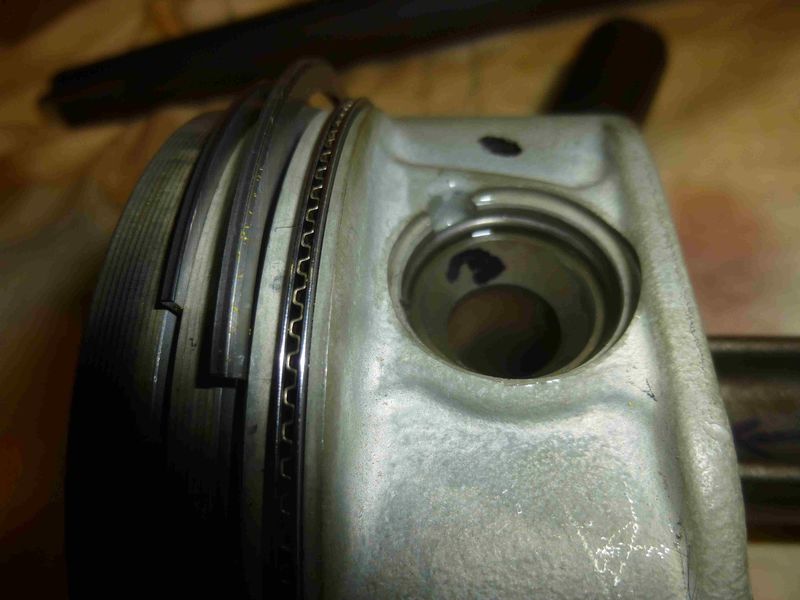
Ring compressor. If you don`t want to buy it, you can rent one for free at Autozone.
For arranging the ring gaps, I took my SAAB shop manual off the shelf. Annoyingly, there`s no such manual for the Porsche available for a hobby mechanic like me. It`s not rocket science though, you just have to rotate the rings so that you minimize the blow by between the piston and cylinder wall.

|

|

|
|
03-25-2020, 10:53 PM
|
#2
|
|
Registered User
Join Date: Oct 2018
Location: North Cali
Posts: 857
|
|
|
|
|
|
03-26-2020, 07:33 PM
|
#3
|
|
Registered User
Join Date: Jul 2019
Location: Charleston
Posts: 555
|
Call me stupid, but how does one get the wrist pin in piston #5?
__________________
'99 supercharged 4.3 chevy Boxsterado
'98 PP13B powered "RX986"
This hairdresser only cuts mullets
|
|
|
|
|
03-27-2020, 09:23 AM
|
#4
|
|
Registered User
Join Date: Jan 2014
Location: New Jersey
Posts: 1,631
|
Thanks for sharing. 46 years ago I was a supervised participant in the rebuild of my 948 cc Austin Healey Sprite engine and a few years later rebuilt my 3 liter Austin Healey 3000 engine with a lot of help. My own Boxster S engine was rebuilt by my shop last year, I couldn't imagine doing this. And you are doing it all at home with a new baby in the house, if I read that correctly a few pages ago. Congratulations on that and please keep posting!
__________________
Current: 2022 718 Cayman GT4, PDK bone stock (the dark side).
Former: 2003 S, 3.6 LN Nickies, ARP rod bolts, under-drive pulley, Fabspeed sport headers, Softronic tune, 987 airbox 987 motor mount, Function-First Sport motor mount insert, Ben's short shifter, Nine8Six projector headlights & center caps, ROW M030, stainless flexible brake lines, B-K rollbar extension & fire extinguisher mount, hardtop
|
|
|
|
|
03-30-2020, 10:05 AM
|
#5
|
|
Registered User
Join Date: Oct 2018
Location: North Cali
Posts: 857
|
Quote:
Originally Posted by PaulE

Thanks for sharing. 46 years ago I was a supervised participant in the rebuild of my 948 cc Austin Healey Sprite engine and a few years later rebuilt my 3 liter Austin Healey 3000 engine with a lot of help. My own Boxster S engine was rebuilt by my shop last year, I couldn't imagine doing this. And you are doing it all at home with a new baby in the house, if I read that correctly a few pages ago. Congratulations on that and please keep posting!
|
Rebuilding an Austin may have been a challenge back in the day, in the pre-internet days
Yes, you got that right, unfortunately the Boxster has only two seats, not ideal for a family, my wife is not concerned about it though, she says by the time it will be back on the road the baby will be able to drive it anyways
|
|
|
|
|
05-07-2020, 11:42 PM
|
#6
|
|
Registered User
Join Date: Oct 2018
Location: North Cali
Posts: 857
|
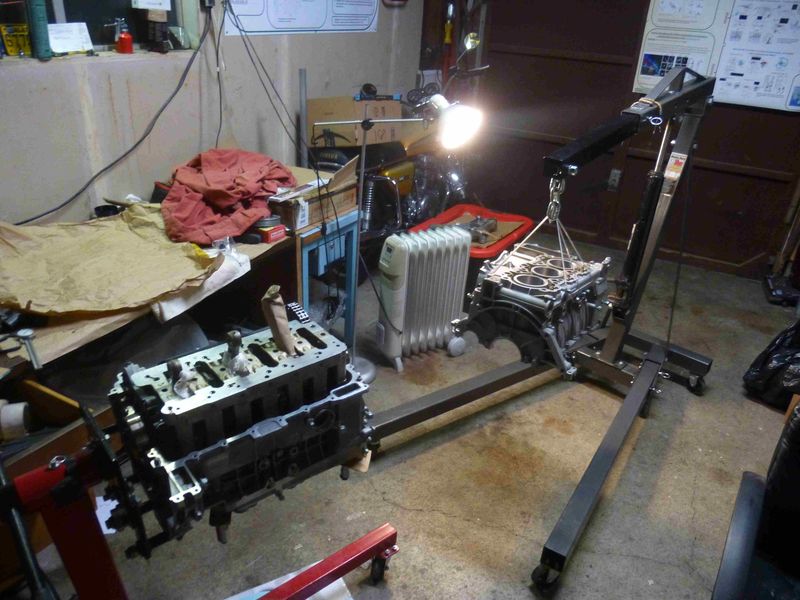
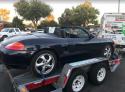
The everlasting Boxster project continues. I uncovered the car just to make sure it`s still there. It is. Been resting here for about 1.5 year. It doesn`t look bad from a bird`s point of view:

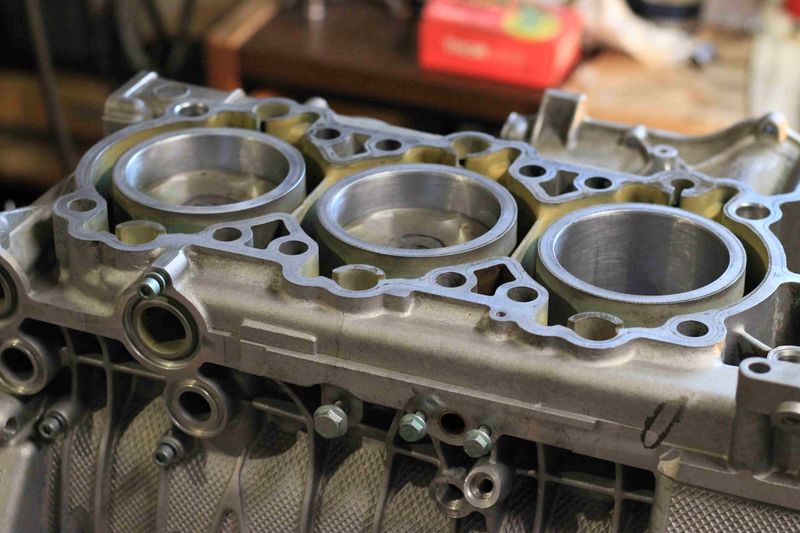
Back to the engine. New crankcase seals.

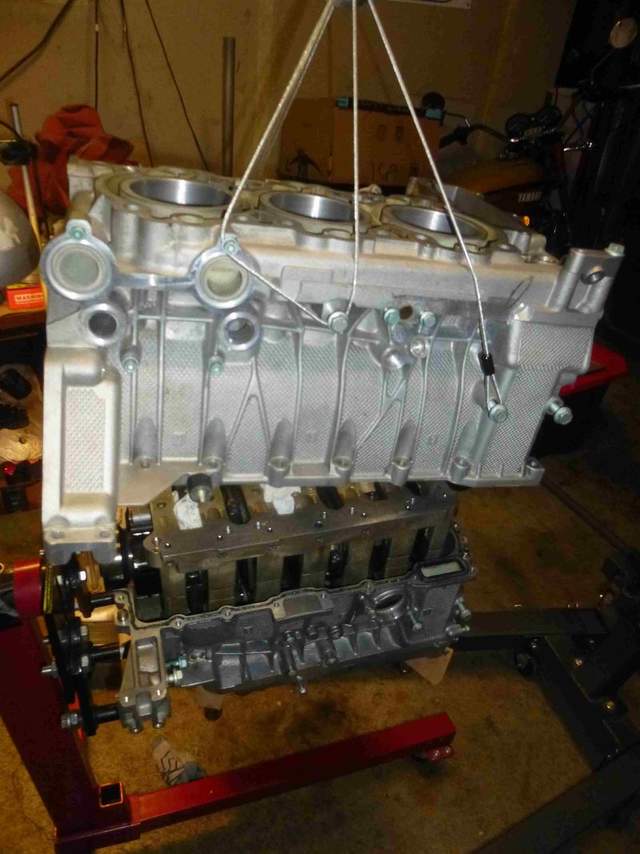
Upper half is coming to mate with lower half.
Mating surfaces are thoroughly cleaned and a small bead of Loctite 5900 is applied in a pattern described in the shop manual.
Speaking of which, he shop manual makes a big deal about alignig the cases using this aligning mandrel.

This is how it looks in real life, i borrowed this picture from ebay. It`s listed only for $4000. Used. I think I`ll pass on this for now.
Instead, I just used the oil pump housing to align the cases and it worked. I inserted it in the engine case, tightened the bolts around the IMS bearing bore, removed it, then tightened down all the bolts in the correct sequence. The screwdriver is to lift the IMS for positioning. It also helps a lot if you place the rear IMS bearing flange in, otherwise the whole assembly gets jammed, so you really need to take your time with this step. But you also have to be quick, because the Loctite is curing...
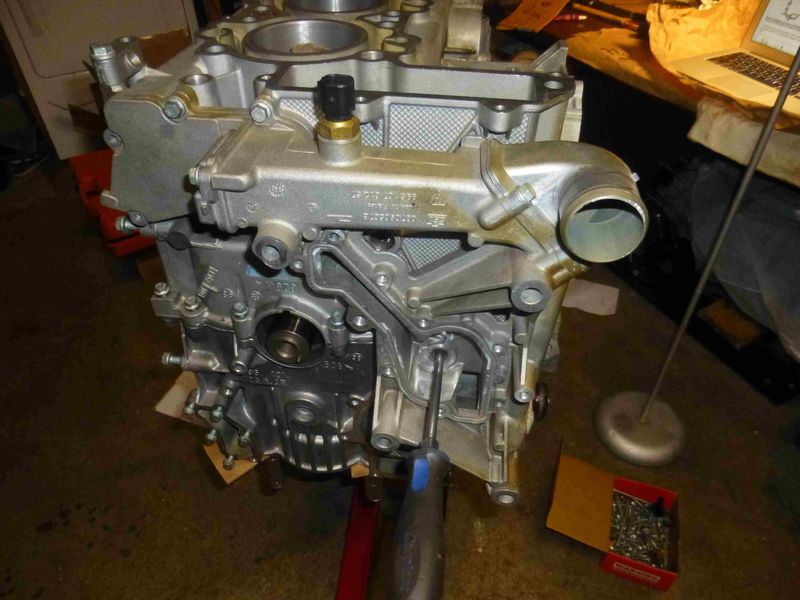
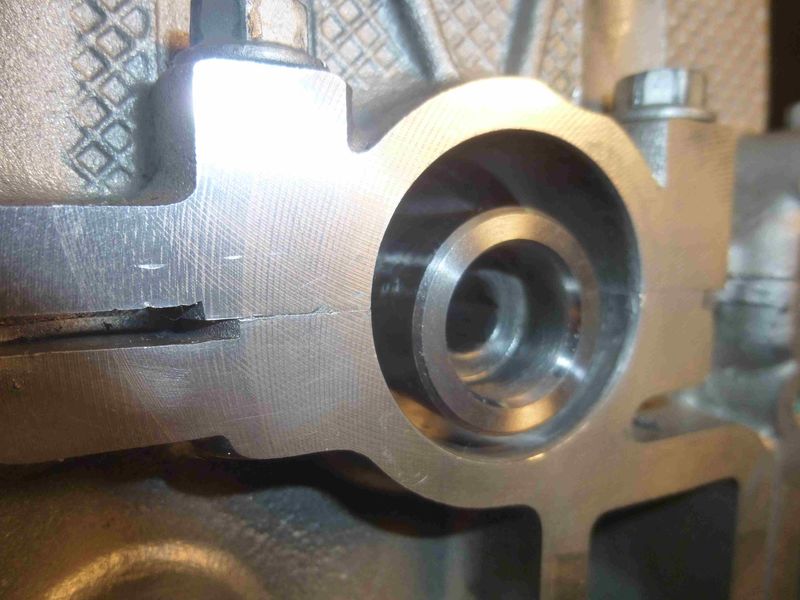
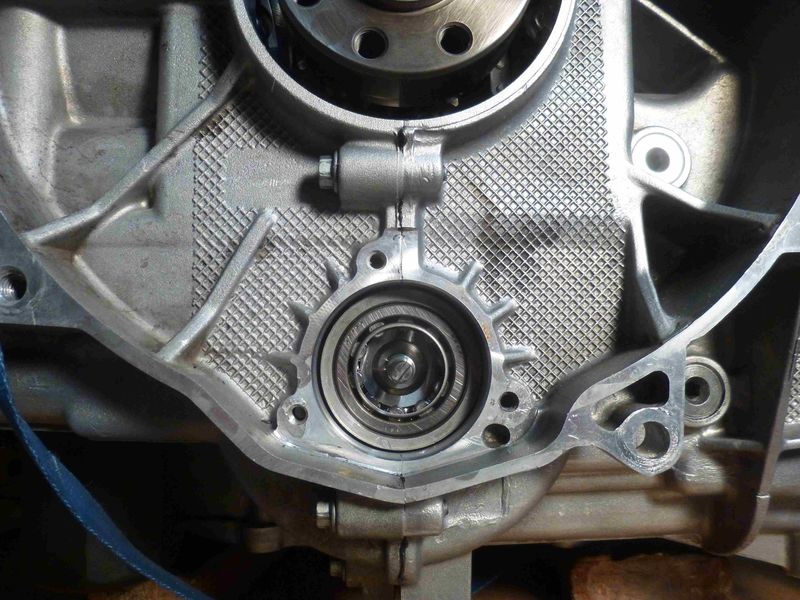
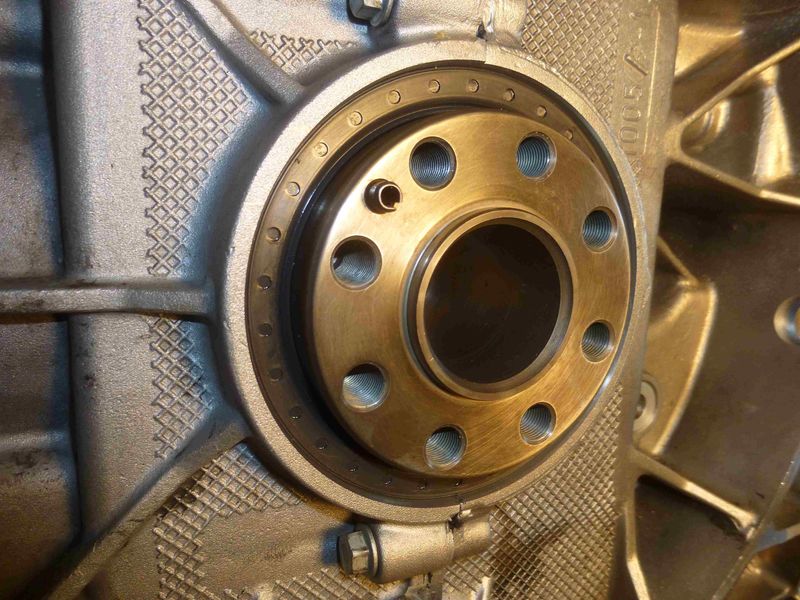
This is the bore where the oil pump housing with the front IMS bearing fits in. The IMS is right in the hole. It`s a super snug fit, and the slightest misalignment will make it impossible to slide the oil pump housing on. Don`t ask how I know...
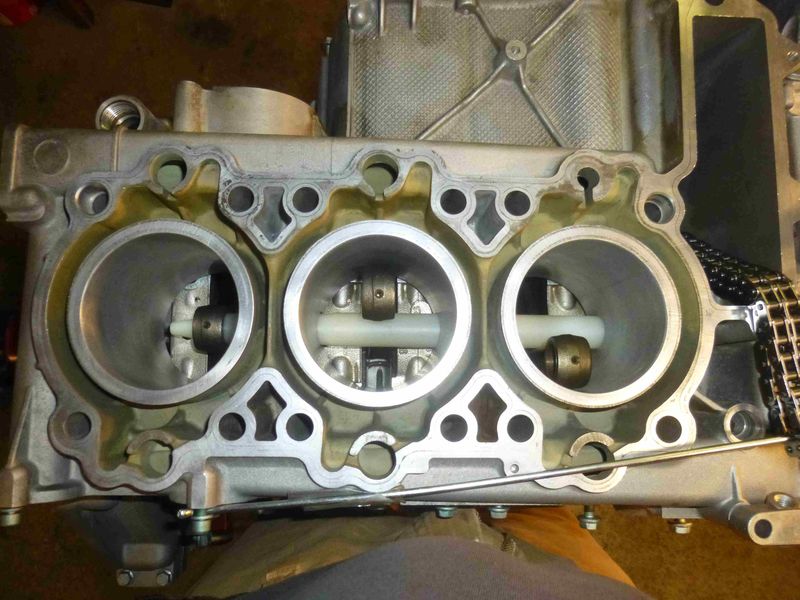
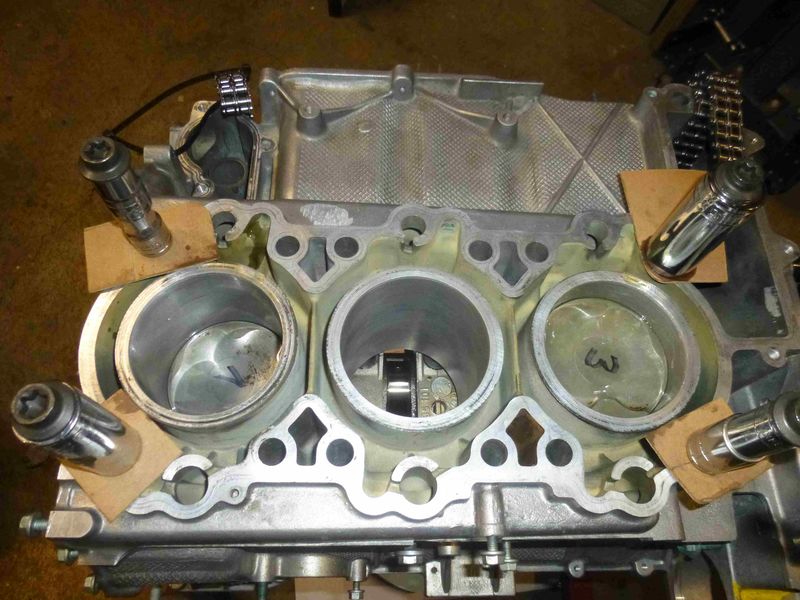
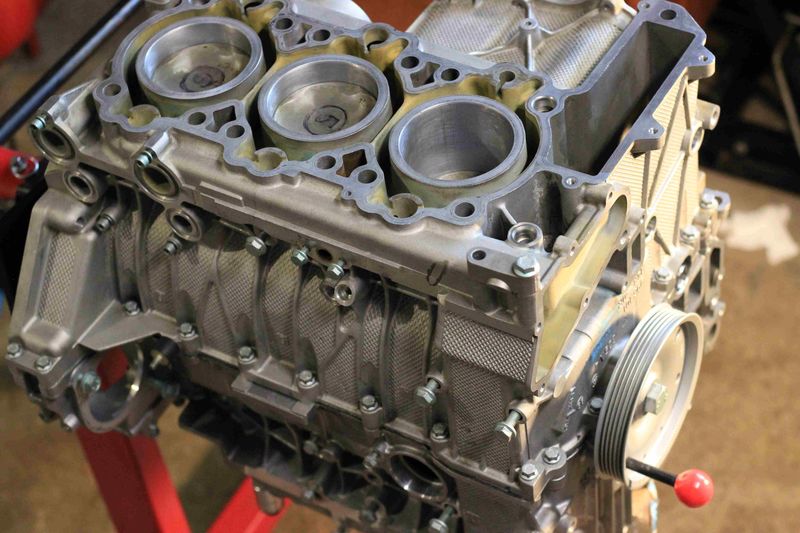
Finally the case halves are joined, sealed and the bolts are tightened, ready for pistons 4-5-6.
|
|
|
|
|
05-12-2020, 09:10 PM
|
#7
|
|
Registered User
Join Date: Oct 2018
Location: North Cali
Posts: 857
|
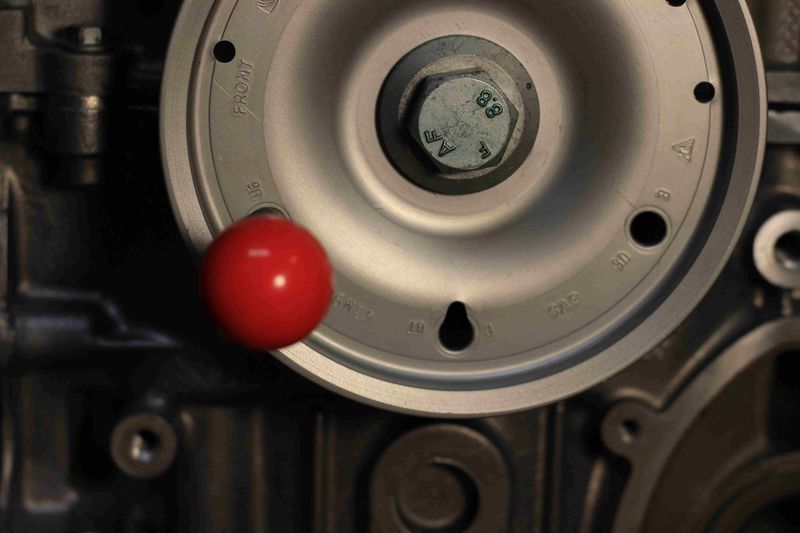
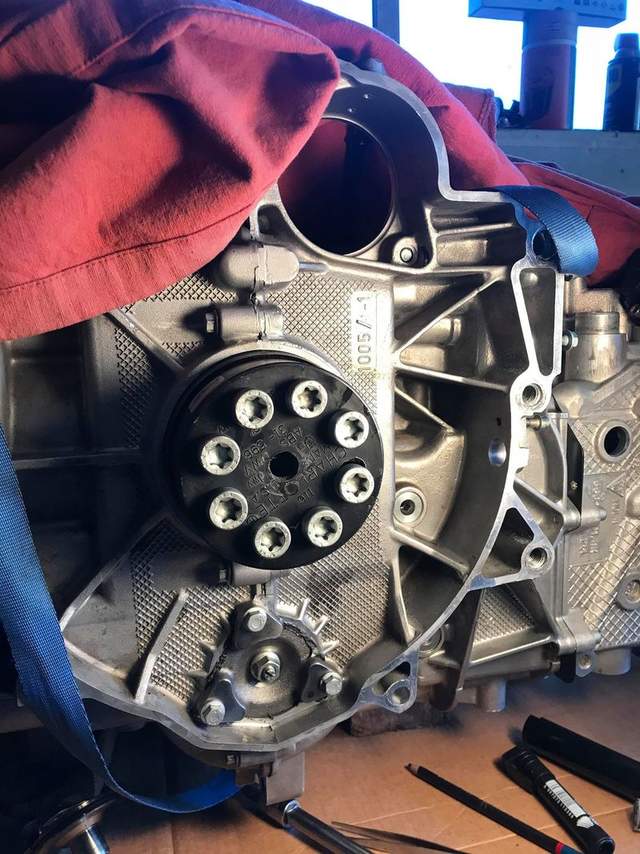
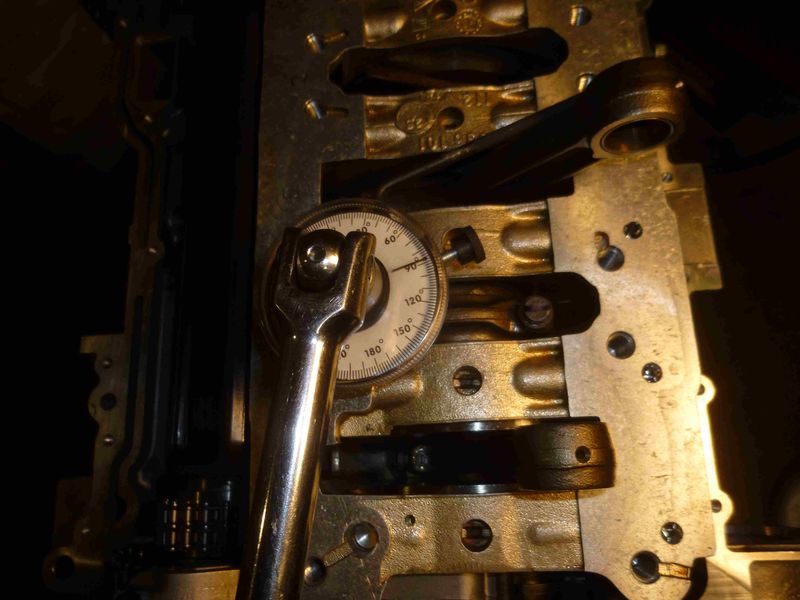
It`s nice of Porsche that they marked the best crankshaft position to insert pistons. This is for #6.
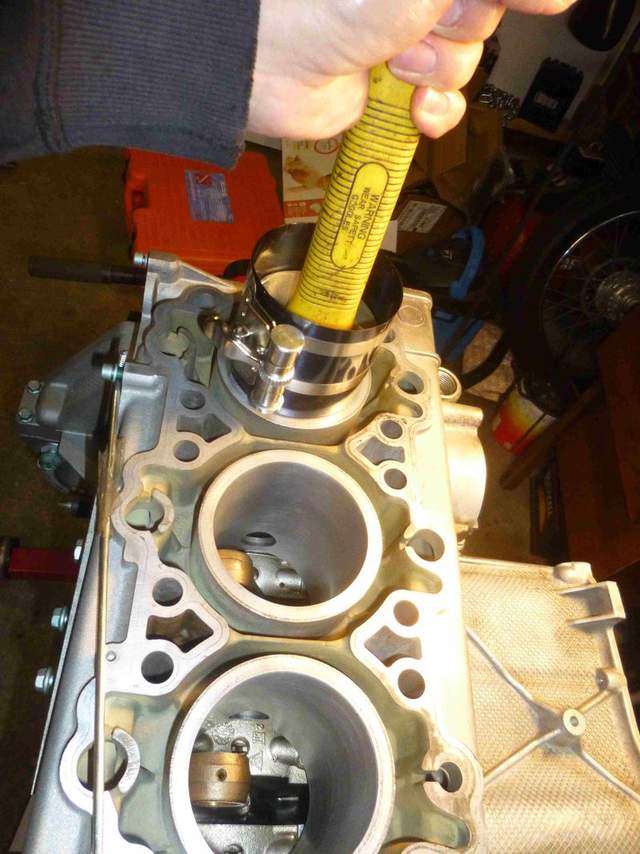
Piston going down. Manual says if the wristpin or circlip insertion fails, the piston can be removed by pulling it out using something glued on the top of the piston as leverage. I don`t want to go down that road.
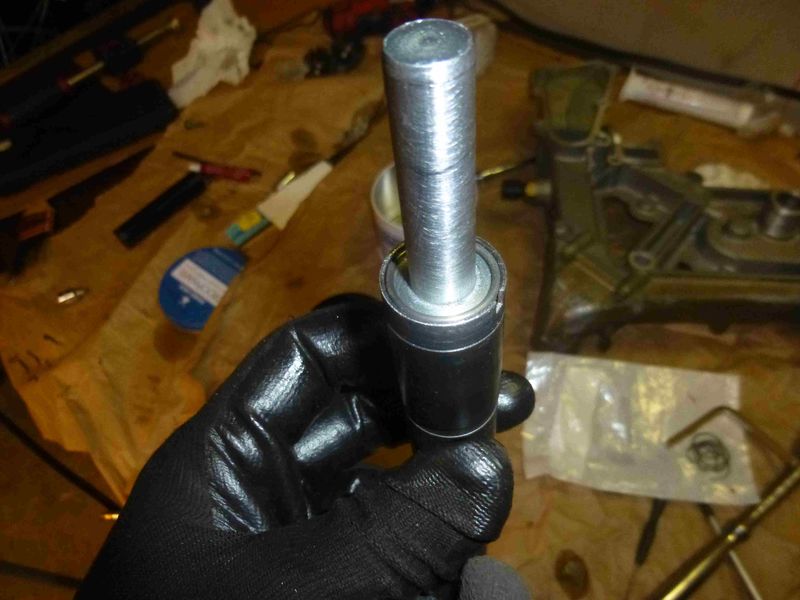
Wristpin on the insertion tool.

I might have missed it, but the manual doesn`t say a word about how to set the connecting rod in the center so that the wristpin can slide in. I spent a good 20 minutes on trying to align the conrod in the middle by grabbiing it through the oil pan side, no luck. Then I just flipped the whole engine upside down and used gravity to hold the conrod in center. I still have no idea how this could be done otherwise
 .
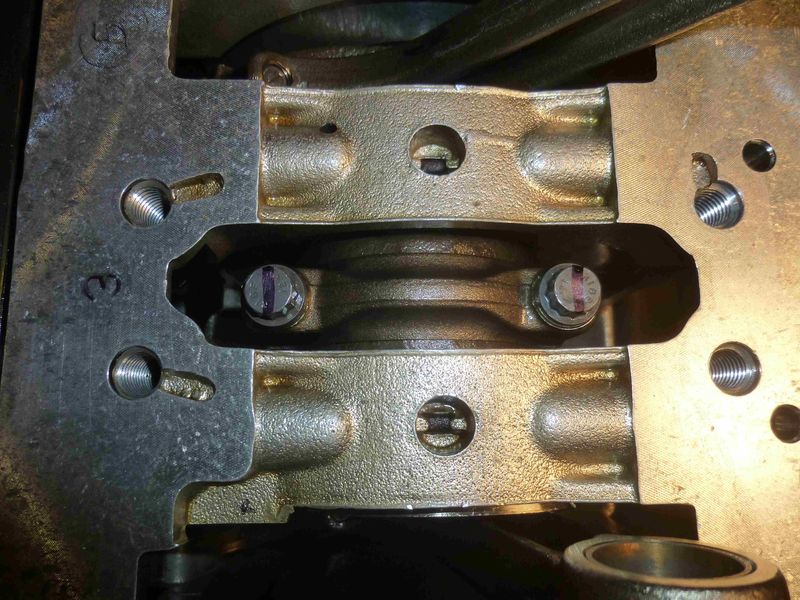
Wristpin in piston #6, circlip is ready to go.
Passing by the toilet paper roll used to hold conrod #5 aside.

This step requires some practice. The circlip has to be inserted using quite a bit of force. If you try it out a couple of times prior to the actual assembly I think it`s hard to screw it up.

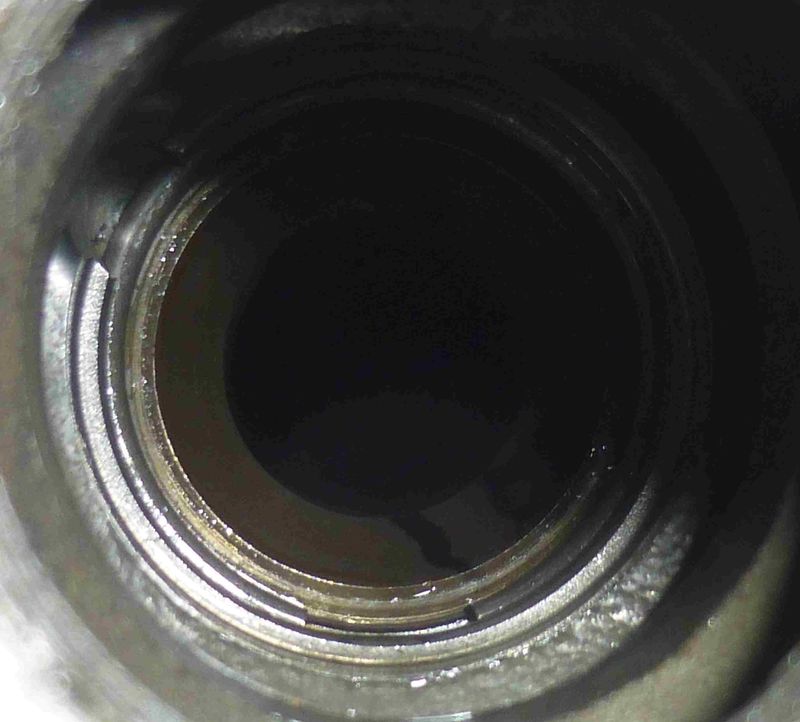
To make sure the circlip is properly seated I used my DSLR camera and made close-ups from the other side of the engine through the insertion hole and then I zoomed in. I`m convinced it won`t fly out.

|
|
|
|
|
05-12-2020, 09:31 PM
|
#8
|
|
Registered User
Join Date: Oct 2018
Location: North Cali
Posts: 857
|
|
|
|
|
|
06-17-2020, 04:27 PM
|
#9
|
|
Registered User
Join Date: Jan 2014
Location: New Jersey
Posts: 1,631
|
Nice job! Please keep updating your progress.
__________________
Current: 2022 718 Cayman GT4, PDK bone stock (the dark side).
Former: 2003 S, 3.6 LN Nickies, ARP rod bolts, under-drive pulley, Fabspeed sport headers, Softronic tune, 987 airbox 987 motor mount, Function-First Sport motor mount insert, Ben's short shifter, Nine8Six projector headlights & center caps, ROW M030, stainless flexible brake lines, B-K rollbar extension & fire extinguisher mount, hardtop
|
|
|
|
|
06-17-2020, 06:32 PM
|
#10
|
|
Registered User
Join Date: Jul 2019
Location: Charleston
Posts: 555
|
I usually pour the gasoline down the ports; gives the gas more head pressure to test for leaks.
Lookin sharp. 
__________________
'99 supercharged 4.3 chevy Boxsterado
'98 PP13B powered "RX986"
This hairdresser only cuts mullets
|
|
|
|
|
06-21-2020, 10:42 PM
|
#11
|
|
Registered User
Join Date: Oct 2018
Location: North Cali
Posts: 857
|
Quote:
Originally Posted by Qingdao
I usually pour the gasoline down the ports; gives the gas more head pressure to test for leaks.
Lookin sharp. |
Thanks! If you pour gas in the ports, isn`t it difficult to tell which valve is leaking?
Last edited by Homeoboxter; 06-21-2020 at 10:48 PM.
|
|
|
|
|
06-22-2020, 08:27 AM
|
#12
|
|
Registered User
Join Date: Jul 2019
Location: Charleston
Posts: 555
|
Quote:
Originally Posted by Homeoboxter
Thanks! If you pour gas in the ports, isn`t it difficult to tell which valve is leaking?
|
They leak slowly. You can see the moister coming from the leaky valve and then you can investigate further.
With new laped in valves you shouldn't have any issues.
Looks like you got it covered though. Should be a fun reliable engine
__________________
'99 supercharged 4.3 chevy Boxsterado
'98 PP13B powered "RX986"
This hairdresser only cuts mullets
|
|
|
|
|
06-22-2020, 07:32 PM
|
#13
|
|
Registered User
Join Date: Oct 2018
Location: North Cali
Posts: 857
|
Quote:
Originally Posted by Qingdao
With new laped in valves you shouldn't have any issues.
Looks like you got it covered though. Should be a fun reliable engine |
Oh, well, we`ll see that
|
|
|
|
|
06-21-2020, 10:47 PM
|
#14
|
|
Registered User
Join Date: Oct 2018
Location: North Cali
Posts: 857
|
Quote:
Originally Posted by PaulE
Nice job! Please keep updating your progress.
|
Thanks, there`s a few more things to add, I`ll upload some pics soon.
|
|
|
|
|
06-21-2020, 11:23 PM
|
#15
|
|
Registered User
Join Date: Oct 2018
Location: North Cali
Posts: 857
|
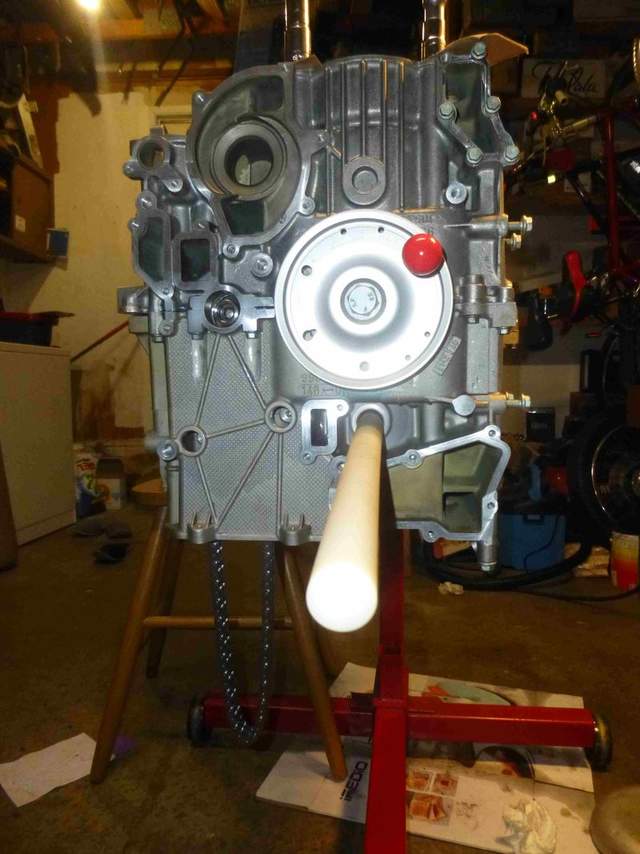
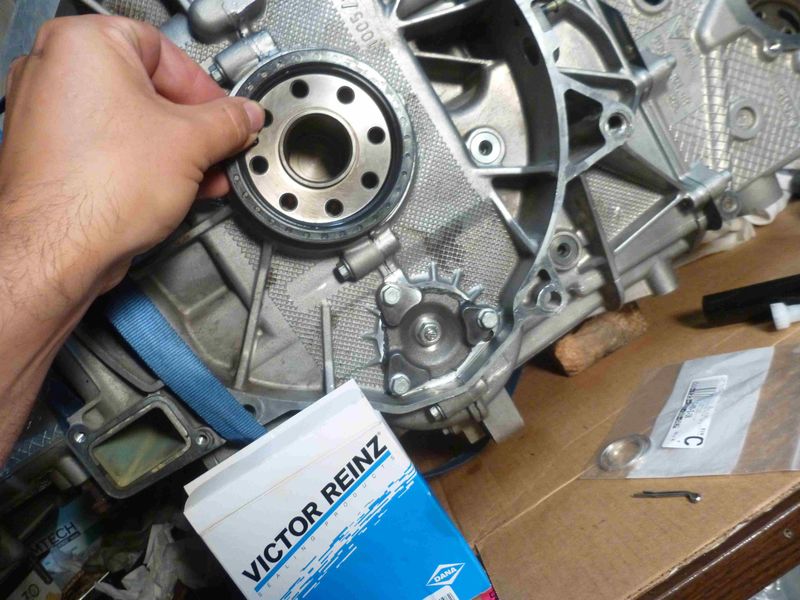
I took the engine off from the engine stand and placed it on the workbench to get access to the rear side. It`s getting very heavy now and I almost managed to drop it when one of the straps snapped. I`ll double the straps or switch to some heavy duty chain from now on.
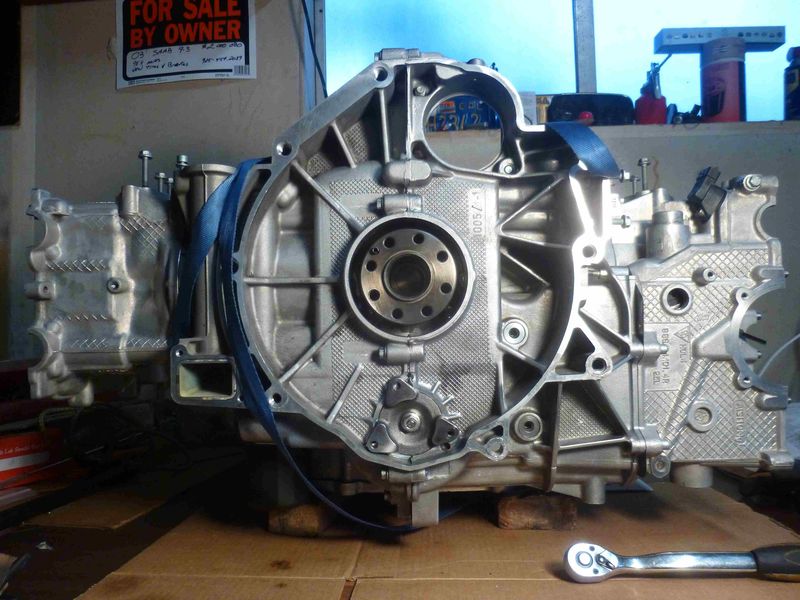
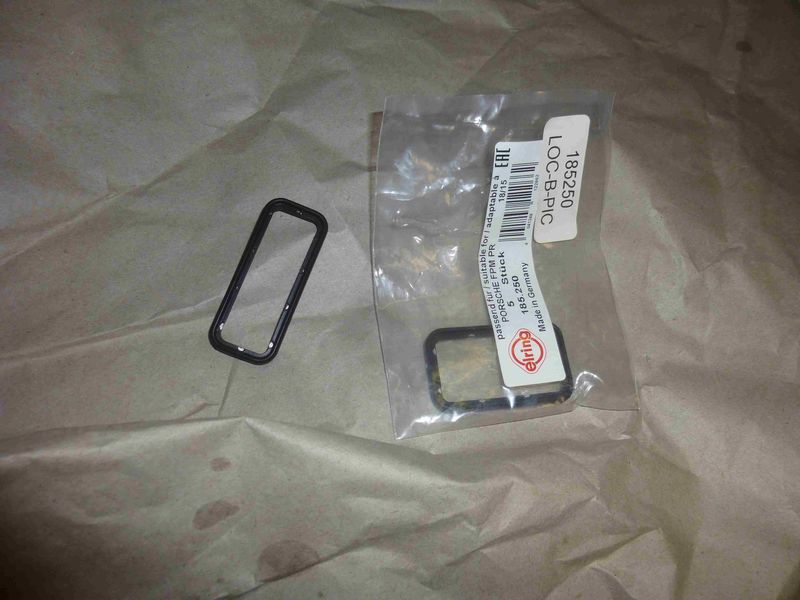
IMS flange is refitted with new O-rings and a bit of sealant.

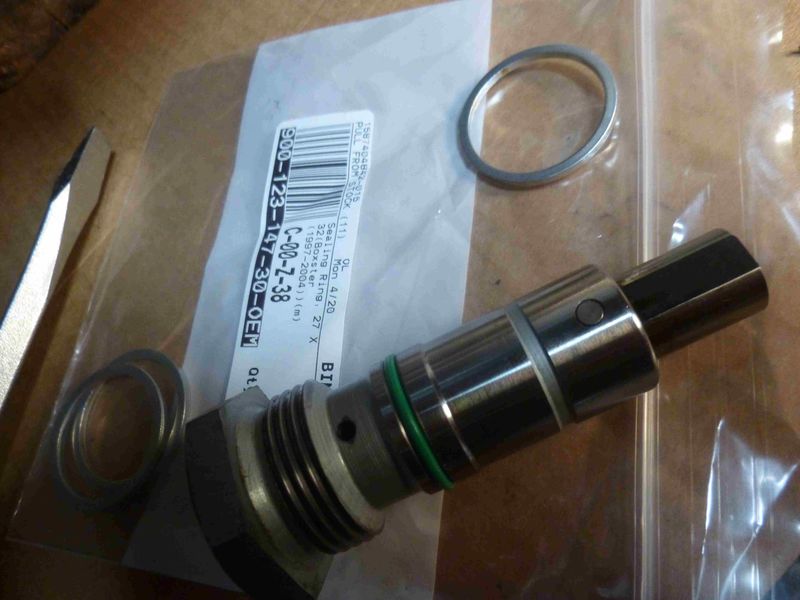
Time to fit the tensioner. There are three tensioners in this engine, they are all alike, but not the same. They are identified with the number of rings, 1, 0, or 2, hard to mix them up. Pretty thoughtful.


New O-ring and aluminum gasket.
Now to the rear main seal. I needed a tool here so I went to a local hardware store to find something I can use.
And I found this. (Without the holes of course.) It`s an end cap for some PVC drain tube, exactly the same size as the RMS. This is my lucky day..
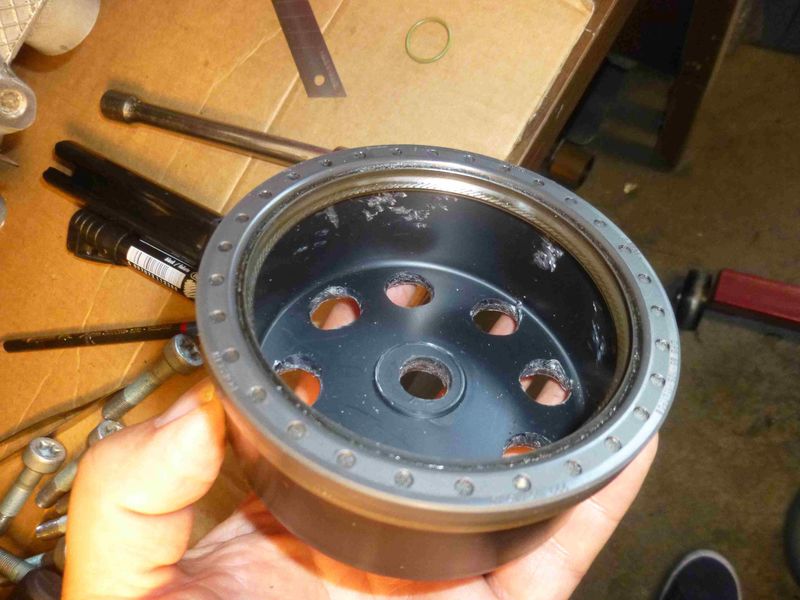
After cutting it to size, it worked perfectly using the flywheel bolts and the old seal as a guide.
Hopefully it won`t leak.
|
|
|
|
|
06-22-2020, 06:02 PM
|
#16
|
|
Registered User
Join Date: Jan 2019
Location: PA
Posts: 1,726
|
Nice work! I could never get that deep into a motor. I've Thought about doing a ring job on a Subaru motor, but when I saw what's all involved, I just decided to change the bottom end. I just do head gaskets and timing belts. haha. That gives me great appreciation for what you're doing!
By the way, is that a ball or roller bearing you chose for the IMS?
__________________
2002 Boxster Base - Arctic Silver - Tiptronic
2010 Subaru Forester
1980 Ford C-8000 Custom Cab Emergency-One Fire Truck
__________________
"I never lose. I either win or I learn." -Nelson Mandela
|
|
|
|
|
06-22-2020, 07:31 PM
|
#17
|
|
Registered User
Join Date: Oct 2018
Location: North Cali
Posts: 857
|
Quote:
Originally Posted by piper6909
Nice work! I could never get that deep into a motor. I've Thought about doing a ring job on a Subaru motor, but when I saw what's all involved, I just decided to change the bottom end. I just do head gaskets and timing belts. haha. That gives me great appreciation for what you're doing!
By the way, is that a ball or roller bearing you chose for the IMS?
|
Yeah, I can understand that It`s time consuming and lots of things may come up along the way that you didn`t think of. But at least then you know what you put into the engine, so you can only blame yourself if it falls apart For the bearing: actually, both. A roller and there`s a ball bearing behind for trust control. There are more pictures of them if you go back a few pages.
|
|
|
|
|
06-22-2020, 08:05 PM
|
#18
|
|
Registered User
Join Date: Jan 2019
Location: PA
Posts: 1,726
|
Quote:
Originally Posted by Homeoboxter
... For the bearing: actually, both. A roller and there`s a ball bearing behind for trust control. There are more pictures of them if you go back a few pages.
|
I just read it. Pretty impressive! You should sell the kit for $1800 
Also, I see you went with open bearings. You're confident they'll get enough lubrication? Don't take it the wrong way, I'm just trying to pick your brain in the event I decide to change mine.
__________________
2002 Boxster Base - Arctic Silver - Tiptronic
2010 Subaru Forester
1980 Ford C-8000 Custom Cab Emergency-One Fire Truck
__________________
"I never lose. I either win or I learn." -Nelson Mandela
Last edited by piper6909; 06-23-2020 at 07:08 AM.
|
|
|
|
|
06-23-2020, 04:33 PM
|
#19
|
|
Registered User
Join Date: Oct 2018
Location: North Cali
Posts: 857
|
Quote:
Originally Posted by piper6909
I just read it. Pretty impressive! You should sell the kit for $1800
Also, I see you went with open bearings. You're confident they'll get enough lubrication? Don't take it the wrong way, I'm just trying to pick your brain in the event I decide to change mine. |
Lol, just simple bearings I had machined to size. Actually, I made the groove for the circlip myself with a custom made grinder
Yes, I`m pretty confident. The IMS literally swims in engine oil. If you go back in the thread I posted some measurements about the oil level. Even though the level dropped a lot, the sprocket is still spinning in oil and should supply the bearing with splashed oil. Also, I added an extra oil channel as well that supplies the bearing with oil directly from the back, just in case, it`s pictured too, if you go back to that section.
|
|
|
|
|
06-23-2020, 06:37 PM
|
#20
|
|
Registered User
Join Date: Jan 2019
Location: PA
Posts: 1,726
|
Quote:
Originally Posted by Homeoboxter
Lol, just simple bearings I had machined to size. Actually, I made the groove for the circlip myself with a custom made grinder |
Don't sell yourself short. It's a pretty ingenious solution.
Quote:
Originally Posted by Homeoboxter
Yes, I`m pretty confident. The IMS literally swims in engine oil. If you go back in the thread I posted some measurements about the oil level. Even though the level dropped a lot, the sprocket is still spinning in oil and should supply the bearing with splashed oil. Also, I added an extra oil channel as well that supplies the bearing with oil directly from the back, just in case, it`s pictured too, if you go back to that section.
|
I'll have to check it out.
__________________
2002 Boxster Base - Arctic Silver - Tiptronic
2010 Subaru Forester
1980 Ford C-8000 Custom Cab Emergency-One Fire Truck
__________________
"I never lose. I either win or I learn." -Nelson Mandela
|
|
|
|
 Posting Rules
|
You may not post new threads
You may not post replies
You may not post attachments
You may not edit your posts
HTML code is Off
|
|
|
All times are GMT -8. The time now is 07:22 AM.
| |


 Boxster
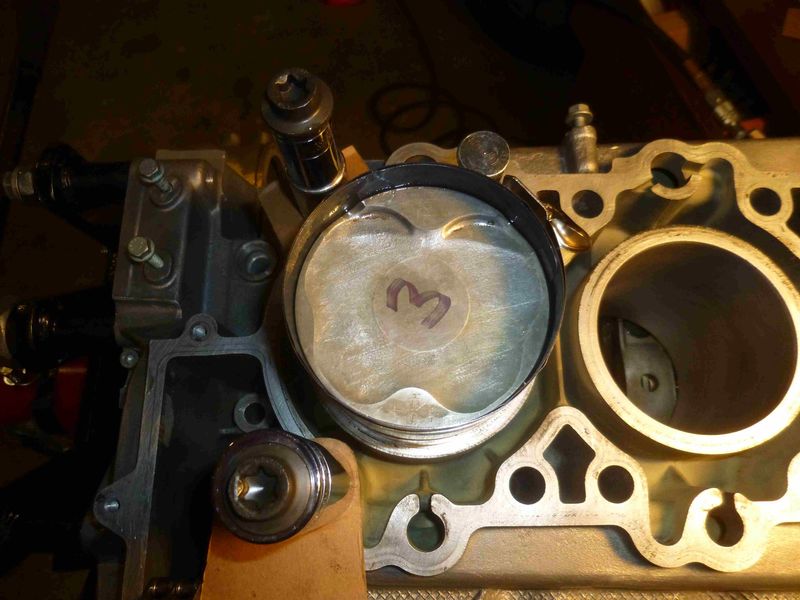


 Hybrid Mode


