 03-01-2025, 09:40 PM
|
#381
|
|
Registered User
Join Date: Apr 2023
Location: Oregon
Posts: 545
|
I clicked the "Post Reply" button by mistake. Nothing to see here, folks. Move along...
__________________
2000 986 base
Arctic Silver/black
2.7 liter
5-speed manual
Last edited by LoneWolfGal; 03-01-2025 at 09:45 PM.
|

|

|
|
03-01-2025, 11:31 PM
|
#382
|
|
Registered User
Join Date: Apr 2023
Location: Oregon
Posts: 545
|
Quote:
Originally Posted by JFP in PA

|
Now that you mention it, I would actually love to have a set of those. However, I'd be surprised if the set's 7/16" socket has a small enough outside diameter to fit in the notch and on the nut, since few do. You've installed a number of Solutions and you must be aware of the flange notch's small size, making access to the nut difficult with standard tools, so what do you use to tighten the center stud's nut?
__________________
2000 986 base
Arctic Silver/black
2.7 liter
5-speed manual
|
|
|
|
|
03-02-2025, 06:53 AM
|
#383
|
|
Registered User
Join Date: Feb 2005
Location: It's a kind of magic.....
Posts: 6,653
|
I have both Snap On and Astro pass thru socket sets and use one of them. At one time, both were available in both six and twelve point design, but the twelve point fell out of favor and became harder to find. We also have a couple of "modified" sockets that had the centers drilled out larger and the outside tip turned down slightly on our lathe.
Also be aware that the opening in the flange has changed over time as they updated the design, and that notch has become smaller, requiring some creativity on the installer.
__________________
Anything really new is invented only in ones youth. Later, one becomes more experienced, more famous and more stupid. - Albert Einstein
|

|
|
|
03-02-2025, 07:26 AM
|
#384
|
|
Registered User
Join Date: Jan 2019
Location: PA
Posts: 1,726
|
Quote:
Originally Posted by LoneWolfGal
NOTE TO SELF: Get a bench grinder, for God's sake. This would have been the perfect application for one.
]
|
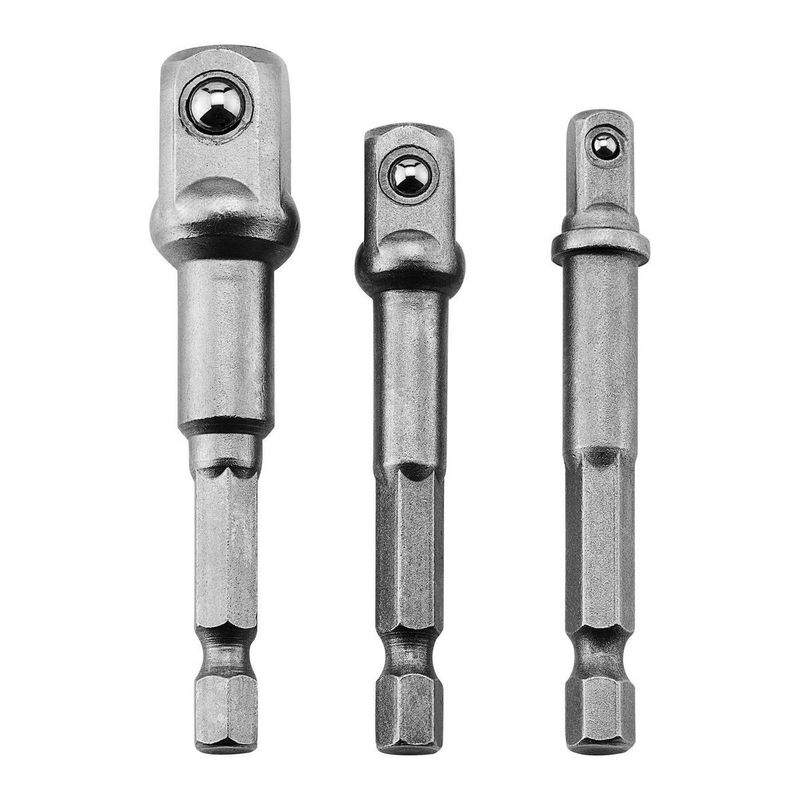
There are so many ways that could be done without a bench grinder.
You could use one of these to attach the socket to a drill and run it at high RPM over a stationary sheet of sandpaper, or a metal file, or even a grinding stone running in the opposite direction.
__________________
2002 Boxster Base - Arctic Silver - Tiptronic
2010 Subaru Forester
1980 Ford C-8000 Custom Cab Emergency-One Fire Truck
__________________
"I never lose. I either win or I learn." -Nelson Mandela
|
|
|
|
|
03-02-2025, 11:15 AM
|
#385
|
|
Registered User
Join Date: Apr 2023
Location: Oregon
Posts: 545
|
Quote:
Originally Posted by piper6909
There are so many ways that could be done without a bench grinder.
You could use one of these to attach the socket to a drill and run it at high RPM over a stationary sheet of sandpaper, or a metal file, or even a grinding stone running in the opposite direction.
|
Good idea, Al. And it probably would have been easier than my improvised grinder. However, I had a very good reason for not going that route: I didn't think of it.
__________________
2000 986 base
Arctic Silver/black
2.7 liter
5-speed manual
|
|
|
|
|
03-02-2025, 03:19 PM
|
#386
|
|
Registered User
Join Date: Jan 2019
Location: PA
Posts: 1,726
|
Quote:
Originally Posted by LoneWolfGal
Good idea, Al. And it probably would have been easier than my improvised grinder. However, I had a very good reason for not going that route: I didn't think of it.
|
That's an excellent reason. Had I known what your approach would be I'd have suggested it sooner. Regardless, you got it done and that's all that matters. 
__________________
2002 Boxster Base - Arctic Silver - Tiptronic
2010 Subaru Forester
1980 Ford C-8000 Custom Cab Emergency-One Fire Truck
__________________
"I never lose. I either win or I learn." -Nelson Mandela
|
|
|
|
|
03-02-2025, 08:14 PM
|
#387
|
|
Registered User
Join Date: Apr 2023
Location: Oregon
Posts: 545
|
I swear, I've been plagued with obstacles during this entire project. The latest obstacle arose when drilling out the socket. I saved the drilling for last, thinking it would be a snap. It turned out to be an order of magnitude more difficult than shaving down the socket's diameter. I broke a new drill bit trying to get through the socket's two internal partitions. That was disheartening. I'm not equipped properly. Clearly, a drill press is needed, and I'd like to have one someday, but for now I think I'm going to take the socket to a local machine shop and have them do the honors. I know those guys. I'll take a short case of Coors with me.
__________________
2000 986 base
Arctic Silver/black
2.7 liter
5-speed manual
|
|
|
|
|
03-03-2025, 03:41 AM
|
#388
|
|
Registered User
Join Date: Jan 2019
Location: PA
Posts: 1,726
|
Quote:
Originally Posted by LoneWolfGal
I swear, I've been plagued with obstacles during this entire project. The latest obstacle arose when drilling out the socket. I saved the drilling for last, thinking it would be a snap. It turned out to be an order of magnitude more difficult than shaving down the socket's diameter. I broke a new drill bit trying to get through the socket's two internal partitions. That was disheartening. I'm not equipped properly. Clearly, a drill press is needed, and I'd like to have one someday, but for now I think I'm going to take the socket to a local machine shop and have them do the honors. I know those guys. I'll take a short case of Coors with me.
|
They'll definitely make quick work of it. But if you want to give it another shot yourself, clamp the socket on a vise (I'm sure you have) and start with the smallest bit you have that's just bately too big for the existing hole. Drill through, then go with the next size bit and repeat until you've reached the desired diameter.
|
|
|
|
|
03-03-2025, 10:11 PM
|
#389
|
|
Registered User
Join Date: Apr 2023
Location: Oregon
Posts: 545
|
Quote:
Originally Posted by piper6909
They'll definitely make quick work of it. But if you want to give it another shot yourself, clamp the socket on a vise (I'm sure you have) and start with the smallest bit you have that's just bately too big for the existing hole. Drill through, then go with the next size bit and repeat until you've reached the desired diameter.
|
Yes, I started with 17/64", which was one 1/64" larger than the 1/4" holes in the internal partitions, figuring to proceed to 9/32", 19/64", 5/16", etc. all the way up to 3/8", the objective. After laboriously drilling its way through the first partition, the 17/64" broke in two. Maybe it had a structural flaw. I'll try the 9/32" before I take it to the machine shop. However, I'm pretty busy with a house purchase, so I'm not sure when I'll get a chance to find out.
At least the Solution is installed, except for torquing the flange and stud. The rear main seal will take only a couple hours, but I expect the cam chain wear pads to be a multi-day project, since I haven't done it before and I tend to be ultra-cautious and mega-meticulous with new procedures. In any case, I plan to finish the swap here before I move all my tools to a new house in a different town.
__________________
2000 986 base
Arctic Silver/black
2.7 liter
5-speed manual
Last edited by LoneWolfGal; 03-10-2025 at 11:51 AM.
|
|
|
|
|
03-04-2025, 04:12 AM
|
#390
|
|
Registered User
Join Date: Jan 2019
Location: PA
Posts: 1,726
|
Congrats on the new house!!
|
|
|
|
|
03-04-2025, 08:57 AM
|
#391
|
|
Registered User
Join Date: Apr 2023
Location: Oregon
Posts: 545
|
Quote:
Originally Posted by piper6909
Congrats on the new house!!
|
Thanks, Al. I'm excited.
__________________
2000 986 base
Arctic Silver/black
2.7 liter
5-speed manual
|
|
|
|
|
03-18-2025, 11:18 AM
|
#392
|
|
Registered User
Join Date: Dec 2009
Location: Orange County, CA
Posts: 1,998
|
thin wall sockets
somehow I cannot find the link someone shared here about the 'thin wall sockets'.. 
|
|
|
|
|
03-18-2025, 04:42 PM
|
#393
|
|
Registered User
Join Date: Apr 2023
Location: Oregon
Posts: 545
|
I'm back from the world of inspections, preliminary reports, seller disclosures, vesting deeds, septic and well-water test results, etc., etc., and the inevitable so forth. Now I need to get cracking on that engine, get it all ready to stick in the car. The OEM cam chain wear pads (a.k.a. timing chain guide rail sets for VarioCam solenoid-actuated chain adjusters) and assorted seals and gaskets I ordered from Pelican on 3/7 hadn't arrived yet, so I called them to see what the holdup was. Turned out they had the wrong billing address associated with my debit card, which seems strange, given that I've ordered lots of stuff from them with the same card. I gave them the correct billing address, the card went though, and they said they would ship the order out today. No harm, no foul, since I won't be ready for those parts until next week. It's too late today to run that socket over to the machine shop and have them drill it out to 3/8". I've broken or worn out three drill bits so far, but I have more bits left, so I might give it another try tonight. Once the screwdriver can fit through it I can finally torque the IMS stud nut. I also picked up a couple of sheetrock screws, which Jake Raby claims is just the ticket (together with pliers) for removing the old rear main seal. The new seal and installation tool for setting the seal's depth are ready to go.
__________________
2000 986 base
Arctic Silver/black
2.7 liter
5-speed manual
Last edited by LoneWolfGal; 03-20-2025 at 05:03 PM.
|
|
|
|
|
03-21-2025, 05:39 PM
|
#394
|
|
Registered User
Join Date: Apr 2023
Location: Oregon
Posts: 545
|
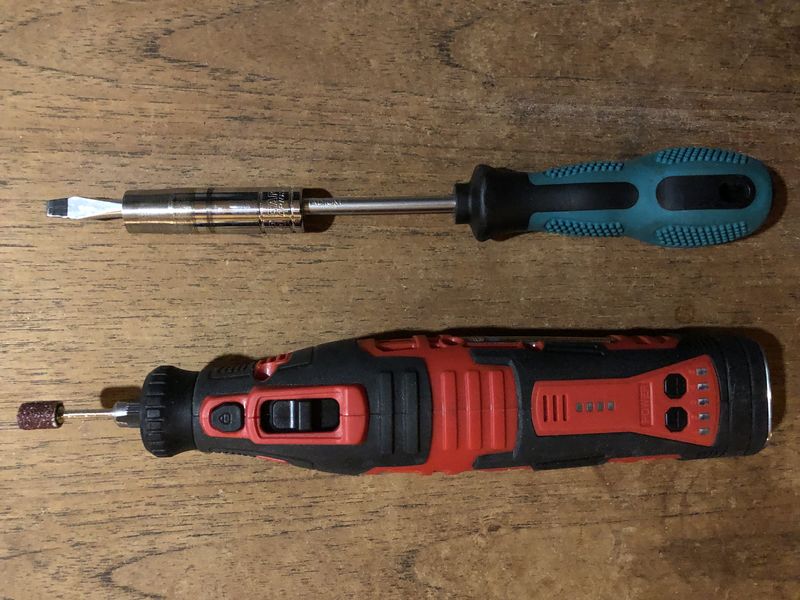
It dawned on me that drilling the socket was the wrong approach. Once again, an 80-grit tungsten-carbide grinding drum, one with a small diameter, was a better solution. Took about 15 minutes.
__________________
2000 986 base
Arctic Silver/black
2.7 liter
5-speed manual
|
|
|
|
|
03-21-2025, 06:58 PM
|
#395
|
|
Registered User
Join Date: Apr 2023
Location: Oregon
Posts: 545
|
Also, the order from Pelican arrived today, containing: (2) "Timing Chain Rail Sets for Solenoid Actuated Chain Adjusters" (cam chain wear pads), (2) "O-Rings for VarioCam Chain Adjusters," (3) "Sealing Rings" (for chain tensioners), and (1) "Camshaft End Plug." You're looking at $135.67. The plug alone was $18.03. It was made in Slovenia. Which, as we all know, is where are the finest plugs are made.

__________________
2000 986 base
Arctic Silver/black
2.7 liter
5-speed manual
Last edited by LoneWolfGal; 03-22-2025 at 07:10 PM.
|
|
|
|
|
03-24-2025, 02:37 PM
|
#396
|
|
Registered User
Join Date: Apr 2023
Location: Oregon
Posts: 545
|
I opened a support ticket at LN, asking for assistance:
As per steps 41 and 42 of the Solution installation manual I installed the nut on the stud finger-tight, and then I torqued the flange bolts to 10Nm. Using a modified 3/8-drive 7/16" deep socket and a medium-large screwdriver I snugged up the nut on the stud. But now I'm scratching my head, because when I try to torque the nut, the stud turns with the nut. I had assumed snugging the nut would immobilize the stud so the nut could be torqued, but that wasn't the case. I tried tightening the nut more, with the same result. I have followed each step of the installation manual to the letter. How can I get that nut torqued?
__________________
2000 986 base
Arctic Silver/black
2.7 liter
5-speed manual
Last edited by LoneWolfGal; 03-24-2025 at 06:30 PM.
|
|
|
|
|
03-24-2025, 06:29 PM
|
#397
|
|
Registered User
Join Date: Apr 2023
Location: Oregon
Posts: 545
|
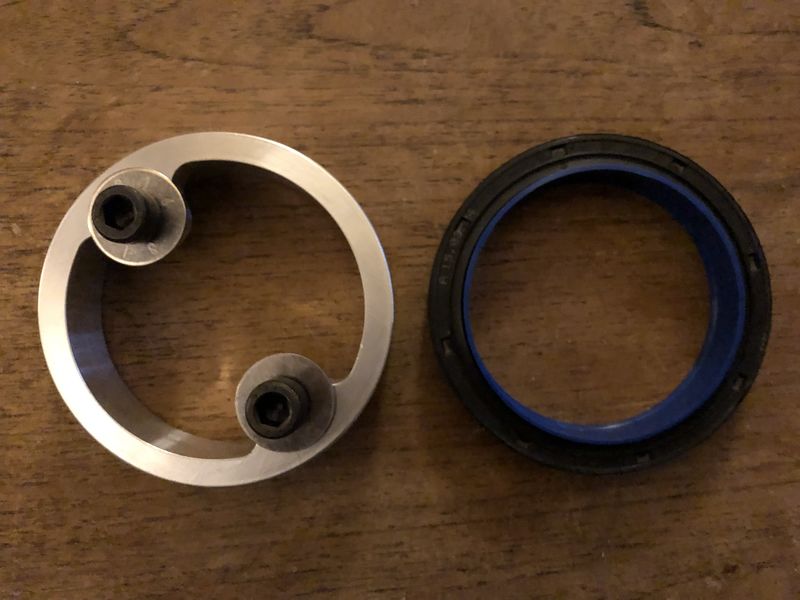
Here's why I'm sure the nut and stud are spinning in unison. Note the registration marks. They don't move in relation to each other. Wish Jake Raby were here. No doubt he'd say something like, "I've seen this before, and here's what you need to do..."

__________________
2000 986 base
Arctic Silver/black
2.7 liter
5-speed manual
|
|
|
|
|
03-25-2025, 10:27 AM
|
#398
|
|
Registered User
Join Date: Apr 2023
Location: Oregon
Posts: 545
|
LN Support's reply:
"The only advice I have is that some customers have used a small zip gun to quickly try and get the nut set and then use the wrench to torque it down."
I haven't replied to that. I wouldn't know what to say. This is a nutty situation, the latest in a string of nutty situations during this IMS bearing installation. It's true that this is new territory for me, and that's why I've been extra cautious in following LN's instructions, plus I've watched hours of videos demonstrating the process. I thought I understood every aspect before I began the installation. LN's support is not helpful. Looks like I'm on my own in solving this problem.
How is it possible for a nut on a rotating stud to "set" in the first place? It would seem to defy the laws of physics. The only possibility I can think of is that tightening the nut causes the other end of the stud, the part that looks like a valve, to press tightly against the bearing itself, limiting the stud's rotation. I've tried tightening the nut as much as is possible with the socket and screwdriver, and that doesn't seem to fix the problem. The nut and stud are still rotating together. I don't have a pneumatic zip gun at my disposal, but I have a powered ratchet. I guess I could try that. Funny, there's no mention of zip guns or problems with "setting" the nut in LN's instructions.
Doggone it, I have years of experience working on conventional engines, but it doesn't help me in this situation. It's humbling. If JFP or someone else with experience installing the Solution can't help me with this, I'm S.O.L. At least, for the moment.
__________________
2000 986 base
Arctic Silver/black
2.7 liter
5-speed manual
Last edited by LoneWolfGal; 03-25-2025 at 03:00 PM.
|
|
|
|
|
03-25-2025, 11:30 AM
|
#399
|
|
Registered User
Join Date: Apr 2023
Location: Oregon
Posts: 545
|
Desperate, I opened a support ticket at flat6innovations.com in hopes Jake Raby himself would respond:
Dear Jake,
I've run into a problem installing a Solution, one LN's support couldn't help me with. I figured since you invented the Solution you'd know what to do. I'm having a problem getting the nut to "set" on the stud so that it can be torqued. The nut and stud rotate together, which makes torquing impossible. I described the situation in detail on 986 forum in my "Swapping engines" thread, in messages #396-398:
https://986forum.com/forums/boxster-general-discussions/86311-swapping-engines.html#post666536
Contacting you here is a last resort.
Best regards,
Michelle (a.k.a. LoneWolfGal)
__________________
2000 986 base
Arctic Silver/black
2.7 liter
5-speed manual
Last edited by LoneWolfGal; 03-25-2025 at 11:52 AM.
|
|
|
|
|
03-25-2025, 12:09 PM
|
#400
|
|
Registered User
Join Date: Jul 2024
Location: Cambridge Ontario
Posts: 144
|
i cant get a clear pic of the stud.. is it slotted in the middle ,, is that a small hole with a thread inside ??
|
|
|
|
 Posting Rules
|
You may not post new threads
You may not post replies
You may not post attachments
You may not edit your posts
HTML code is On
|
|
|
All times are GMT -8. The time now is 04:43 PM.
| |


 Linear Mode


