|
Smokin ass deal on that earl pan!
__________________
1999 Boxster 2.5l 5-spd. 168k miles and climbing.
Build: http://986forum.com/forums/show-tell-gallery/63257-greta-not-really-build-so-much-maintenance-record-build-thread-w-bs.html
IG: @ryanjboutin
|


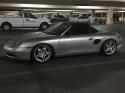 Greta
Greta


 Threaded Mode


