Go Back   986 Forum - The Community for Porsche Boxster & Cayman Owners > Porsche Boxster & Cayman Forums > DIY Project Guides

Post Reply
 
LinkBack Thread Tools Display Modes
Old 11-30-2017, 06:49 PM   #1
Registered User
 
Join Date: Oct 2016
Location: Houston, TX
Posts: 47
Boxster 986 Clutch and Transmission Inspection and Repair

Hello fellow Boxster enthusiasts,

I have a 2004 Boxster S with 79k miles. I've done all maintenance on the car myself including alternator, water pump, front and rear control arms/track arms, exhaust mount repair, and oil changes every 3-5k miles including filter inspection. My car has been on four 6 ton jack stands for the last month as I’ve slowly worked on my clutch and transmission during the busy holiday season and a week vacation. So far I’ve spent about 12 hours on the project and I’m basically finished as I wait for 1 quart of transmission oil to top it off and reinstall the muffler, bumper, etc.

The clutch was not slipping but there was chatter all the time when pulling away or reversing into a parking spot. I conducted a few road tests to detect slipping but it never occurred but I’ve read others say their worn clutches never slipped. Once the weather cooled here in Houston I set out to inspect and possibly replace my clutch. While I was in there I planned to possibly replace a leaking gear selector bushing (996-303-515-00-OEM) and seal (996-303-517-00-OEM) that allowed a minuscule but continuous drip of tranny oil onto the rear sway bar.

Using numerous sources including Pelican, Pedro’s, Youtube vids, Porsche service manual, etc, I was confident I could tackle the clutch but the transmission gear selector seal replacement was risky because not much info is on the web other than that found here: Transmission case separation?

Here are a few pointers and lessons learned:

Raising Boxster for Transmission Removal

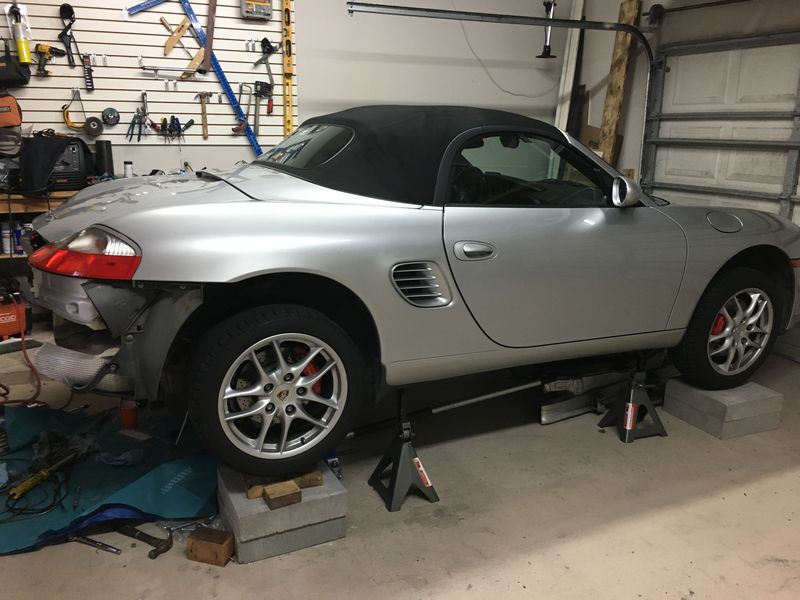
I supported the car 20” off the ground using 6-ton harbor freight jack stands. First, I raised the car one wheel at a time onto solid 6” tall cement blocks, then repeated the process getting all tires 1’ off the ground before raising the car onto jacks stands at the jack points using a 3-ton hydraulic jack. The hydraulic jack point for the front was under the front lower control arm (tuning fork shaped part)-to-body bolt and for the rear it was under the diagonal brace to subframe bolts. I’ve used these points confidently for many repairs but I always have a jack stand under the factory jack points and they are holding the vehicle weight while the hydraulic jack is only applying light pressure on the car and is secondary emergency support. My hydraulic jack has rubber pads at the jack point but I usually add a square piece of wood 2x4 for weight distribution. Because the car was already elevated, i used a 4x4 for additional height because the hydraulic jack reached its limit before I could get the jack in place at the height I wanted. I raised the front first then the rear; if rear raised first the car could potentially roll forward. Make sure the e-brake is engaged when jacking up the car.


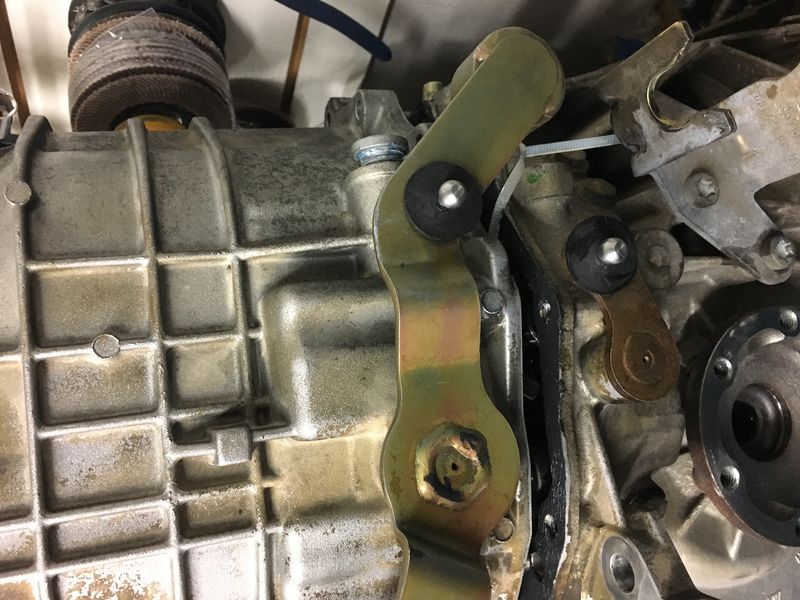
Boxster Transmission Mount Replacement using modified 993 part

While removing the transmission mounts I learned that my right transmission mount was almost shot as it had little resistance to movement compared to the left side. I used a 993 mount (993-375-049-09-M963) to save some money but the stud needs to be cut which I accomplished angle grinder with metal cutting wheel. I used the original mount as reference before cutting.

RMS and IMS inspection and coolant cover seal

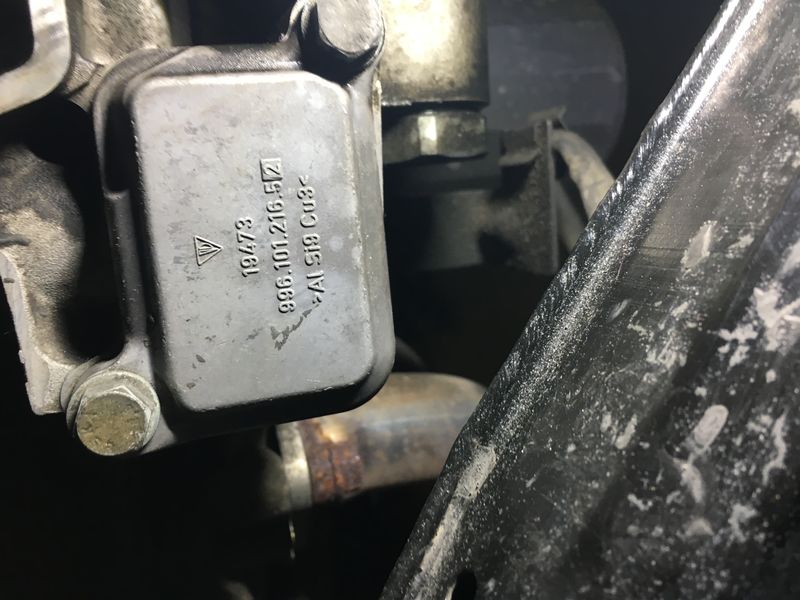
Once the transmission and clutch was removed I cleaned the area to inspect the RMS and IMS cover for leaks. Neither showed any indication of a problem so I left both alone as well as the transmission input shaft seal. Some may argue that I should have replaced these parts but I’ve decided only to address failed parts during this project. Given that many original IMS bearings that are removed are in great condition and I’ve never detected any debris within my oil filter I decided to continue to monitor, just as you would even if you had replaced the bearing with a new one as apparently even these are not failure proof. The only active leak I found was from a cover for the cooling system to the left of the flywheel. To repair the leak I had to drain the coolant and applied coolant system/water pump rtv sealant to seal the cover. The cover has not leaked since this repair.


Opening Transmission Cover and Gear selector bushing and seal Replacement

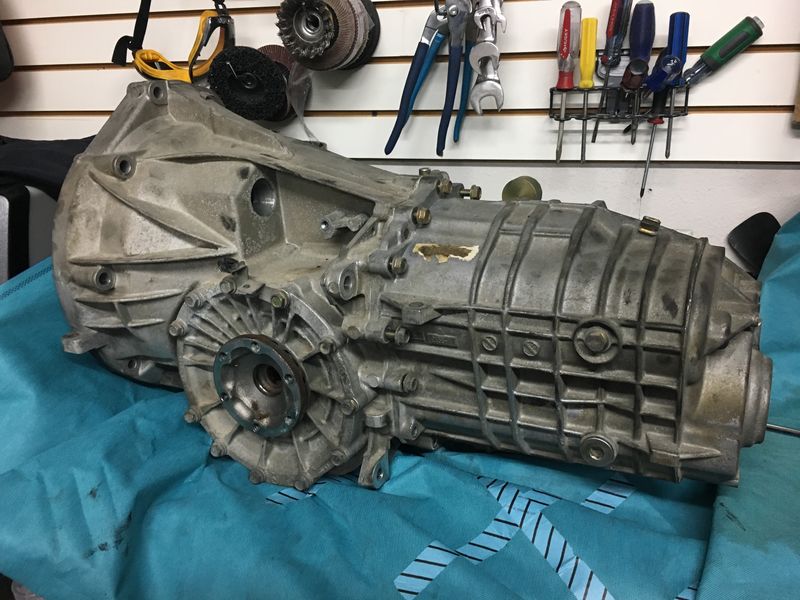
Drain the transmission oil before opening the rear cover. The transmission weighs around 80lbs and was difficult to raise onto a bench but I was able on my own. I opened the cover while the transmission was horizontal and in neutral. Get familiar with manually operating the gears before opening so you can test function after reassembly. I recommend elevating the rear cover off of the surface to make removal easier but also support front housing. I struggled with this and understand why a horizontal stand would be useful. Perhaps using a tie down over the bell housing with a wedge under the diff housing would be sufficient to elevate the rear cover from the table top. After removing the cover’s 12 bolts, loosening the gear selector detent bolt almost completely, and removing reverse switch (not sure if this is completely necessary), I used a block of wood and hammer to separate the rear cover from front housing at a few points that protruded. The two pieces will separate but only less than an 3/4” before the gear selector (external) must be rotated out of its connection to the gear selector rod; this is only possible with detent screw almost fully unscrewed. If the detent screw completely removed detent will fall into case which happened to me. This is not an issue if transmission is horizontal but if vertical you can possibly but unlikely end up with the detent roller in the differential housing which would require further unnecessary disassembly; only one passage at bottom of transmission meant for oil flow into diff housing but it’s large enough for this roller to fit. Once the cover gets past this initial gear selector snag it should pull out completely without any other parts falling or separating. Once the cover is off make sure you don’t drop and lose the detent or roller. This is a good time to clean everything including the magnet with shop towels.


Removal of the gear selector is simple at this point so I won’t elaborate. The bore for the gear selector shaft has TWO bushings. I had only ordered one so needed to order an additional bushing; I ordered 2 more just in case. I removed the shaft seal with a narrow flat head but I recommend trying a pick first as the screwdriver left a small scratch. I removed the two brass bushings with a small flat tipped round chisel. I tapped the inside bushing out first then the outside bushing. Moderate heat from a torch was helpful. The original inside bushing was inset info the cover by around 4mm but when I reinstalled the new bushing I could only get it flush with the cover on both sides. I used the bottom side of a suitable socket as a flat surface to hammer them in. Moderate heat also used during installation. The seal was tapped in using a socket of suitable size.


While you have access to the internals you can manually push the shift forks up to change gears from neutral. I don’t recommend moving the gears this way unless absolutely necessary and if you must, move them back to the original position for reassembly. The only reason I had to do this is because I made the mistake of fiddling with the smaller gear selector lever and pulled out the shift rod (98630302100) which has 4 small rollers that can fall out if this shift rod is pulled out too far. After figuring out how to move the gears with the shift forks to create clearance for removal of this shift rod, I used a magnet to pull the small rollers from the recess that the rod sits in.

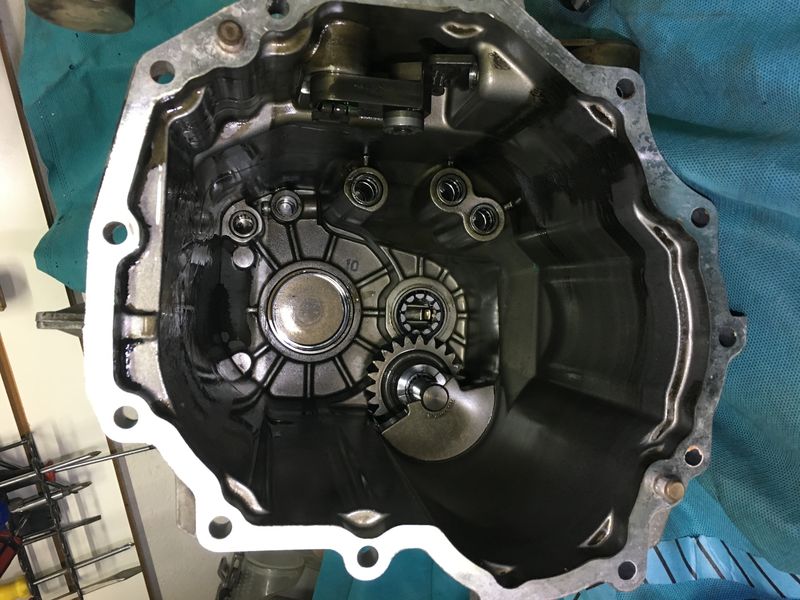
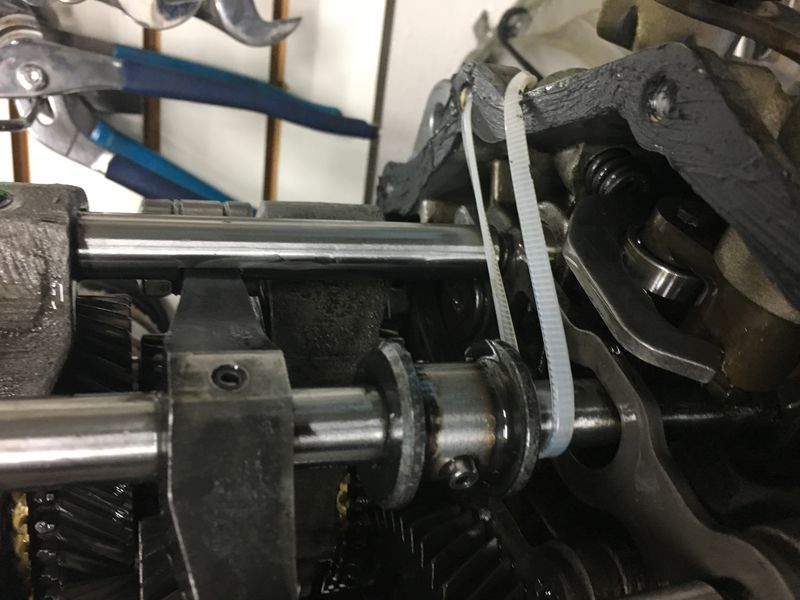
I reinstalled the cover with the transmission vertical. For reinstallation of the cover, four shift rods need to be stabilized and aligned with each other. I used a zip tie to accomplish this and removed it before closing the cover. See attached pic for proper alignment and zip tie method. I oiled all shaft ends to ease cover alignment and installation and used a thin layer of rtv black on the diff housing side of the interface. Don’t forget to install the magnet! With the zip tie stabilization the cover slid on without an issue up to 3/4” closed. Remove the zip tie now. At this point you’ll need to peek into the remaining opening to align the detent roller and the shift rod, then the cover will shut completely with very slight force which is due to the detent. Tighten the detent screw and reinstall reverse switch. After lightly tightening the 12 rear cover screws I allowed the rtv to sit for around an hour before final torquing. I used blue locktite on all screws.


Once all was reassembled I tested shift action through all gears and the gearbox was functional. I checked the gear selector shaft for play and there was minimal however evident play similar to original bushings. The bushings do not seal the shaft however I believe this play will lead to accelerated seal wear and failure. If I had known this would be the result I would have only replaced the seal but the project was a fun learning experience and the parts were less than a few dollars each.

__________________
2004 Boxster S 79K Miles

Last edited by Htci; 12-02-2017 at 09:37 AM.
Htci is offline   Reply With Quote
Old 12-01-2017, 02:28 PM   #2
Registered User
 
Join Date: Aug 2015
Location: Brandon MB
Posts: 51
Any way to change your mind about replacing the IMS bearing? You're 95% of the way there now.
CdnRD is offline   Reply With Quote
Old 12-01-2017, 05:36 PM   #3
1999 base
 
Meir's Avatar
 
Join Date: Dec 2011
Location: Coral Springs FL
Posts: 1,617
Garage
Job well done.
Meir is offline   Reply With Quote
Old 12-01-2017, 06:06 PM   #4
Registered User
 
Join Date: Oct 2016
Location: Houston, TX
Posts: 47
Quote:
Originally Posted by CdnRD View Post
Any way to change your mind about replacing the IMS bearing? You're 95% of the way there now.
Ive spent the last 3 years of my boxster ownership deliberating over whether I would replace the IMS bearing and many hours leading up to and during the tear down looking into IMS bearing options. I had settled on the Pelican replacement given that all DIY kits recommended a 30-40k replacement, the reasonable price point of the Pelican part, and reputation of Pelican. However, after considering many owners experiences of performing the replacement only to find that their original bearing was in great condition, the fact that I’ve never suspected a impending part failure based on oil filter inspection, the fact that I only drive the car less than 4K miles a year, the fact that I change the oil every 3-4K miles, have never had a CEL, that I expect to be back inside the clutch in 30-40k miles if I keep the car that long, and that reported incidence of bearing failure is low, I decided that I would postpone this part replacement until closer to 120k Miles.
__________________
2004 Boxster S 79K Miles
Htci is offline   Reply With Quote
Old 12-01-2017, 06:38 PM   #5
Registered User
 
Join Date: Oct 2016
Location: Houston, TX
Posts: 47
Continuation

Here's a few more details on this project that I couldn't publish with the first section because of message length limits.

Flywheel inspection and resurfacing, clutch disc inspection, pressure plate cleaning
Regarding the clutch disc, pressure plate (PP) and flywheel, what I found were many heat spots especially on the flywheel which was almost 100% covered with spots while the PP only covered around 10%; I know, pic of PP shows throwout bearing on wrong side but it was installed properly. The clutch disc thickness was like new, (~8 mm total thickness and ~2 mm depth to all rivets) and it’s condition was great. I performed the dual mass flywheel test as shown in numerous videos and documents and it was in good condition so I decided to resurface the flywheel surface at a local engine shop in Houston (Scroggins); rust prevention oil was removed from resurfaced flywheel before installing clutch disc. To address the PP spots I used a paint removal abrasive disc on an angle grinder to lightly clean the surface and possibly add grip. New PP and flywheel bolts and pilot bearings were installed, Otherwise all other parts including throwout bearing and fork deemed reuseable after inspection.


Reinstallation of PP and flywheel was straightforward but I had to fabricate a simple tool to hold the flywheel while tightening the bolts; two holes drilled into 1”x4” 11 gauge steel plate. Reinstallation of the transmission was aided by using transmission bolts at 9, 12, and 3 o’clock positions to align then begin threading to pull transmission in while supporting on a transmission jack. If using the harbor freight transmission jack with trough in center I suggest using thick (11 gauge) plate to have a flat surface so transmission “feet” don’t slide into the low spot. I also struggled with this step because I had the clutch slave installed. I suggest installing slave after transmission install but before transmission mounts, at least left side mount. Finish by bleeding with a pressure bleeder; make sure clutch pedal is secured to floorboard while bleeding. Additionally, I recommend testing the pilot bearing fitment on the input shaft before installing it into the flywheel as I’ve read cases of tight fits that have hindered transmission installs.

Conclusion
Total labor time to remove transmission and clutch was 6 hours moving at a cautious pace, 3 hours total for transmission bushing and seal replacement including opening and closing transmission, 3 hours reinstalling transmission, and I expect remainder of reinstallation to take about 4 hours to get car back on the ground. Total for parts used, including one transmission mount, pressure bleeder and flywheel resurfacing was less than $300. Thank you everyone for providing detailed DIY instructions as this project wouldn't have been possible for me to DIY otherwise. This is my contribution to the growing Boxster knowledge base and I hope it provides others with confidence to do these repairs themselves. If you do choose to DIY, take precautions such as safety gear, a helper, and an understanding of safe support points and tools to support the frame, engine and transmission, as this type of project can become deadly if not approached with planning and caution.
__________________
2004 Boxster S 79K Miles
Htci is offline   Reply With Quote
Old 12-01-2017, 08:47 PM   #6
Registered User
 
Join Date: Aug 2015
Location: Brandon MB
Posts: 51
Fair enough. The risk is no doubt overstated. It was just clear by your post that you have the skills to make quick work of it
CdnRD is offline   Reply With Quote
Old 12-02-2017, 10:04 AM   #7
Registered User
 
Join Date: Oct 2016
Location: Houston, TX
Posts: 47
Forgot to attach this image to the original post. Here's the two brass bushings (996-303-515-00-OEM). During reinstallation of inside bushing I could only push it flush with the case rather than recessed like the one shown. I am not worried that my install will have any negative effects. I also observed that two similarly designed brass bushings are used in the detent bore but I doubt these ever need replacement.

__________________
2004 Boxster S 79K Miles
Htci is offline   Reply With Quote
Old 12-02-2017, 08:27 PM   #8
Registered User
 
Join Date: Oct 2016
Location: Houston, TX
Posts: 47
Finally Done!

Took my Boxster out for a drive tonight after completing the repair. Holy Smokes! It drives so much better with the flywheel resurfaced and the clutch bled. The clutch pedal is so easy to push in now; I can now use my toes instead of leg to push in the clutch. No more clutch judder when taking off or reversing, it's smooth as butter now. In addition, before the repair the car would make a fairly loud rattling noise when I shut the car off without depressing the clutch pedal. I'm now positive that the noise was from the exhaust system shaking as the engine came to a stop because the right side transmission mount was shot, even though the mount never leaked fluid. Therefore, leaking fluid from the transmission mount is not an accurate method of determining its condition. Rather than removing the mount to inspect it, a simple test would be to have someone observe the mount for excessive movement as you hold the brakes and/or e-brake while letting out the clutch in first gear or setting the car in drive and mildly revving the engine. Since these cars are so low it might be difficult to observe the mount unless the rear tires are on a ramp. The right side transmission mount experiences the most wear from tension compared to the left side which experiences compression while moving forward; forces are opposite in reverse.

Boxster Skid Plate Installation

I've never seen illustrated instructions on the skid plate installation. When the skid plate is the removed, the left and right subframes move away from each other making reinstallation of the skid plate impossible unless they are pulled back towards each other. To accomplish this I mount the skid plate with one nut and one screw at the front and rear loosely threaded. Then I hook a ratcheting tie-down to the sway bar, lateral to the left and right mounts, routing the strap under the skid plate; for removal of the skid plate I route the strap over the skid plate, between the transmission and the skid plate. As you ratchet the tie-down the two subframe members will move towards each other and eventually the bolts will align. Once they are aligned you can use a rubber mallet on the skid plate to pop the skid plate all the way up through the bolts; this step should not require a lot of force with the mallet. Finish installation and torqueing of the two bolts and two nuts then remove the tie-down. Some owners insist on re-aligning the rear anytime the skid plate is removed but I've removed mine at least four times during the last 10K miles without an alignment and I have yet to observe alignment related issues.

__________________
2004 Boxster S 79K Miles

Last edited by Htci; 12-03-2017 at 02:36 PM.
Htci is offline   Reply With Quote
Old 12-14-2017, 10:56 AM   #9
Registered User
 
Join Date: Oct 2016
Location: Houston, TX
Posts: 47
200 mile update

The shut down rattle has returned so I replaced the left side transmission mount but this did not resolve the issue. I’ll need a helper and stethoscope to determine source; it could be a catalytic converter, gearbox, flywheel, or heatshield. Minor clutch stutter has returned but not nearly as bad as before the repair. Would I have done anything different? No, I now know that my clutch disc is in excellent condition and has many thousands of miles ahead of it, my flywheel surface is like new, my gearshift linkage does not leak, and all motor and transmission mounts are new. If anyone has any questions about pursuing a similar repair I’m happy to give advice.
__________________
2004 Boxster S 79K Miles
Htci is offline   Reply With Quote
Old 02-28-2021, 02:10 AM   #10
Registered User
 
Join Date: Aug 2019
Location: Essex
Posts: 42
Hi did you find the source of the rattle. My 3.2s has EXACTLY the same rattle.

Blue99 is offline   Reply With Quote
Post Reply


Posting Rules
You may not post new threads
You may not post replies
You may not post attachments
You may not edit your posts

BB code is On
Smilies are On
[IMG] code is On
HTML code is On
Trackbacks are On
Pingbacks are On
Refbacks are On


All times are GMT -8. The time now is 08:07 AM.


Powered by vBulletin® Version 3.8.7
Copyright ©2000 - 2024, vBulletin Solutions, Inc.
Content Relevant URLs by vBSEO 3.6.0
Copyright 2024 Pelican Parts, LLC - Posts may be archived for display on the Pelican Parts Website -    DMCA Registered Agent Contact Page