Here's a few more details on this project that I couldn't publish with the first section because of message length limits.
Flywheel inspection and resurfacing, clutch disc inspection, pressure plate cleaning
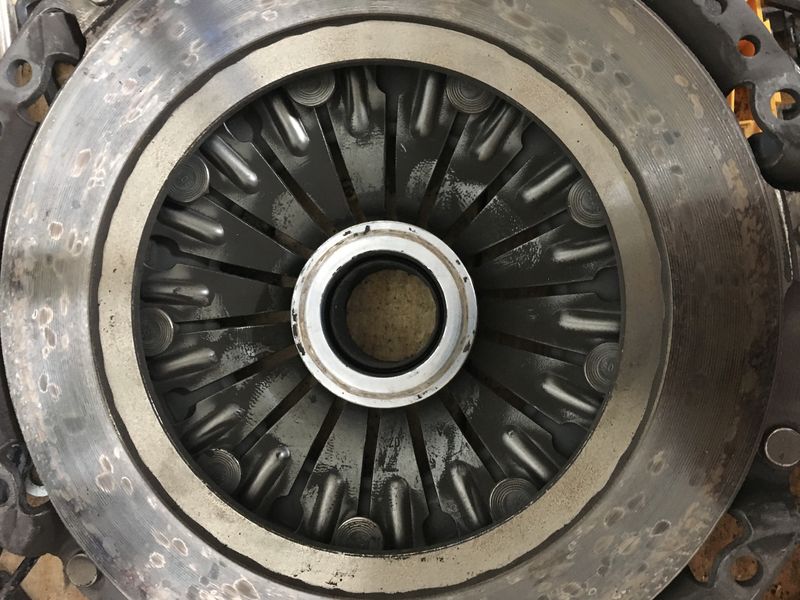
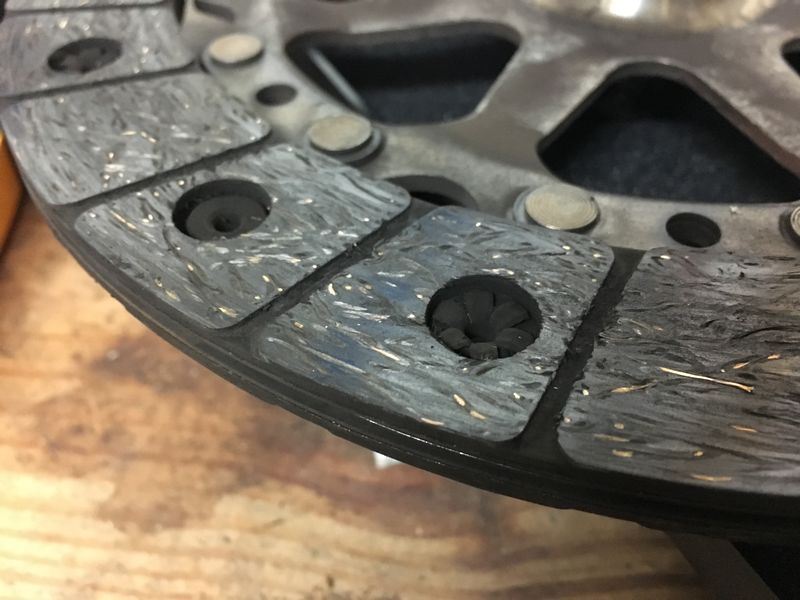
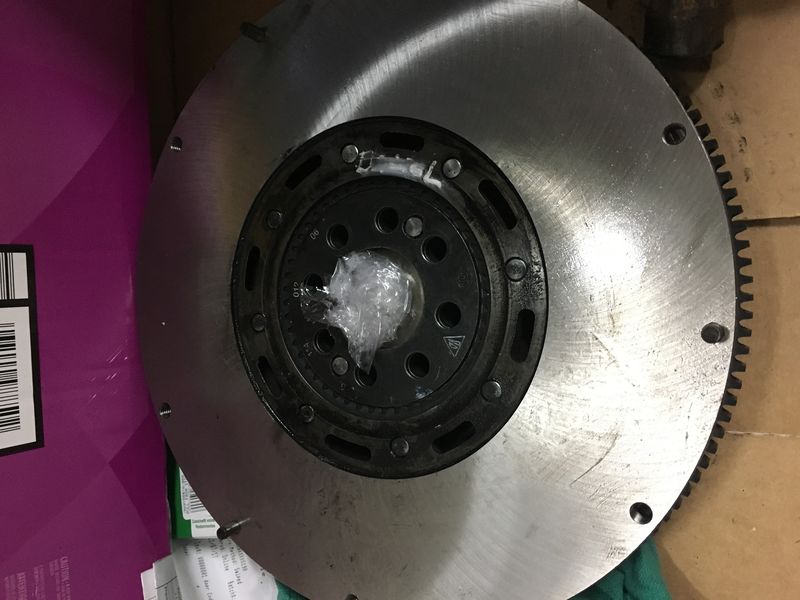
Regarding the clutch disc, pressure plate (PP) and flywheel, what I found were many heat spots especially on the flywheel which was almost 100% covered with spots while the PP only covered around 10%; I know, pic of PP shows throwout bearing on wrong side but it was installed properly. The clutch disc thickness was like new, (~8 mm total thickness and ~2 mm depth to all rivets) and its condition was great. I performed the dual mass flywheel test as shown in numerous videos and documents and it was in good condition so I decided to resurface the flywheel surface at a local engine shop in Houston (Scroggins); rust prevention oil was removed from resurfaced flywheel before installing clutch disc. To address the PP spots I used a paint removal abrasive disc on an angle grinder to lightly clean the surface and possibly add grip. New PP and flywheel bolts and pilot bearings were installed, Otherwise all other parts including throwout bearing and fork deemed reuseable after inspection.


Reinstallation of PP and flywheel was straightforward but I had to fabricate a simple tool to hold the flywheel while tightening the bolts; two holes drilled into 1x4 11 gauge steel plate. Reinstallation of the transmission was aided by using transmission bolts at 9, 12, and 3 oclock positions to align then begin threading to pull transmission in while supporting on a transmission jack. If using the harbor freight transmission jack with trough in center I suggest using thick (11 gauge) plate to have a flat surface so transmission feet dont slide into the low spot. I also struggled with this step because I had the clutch slave installed. I suggest installing slave after transmission install but before transmission mounts, at least left side mount. Finish by bleeding with a pressure bleeder; make sure clutch pedal is secured to floorboard while bleeding. Additionally, I recommend testing the pilot bearing fitment on the input shaft before installing it into the flywheel as Ive read cases of tight fits that have hindered transmission installs.
Conclusion
Total labor time to remove transmission and clutch was 6 hours moving at a cautious pace, 3 hours total for transmission bushing and seal replacement including opening and closing transmission, 3 hours reinstalling transmission, and I expect remainder of reinstallation to take about 4 hours to get car back on the ground. Total for parts used, including one transmission mount, pressure bleeder and flywheel resurfacing was less than $300. Thank you everyone for providing detailed DIY instructions as this project wouldn't have been possible for me to DIY otherwise. This is my contribution to the growing Boxster knowledge base and I hope it provides others with confidence to do these repairs themselves. If you do choose to DIY, take precautions such as safety gear, a helper, and an understanding of safe support points and tools to support the frame, engine and transmission, as this type of project can become deadly if not approached with planning and caution.


 boxster S

 Hybrid Mode


