 03-21-2012, 05:47 AM
|
#1
|
|
Cubby
Join Date: Nov 2011
Location: Glasgow
Posts: 27
|
Remove amber film on headlights
Hi all, I know I might be repeating previous questions.
I have a pair of headlights with the orange tint on the outside and I am trying to find a way to remove the orange.
I have found on the forum a way to remove the orange tint from inside the headlights but surely there must be a way remove the orange tint that is on the outside.
When running hand over headlight you can feel an edge/lip from the orange color, so does anyone have any advice.
Thanks in advance.
Craig
|

|

|
|
03-21-2012, 09:26 AM
|
#2
|
|
Opposed to Subie Burble
Join Date: Mar 2007
Location: Central CT
Posts: 1,197
|
I'm going to make a few assumptions here in my response, so hopefully they're the right ones. If I am not talking about the same thing you're thinking, please clarify.
I assume you're talking about the actual turn signal housing in the headlight when you're talking about the "inside", and the small amber triangle when you're talking about the "outside". In that case, while I'm not sure how you were able to get the amber out of the signal piece, the only way that I know to have a clear triangle is to buy a clear triangular piece and replace it on your headlight. It is a separate piece of the headlight assembly, which is why you feel a roughness between it and the signal portion.
This is a very sought after part, as it breaks very easily and even easier with age as the plastic gets brittle. The headlights that were built with clear turn signals are also sought after, so you'll find the parts may be a bit pricey compared to the amber versions that people don't seem to want. But if you really desire the clear headlight look, that's the way to do it. If your signal is already clear, just get some clear triangles.
__________________
-O/D
1997 Arctic Silver Boxster, 5-spd
IMSR + RMS
Robbins glass window top
|
|
|
|
|
03-21-2012, 10:35 AM
|
#3
|
|
Registered User
Join Date: May 2009
Location: Frederick, MD
Posts: 1,396
|
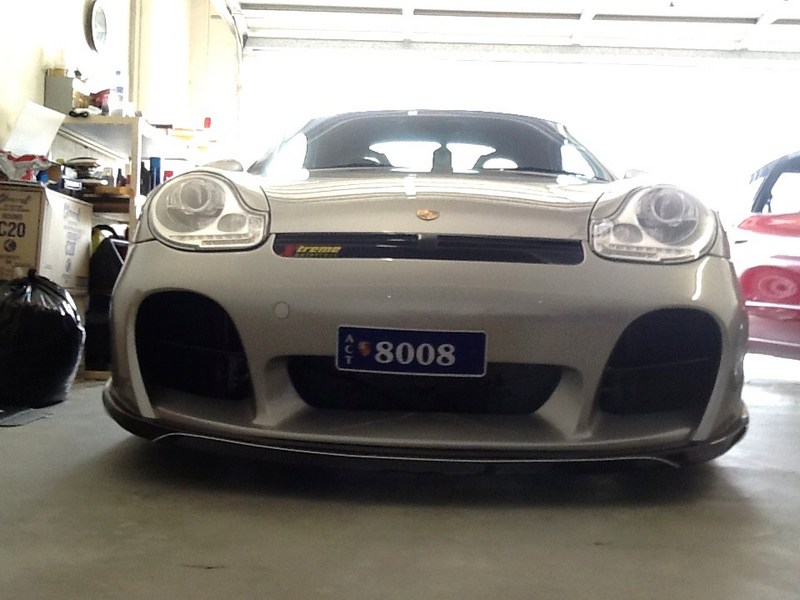
i assume you want to "de-amber" your lights. sadly if your headlights look like this:

then they can not be "de-ambered"
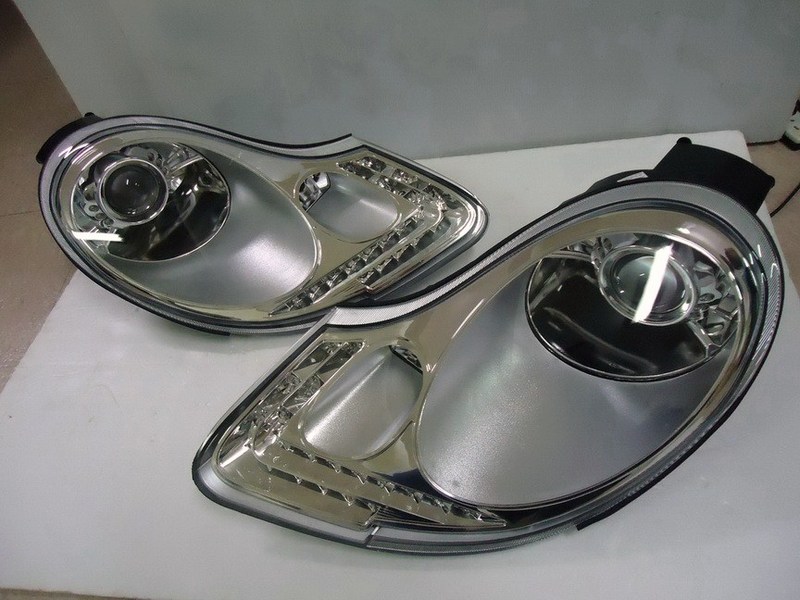
only these headlights can be "de-ambered":

you can always black them out, either by sanding them down and painting them or getting the blackout film (which is what i did)
__________________
"Speed has never killed anyone, suddenly becoming stationary... that's what gets you."
Last edited by tonycarreon; 03-21-2012 at 10:39 AM.
|
|
|
|
|
03-21-2012, 02:57 PM
|
#4
|
|
Opposed to Subie Burble
Join Date: Mar 2007
Location: Central CT
Posts: 1,197
|
y'know tony, despite the line between the bumper and the light, that really doesn't look all that bad...
__________________
-O/D
1997 Arctic Silver Boxster, 5-spd
IMSR + RMS
Robbins glass window top
|
|
|
|
|
03-21-2012, 05:15 PM
|
#5
|
|
Registered User
Join Date: May 2009
Location: Frederick, MD
Posts: 1,396
|
Quote:
Originally Posted by Overdrive

y'know tony, despite the line between the bumper and the light, that really doesn't look all that bad...
|
that's exactly how i think of it. "not that bad, not that great." at some point i'll decide what i want to do. i prefer "blacked out" over even the de-ambered. i have a third headlight (i bought it to replace one of the foggy ones) that i'm going to try doing the sand + paint. if i end up liking that, i may go ahead and eventually get the clear lights and black them out.
for 2 years, i had no "issues" with the amber. but in the past year or so they've started to wear thin on me. i think for now just having the black film on there updated the look enough that i like it. who knows, i'll probably get tired of that too.
i figure for the $15 or $20 i paid for it, it's enough of an update for now. the only thing that bothers me on the film is the line between the turn signal and the reflector/triangle. no way around that since the film came in two pieces - one for each part.
__________________
"Speed has never killed anyone, suddenly becoming stationary... that's what gets you."
|
|
|
|
|
03-23-2012, 06:57 AM
|
#6
|
|
Cubby
Join Date: Nov 2011
Location: Glasgow
Posts: 27
|
Thanks guys
Hi Overdrive and Tonycarreon,
Thanks for the replys, I appreciate your advice.
Tony my headlights are your first picture, bummer, the blackout film looks pretty good on your car mate. What do you mean sanding them down? Is it possible to take a very fine grinder/sanding disk and sand off the amber. Then when all amber off polish the lens???? Just a thought.
Overdrive, sorry if my explanation wasnt very good. I am aware that you can buy the corner pieces, I have bought them from eBay, so now it is the amber signal part that needs done. My lights were the same as the first picture from Tony.
I have managed to get a pair of headlights similar to picture 2, fitted them and they look the dogs bollocks. So I now have a pair of lights to try and play around with. Is the amber plastic solid or is it a some kind of film that applied at time of manufacture.
Sorry guys if my explanation isnt clear.
Cheers guys
Cubby
|
|
|
|
|
03-23-2012, 11:05 AM
|
#7
|
|
Registered User
Join Date: May 2009
Location: Frederick, MD
Posts: 1,396
|
Quote:
Originally Posted by cubbyno9
Tony my headlights are your first picture, bummer, the blackout film looks pretty good on your car mate. What do you mean sanding them down? Is it possible to take a very fine grinder/sanding disk and sand off the amber. Then when all amber off polish the lens???
|
when is say sand/paint i mean black them out. you won't be able to sand down the amber. it's all the plastic. on the newer ones, there's a film on the inside back of the turn signal that can be heated and removed. on the older ones (like you and i have) the plastic itself is amber.
as far as sanding/painting, there are a lot of youtube videos on how to do it, but essentially you:
1) fine grit sand the light so the paint has a surface to stick to
2) get some the tail light spray paint and paint them.
i believe you have to spray them a couple of times, let them dry and spray a clear coat on them afterwards. you'll then have black turn signals.
__________________
"Speed has never killed anyone, suddenly becoming stationary... that's what gets you."
|
|
|
|
|
03-23-2012, 08:29 AM
|
#8
|
|
Opposed to Subie Burble
Join Date: Mar 2007
Location: Central CT
Posts: 1,197
|
The amber is on the inside of the light, and I'm not sure whether or not it's a film that can be removed, but I'd strongly recommend against opening your lights up if you don't need to. You can clean them up and try to revive them, though. There are kits out there that you can use to clear up the plastic when it becomes opaque and yellowed. If you've already got a set of clear signaled lights, try and do that first.
__________________
-O/D
1997 Arctic Silver Boxster, 5-spd
IMSR + RMS
Robbins glass window top
|
|
|
|
|
03-23-2012, 06:32 PM
|
#9
|
|
Registered User
Join Date: Jul 2004
Location: Houston, Texas
Posts: 7,243
|
I know a guy about to sell aftermarket headlamps without any amber in them. Let me find out more and post it here.
Update: he told me he has black and clear versions for sale. Pics to follow.
Last edited by RandallNeighbour; 03-24-2012 at 08:36 PM.
|
|
|
|
|
03-25-2012, 07:22 PM
|
#10
|
|
Registered User
Join Date: Jul 2004
Location: Houston, Texas
Posts: 7,243
|
OK guys, I have no affiliation with this company and I'm not making a dime off this posting, so I thought I'd pass it along for those of you looking to de-amber and want other options. This guy lives in Cali and sells bumpers and skirts for Porsches on eBay.
He emailed me a while back after I asked him about his bumpers and we've been dialoging for quite some time... mostly because I'm perpetually broke these days and don't have the money to pull the trigger on the front bumper cover I want.
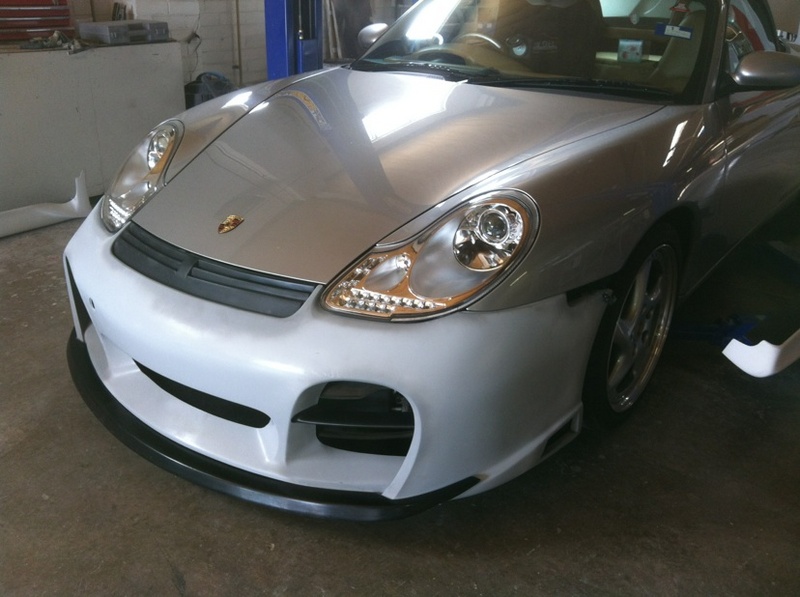
Anyway, here's pics of his aftermarket headlights in clear and black versions... I don't know anything about them (such as whether they're xenon or halogen), so ask him and not me if you have questions. His info is below the pix...
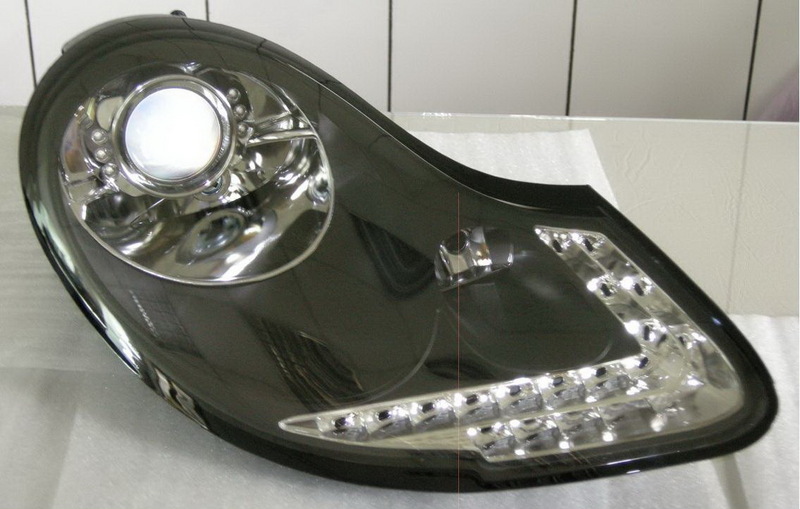
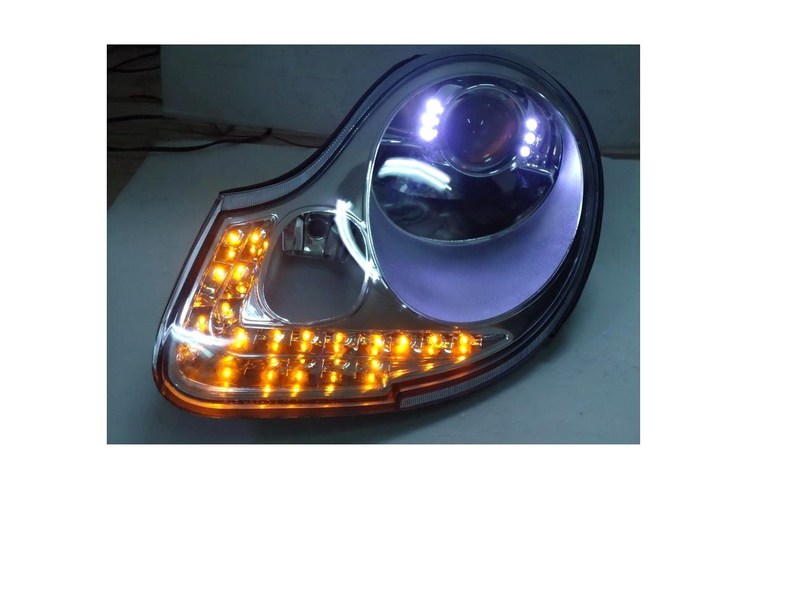
these new aftermarket headlights will fit any 986 Boxster (1997-2004) and any 996 (1998-2001) with Boxster style headlights
Items List / ebay price / 986forum special
the price for the chrome- $995.- / $895.- / $795.-
the price for the black- $995.- / $895.- / $795.-
shipping in the USA / Fedex ground is $45.- (rather large box)
for Canada - $75.-
International- $145.-
if they want to order they can contact me at this email jezzsb@aol.com
with their full name, address and phone# and whether they want chrome or black. I will email them an invoice and paypal request, or the invoice will have our mailing information for check or money order
thanks,
Jeffrey
Xtreme Motorcars
(707) 350-0415
|
|
|
|
|
03-26-2012, 04:48 AM
|
#11
|
|
Registered User
Join Date: May 2009
Location: Frederick, MD
Posts: 1,396
|
randall:
jinster bought these (clear, RHD) from ebay (don't know if it was the same guy) but he was fairly happy i believe. he noted they came with halogen bulbs...
http://986forum.com/forums/general-discussions/28934-anyone-knows-where-get-some-these-headlights-986-996-a.html
didn't know they came in smoked/black, and there's a forum discount - my wallet is already vibrating...
__________________
"Speed has never killed anyone, suddenly becoming stationary... that's what gets you."
Last edited by tonycarreon; 03-26-2012 at 04:51 AM.
|
|
|
|
|
03-26-2012, 05:06 PM
|
#12
|
|
1999 base
Join Date: Dec 2011
Location: Coral Springs FL
Posts: 1,617
|
WOW!
Bumper looks very nice as well.
|
|
|
|
|
03-27-2012, 09:32 AM
|
#13
|
|
Registered User
Join Date: Jul 2010
Location: Oregon
Posts: 77
|
wow! nice bumper indeed!
Im totally in for a pair of black headlights!
|
|
|
|
|
04-11-2012, 08:00 PM
|
#14
|
|
Registered User
Join Date: Jun 2010
Location: saskatchewan
Posts: 6
|
Email sent, I am very interested in the black set, Thanks Randall
|
|
|
|
|
04-21-2012, 06:32 PM
|
#15
|
|
Registered User
Join Date: Nov 2009
Location: PA
Posts: 170
|
So does anyone have these black ones installed?
|
|
|
|
|
04-25-2012, 12:51 PM
|
#16
|
|
Registered User
Join Date: Oct 2010
Location: NKY
Posts: 211
|
has anyone emailed this guy regarding a group buy? i'd love a set of black.
__________________
2001 Seal Gray 5-Speed - 2007 Yamaha R6 - 2003 Honda Civic EX - 1999 Nissan Frontier XE - 2003 Coleman Utah
|
|
|
|
|
04-25-2012, 09:34 PM
|
#17
|
|
Registered User
Join Date: Jul 2004
Location: Houston, Texas
Posts: 7,243
|
I email him all the time about unrelated parts for my boxster. He's probably open to it. Do contact him to see about a group buy. Jeffrey's a good guy!
|
|
|
|
|
04-26-2012, 09:05 AM
|
#18
|
|
Registered User
Join Date: Oct 2010
Location: NKY
Posts: 211
|
I'll shoot him a note today and post back when I hear from him.
__________________
2001 Seal Gray 5-Speed - 2007 Yamaha R6 - 2003 Honda Civic EX - 1999 Nissan Frontier XE - 2003 Coleman Utah
|
|
|
|
|
04-26-2012, 06:07 PM
|
#19
|
|
Registered User
Join Date: Oct 2010
Location: NKY
Posts: 211
|
heard from jeff today, he's checking with his oversees suppliers and will get back with me.
in the meantime, what do you guys think would look better on a seal grey 986, the chrome or the black housing?
__________________
2001 Seal Gray 5-Speed - 2007 Yamaha R6 - 2003 Honda Civic EX - 1999 Nissan Frontier XE - 2003 Coleman Utah
|
|
|
|
|
04-27-2012, 12:14 PM
|
#20
|
|
Registered User
Join Date: Jul 2010
Location: Oregon
Posts: 77
|
on a seal grey? man, that's a hard one. I think both would look good. Probably black if you have an aftermarket bumper. Chrome if stock. I have an arctic silver and might go for the black one. Light colored cars would look good with the dark headlights while dark colored cars might look better with the chrome. Just my two cents, Or simply buy both Lol. Any other members that could post pictures of these headlights?
|
|
|
|
 Posting Rules
|
You may not post new threads
You may not post replies
You may not post attachments
You may not edit your posts
HTML code is On
|
|
|
All times are GMT -8. The time now is 11:57 AM.
| |


 Range Rover Sport
 Boxster
 boxster S
 Hybrid Mode


