 04-20-2016, 11:42 AM
|
#1
|
|
Registered User
Join Date: Dec 2012
Location: FL
Posts: 4,145
|
Help, I can't get this blasted LCA ball joint loose
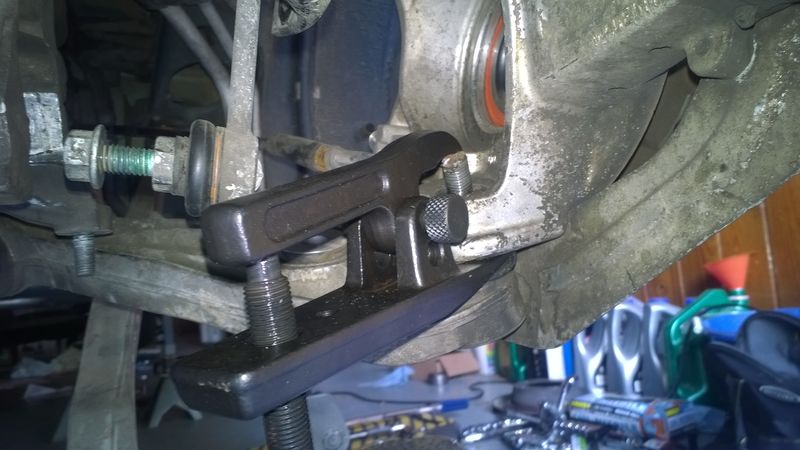
Help a brother out. This is the last piece before I can start putting everything back together again with a new LCA. I have used the tool, I have hit the stud with a hammer, I have sprayed WD40 version of PBBlaster, the ball joint separator is on there tight right now and I'm letting it sit, if I turn it too much eventually it comes flying off, Monday night I hit myself in the face with the end of a breaker bar when the tool popped loose.
Ideas I may try tonight (please let me know if these are terrible ideas)
- Dry ice and try to apply it to the stud or the ball joint from underneath
- A butane torch to try and heat the part of the wheel carrier that is around the ball joint.
- Maybe a plumbers wrench, and grip the stud really tightly and try and turn it?
I really really need to get this out and get the car back together so I can take it to get corner balanced and aligned and get ready for a track weekend next weekend.
Help 
Last edited by steved0x; 04-20-2016 at 11:46 AM.
|

|

|
|
04-20-2016, 11:49 AM
|
#2
|
|
Registered User
Join Date: Sep 2012
Location: Guelph, ON
Posts: 981
|
Put some tension on that splitter and then hit the top of the bolt with the air-hammer with a couple of short bursts (put the nut on it first otherwise you might kill the threads) those tapered bolts are bastard to get out especially if there is any kind of corrosion happening in there....
H
__________________
_________________________________________
Previously owned:
2000 Boxster S 3.2 Ocean Blue / 1974 911 Targa Silver
|

|
|
|
04-20-2016, 12:10 PM
|
#3
|
|
Registered User
Join Date: Dec 2012
Location: FL
Posts: 4,145
|
The end of the threads are toast already and you should see the nut, it is like a ball of putty. I had to use a 3/4 socket to get it off since it was deformed and the 18mm wouldn't go over it.
I'll head out this evening and get an air hammer from HF, any special ends or anything to get or will the default chisel be just fine?
Any of these? Search results for: 'air hammer'
|
|
|
|
|
04-20-2016, 12:26 PM
|
#4
|
|
Registered User
Join Date: May 2014
Location: S.California
Posts: 2,029
|
Let's assume the problem is corrosion?
PB Blaaster is O.K. but a google search suggests Kroil is better.
Whatever you use,patience & persistence are required. Tap it all around, put some more penetrant on,leave it for several hours -repeat.
Hope this helps.
|
|
|
|
|
04-20-2016, 12:38 PM
|
#5
|
|
Registered User
Join Date: Feb 2005
Location: It's a kind of magic.....
Posts: 6,657
|
Quote:
Originally Posted by steved0x

Help a brother out. This is the last piece before I can start putting everything back together again with a new LCA. I have used the tool, I have hit the stud with a hammer, I have sprayed WD40 version of PBBlaster, the ball joint separator is on there tight right now and I'm letting it sit, if I turn it too much eventually it comes flying off, Monday night I hit myself in the face with the end of a breaker bar when the tool popped loose.
Ideas I may try tonight (please let me know if these are terrible ideas)
- Dry ice and try to apply it to the stud or the ball joint from underneath
- A butane torch to try and heat the part of the wheel carrier that is around the ball joint.
- Maybe a plumbers wrench, and grip the stud really tightly and try and turn it?
I really really need to get this out and get the car back together so I can take it to get corner balanced and aligned and get ready for a track weekend next weekend.
Help
|
If you are not going to reuse the lower arm and ball joint, use an old fashion "pickle fork" separator and a large hammer:
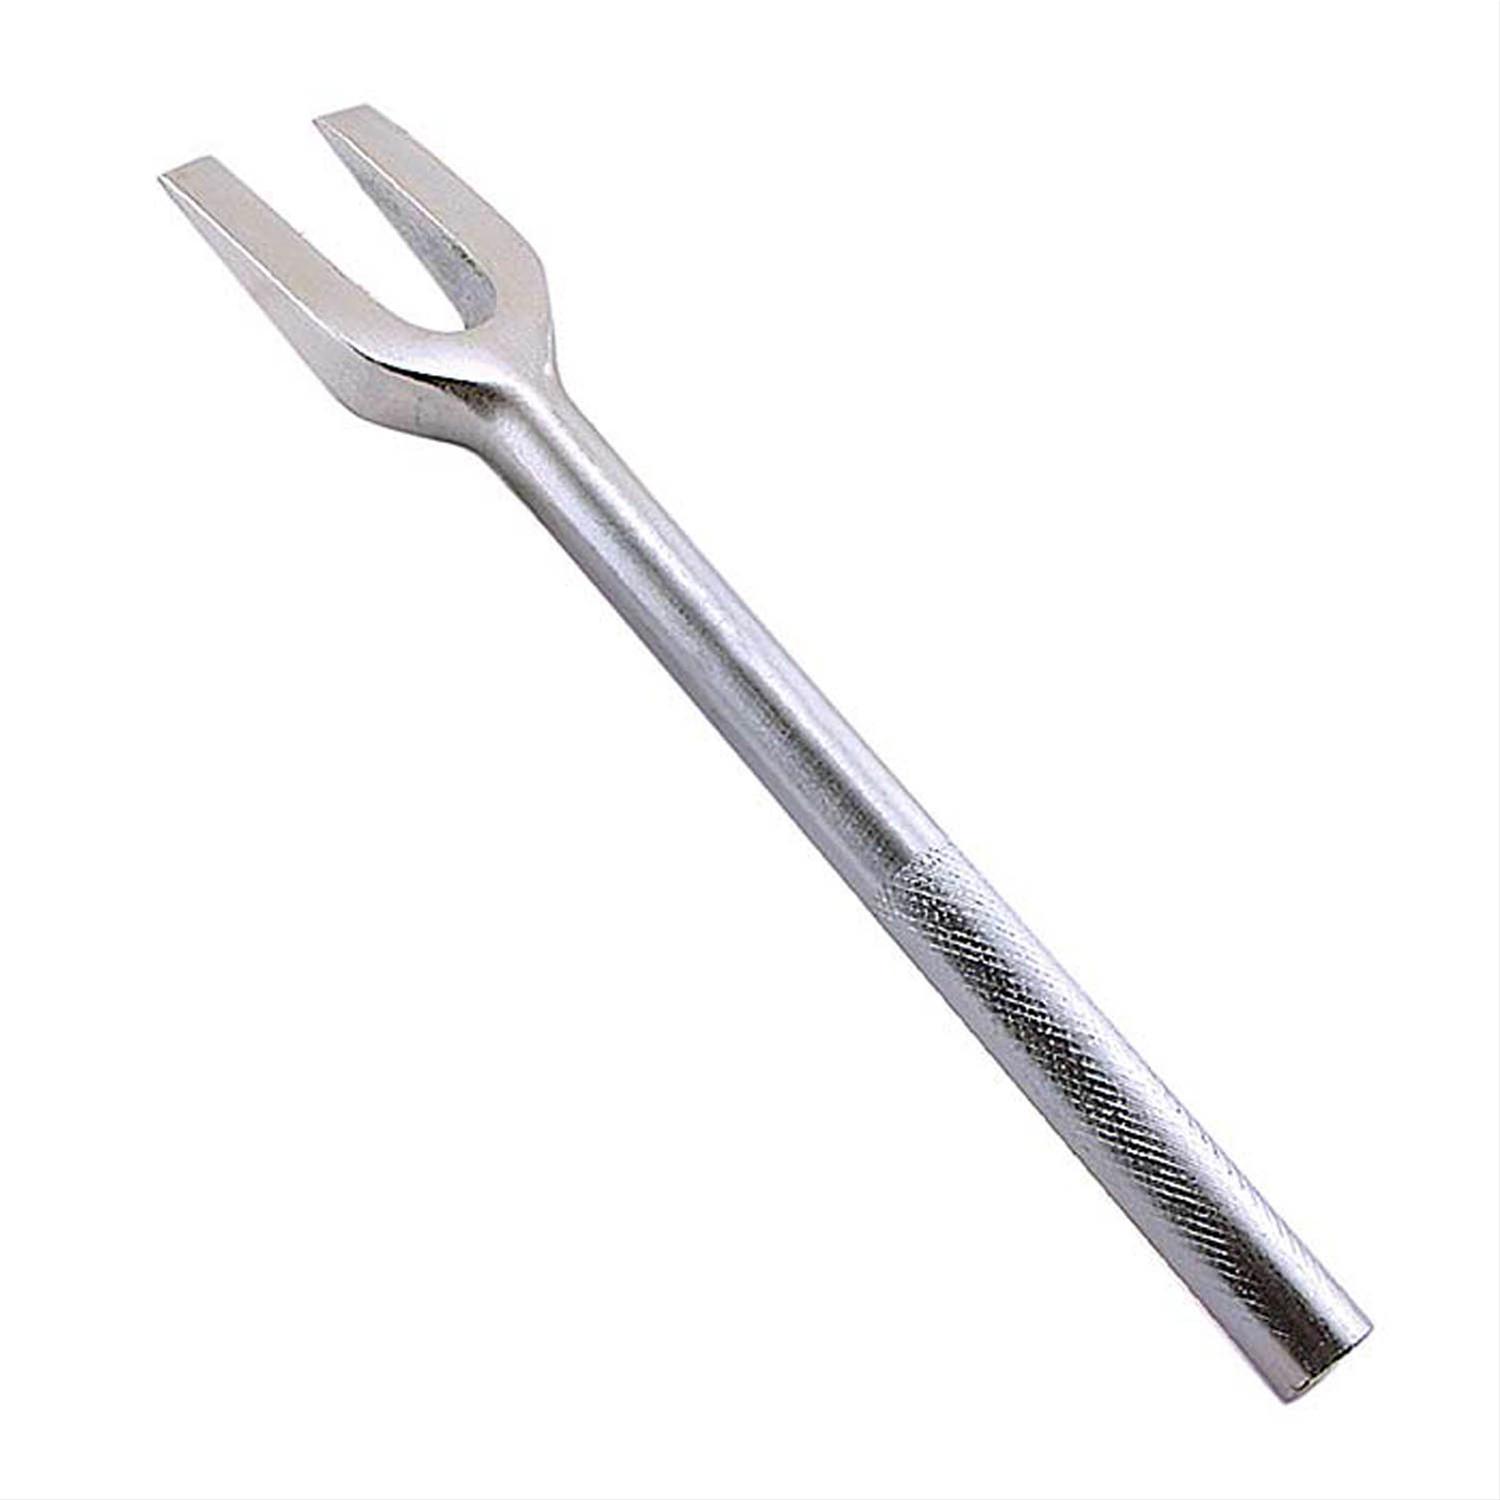
A couple of good smacks and it should let go.
__________________
Anything really new is invented only in ones youth. Later, one becomes more experienced, more famous and more stupid. - Albert Einstein
|
|
|
|
|
04-20-2016, 12:54 PM
|
#6
|
|
Registered User
Join Date: Sep 2012
Location: Guelph, ON
Posts: 981
|
By the sounds of it, its already FUBAR.... yikes...
Penetrating fluid, a little pressure from the separator or pickle fork and couple of shots with the 1" blunt hammer end of the air hammer and they pop 99.9% of the time.
Depending how much he widened the shaft of the bolt by beating on it, he might have to cut it off with the cutting wheel to get it through the hole now....
__________________
_________________________________________
Previously owned:
2000 Boxster S 3.2 Ocean Blue / 1974 911 Targa Silver
|
|
|
|
|
04-20-2016, 01:05 PM
|
#7
|
|
Registered User
Join Date: Dec 2012
Location: FL
Posts: 4,145
|
Headed to harbor freight now:
- Air hammer
- Pickle fork
- Cutting wheel
Should come to around $15-$20 or so
And depending on which 20% coupon I can scrounge from my car magazine I'll have either a free flashlight (yay) or a tarp (moderate) or another measuring tape (I guess) or an electronic tester (I'll pass)
|
|
|
|
|
04-20-2016, 01:07 PM
|
#8
|
|
Registered User
Join Date: Dec 2012
Location: DE
Posts: 126
|
If you grind the finger of the ball joint separator tool where it hits the end of the ball joint, you might be able to make it less likely to slip off. On mine (not the same brand), I ground it flat - maybe a bit concave, and it stays put now. Also, the ground area isn't as slippery as the factory finish.
|
|
|
|
|
04-20-2016, 01:22 PM
|
#9
|
|
Registered User
Join Date: Jun 2014
Location: LB, Germany
Posts: 1,526
|
The ideas are all good. But i would say take a break, drink something, relax, than go back to work.
There is no need to hit yourself into your face more than once a day. 
Regards from Germany
Markus
|
|
|
|
|
04-20-2016, 01:22 PM
|
#10
|
|
Racer Boy
Join Date: Sep 2015
Location: Seattle, WA
Posts: 946
|
I just went through the same project, it's a real stinker (although that is not the word or words that I used). I used an impact wrench on the ball joint separator, and although it was a struggle, it did work. When the ball joint finally lets go, parts will go flying, so make sure you have your arms, hands, and feet positioned safely. One of the control arm went flying on my car, and smashed the stuffing (again, not the word I used) out of my finger.
I know that you do track days, so if you are going to get an impact wrench, why not spend a few more dollars and get a battery powered one? I have an inexpensive one (under $50), and I use it all the time. Since I got it, I never use my air impact wrench any more (no air lines to deal with, no noisy compressor to listen to). You can also take it to the track, and if you have to change a wheel, it's uber-handy. The electric impact wrench, along with my aluminum racing jack are two tools that every time I use them, I'm really glad I have them!
|
|
|
|
|
04-20-2016, 01:41 PM
|
#11
|
|
Registered User
Join Date: Dec 2012
Location: FL
Posts: 4,145
|
I'm balls deep with the loaner pickle fork I got from the auto parts store. Heading to HF now for a bigger one and an impact hammer. I'm going to try tapping on the top of that stud with the hammer, and maybe driving in the pickle fork deeper. I'm trying to figure a good way to counterhold the wheel carrier so it doesn't move as much when I hit the pickle fork with the hammer., maybe I will bolt back up all the suspension pieces (toe arms, track arm, and other end of the LCA, but I don't want to put too much stress on them. Although driving the car surely puts a lot of stress on them as well.
Last edited by steved0x; 04-20-2016 at 01:55 PM.
|
|
|
|
|
04-20-2016, 03:12 PM
|
#12
|
|
Registered User
Join Date: Dec 2012
Location: FL
Posts: 4,145
|
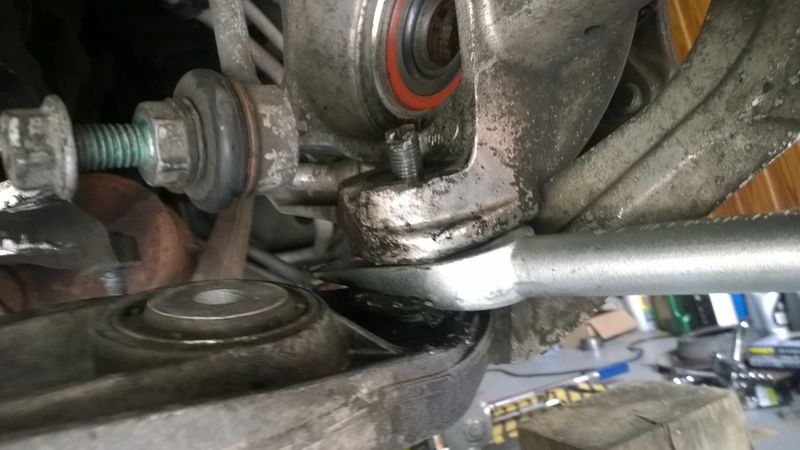
Yes, success!!!!
|
|
|
|
|
04-20-2016, 03:14 PM
|
#13
|
|
Registered User
Join Date: Oct 2014
Location: California Central Coast
Posts: 1,476
|
Quote:
Originally Posted by steved0x
Yes, success!!!!
|
Bigger Hammer?
|
|
|
|
|
04-20-2016, 03:17 PM
|
#14
|
|
Registered User
Join Date: Feb 2005
Location: It's a kind of magic.....
Posts: 6,657
|
Quote:
Originally Posted by steved0x
Yes, success!!!!
|
Now you know why we put a thin coating of anti seized on new ball joint studs.......
__________________
Anything really new is invented only in ones youth. Later, one becomes more experienced, more famous and more stupid. - Albert Einstein
|
|
|
|
|
04-20-2016, 05:01 PM
|
#15
|
|
Registered User
Join Date: Dec 2012
Location: FL
Posts: 4,145
|
Quote:
Originally Posted by JFP in PA
Now you know why we put a thin coating of anti seized on new ball joint studs.......
|
Amen to that, +100000000000
|
|
|
|
|
04-20-2016, 05:02 PM
|
#16
|
|
Registered User
Join Date: Dec 2012
Location: FL
Posts: 4,145
|
Quote:
Originally Posted by 911monty
Bigger Hammer?
|
Hit the stud a few times with the impact hammer but barely got any clean contacts. Them grabbed the carrier with my tight hand and hit the pickle fork as hard as I could 3-4 times and POW!!!
|
|
|
|
|
04-20-2016, 05:52 PM
|
#17
|
|
Registered User
Join Date: Dec 2012
Location: FL
Posts: 4,145
|
Now I'm putting the ebrake back on, dang that thing is fiddly...
|
|
|
|
|
04-20-2016, 06:33 PM
|
#18
|
|
Racer Boy
Join Date: Sep 2015
Location: Seattle, WA
Posts: 946
|
Yes, it sure is.
|
|
|
|
|
04-21-2016, 06:01 PM
|
#19
|
|
Registered User
Join Date: Dec 2012
Location: FL
Posts: 4,145
|
Quote:
Originally Posted by Racer Boy
Yes, it sure is.
|
Got it back together on my driver side....
The SIR tool could remove the bearing if it had maybe 2-3mm of clearance on top of the parking brake shoes. I may rent a slide hammer from the auto parts store and see if I can pull the hub on the other just enough to slip the sir tool in there... And leave the parking brake alone
|
|
|
|
 Posting Rules
|
You may not post new threads
You may not post replies
You may not post attachments
You may not edit your posts
HTML code is On
|
|
|
All times are GMT -8. The time now is 08:58 PM.
| |


 1998 Porsche Boxster
 Linear Mode


