 09-29-2010, 10:14 AM
|
#41
|
|
Registered User
Join Date: Apr 2009
Location: SF Bay Area
Posts: 247
|
I ordered freeze and release from grainger (industrial supply wholesaler). Not sure if you have them in atlanta but they have a website and will ship to you i bet.
__________________
2003 Cayenne Turbo
|

|

|
 09-29-2010, 10:18 AM
|
#42
|
|
Registered User
Join Date: Sep 2004
Location: Atlanta
Posts: 1,820
|
Quote:
|
Originally Posted by manolo
I ordered freeze and release from grainger (industrial supply wholesaler). Not sure if you have them in atlanta but they have a website and will ship to you i bet.
|
yeah, i found it online at a lot of places. was looking to see if it was available off the shelf somewhere. turns out that West Marine near me stocks the CRC Freeze Off. i will pick some up today & give it a shot.
|

|

|
 09-29-2010, 11:42 AM
|
#43
|
|
Registered User
Join Date: Jan 2007
Location: Depends on the day of the week....
Posts: 1,400
|
Quote:
|
Originally Posted by insite
@manolo:
that stuff sounds promising; it's a REALLY smart idea. anyone know if any of the major retailers carry these? i haven't been able to find them except by mail order.
@stephan smith: WTF?
@cloudsurfer:
you're right on the oil pump drive; that think is pulled WAY over to the right. i'd planned on putting the new drive in right away & reassembling. didn't realize my oil pump drive wasn't in the box........
that having been said, i am actually shocked by how ****************ty the whole design of the IMS is. i can't believe porsche spent so much time on it rather than spending time figuring out how to eliminate it.....
the last piece of my intake should arrive today (samco 135 elbow). i'll post mock-up pics this weekend.
|
You ain't kidding my friend....
__________________
Boxster S
|

|

|
 09-29-2010, 01:08 PM
|
#45
|
|
Registered User
Join Date: Sep 2004
Location: Atlanta
Posts: 1,820
|
wow; talk about overkill. this is what happens here when we don't constrain the budgets of our engineers: mission creep. what's with the rivets? looks like a casting sandwich? i'd have to play with it for a bit, but in trying to solve a single failure mode, they appear to have introduced about four more......
|

|

|
 09-29-2010, 02:13 PM
|
#46
|
|
Registered User
Join Date: Jan 2007
Location: Depends on the day of the week....
Posts: 1,400
|
I think the second "fail safe" bearing is an interesting idea, but the way this thing looks with hex cap screws and rivets is completely lost on me. Why, of all things, would the flange have rivets in it? Is it supposed to look cool, like the fake 2 piece wheels? LOL
I have the LN IMS "upgrade" in my engine, which contains 3 bearings, but unfortunately cannot be done without sending the whole shaft to them, though I do love the idea that it's not one single point of potential failure.
I think it's wise to consider this thing a preventative maintenance item, to be replaced at every clutch job.
Now, I'm also completely lost how they claim they have "engineered" a prescribed amount of "slip" into the interface between primary and secondary bearing. Sure, you get far enough and you'll throw cam timing faults, but how is the bearing supposed to only "slip" so far?
__________________
Boxster S
|

|

|
 09-30-2010, 03:55 AM
|
#47
|
|
Registered User
Join Date: Sep 2004
Location: Atlanta
Posts: 1,820
|
the flange on that thing really does look cast to me. right off the bat, that indicates this is in fact NOT a spare no expense solution.
|

|

|
 09-30-2010, 04:03 AM
|
#48
|
|
Registered User
Join Date: Sep 2004
Location: Atlanta
Posts: 1,820
|
verdict on CRC Freeze Off: GIMMIC
i think the reason it works for people is that it does contain penetrating lubricant. it does not, in fact, cool the part to -47deg. i followed their directions on a loose bolt; the coldest i could get it with a 20sec spray was around +39F according to my IR thermometer. that's not very cold.
on the other hand, using a can of office air duster, a 10sec spray from the UPSIDE DOWN can cooled the bolt to -18. i certainly could have cooled it further this way.
the CRC stuff has the oil mixed in; i think it interferes with the phase change of the refrigerant & makes it less effective. spraying the upside down can of air duster, though, spits out 100% liquid that converts to 100% gas on contact. it's this phase change that supplies the primary mode of heat transfer.
i tried this on the studs to no avail. dry ice would still work a lot better than either of these. liquid nitrogen? even better than that.....
looks like i'll need to break out the big guns this weekend.
|

|

|
 09-30-2010, 06:45 AM
|
#49
|
|
Registered User
Join Date: Sep 2009
Location: The City
Posts: 1,084
|
good to know. good luck
|

|

|
 09-30-2010, 07:00 AM
|
#50
|
|
Registered User
Join Date: Apr 2008
Location: Southern New jersey
Posts: 1,054
|
How far from the bolt did you hold the nozzle? IIRC you need to be 6" (or was it 12" ?) from the part for it to work properly. I have no first-hand knowledge though.
|

|

|
 09-30-2010, 07:03 AM
|
#51
|
|
Registered User
Join Date: Sep 2004
Location: Atlanta
Posts: 1,820
|
Quote:
|
Originally Posted by stephen wilson
How far from the bolt did you hold the nozzle? IIRC you need to be 6" (or was it 12" ?) from the part for it to work properly. I have no first-hand knowledge though.
|
it comes with a straw & says to use the straw and hold it 'close to the part'. i tried holding it right next to the part & also 6" away. no real difference.
|

|

|
 09-30-2010, 07:06 AM
|
#52
|
|
Registered User
Join Date: Jun 2007
Location: Littleton, CO
Posts: 456
|
More good data, insite. Thank you.
Interesting that the canned duster works for that. I've heard of people using dry ice to pull out door dings. I wonder if an upside duster can could work for that, too.
__________________
"Of all the extreme sports I've ever participated in- windsurfing, kite boarding, wake boarding, tow-in surfing and snowboarding- skiing, for me, made everything else easy."
-Chuck Patterson
|

|

|
 09-30-2010, 07:11 AM
|
#53
|
|
Registered User
Join Date: Sep 2004
Location: Atlanta
Posts: 1,820
|
Quote:
|
Originally Posted by Pat
More good data, insite. Thank you.
Interesting that the canned duster works for that. I've heard of people using dry ice to pull out door dings. I wonder if an upside duster can could work for that, too.
|
gotta love thermodynamics. a phase change is always the best way to move heat. it's how air conditioners work. it's also why a steam burn is so much worse than a liquid burn. when you flip the duster can upside down, the liquid layer rather than the gas layer comes out of the nozzle. when it turns to gas, it sucks the heat out of whatever it came into contact with.
incidentally, you can remove warts with this stuff. flip the can upside down, spray a q-tip for 10 seconds, and put the q-tip on the wart for 10 seconds. repeat once. no more wart, & no visit to the doc.
|

|

|
 10-01-2010, 11:10 AM
|
#54
|
|
Registered User
Join Date: Apr 2009
Location: SF Bay Area
Posts: 247
|
I havent used the crc stuff but the loctite version is great. Maybe they cheaped out on the crc stuff?
__________________
2003 Cayenne Turbo
|

|

|
 10-01-2010, 11:54 AM
|
#55
|
|
Registered User
Join Date: Sep 2004
Location: Atlanta
Posts: 1,820
|
well, you know that anytime you need to dig out the '**************** we'd better not need', it's either gonna be a really good day, or a really bad one.....
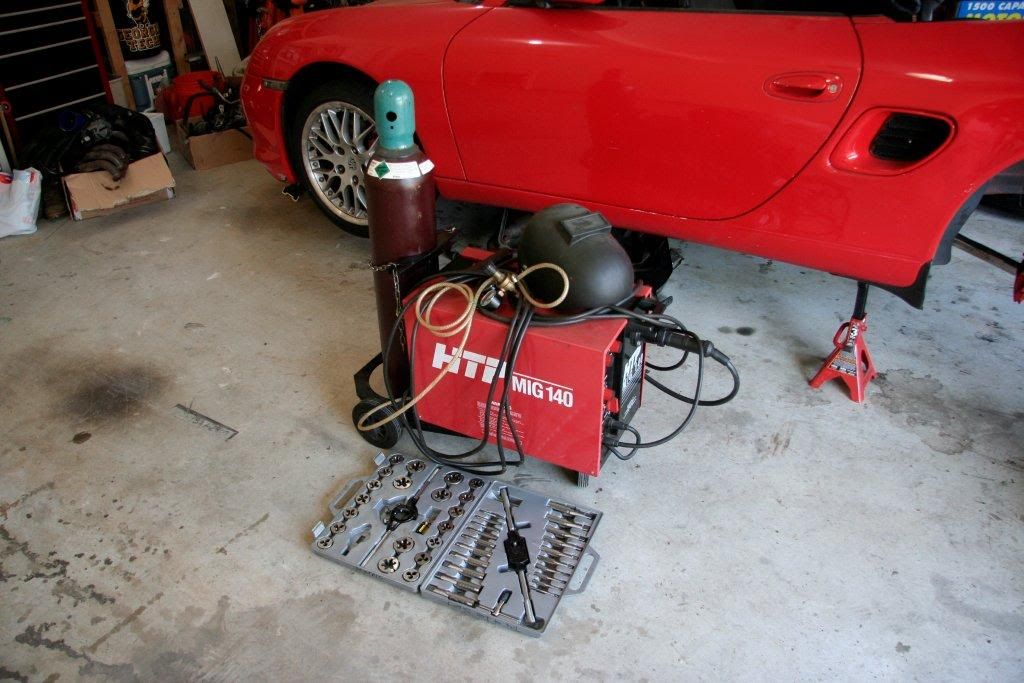
started off welding nuts to the exhaust studs; no good. the metal is REALLY soft, so looks like drilling is the way to go.
they, i decided to put the oil pump back on . well, the flange wasn't lined up. i set TDC & removed the tensioner. still wouldn't line up. unfortunately, it was stuck between teeth on the timing chain. i finally got it aligned, but i'm pretty sure it jumped a tooth.
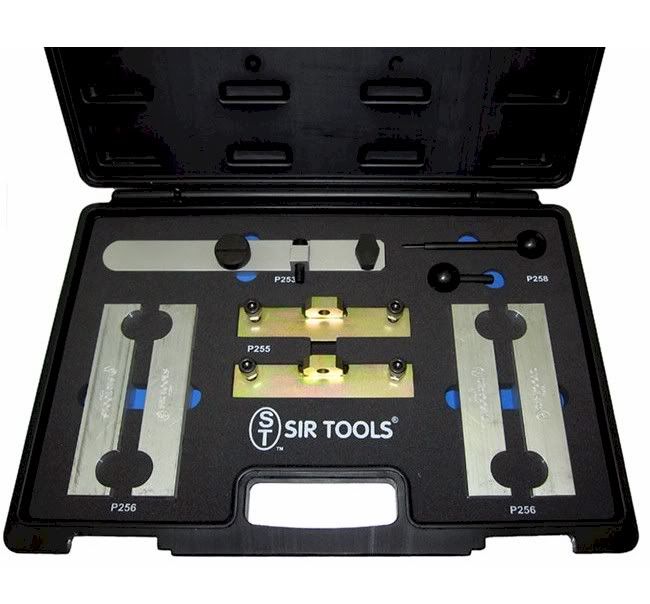
i called ProFormance Place & they don't have the tools. i called the dealer & they told me that it would be $1,700 to re-time ONE SIDE with the engine removed! ha! i called flat6 & they'll do it for @85/hr; it would probably be fairly reasonable.
so, my choices are: rent/borrow a pick-up (mine is an SUV; getting the motor in & out is probably not gonna happen) & drive it up to cleavland, ga (1.5hrs) or buy the timing tools ($485).
that, or maybe someone here will loan / rent them to me? argh!
|

|

|
 10-01-2010, 12:06 PM
|
#56
|
|
Registered User
Join Date: Apr 2009
Location: SF Bay Area
Posts: 247
|
That sucks. Thats great that you are so close to flat6. I think its time well spent to borrow a truck and get the motor to them for re-timing just to be safe. Hope it goes well, im watching your progress!
__________________
2003 Cayenne Turbo
|

|

|
 10-01-2010, 12:16 PM
|
#57
|
|
Registered User
Join Date: Dec 2009
Location: Orange County, CA
Posts: 1,998
|
SUV as parts hauler
[QUOTE=insite] so, my choices are: rent/borrow a pick-up (mine is an SUV; getting the motor in & out is probably not gonna happen) & drive it up to cleavland, ga (1.5hrs)
Insite: I had used my wife's Volvo V70 (wagon) 'with tan interior', one time to transport a V6 Alfa engine, thereafter an Alfa transaxle..
I folded the rear seats and used plastic lining to protect the carpet (the ones you use for painting the house) and heavy, thick cardbox to protect the plastic, the engine was heavy enough so no shifting occurred and no stain damage to the tan interior, of course taking the turns slowly...
.
|

|

|
 10-01-2010, 12:50 PM
|
#58
|
|
Registered User
Join Date: Sep 2004
Location: Atlanta
Posts: 1,820
|
[QUOTE=Gilles]
Quote:
|
Originally Posted by insite
so, my choices are: rent/borrow a pick-up (mine is an SUV; getting the motor in & out is probably not gonna happen) & drive it up to cleavland, ga (1.5hrs)
Insite: I had used my wife's Volvo V70 (wagon) 'with tan interior', one time to transport a V6 Alfa engine, thereafter an Alfa transaxle..
I folded the rear seats and used plastic lining to protect the carpet (the ones you use for painting the house) and heavy, thick cardbox to protect the plastic, the engine was heavy enough so no shifting occurred and no stain damage to the tan interior, of course taking the turns slowly...
|
thanks, gilles. my concern is more w/ the engine & hoist arm both clearing the opening.
anyone on here time one of these motors before? looking through the factory manual, FEAR here seems to me to be much ado about nothing. my issue isn't really with the cam alignment between intake & exhaust; it's timing of the exhasut cam w/ respect to the crank.
can i not just pull the extraction pump, loosen the sprocket bolts & line the cams back up with my match marks? it seems that all the factory tool does is to rotate the exhaust cam until the notch points exactly at the intake cam. am i missing something?
|

|

|
 10-01-2010, 06:08 PM
|
#59
|
|
Registered User
Join Date: Dec 2009
Location: Orange County, CA
Posts: 1,998
|
[QUOTE=insite] can i not just pull the extraction pump, loosen the sprocket bolts & line the cams back up with my match marks?
/QUOTE]
Insite,
With past experiences, as long as you align both marks on the intake/exhaust cams (@ TDC) "AND" rotate rotate the complete assembly afterward a couple of times
to double check your marks, you should be ready to roll.
However, I have never done it on this particular engine, therefore it would be nice if someone that actually has done it chimes in.
Great post, please keep the comments and pics coming
.
Last edited by Gilles; 10-01-2010 at 08:30 PM.
|

|

|
 10-02-2010, 01:33 PM
|
#60
|
|
Registered User
Join Date: Sep 2004
Location: Atlanta
Posts: 1,820
|
okay, so necessity is the mother of invention. how to make a 996/boxster cam timing tool for ten bucks:
1. find a socket that just BARELY fits into this hole. for me it was a 21mm.
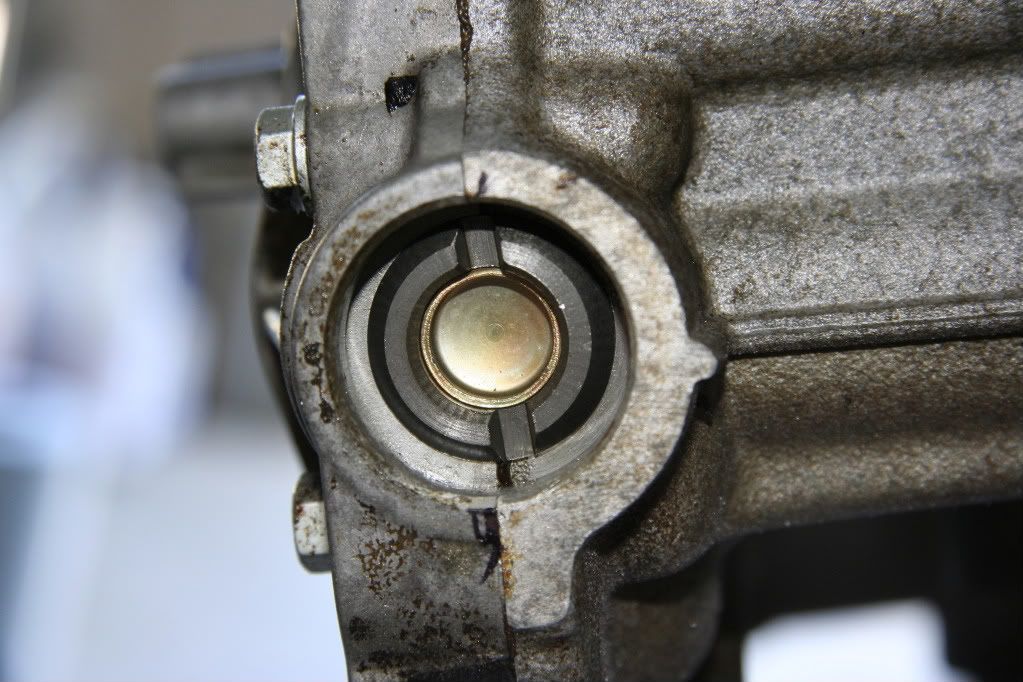
2. find a wood bore drill bit that BARELY fits into the socket. for me, it was 15/16.
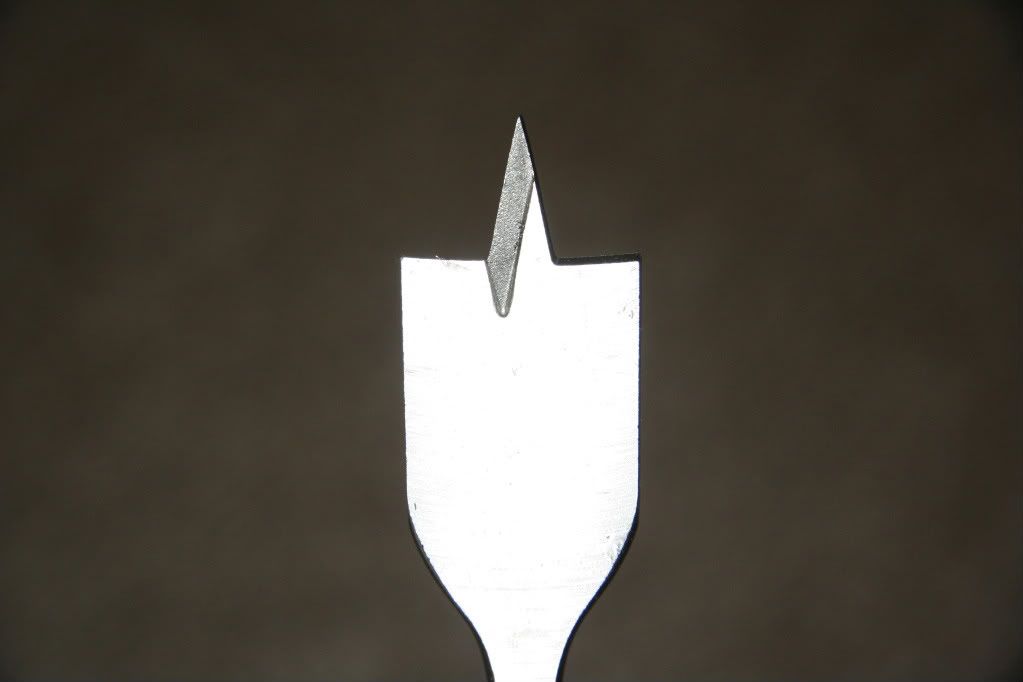
3. cut the end off the drill bit & cut the tip off the drill bit, leaving about 5mm protruding from the tip.
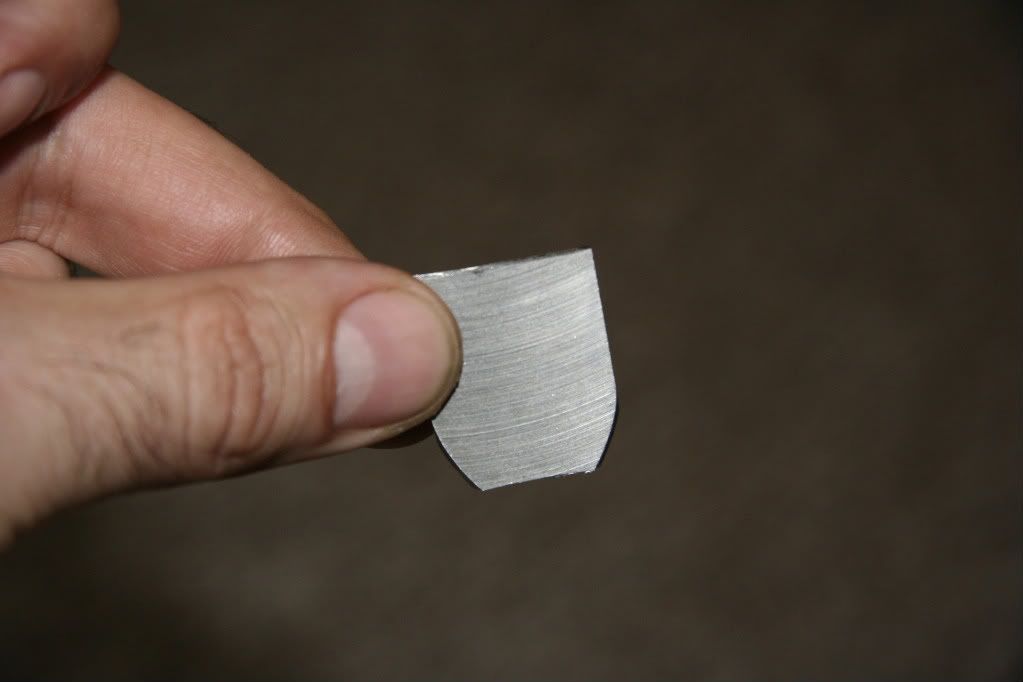
4. put the cut piece into the socket. voila, you have a 1/2" drive porsche cam rotation tool.
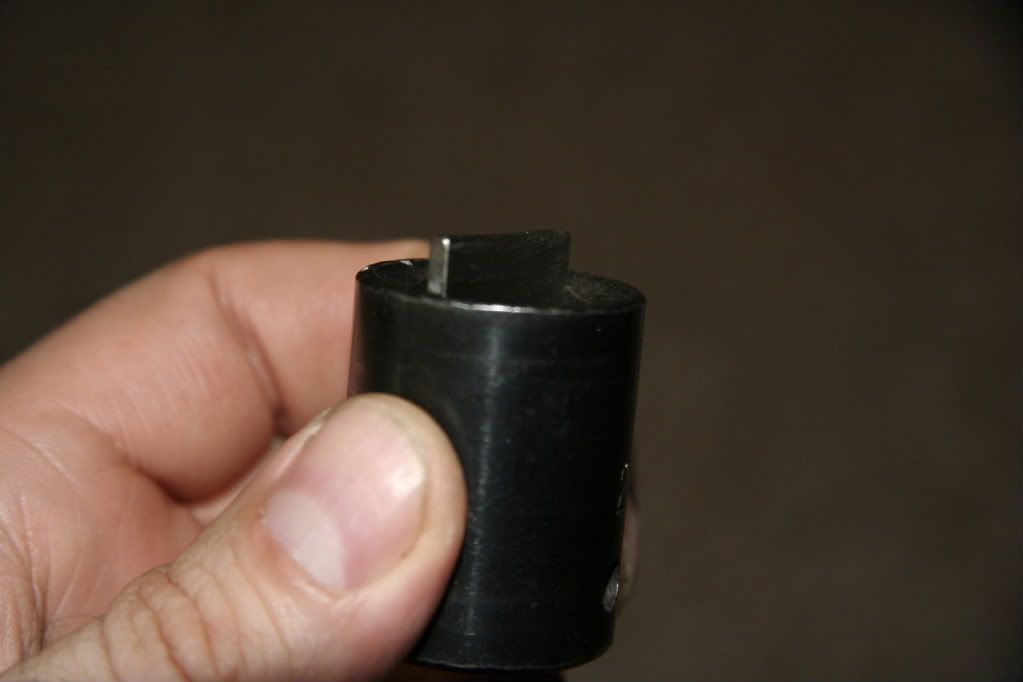
now time your cams. more to follow.
|

|

|
 Posting Rules
|
You may not post new threads
You may not post replies
You may not post attachments
You may not edit your posts
HTML code is On
|
|
|
All times are GMT -8. The time now is 04:48 AM.
| |