@JonD:
I had the same problem. But it was a matter of the right pulling force. I pulled quite hard at both upper ends of the frame and one end moved a bit. From that it was possible to go on all around the window.
@JonD:
I had the same problem. But it was a matter of the right pulling force. I pulled quite hard at both upper ends of the frame and one end moved a bit. From that it was possible to go on all around the window.
Herbert
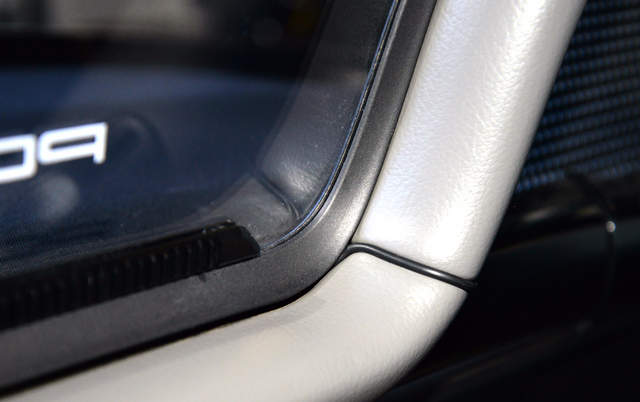
Herbert since you saw what I wrote before. There's actually a VERY simple no force way to remove the Perspex, In fact NO effort at all.
Get a flat screw driver one that fits between the Perspex and the frame (there's a tiny gap at the TOP of the frame). Lever it a little and gently pulling towards the frame the Perspex tab just pops out away from the frame then it just comes out.
Really simple and no effort actually
__________________
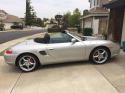
1998 Porsche Boxster
986 Arena Red, Tiptronic Base
Hi Fred...I would definitely be interested in the new version WD with the coating. Still winter here for a while so I won't be doing my install any time soon.
Would you like a PM as confirmation? Thank you for additional research and kind offer to the early purchasers...first class as usual!
Just finished my install. Very nice DIY. I used the ashtray light which was very easy to access
First run the wires completely before tying them down. There is no right or wrong way
Then solder the wires, black goes to brown (-, ground, or earth for those in Europe)
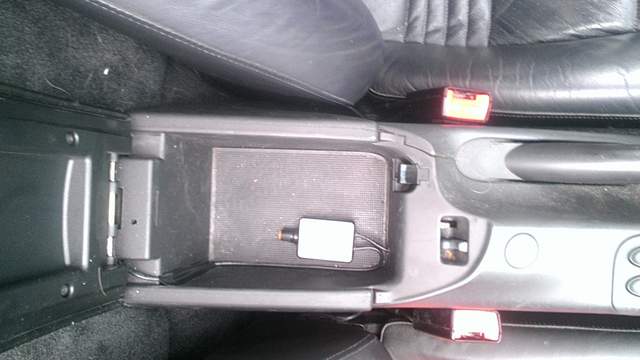
I chose to pop a hole in my center console box. I didn't know ho wretched this picture was until I downloaded it, but there you are
The hole the power cable comes out of will eventually have a phone charger coming out of it, and Fred, I'd like to modify your power box (nice as it is) by relocating the pot resistor from the box to another spot. I'm thinking of mounting the new pot resistor inside the center console box so only a switch similar to the wiper delay switch shows and running wires to the PCB. Is there any reason that would not work?
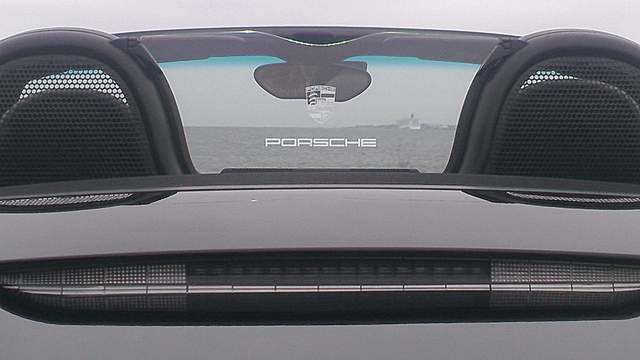
And here is a picture with the ocean in the background. the weather isn't cooperating, but there is a cruise ship out the windscreen to make up for it.
Location: Montreal, QC. (currently expat to Shanghai)
Posts: 3,249
Quote:
Originally Posted by Jamesp
I'm thinking of mounting the new pot resistor inside the center console box so only a switch similar to the wiper delay switch shows and running wires to the PCB. Is there any reason that would not work?
You won't need to adjust the intensity quite often. Its one of those adjust-and-forget thing. More functional as a Power ON switch... in case you have a blank anywhere, that could go there easy.
Different leds emits different intensity. That was the reasoning behind the brightness controller really (one fits all). Amber might have to be set 50% , cold white at 25%, and red needs to be at 5% (red is the brightest of all). That's all that box does in all honesty. I'd just hide it somewhere - no use!
__________________
______________________________
'97 Boxster base model 2.5L, Guards Red/Tan leather, with a new but old Alpine am/fm radio.
You won't need to adjust the intensity quite often.
After one days driving I beg to differ. This is a toy within a toy and needs to be continuously adjusted. Full intensity for top down city driving at dusk, medium intensity after that, lowest intensity with the top up, and off for night time top up long distance driving. At least that's me, other's mileage may differ.
Those who already have supported and purchased a SkyBreaker from me will be given the option to receive a FREE "coated" replacement WD having the same etch as per original order. However, not entirely free loll I will be charging you $20 shipping on the export (PMMA, etch job and hard coating on me)."
Count me in Fred, sounds like a very reasonable way to spend $20!
__________________
______________________________________________
2001 Boxster S Lapis Blue
TS Cat Bypass Pipes and exhaust
iPad Mini Dash Install
DEPO Tail Lights
Location: Montreal, QC. (currently expat to Shanghai)
Posts: 3,249
Quote:
Originally Posted by JayG
you evil genius, definitely have too much time on your hands
aha - not too much time Jay, quite the opposite. This came to mind when I was being harassed by my mate here, asking for his SkyBreaker, every day almost. Didn't had much time to prototype the 987 kit, etc etc. Told him: just drop by and I'll give you a temp solution. We'll do his 987 SkyBreaker kit later this spring
Quote:
Originally Posted by Fintro11
Hey Fred, will you paint my whole car? Lol
lol Firefly Boxster!!! I'll start with my bike and see how it goes (wish I'd be serious)
__________________
______________________________
'97 Boxster base model 2.5L, Guards Red/Tan leather, with a new but old Alpine am/fm radio.
aha - not too much time Jay, quite the opposite. This came to mind when I was being harassed by my mate here, asking for his SkyBreaker, every day almost. Didn't had much time to prototype the 987 kit, etc etc. Told him: just drop by and I'll give you a temp solution. We'll do his 987 SkyBreaker kit later this spring
Fair enough, still an evil genius
__________________
2004 Boxster S 6 speed - DRL relay hack, Polaris AutoTop DIY
2004 996 Targa Tip
Instructor - San Diego region
2014 Porsche Performance Driving School
2020 BMW X3, 2013 Ram 1500, 2016 Cmax, 2004 F-150 "Big Red"
Just started playing with my new windscreen and a 9V battery. It is very, very cool! I may swap out the white LED for blue before I install it. Unfortunately, I am waiting for it to get warmer and my hardtop to come off before I wire it up. I also need to find another plastic frame for the plexiglass, mine is starting to break.
As always, exquisite work by Fred.
The photo doesn't do it justice, and it still has contact paper on the back:
__________________
1999 Ocean Blue Metallic Boxster - blueboxster.com
What do the experts think about using a fuse tap? Ideas on which circuit to use? I want to run the wire to the driver foot well and then locate the switch next to the document holder under the steering wheel.
__________________
______________________________________________
2001 Boxster S Lapis Blue
TS Cat Bypass Pipes and exhaust
iPad Mini Dash Install
DEPO Tail Lights
What do the experts think about using a fuse tap? Ideas on which circuit to use? I want to run the wire to the driver foot well and then locate the switch next to the document holder under the steering wheel.
I like the idea of the LEDs coming on when I turn on the headlights.


![Porsche Wind Deflector with Edge Lighting [from CAD, prototyping to finish]](/forums/iconimages/diy-project-guides/porsche-wind-deflector-edge-lighting-%5B-cad-prototyping-finish%5D_ltr.gif)

 Boxster 986 S
 BMW 330d


 Boxster S
 Genesis 3.8
 2001 Porsche Boxster S

 2001 Boxster S
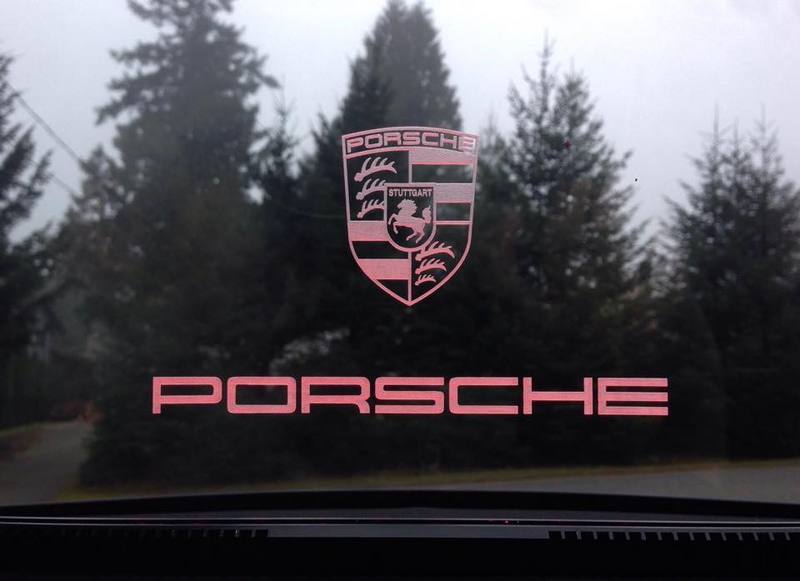

 2004 Porsche Boxster S
 2004 Porsche 996 Targa
 Porscha
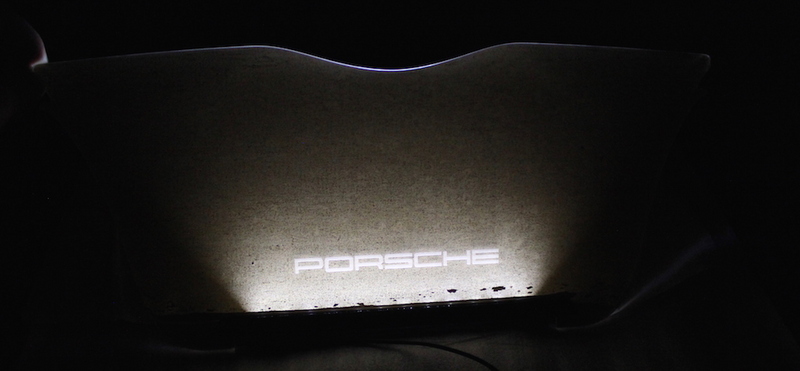


 Hybrid Mode


