 01-26-2015, 02:47 PM
|
#1
|
|
Registered User
Join Date: Jul 2014
Location: Listowel, Ontario, Canada
Posts: 1,120
|
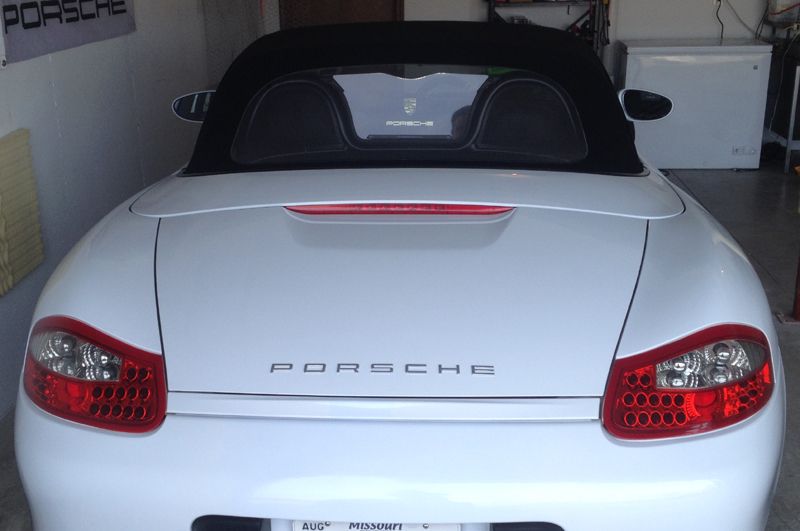
Thank you Canada Post! Arrived safe and sound today. Looks fantastic Nine! Hey - question - maybe this has been answered but don't see it - what is the gold Porsche crest and allen wrench for? Don't see where those would be used off hand. Help!
__________________
2011 Boxster 987.2 Arctic silver / Black leather, PDK with Sports Chrono Package Plus
|

|

|
|
01-26-2015, 04:01 PM
|
#2
|
|
Beginner
Join Date: Mar 2013
Location: Houston
Posts: 1,659
|
Cleared customs, on it's way to destination. 
__________________
2003 S manual
|
|
|
|
|
01-26-2015, 05:13 PM
|
#3
|
|
Registered User
Join Date: Jun 2013
Location: Nanaimo, Vancouver Island, British Columbia, Canada
Posts: 916
|
Quote:
Originally Posted by Giller

Thank you Canada Post! Arrived safe and sound today. Looks fantastic Nine! Hey - question - maybe this has been answered but don't see it - what is the gold Porsche crest and allen wrench for? Don't see where those would be used off hand. Help!
|
you hot glue it to your racing shoes
|

|
|
|
01-26-2015, 05:41 PM
|
#4
|
|
Registered User
Join Date: Sep 2013
Location: California
Posts: 466
|
Quote:
Originally Posted by Giller
Thank you Canada Post! Arrived safe and sound today. Looks fantastic Nine! Hey - question - maybe this has been answered but don't see it - what is the gold Porsche crest and allen wrench for? Don't see where those would be used off hand. Help!
|
Nose ring and ear ring
__________________
"Blind acceptance is a sign, of stupid fools who stand in line."
|
|
|
|
|
01-29-2015, 05:20 PM
|
#5
|
|
Registered User
Join Date: Aug 2005
Location: Sanford NC
Posts: 2,602
|
Get the Novus 1 2 3 kit if you have the plastic window. I swear after the first time I used all three the plastic window was more flexible (as if it had absorbed some chemicals) and wasn't as brittle as it had been. Use the polish about every other car washing and it stays nice and clear. Only difficulty is getting your hand and the rag all over the inside of the window really requires some contortions.
|
|
|
|
|
01-29-2015, 05:30 PM
|
#6
|
|
Registered User
Join Date: Oct 2012
Location: Wake Forest, NC
Posts: 867
|
Quote:
Originally Posted by mikefocke
Get the Novus 1 2 3 kit if you have the plastic window. I swear after the first time I used all three the plastic window was more flexible (as if it had absorbed some chemicals) and wasn't as brittle as it had been. Use the polish about every other car washing and it stays nice and clear. Only difficulty is getting your hand and the rag all over the inside of the window really requires some contortions.
|
Mike, thanks for commenting. I do have the Novus kit but you're right - getting at the inside of the window is a job for an 85 lb Russian gymnast. I need to do a better job on the inside surfaces, as I tend to ignore them in favor of the "easy" side, and it shows. I'll try to get at it this spring.
__________________
2000 Boxster S, 6 speed, Sport Package, Litronics, LED tail lights, LNE IMS-B, OBC, Skybreaker wind deflector, Arctic Silver/Graphite Grey
|
|
|
|
|
01-29-2015, 11:26 AM
|
#7
|
|
Registered User
Join Date: May 2012
Location: Vancouver Island, Canada
Posts: 211
|
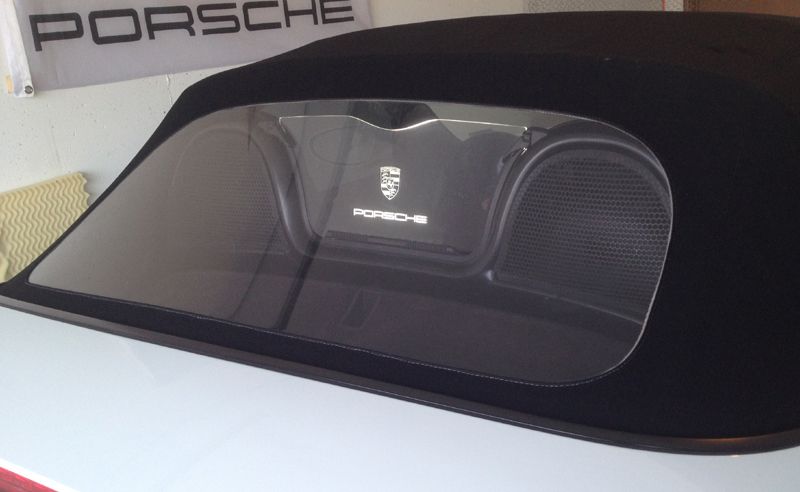
I think kjc has installed it exactly right. Congrats, it looks great!
Mine is sitting here still in the shipping package...Excellent wrapping job Fred, thanks for taking such care!
Can't wait to get her out of storage so I can start my installation.
__________________
'01 Boxster S (purchased new) triple black, litronics, cruise, heated seats,18's.
|
|
|
|
|
01-29-2015, 12:44 PM
|
#8
|
|
WALDMEISTER
Join Date: Sep 2013
Location: Germany
Posts: 1,381
|
Just fantastic...can't look any better!
__________________
Original Owner | PORSCHE Boxster 2.7L (MY01) | Seal Gray
|
|
|
|
|
01-30-2015, 11:10 AM
|
#9
|
|
Custom User Title Here
Join Date: Mar 2012
Location: Ft. Leonard Wood
Posts: 6,169
|
__________________
https://youtube.com/@UnwindTimeVintageWatchMuseum
|
|
|
|
|
01-30-2015, 12:46 PM
|
#10
|
|
Registered User
Join Date: Oct 2012
Location: Wake Forest, NC
Posts: 867
|
For what it's worth, I put the switch/brightness control module in the storage cubby in my dash. I usually only use it for my phone or red clip, so there's still plenty of room. The unit is attached with a 3M Command Strip.

__________________
2000 Boxster S, 6 speed, Sport Package, Litronics, LED tail lights, LNE IMS-B, OBC, Skybreaker wind deflector, Arctic Silver/Graphite Grey
|
|
|
|
|
01-30-2015, 11:30 PM
|
#11
|
|
Registered User
Join Date: Jun 2013
Location: Nanaimo, Vancouver Island, British Columbia, Canada
Posts: 916
|
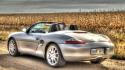
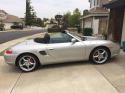
it stopped raining so I tried to get a good shot 
|
|
|
|
|
01-31-2015, 03:32 AM
|
#12
|
|
Registered User
Join Date: Sep 2013
Location: Montreal, QC. (currently expat to Shanghai)
Posts: 3,249
|
Product evolution
^ Niceee, I like. Thanks for sharing Martin!
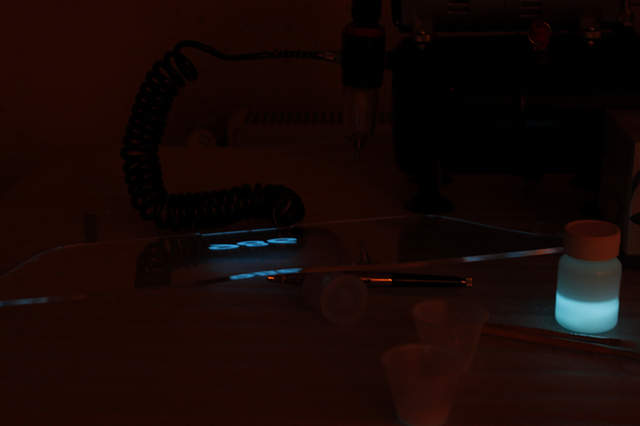
Some of the latest development worth sharing with you guys:
Spoke to my pmma supplier this morning about maintenance, polishing techniques, recommended creams etc. I've also mentioned that some of my customers, who are new to pmma acrylic, aren't necessarily "pro" polishers. Also added that some of us couldn't afford developing polishing technique onto a LIVE part - how to fix that problem, this and that.... just catching up really.
Long story short, he introduced me to a company that specialized in composite hardening. Needless to add that I've called on them immediately after hanging up with him. Surprisingly, these guys specialize in clear acrylic & polycarbonate coatings for automotive parts and they have kindly accepted to take my account. I've already put two WD SkyBreakers in the express mail this afternoon for them to built a fixture for us (it's a dipping process, lamination is old school apparently). They'll do this over the coming week for us so I will have those back by latest this coming weekend.
They quoted us $18 for the coating process for 1 (one) SkyBreaker panel - regardless of the quantity (NOT cheap). How it works: I send them the pre-etched WDs, they coat them, send them back to me and I laser cut the profile of the Boxster WD shape as the final process. Sounds complicated but it's not.
The coating is extremely hard. You can rub your stainless steel watch on it and it just won't scratch at all, no more micro scratches, etc, nada - according to them (they mentioned crystal based coating something, I lost half of it). EXCELLENT but here is the catch; if you ever damage your WD (e.g. heavy object falling onto it, making a nasty mark/scratch), it will not be possible to repair using NOVUS or PlastX lol. Forget about #600 grit abrasive paper also... the coating is so hard any repair method simply won't work. Meaning, when coated, it's final - sealed for life.
So here is the deal:
Those who already have supported and purchased a SkyBreaker from me will be given the option to receive a FREE "coated" replacement WD having the same etch as per original order. However, not entirely free loll I will be charging you $20 shipping on the export (PMMA, etch job and hard coating on me).
Others who are waiting for a kit will be given the two following options:
Option 1: Kit with plain acrylic = $155 (requires maintenance, easy repair/polishing)
Option 2: Kit with plain acrylic + hard coating = $175 (no maintenance required, no crazing, chemical friendly, etc! but very hard to repair if not impossible)
Let me know what you guys think, what suits you best, any recommendation, etc
Help me to make this SkyBreaker Wind Deflector product the Best-in-the-World (in its real meaning this time)
__________________
______________________________
'97 Boxster base model 2.5L, Guards Red/Tan leather, with a new but old Alpine am/fm radio.
|
|
|
|
|
01-31-2015, 05:33 AM
|
#13
|
|
Beginner
Join Date: Mar 2013
Location: Houston
Posts: 1,659
|
I'm in!
__________________
2003 S manual
|
|
|
|
|
01-31-2015, 07:35 PM
|
#14
|
|
Registered User
Join Date: Jan 2015
Location: Melbourne, Australia
Posts: 74
|
Quote:
|
Originally Posted by Nine8Six;434028
Others who are waiting for a kit will be given the two following options:
[B
Option 1:[/B] Kit with plain acrylic = $155 (requires maintenance, easy repair/polishing)
Option 2: Kit with plain acrylic + hard coating = $175 (no maintenance required, no crazing, chemical friendly, etc! but very hard to repair if not impossible)
Let me know what you guys think, what suits you best, any recommendation, etc
Help me to make this SkyBreaker Wind Deflector product the Best-in-the-World (in its real meaning this time)
|
Hi Fred,
I'm still chomping at the bit waiting for that email that says you have stock so I can order and pay for one. I for one will be very happy to get the Option 2 kit with hard coating. Any idea yet on a possible time frame for the next batch? Not pushing mate just impatient little ol me lol. Thanks Fred
__________________
1998 Porsche Boxster
986 Arena Red, Tiptronic Base
|
|
|
|
|
01-31-2015, 07:53 PM
|
#15
|
|
Registered User
Join Date: Jan 2015
Location: Melbourne, Australia
Posts: 74
|
Just wanted to add Fred, I reckon and have a feeling, I'll possibly have the first 986 in Melbourne with your SkyBreaker installed. Good advertising, I bet I get heaps of inquiries about it, and I'll direct them all to your website 
__________________
1998 Porsche Boxster
986 Arena Red, Tiptronic Base
|
|
|
|
|
01-31-2015, 06:23 AM
|
#16
|
|
On the slippery slope
Join Date: Mar 2014
Location: Austin and Palm Springs
Posts: 3,802
|
Fred, once again you go above and beyond!
You never fail to amaze us all
__________________
2004 Boxster S 6 speed - DRL relay hack, Polaris AutoTop DIY
2004 996 Targa Tip
Instructor - San Diego region
2014 Porsche Performance Driving School
2020 BMW X3, 2013 Ram 1500, 2016 Cmax, 2004 F-150 "Big Red"
|
|
|
|
|
01-31-2015, 06:35 AM
|
#17
|
|
Registered User
Join Date: Sep 2013
Location: Montreal, QC. (currently expat to Shanghai)
Posts: 3,249
|
Quote:
Originally Posted by JayG
and beyond!
|
haven't invented any of that remember? Just pure and simple entertainment
Care to guess what that is?
__________________
______________________________
'97 Boxster base model 2.5L, Guards Red/Tan leather, with a new but old Alpine am/fm radio.
|
|
|
|
|
01-31-2015, 08:23 AM
|
#18
|
|
Registered User
Join Date: Nov 2009
Location: San Jose , CA
Posts: 579
|
Quote:
Originally Posted by Nine8Six
Care to guess what that is?
|
HUD? Cool stuff. Oh, and count me in for the super hard one.
Tony
Sent from my Transformer Prime TF201 using Tapatalk
__________________
Lapis Blue 03 Boxster S
Seal Grey 04 Boxster S (RIP 9-21-14)
|
|
|
|
|
01-31-2015, 08:46 AM
|
#19
|
|
Registered User
Join Date: Sep 2013
Location: Montreal, QC. (currently expat to Shanghai)
Posts: 3,249
|
Niceeee pix, cool to see!
__________________
______________________________
'97 Boxster base model 2.5L, Guards Red/Tan leather, with a new but old Alpine am/fm radio.
|
|
|
|
|
02-05-2015, 12:16 AM
|
#20
|
|
Registered User
Join Date: Jan 2015
Location: Melbourne, Australia
Posts: 74
|
False alarm sorry
__________________
1998 Porsche Boxster
986 Arena Red, Tiptronic Base
Last edited by JonD; 02-05-2015 at 12:49 AM.
|
|
|
|
 Posting Rules
|
You may not post new threads
You may not post replies
You may not post attachments
You may not edit your posts
HTML code is On
|
|
|
All times are GMT -8. The time now is 11:56 PM.
| |


![Porsche Wind Deflector with Edge Lighting [from CAD, prototyping to finish]](/forums/iconimages/diy-project-guides/porsche-wind-deflector-edge-lighting-%5B-cad-prototyping-finish%5D_ltr.gif)
 Boxster S
 Genesis 3.8
 2001 Porsche Boxster S
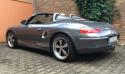 "GRAY"

 2004 Porsche Boxster S
 2004 Porsche 996 Targa
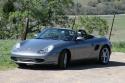 2004 Porsche Boxster
 2003 Porsche Boxster S
 Hybrid Mode


