 12-15-2018, 03:42 PM
|
#41
|
|
Registered User
Join Date: Aug 2018
Location: Powell River, BC
Posts: 23
|
Beautiful! What are you using for the cleaning?
|

|

|
|
12-15-2018, 09:36 PM
|
#42
|
|
Registered User
Join Date: Oct 2018
Location: North Cali
Posts: 853
|
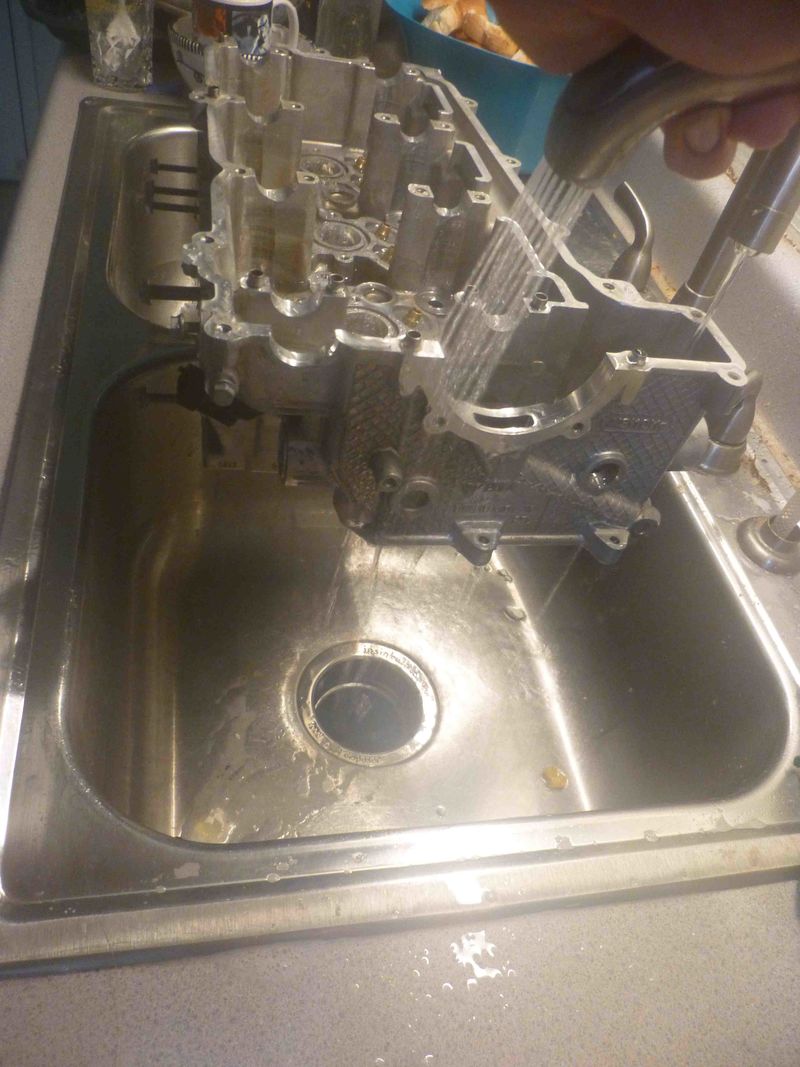
I got soaked the large parts in diesel oil for days, then oil mud comes off easily using a brush. Burnt oil gunk and grime on the pistons came off using Barryman carb cleaner.
This is the best stuff, it`s expensive though, so I couldn`t get soaked everything in it. Barryman also pretty well intermixes with water, so you can just wash it off with pressurized water even in the sink, so you get a very nice and clean surface to work on.
Quote:
Originally Posted by dachrist

Beautiful! What are you using for the cleaning?
|
|
|
|
|
|
12-16-2018, 03:01 PM
|
#43
|
|
Registered User
Join Date: Aug 2018
Location: Powell River, BC
Posts: 23
|
Thanks! I am trying to figure out what the best method is for cleaning the exterior of my transmission.
|
|
|
|
|
12-17-2018, 08:39 PM
|
#44
|
|
Registered User
Join Date: Oct 2018
Location: North Cali
Posts: 853
|
Pressure washer after soaking in some strong detergent would do it. Good luck!
Quote:
Originally Posted by dachrist
Thanks! I am trying to figure out what the best method is for cleaning the exterior of my transmission.
|
|
|
|
|
|
12-17-2018, 09:02 PM
|
#45
|
|
Registered User
Join Date: Oct 2018
Location: North Cali
Posts: 853
|
|
|
|
|
|
12-18-2018, 07:28 AM
|
#46
|
|
Registered User
Join Date: Sep 2018
Location: Ca
Posts: 119
|
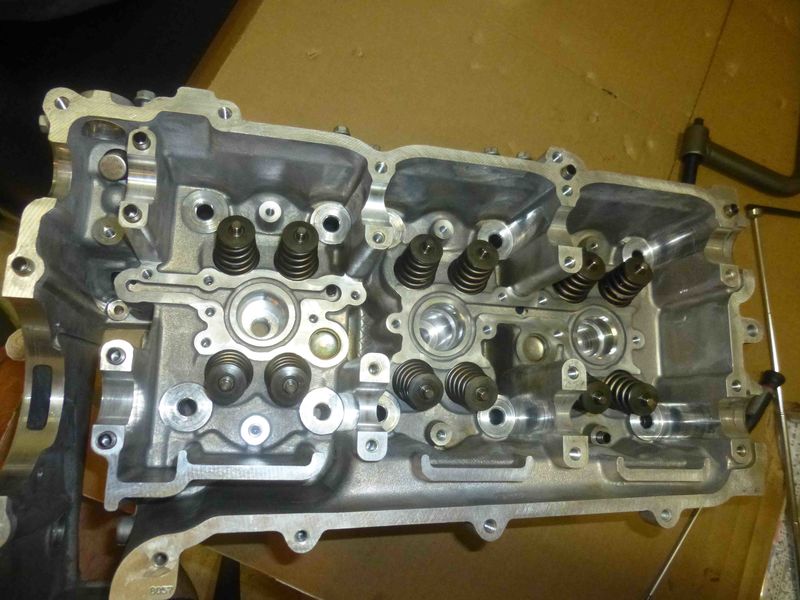
Excellent!
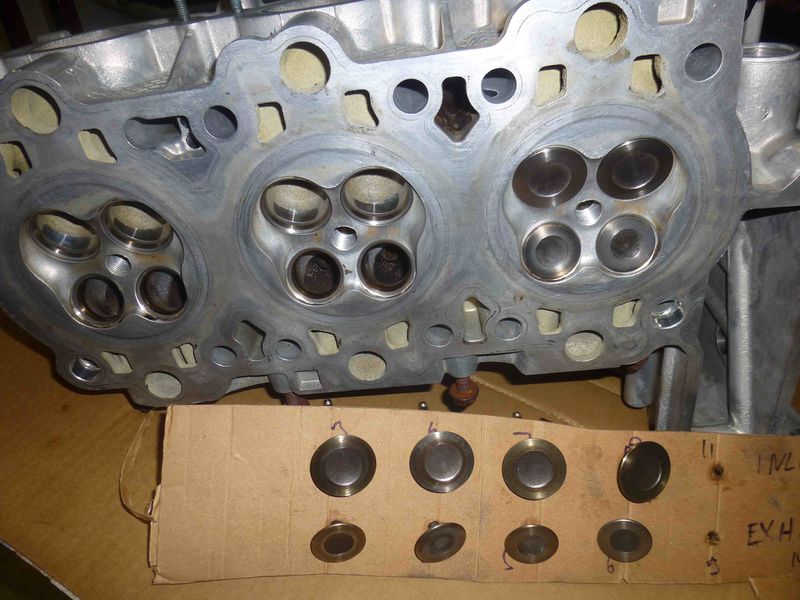
Used egg cartons work great for keeping those lifters from getting mixed up....
Got my head back on and other side comes off by the weekend....
|
|
|
|
|
12-18-2018, 08:04 AM
|
#47
|
|
Registered User
Join Date: Oct 2018
Location: North Cali
Posts: 853
|
Quote:
Originally Posted by Ottomotion
Excellent!
Used egg cartons work great for keeping those lifters from getting mixed up....
Got my head back on and other side comes off by the weekend....
|
Nice! I think I`ll have some time to reassemble the heads too, just received the new seals. Using egg cartons sound like a smart idea 
|
|
|
|
|
12-30-2018, 02:46 PM
|
#48
|
|
Registered User
Join Date: Oct 2018
Location: North Cali
Posts: 853
|
|
|
|
|
|
12-30-2018, 02:48 PM
|
#49
|
|
Registered User
Join Date: Oct 2018
Location: North Cali
Posts: 853
|
|
|
|
|
|
12-30-2018, 03:15 PM
|
#50
|
|
Who's askin'?
Join Date: Mar 2018
Location: Utah
Posts: 2,448
|
Quote:
Originally Posted by dachrist
Thanks! I am trying to figure out what the best method is for cleaning the exterior of my transmission.
|
I use oven cleaner with a pressure washer.
Sent from my SM-G930T using Tapatalk
|
|
|
|
|
12-30-2018, 09:55 PM
|
#51
|
|
Registered User
Join Date: Sep 2018
Location: Ca
Posts: 119
|

Go, man, go!
|
|
|
|
|
12-31-2018, 03:36 AM
|
#52
|
|
Registered User
Join Date: Jun 2014
Location: LB, Germany
Posts: 1,520
|
Quote:
Originally Posted by dachrist
Thanks! I am trying to figure out what the best method is for cleaning the exterior of my transmission.
|
The brown material on the engine and transmission from the factory is a corrosion inhibitor for the alloy.
__________________
My Porsche keyfob, instrument cluster and alarm ecu repair service: https://sportwagendoktor.de
|
|
|
|
|
01-05-2019, 09:59 AM
|
#53
|
|
Registered User
Join Date: Oct 2018
Location: North Cali
Posts: 853
|
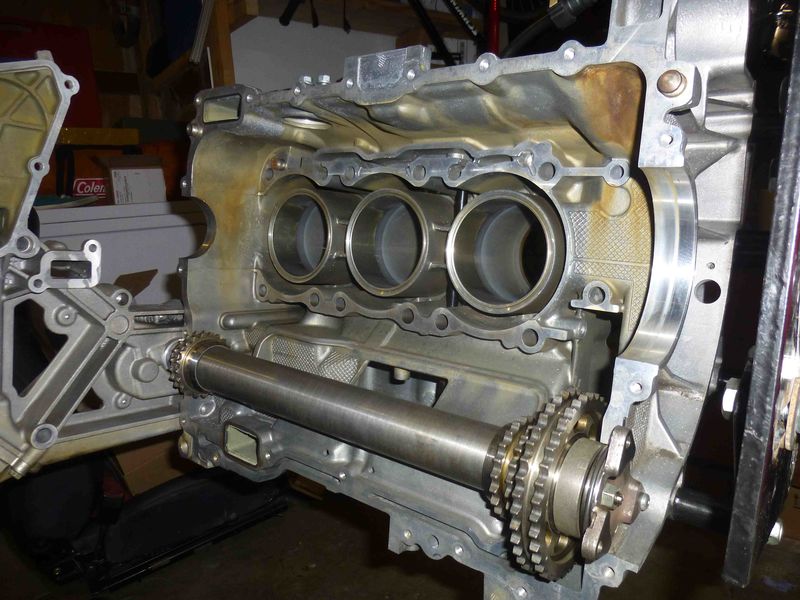
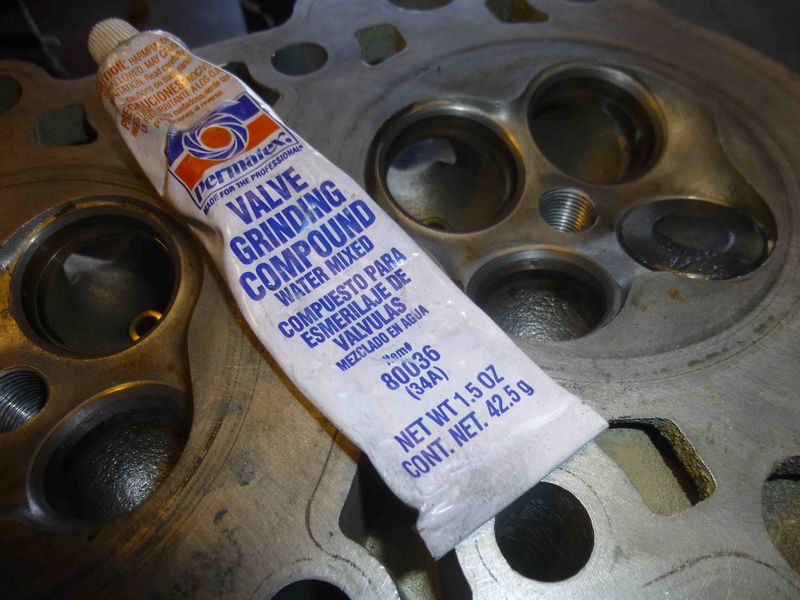
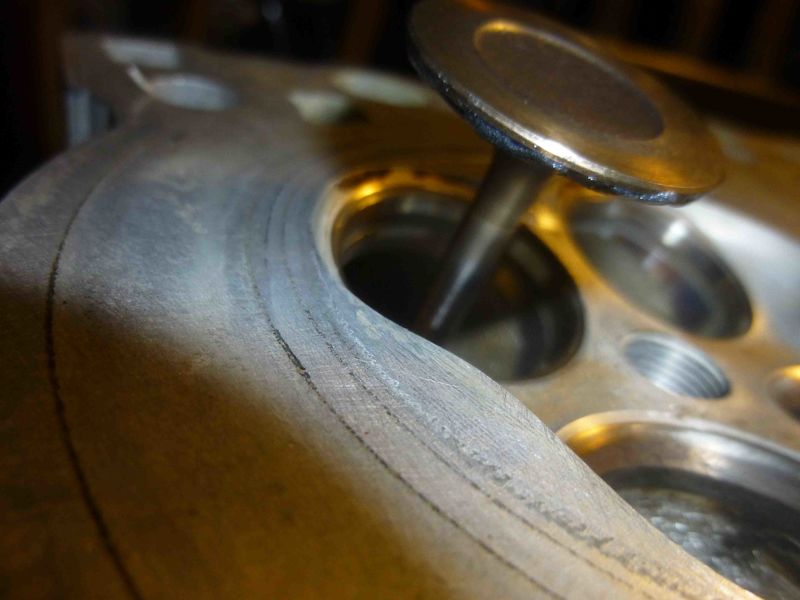
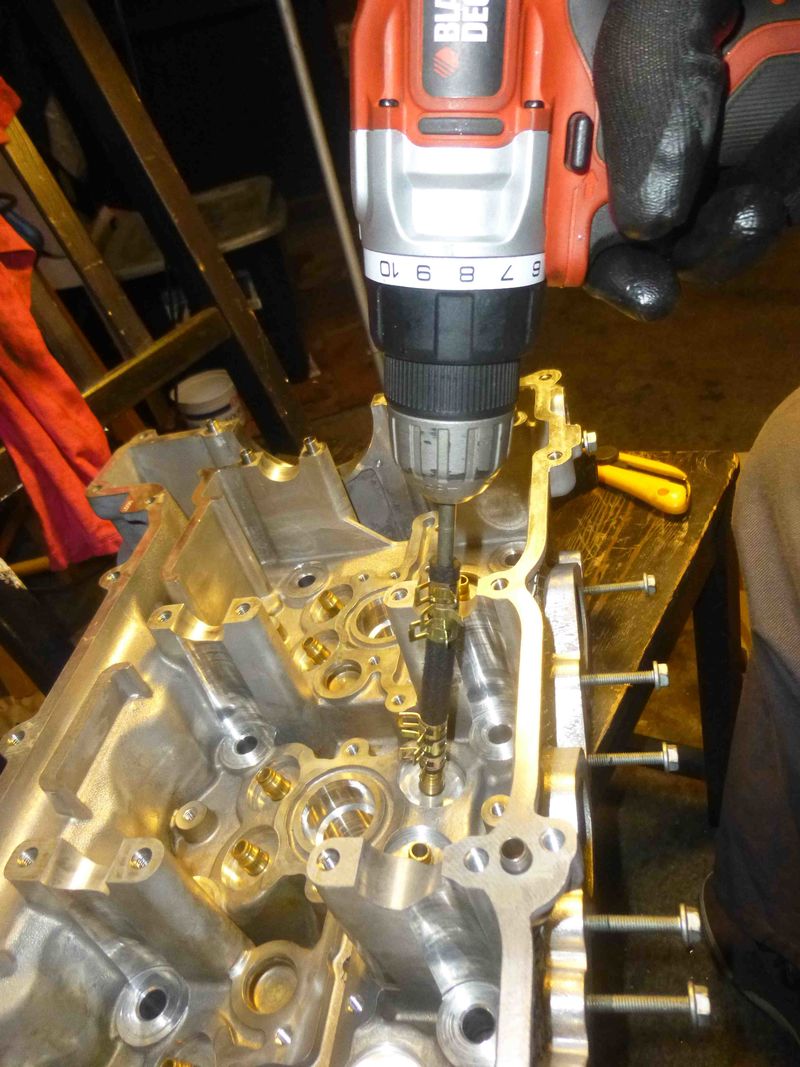
Reassembly of the short block is coming along slowly, got the spacers for the IMS from the machine shop. Finally I ended up using just the small ring and not the large spacer. The bearing is a dual-row ceramic hybrid which is narrower than the orignal dual-row, that`s why the spacer is necessary. The bearing will be held in place using a snap ring.
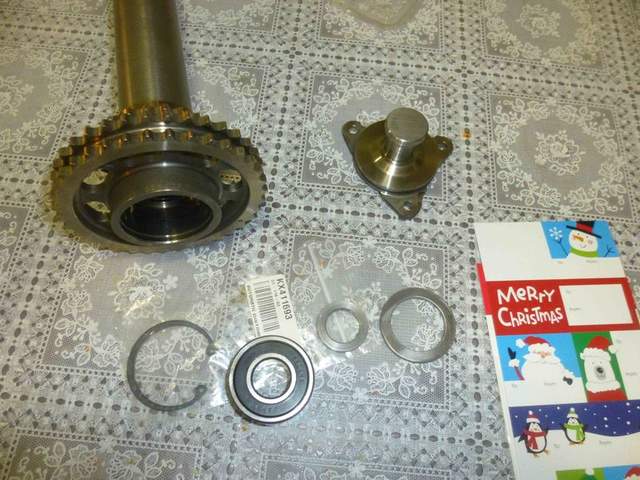
The bearing went in easily after heating up the shaft with a heat gun and putting the bearing in the freezer for a few hours. I put the IMS assembly together just to see if all works fine.


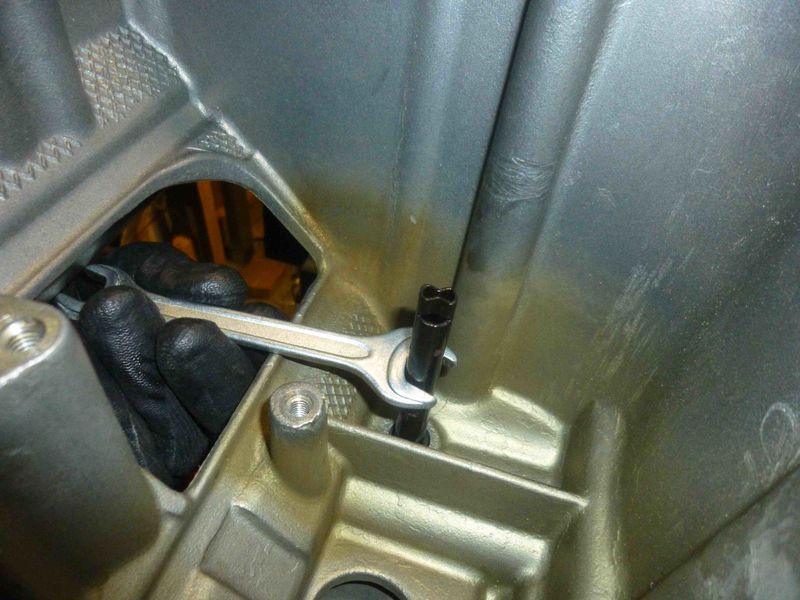
I plugged the dipstick back in as I wanted to see how the oil level relates to the IMS.

Here`s the end of the dipstick in the sump. The wrench is placed roughly at the maximum oil level. The oil level is over the the IMS. Note that it`s upside down.
Max level shown from the IMS side:
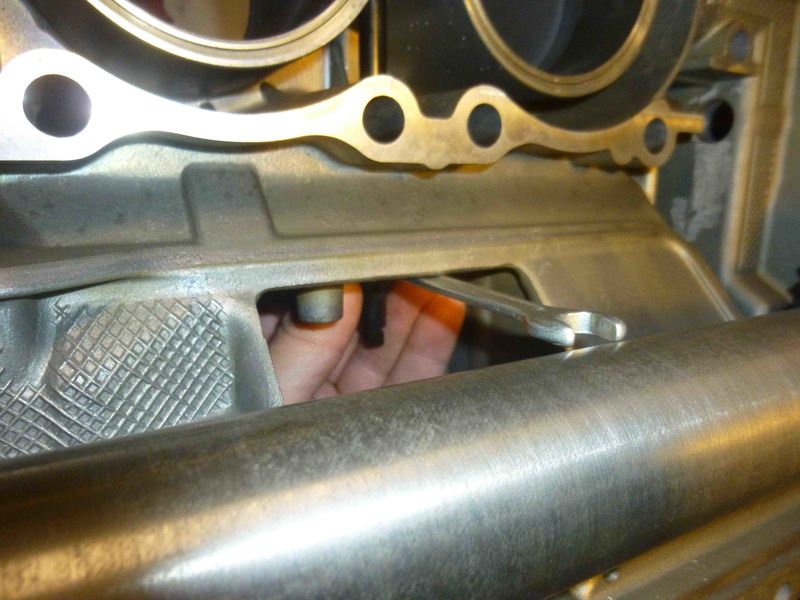
This level belongs to the minimum mark on the dipstick:
The cavity of the sump and in the center cavity with the IMS share the same oil level as they are connected through these holes:

I might be missing something, but what this suggests is that the IMS runs in oil even when the oil level is at the lowest mark. This might be obvious for many of us, however, it came as a surprise for me, since there`s been suggested that the IMS bearing is lubricated by oil vapor after the original grease filling is gone. Apparently this is not the case and a dual row bearing with removed oil seals should work fine as a replacement of the original.
|
|
|
|
|
01-06-2019, 02:54 PM
|
#54
|
|
Registered User
Join Date: Sep 2018
Location: Ca
Posts: 119
|
Excellent information....
|
|
|
|
|
01-07-2019, 01:09 AM
|
#55
|
|
Registered User
Join Date: Jun 2014
Location: LB, Germany
Posts: 1,520
|
No, because when you drive the car there is no constant oil level in the engine (acceleration, braking, corners). The oil is swapping around in the engine oil pan and in the engine. And the hotter the oil is, the more it swaps, because of the lower viscosity. Also when the engine runs oils level is also not constant, because the oil pump circulates the oil and the oil is also "splashed around" (maybe there is a better term for that in english) in the engine.
Regards from Germany,
Markus
__________________
My Porsche keyfob, instrument cluster and alarm ecu repair service: https://sportwagendoktor.de
|
|
|
|
|
01-07-2019, 10:34 AM
|
#56
|
|
Registered User
Join Date: Oct 2018
Location: North Cali
Posts: 853
|
Quote:
Originally Posted by Ottomotion
Excellent information....
|
Thanks, Otto!
|
|
|
|
|
01-07-2019, 11:01 AM
|
#57
|
|
Registered User
Join Date: Oct 2018
Location: North Cali
Posts: 853
|
Quote:
Originally Posted by Smallblock454
No, because when you drive the car there is no constant oil level in the engine (acceleration, braking, corners). The oil is swapping around in the engine oil pan and in the engine. And the hotter the oil is, the more it swaps, because of the lower viscosity. Also when the engine runs oils level is also not constant, because the oil pump circulates the oil and the oil is also "splashed around" (maybe there is a better term for that in english) in the engine.
Regards from Germany,
Markus
|
Hey Marcus,
Thanks for your comment! This is a show&tell thread, I`m just sharing pictures while rebuilding this engine and some thoughts that come up along the way. Whether or not you find it informative is up to you and depends on your interpretatation 
I agree, during driving the oil mass is floating around the crankcase, it`s unlikely though that this would negatively affect a ball bearing that otherwise at least half way sits in oil, unless you are speeding around in a rondabout for an hour. As for the circulation, after the engine stopped, most of the circulated oil remains in the oil galleries, this ensures that the oil gets to the plain bearings at the first revolution of the crank upon start. If it was otherwise, the plain bearings, that require constant oil pressure all the time, would be starving at every start leading to bearing failure shortly. Thus, I think the amount of oil that flows back after the pump stops is almost negligible. Or, on the contrary, the level in the sump may even rise a little bit when the engine is running, due to the scavanging pumps pumping the oil back to the sump from the periphery.
Cheers, Greg
|
|
|
|
|
01-07-2019, 11:20 AM
|
#58
|
|
Registered User
Join Date: Sep 2018
Location: Ca
Posts: 119
|
Ya but I would think most IMSB failures are happening on cars that are never tracked or put into situations where G forces are going to move oil away to the extent SB454 describes. What about windage trays? Not doing their job?
It would be interesting to have a window into the sump to see where the low oil level is when the engine is at full song....
Otto
|
|
|
|
|
01-07-2019, 11:25 AM
|
#59
|
|
Motorist & Coffee Drinker
Join Date: Jul 2014
Location: Oklahoma
Posts: 3,948
|
Great pictures. I sometimes regret scrapping my bad engine, just to be able to see and understand the kind of stuff that you are displaying.
__________________
I am not an attorney, mechanic, or member of the clergy. Following any advice given in my posts is done at your own peril.
|
|
|
|
|
01-15-2019, 11:26 PM
|
#60
|
|
Registered User
Join Date: Oct 2018
Location: North Cali
Posts: 853
|
Quote:
Originally Posted by 78F350
Great pictures. I sometimes regret scrapping my bad engine, just to be able to see and understand the kind of stuff that you are displaying. |
You should, perfect stress relief 
|
|
|
|
| Thread Tools |
|
|
| Display Modes |
 Linear Mode Linear Mode
|
 Posting Rules
|
You may not post new threads
You may not post replies
You may not post attachments
You may not edit your posts
HTML code is Off
|
|
|
All times are GMT -8. The time now is 12:26 PM.
| |


 Boxster


 Parts Car, car parts
 Honda Del Sol(s)
 "Hers"
 My Original '99
 The 78 F350
 This
This That
That The S 2.5
 Other
Other


