Go Back   986 Forum - The Community for Porsche Boxster & Cayman Owners > Porsche Boxster & Cayman Forums > Performance and Technical Chat

Post Reply
 
LinkBack Thread Tools Display Modes
Old 06-23-2024, 11:13 AM   #1
Registered User
 
Join Date: Jan 2023
Location: Pittsburgh
Posts: 12
I broke the LN Faultless IMS tool

Anyone know why LN's Faultless IMS tool would NOT work (apparently "faultless" doesn't mean full-proof)?

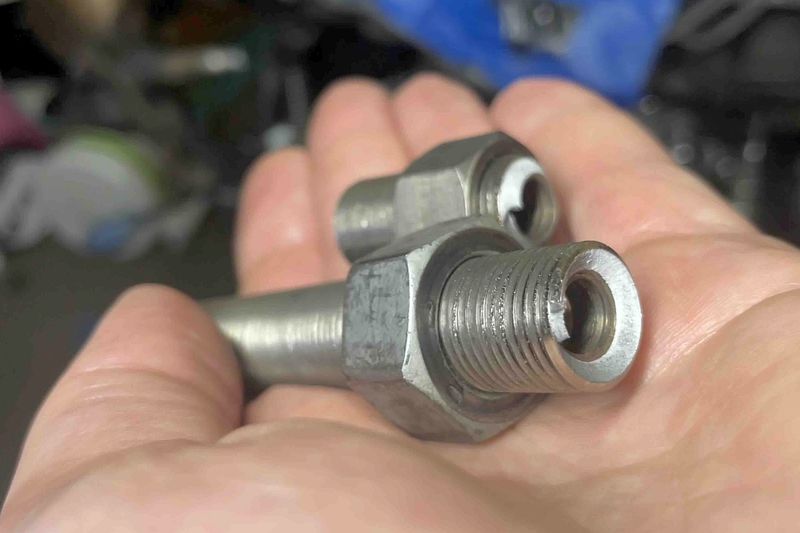
While installing the new IMS bearing, I really had to crank on it... which broke the threaded rod

Before I remove it and try again with another threaded rod, I'm wondering what went wrong? Experts please help.

Name:  IMG_8475_rsz1719230591 (1).jpg
Views: 126
Size:  41.5 KB

Attached Images
 

Last edited by 986girldad; 06-24-2024 at 08:10 AM. Reason: smaller image
986girldad is offline   Reply With Quote
Old 06-23-2024, 12:24 PM   #2
Registered User
 
Join Date: Feb 2005
Location: It's a kind of magic.....
Posts: 6,372
Please resize the picture to something we can actually see.

First of all, all of the components of the Faultless Tool kit are available individually from LN. Secondly, having owned one since they first came out, and used it literally hundreds of times without any issues, I would have to say, "operator error".

It would help if you told us exactly where you were in the retrofit process when this part failed, which type of IMS bearing (single or dual row), and year of the car you are working on.
__________________
Anything really new is invented only in one’s youth. Later, one becomes more experienced, more famous – and more stupid.” - Albert Einstein
JFP in PA is offline   Reply With Quote
Old 06-24-2024, 04:09 AM   #3
Motorist & Coffee Drinker
 
78F350's Avatar
 
Join Date: Jul 2014
Location: Oklahoma
Posts: 3,744
Garage
I'm not an expert, but I've used the tool once and can resize pictures. Here's your picture cut down a bit:


Did your faultless tool include the instructions in a binder? What step were you on? My guess is that the Intermediate Shaft was out of alignment and you were pushing the bearing against it rather than into it.
__________________
I am not an attorney, mechanic, or member of the clergy. Following any advice given in my posts is done at your own peril.
78F350 is offline   Reply With Quote
Old 06-24-2024, 04:13 AM   #4
1998 Boxster Silver/Red
 
Join Date: Sep 2017
Location: 92262
Posts: 2,961
No wonder the part broke: It's ****************ing huge! And JFC, your hands are HUGE, too. How do you get anything done, when small hands are a Porche's favorite friend. Bet you're a real lady-pleaser. Or, man pleaser... for I don't know which way you swing.

So, yeah, smaller pics. Using your phone? Resize.

GLWS.
__________________
1998 Porsche Boxster
Starter986 is offline   Reply With Quote
Old 06-24-2024, 08:04 AM   #5
Registered User
 
Join Date: Jan 2023
Location: Pittsburgh
Posts: 12
Haha! Sorry for the giant pic (compensating for my tiny 2.7). Thanks for the resize, @78F350.

Details:

2002 base model, 5-chain engine, single row bearing.

Following LN's instructions, I'm on Step 25—pushing the new bearing into the intermediate shaft. I was holding the internal nut and turning the outer nut clockwise to press in the new bearing. It felt like I was appliying too much torque, so I backed off, loosened the the tool to float it, and gave the assembly a bit of wiggle in case I wasn't on right. Then I retightened the mounting bolts of the tool and tried again. I leaned in with my giant hands and... snap goes the threaded rod. I disassembled the tool from the engine and the bearing is partially installed.

Name:  IMG_522A76C51B3E-1.jpeg
Views: 47
Size:  57.9 KB

This is my first time, so I'm wondering if the bearing got caught on something that would've blocked it from inserting? It's impossible to see around the faultless tool. The partially-installed bearing is still there, and it feels like it's connected to the IMS.

My plan is to remove the bearing with the faultless tool and retry, but I wanted to ask for any insight from y'all since I'm a virgin and just snapped my rod off.
986girldad is offline   Reply With Quote
Old 06-25-2024, 04:35 AM   #6
Registered User
 
Join Date: Jan 2023
Location: Pittsburgh
Posts: 12
Haha! Sorry for the giant pic (compensating for my tiny 2.7). Thanks for the resize, @78F350.

Details:

2002 base model, 5-chain engine, single row bearing.

Following LN's instructions, I'm on Step 25—pushing the new bearing into the intermediate shaft. I was holding the internal nut and turning the outer nut clockwise to press in the new bearing. It felt like I was applying too much torque, so I backed off, loosened the tool to float it, and gave the assembly a bit of wiggle in case I wasn't on right. Then I retightened the mounting bolts of the tool and tried again. I leaned in with my giant hands and... snap goes the threaded rod. I disassembled the tool from the engine and the bearing is partially installed.

This is my first time, so I'm wondering if the bearing got caught on something that would've blocked it from inserting? It's impossible to see around the faultless tool. The partially-installed bearing is still there, and it feels like it's connected to the IMS.

My plan is to remove the bearing with the faultless tool and retry, but I wanted to ask for any insight from y'all since I'm a virgin and just snapped my rod off.

Last edited by 986girldad; 06-25-2024 at 04:37 AM. Reason: clarification
986girldad is offline   Reply With Quote
Old 06-25-2024, 05:39 AM   #7
Registered User
 
Join Date: Feb 2005
Location: It's a kind of magic.....
Posts: 6,372
DO NOT REMOVE THE NEW BEARING, because if you do, it will damage the hybrid ceramic balls and will have to be thrown away. Installing the bearing does not put any load on them, but extracting the bearing uses the center bolt to pull on them.
__________________
Anything really new is invented only in one’s youth. Later, one becomes more experienced, more famous – and more stupid.” - Albert Einstein
JFP in PA is offline   Reply With Quote
Old 06-26-2024, 04:48 PM   #8
Registered User
 
Join Date: Jan 2023
Location: Pittsburgh
Posts: 12
Thank you 🙏
So how do I get it in? It feels stuck
986girldad is offline   Reply With Quote
Old 06-27-2024, 06:27 AM   #9
Registered User
 
Join Date: Feb 2005
Location: It's a kind of magic.....
Posts: 6,372
You may need to resort to the old way of installing the bearing using a hammer and installation tool.

I am actually interested in what you find when you remove the Faultless tool as I have never had a bearing cock or refuse to go in when using mine; normally they just glide into place with minimal effort.
__________________
Anything really new is invented only in one’s youth. Later, one becomes more experienced, more famous – and more stupid.” - Albert Einstein
JFP in PA is offline   Reply With Quote
Old 06-27-2024, 10:37 AM   #10
Registered User
 
Join Date: Jan 2023
Location: Pittsburgh
Posts: 12
Quote:
Originally Posted by JFP in PA View Post
You may need to resort to the old way of installing the bearing using a hammer and installation tool.

I am actually interested in what you find when you remove the Faultless tool as I have never had a bearing cock or refuse to go in when using mine; normally they just glide into place with minimal effort.
I'm also in PA, so PM me if you feel like seeing it IRL. Otherwise, here's a video of the tool removed and the bearing jammed with the lock ring exposed: https://youtu.be/71iXAxee1NA
986girldad is offline   Reply With Quote
Old 06-28-2024, 12:12 PM   #11
Registered User
 
Join Date: Jan 2023
Location: Pittsburgh
Posts: 12
Quote:
Originally Posted by JFP in PA View Post
You may need to resort to the old way of installing the bearing using a hammer and installation tool.

I am actually interested in what you find when you remove the Faultless tool as I have never had a bearing cock or refuse to go in when using mine; normally they just glide into place with minimal effort.
The lock ring is still visible. Here's a video: https://youtu.be/71iXAxee1NA?si=iMESD2wiaJ2Xiu-_

I'm in Western PA. If you feel like lending your expertise, PM me.

P.S. Sorry for the delayed responses. Moderators need to approve everything I post (newb )
986girldad is offline   Reply With Quote
Old 06-29-2024, 08:26 AM   #12
Registered User
 
Join Date: Jan 2023
Location: Pittsburgh
Posts: 12
The old fashioned way worked! It was a bit tricky getting the metal ring in while hammering, but a little pick, a flathead, and a lot of patience did the trick. Thank you again @JFP in PA!!! I would've trashed my bearing had you not chimed in, so I am very thankful for your help.

986girldad is offline   Reply With Quote
Post Reply

Tags
dyi , ims , ln engineering , sos , tools


Posting Rules
You may not post new threads
You may not post replies
You may not post attachments
You may not edit your posts

BB code is On
Smilies are On
[IMG] code is On
HTML code is On
Trackbacks are On
Pingbacks are On
Refbacks are On


All times are GMT -8. The time now is 03:49 PM.


Powered by vBulletin® Version 3.8.7
Copyright ©2000 - 2024, vBulletin Solutions, Inc.
Content Relevant URLs by vBSEO 3.6.0
Copyright 2024 Pelican Parts, LLC - Posts may be archived for display on the Pelican Parts Website -    DMCA Registered Agent Contact Page