I just finished replacing my rear trailing arms (well one side anyway, will update when the other side is done).
(Here is a video guide on youtube of the FRONT arms:
https://www.youtube.com/watch?v=899_OjGjBMg)
Parts needed:
2 new trailing arms - part #8 on this diagram
Rear Axle Wheel Carrier Control Arm Wheel Hub
986 Boxster TRW equivalent: TRW JTC1186 Control arm:
Robot Check
987 Boxster TRW equivalent: TRW JTC1316 Control arm:
Robot Check
I used the 987 part, see this thread for discussion:
rear suspension noise over tar strips
And thanks to Smallblock454 for providing the TRW part numbers.
Bentley says to replace the locking nuts, part # 90038001201
Tools needed.
- 18 MM socket for the bolt ends (or wrench/crowfoot depending on clearance)
- 21 MM socket for the nut (or wrench/crowfoot depending on clearance)
- Torque wrench that goes to 118 ft/lbs (the torque for both ends of this trailing arm)
- Wobble extension and/or other extensions
- Breaker bar
I jacked up the car and put on jack stands and removed the wheels (they were already off for a brake bleed). I ended up putting the wheels back on and lowering to ramps, when I do the other side I am going to leave the car on the ramps.
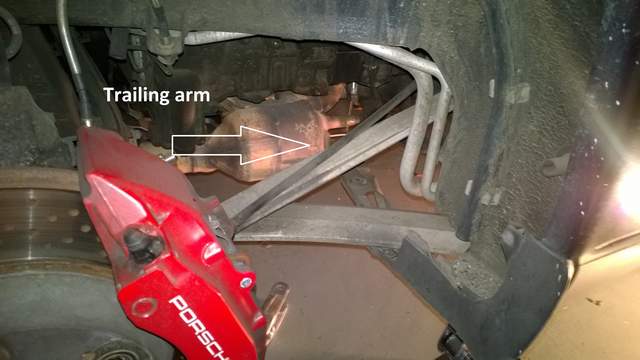
I started with the passenger side and removed the front fender liner (3 or 4 nuts, very easy, 10mm)


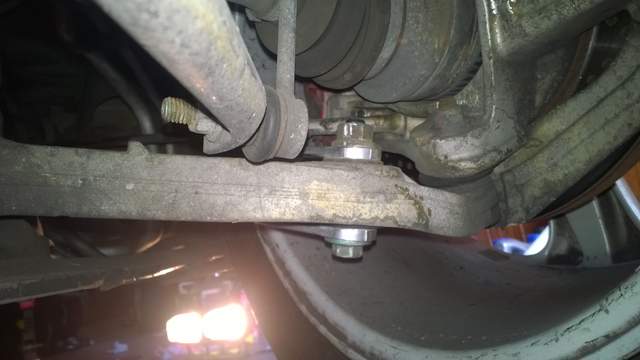
Here is me removing the bolt that goes through the LCA (rear of arm). Note the jack in the back, in addition to jack stands I always put the jack near where I am working for extra safety in case a jack stand fails.

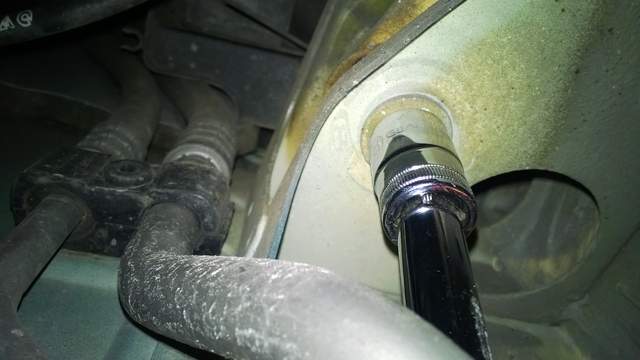
And this is removing the bolt that attaches to the body at the front of the arm (bolt threads into body with no separate nut). This is where I needed the wobble arm because there is some tubing that is in the way.

Note that I do not have the rearmost underbody panel on due to my deep sump and the fact that that panel is trashed anyway... you may need to remove it to get to the front bolt.
With the bolts removed, I removed the trailing arm. What worked for me was to take the back end of the bar and push it toward the middle of the car, sliding along the LCA, and then pop out the front end of the control arm toward the center of the car as well. Then move the whole assembly to the front of the car until the back end clears the LCA, and then it comes right out.
Note that I removed this one with the car on jack stands and the suspension unloaded. If my bushing end wasn't shot I do not believe I would have been able to remove it... [Edit: I no longer believe this is true - the monoball end of the arm is designed to pivot and so it should be able to be removed. I do believe an EPS/Vertex Urethane bushing arm would be hard to remove (and even harder to install) because that bushing would be under a lot of twisting load]
With the old arm removed, I was easily able to move around the bushing piece at the end (where with the new ones it absolutely would not budge) [Edit: now that I have taken one apart I was able to see how the monoball works - it is supposed to rotate around - that is how it accommodates the changing angles of the arm due to suspension load changes. I believe the stiffness of the new arms was due to the stiff rubber boots]

The old piece next to the new piece:

When I went to put the new piece in is when I realized there was no way unless I loaded the suspension.
[Edit: you could pivot the bushing to get it to line up to the correct angle but this is tougher to do with new arms. So I think this is easier to do but not required. With the Vertex/EPS I think it would be required because that is a traditional bushing and not a monoball and so that one would be very hard to rotate]
This is because with the suspension unloaded, the LCA is at a greater angle and when the forked end of the control arm is over it, the other end is twisted too much to slip in where it needs to go. I put the back wheels back on and lowered it down onto some ramps which flattened out the LCA. At this point I was able to get the new arm into position.
To reposition, I pushed the front of the arm toward the front of the car so I could slip the forks of the back end over the LCA. Then what worked for me was to slide the forked end up the LCA toward the center of the car until I could get the bushing end slightly rotated and slipped into where it needs to go.

I got that bolt started and then went to the back of the car. That one was a little tougher but I was able to push it on and get it lined up. Pushing from the back of the car on the top of the fork with my hand got it positioned. I thought about jacking/lowering the car to change the angle of the LCA but didn't want to stress the forks when they were not in position. Pushing the top of the fork from the back of the car was the magic combination and it slide right into place...
All buttoned back up and torqued to 118 ft/lbs. A clever eye may notice that the nut/bolt is reversed here from what is shown in the parts diagram. That is the way it was previously installed so I put it back together that way (and only noticed it was reversed as I was typing this guide... )Looks like someone has been here before... I will check to see if the other side is that way. [Edit: this is the way it is supposed to be - I don't even think there is room to thread the bolt from the top]


Now I need to take the wheel back off and reinstall the fender liner. Next side I am going to leave on the wheel and not mess with the fender liner - it is much easier to get at the fork end from the back of the car than through the side... [Edit: I subsequently did the other side with the wheel on and the back end on ramps - it was very easy and took about 20 minutes. The hardest part was applying the 118 ft/lbs of torque to the frontmost bolt - that is tough to do while laying under the car...]
FAQ:
Q: Does the car need to be on wheels and suspension loaded before installing and torqueing down the bolts of this trailing arm?
A: The Bentley doesn't say so, but in my opinion the car will be on the wheels and the suspension loaded anyway or else it will be very hard to fit the parts. So by default the suspension will be loaded anyway when you do the installation and final torque. It can be done with the suspension but I think it is easier when it is loaded. In my opinion backing the car onto 2 ramps is the quickest way if there is no access to a lift.
Q: Can I tell if the part is bad without removing it to take a look.
A: In my opinion no. It is very securely fastened at the forked end and so I don't think you will see any rotational movement at the bushing end, but maybe some lateral play (which could be a sign of it being bad). However, if you were to unbolt the forked end and slide it up the LCA toward the center of the car so the forks are somewhat clear, you could then try and rotate the bushing end along the long axis of the arm. If you can it is probably shot. [Edit: this is not true in my opinion now. I believe the bushing is designed to rotate that way. I think one way to tell if it is bad is to unbolt the forked end and then see if the ball end rattles around. Or remove the arm, put the bushing in a vise and push on it. If it moves or clicks, those may be indicators of it being bad]
Edit 11/9/2016 I found a new website the other day, a 996 Register, and it has an embedded video showing one technique on how to check the arms. The person in the video hits them with a rubber mallet, and the bad one makes a metallic pinging noise, while the good one does not. Here is the page with the video:
http://www.996revolution.com/maintenance.html
Note that I haven't tried this, I found the video long after I had completed my job.
Q: Do I need an alignment after replacing this part.
A: No

[Edit: at least 1 out of 3 of my FAQs were correct when I first put them out... )