This post details replacing key components in an air conditioning system. There is no way to complete this job without a vacuum pump, and a set of AC gauges or a scale to weigh refrigerant as you add it to the system. You can also replace the components yourself and then take it to a mechanic for a recharge. If your system has refrigerant in it always take your AC to a certified refrigerant recycler as R134 is odorless, non toxic, and has little effect on ozone or the environment.
Also a serious word on safety. The AC high side pressure is far higher than can pressure. The can runs about 70 psig at about 85 F, the high side can run to about 290 psig at 85 F. Refrigerant can squirt out of the can at 70 psig and freeze your flesh. High side pressure can blow things up (like the can) showering you with shrapnel while simultaneously covering you in liquid refrigerant and freezing your flesh. That's bad. Needless to say, it is important to keep the high side valved off from the low side. Repeat, it is very important to keep the high side valved off at all times. Eye and skin protection is also advised as AC has little margin for error and can hurt you.
AC works by compressing low pressure (1.4 to 1.7 bar) to a high pressure (12 to 19 bar at 85 degrees). Section 8 of the shop manual has graphs of temperature versus high side pressure. The refrigerant gas is compressed and sent through the condensers, at the front of the car where refrigerant gas, wait for it, condenses into a liquid. The liquid continues from the condenser to the receiver dryer (or tank, or desiccant depending on what you read) to the expansion valve where it is flashed into a gas and small droplets of coolant that land in the evaporator (past the expansion valve we are on the low pressure side). The flashed refrigerant fully returns to a gas state in the evaporator dramatically cooling it and enters the low side of the compressor where it starts to loop again. Warm air blown over the evaporator cools and enters the cabin providing AC. The boundaries between the high and low side being the compressor, and the expansion valve. Now you know the condensers are on the high side, and the evaporator is on the low side.
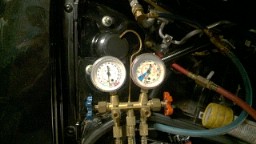
Refrigerant can be added on two ways, by weight (best) which for a Boxster is 850 grams R134, or by checking the low and high side pressure and taking into account the ambient temperature, and humidity. (which is why there is a range of pressures at a given ambient temperature). When I add refrigerant I keep the valve on the can up so liquid does not enter the system, only gas. This takes longer but eliminates the possibility of “slugging” the compressor, that is allowing a slug of liquid to enter the compressor. The liquid is in-compressible, the compressor will try to compress it, and lose. That means you lose too with a broken compressor and a slug to your wallet.
Too much refrigerant will not make the system run better so don't go there, weigh the refrigerant going in, or get the high and low side pressure right.
So if weight is so important, why the pressure gauges at all? To measure the health of the system, diagnose problems, and add refrigerant to offset leakage over time as needed (every pressure system leaks a little). Get a book on AC repair and it will tell you how to interpret gauge pressure readings.

It is also important to have the correct amount of PAG oil in the system. ND 8 or PAG 46 is what is needed. This picture is 55 cc of oil drained from the old compressor. A tape line marks top of meniscus.

A total of 195 +/- 15 cc of oil is required in the system and in my case two parts that hold oil are being changed, the receiver dryer and the compressor. The receiver dryer should have approximately 30 cc and the compressor should have approximately 50cc. Typically I simply drain the oil from a used component and then add that amount + a pinch (~ a few cc's use your judgment) more for what is still in the used component and call it good. The oil is typically added to the high and low side compressor ports.
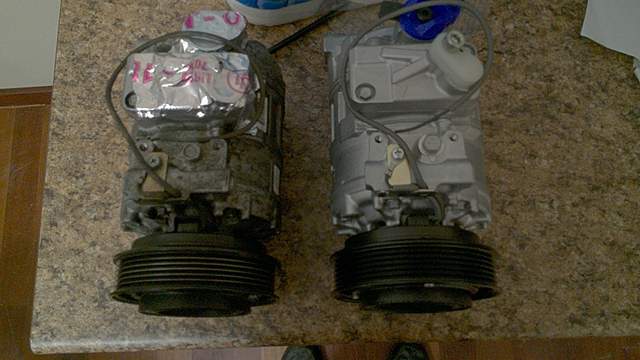
Naturally there is a twist with Boxsters. Adding oil is a little different than other compressors I've worked with. On the installation notes in the Boxster service manual direction is given to open the oil filler screw (bolt in the middle of the compressor in this photo)

on the compressor and empty approximately 80 cc of oil out, leaving approximately 120 cc in the compressor, then replace the screw. That's a lot of oil considering the compressor is supposed to have 50 cc in it during operation. I replaced the 55cc with 60 cc after draining the new compressor.
The receiver/dryer was also replaced (called the “fluid tank” in the manual and “desiccant” in the parts list) and per the manual it held another 30cc of oil. Mine drained very little and I assumed the oil would not easily drain, so I added 30 cc to the new receiver/dryer. Again, the end goal is to end up with 195 +/- 15 cc of oil in the system.
When replacing AC components don't start the job until you have all of the components you will need to complete the job. The key is to have the refrigerant loop open for as little time as possible. Air and the associated water from humidity and dirt will kill the internal components (particularly the receiver dryer) quickly when the system is open.
Since my compressor is shot (figured that out with gauges) I have to open up the system and might as well replace other components that may be on their way out. The receiver dryer is essentially the filter for the system and as the name implies, it takes water out of the system. Even a few drops of water will freeze in the refrigerant loop and prevent the system from functioning. When opening the loop, I looked for contamination in the oil, essentially any particulate. If found the system must be flushed, a major pain. Luckily for me no particulate was found.
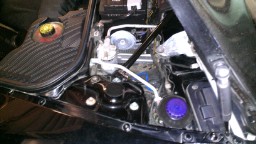
So to start, put the top in the service position and open the front hood. The AC high pressure (high side) and low side are accessed under the right side plastic cover next to the battery cover. Remove that cover, the battery cover and the left hand side cover.
With the engine off, use a set of gauges to access the service ports under the right close out cover, to verify there is no pressure in the system. Do not use a screwdriver to open the AC Schrader valves particularly when the car is running. If you push the high side valve with a screwdriver with the car running you are likely to injure (freeze) yourself with high pressure liquid refrigerant. You can put your eye out quicker than a Daisy 200 Shot Red Ryder Range Model rifle.
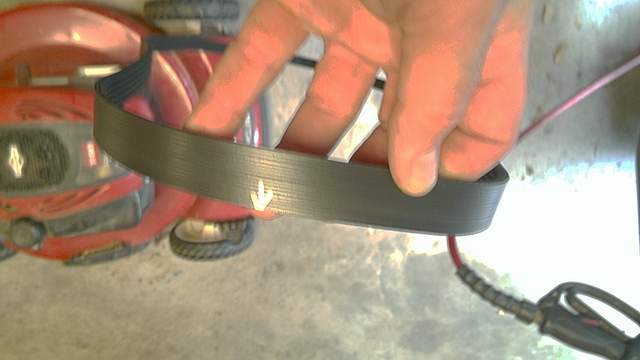
Remove the belt and mark which side faces forward so it is rotating the same way when re-installed. I always install the belt so the writing is right side up when read from the front of the engine, but I marked this one anyway with a sharpie.

If there is no pressure in the system the compressor can be removed.
The first step is to suck out the power steering fluid from the reservoir and remove it using the twist lock at its base. Then disconnect the one electrical wire connector between the left side intake runners. Once that is out of the way, go to work on the three bolts holding the compressor in, 2 in front and one in the back, the back bolt being accessed between the intake runners. The front most AC line fitting bolt can be accessed with the compressor in place, but I found that I had to remove the three mounting bolts and slide the compressor forward to access the bolt on the rear most AC line fitting.
I prefer having some tinfoil handy to seal the open lines if needed, but I've been known to use a paper towel plug. Just have something handy to keep the bulk of the air moisture and dirt (all the dirt) out of the system unless your ready to immediately swap in the new compressor which is my preference.
Putting the new compressor in is the reverse of taking it out. Replace the lines, bolt the compressor in, hook up the single electrical wire, and replace the power steering reservoir and fluid.
Next I changed the expansion valve which is located just behind the low and high side valves under the right side closeout cover. This is a simple unbolt and replace job, again have the system open for as little time as possible. Lube the internal parts of the expansion valve with PAG oil before installing.

Last on the hardware list is replacing the receiver dryer. Again an easy unbolt and re-bolt. Changing the green o-ring seals is suggested for all of these replacements, but mine looked new so I simply re-used them. If your system has a leak, replace them all.

After all of the parts replacement was completed, the system was pulled down to vacuum for several hours. I pull it down until the vacuum pump isn't bubbling, then valve off the system and turn off the pump. Then I start the pump and open the system to it. After a few hours of this the pump stops bubbling when re-introduced to the system and I'm done with the vacuum pump. Doing it this way has the advantage of catching a leak in the system before putting in the refrigerant as the pump will continue to bubble if there is a small leak.