Go Back   986 Forum - The Community for Porsche Boxster & Cayman Owners > Porsche Boxster & Cayman Forums > DIY Project Guides

Post Reply
 
LinkBack Thread Tools Display Modes
Old 11-12-2010, 09:08 AM   #1
Registered User
 
Join Date: Sep 2009
Location: The City
Posts: 1,084
Garage
DIY Red Seat-belts Upgrade.

This will be a somewhat detailed look into what is necessary to change your bland black seat-belts into Red. Of course, you can substitute red for yellow or silver and for those more unique any color of the rainbow. Keep in mind that if you DO NOT HAVE EXTRA HARDWARE. This project will take about a week with your Boxster sitting in the garage waiting.

you will first need to buy:

9yds seat-belt fabric (red, yellow, fuchsia whatever floats your boat)
2 buckle stoppers (the little plastic things that keep the buckle from falling to the floor when not in use)

I bought mine from the following people and I would like to say thank you to the folks at Seat-belt Planet AKA Gotbelts and I believe also seat-belts.net (all the same company)

Bill Combs over there is a great guy I had originally bought Normal red but I was not happy so I got in contact with him and he set me up with Flame Red and all I had to do was pay for the return shipping no restocking fee or what have you. Great customer service all around.

I have no affiliation with them just a satisfied customer!

Secondly I would like to thank Zackwatt since I hope he does not mind but I am borrowing some of his pictures from his DIY he had on how to get at and remove the tensioner and what not. I will not go in depth I feel his pics on that subject are self explanatory, and for cars 2003 and up I recommend visiting his DIY HERE since his is a better DIY for those model years.

First here is Zackwatts photos to remove and get at the seat-belt spindle: you will need a
philips screwdriver
flat head screwdriver
7mm wrench
short 17mm socket.


Last edited by Lobo1186; 11-12-2010 at 10:19 AM.
Lobo1186 is offline   Reply With Quote
Old 11-12-2010, 09:45 AM   #2
Registered User
 
Join Date: Sep 2009
Location: The City
Posts: 1,084
Garage
If you have made it this far then you are doing well. If the pics are not enough go to this link Zackwatt's DIY I will continue to speed through these parts.

Next you will see the whole seat-belt kit-n-caboodle right in front of you. It should look like this:


Note the wire. If you see this wire DO NOT DISCONNECT IT!!!! first you must disconnect your battery.

now for the fun part. There are Three anchor points on the whole assembly:

1) Floor Anchor, Using a flat-head screwdriver, simply pry off the cap and you will see a 17mm Bolt, LOOSEN or REMOVE it does not matter.


2) At the pinnacle of the seat-belt behind the headrest there is a pulley type part. Pop open the cover and you will see a 17MM bolt, LOOSEN SLIGHTLY


3) On the seat-belt spindle there is a bolt towards the bottom of the assembly on the outside it is 17MM, LOOSEN most of the way.


After this we will go into how you will complete the swap over.
Lobo1186 is offline   Reply With Quote
Old 11-12-2010, 10:08 AM   #3
Registered User
 
Join Date: Sep 2009
Location: The City
Posts: 1,084
Garage
So now that you have everything ready first thing is first. grab something like a small flat-head screwdriver.

Next looking at your seat-belt spindle there is a little plastic piece that feeds it into the spindle detach it from the spindle.

Next pull the seat-belt all the way out so that there is none left on the spindle.

Once you have done this the spindle should look like this:


Next insert the flat head into the pulley at the top of the rollbar. (What this will do is keep the fabric from reeling back up when you take your hands of the seat-belt.)

Next remove the bolt from the spindle and pull away from the rollbar then towards you. (be carefull you do not want to dislodge the screwdriver.)

After that grip the spindle so it cannot spin


push the seatbelt through the spindle.

(example 1)


(example 2)


Once you have done this there is a pin that keeps the belt in the spindle remove it.

IT IS EXTREMELY IMPORTANT YOU DO NOT LET GO OF THE SPINDLE. IF YOU DO IT WILL RETRACT AND WITHOUT THE BELT IT WILL SPIN ALL THE WAY AND YOU WILL HAVE TO FIGURE OUT HOW MANY TURNS IT TAKES TO GET IT BACK TO ITS ORIGINAL POSITION.

Once the pin is out you can now pull the seat-belt through the spindle


Last edited by Lobo1186; 11-12-2010 at 10:16 AM.
Lobo1186 is offline   Reply With Quote
Old 11-12-2010, 10:15 AM   #4
Registered User
 
Join Date: Sep 2009
Location: The City
Posts: 1,084
Garage
Now you should be holding the spindle nice and tight. Take that flathead screwdriver and slide it through the spindle so that it cannot retract. (in this pic I used a drill bit works the same. I have also used a small handled paint brush)


Set the spindle aside in a safe place you will not need it until later.

Remove the Anchor and the Pulley.

now that you have the seat-belt freed from the car roll it up put it in a bag whatever it takes and set it aside. (note all the hardware will be on it. consisting of the ANCHOR, PULLEY, PLASTIC PIN [may be white or black] and the BUCKLE. the buckle stoppers are disposable.)

REPEAT the process for seat-belt number two.


<>

If you want you can just remove all the assemblies intact. IE with the fabric still rolled on the spindle. From there as long as the spindle is oriented as it would be in the car you can unwind all of the seat-belt. (the reason I did it different above is it is easy to unwind while still on the roll-bar and also I had my new belts ready so it was just a fast swap.) That way you can do all the unwinding and removal of the fabric in your favorite lazy-boy. Just make sure all the bolts and hardware is in a plastic bag or in a place where you will not lose it in the interim.

Last edited by Lobo1186; 11-12-2010 at 01:49 PM.
Lobo1186 is offline   Reply With Quote
Old 11-12-2010, 11:18 AM   #5
Carnut
 
AndyA6's Avatar
 
Join Date: May 2010
Location: Utah
Posts: 775
Thank You, Sir!

Will do this over the winter, nice project!

Andy
__________________
'14 Boxster
AndyA6 is offline   Reply With Quote
Old 11-12-2010, 02:27 PM   #6
Registered User
 
Join Date: Sep 2009
Location: The City
Posts: 1,084
Garage
Swapping the colors.

First locate a local boot or shoe repair shop. This is because they have thicker needles that can handle the fabric.

Take your newly freed belts and the new fabric to the shop and tell them to switch over the hardware to the new set.

Important things to Bring:

Anchor
Buckle
Pulley
Spindle Pin

Important things to mention:

Length should be the same
Orientation of the hardware needs to be the same
Length of the area of fabric that is folded over and sewn (at both ends) should be the same
And once again ORIENTATION of the hardware needs to be the same as the orientation of the hardware to the way the fabric is sewn.

So once you have gotten back your nifty new belts it is time to put them back in. (before you take them from the store do a quick quality control of the belts just make sure they were done well and that the cut fabric was melted at the ends so that it doesnt fray. if they are not hit them quick with a lighter.)


heres mine before it was sewn up:


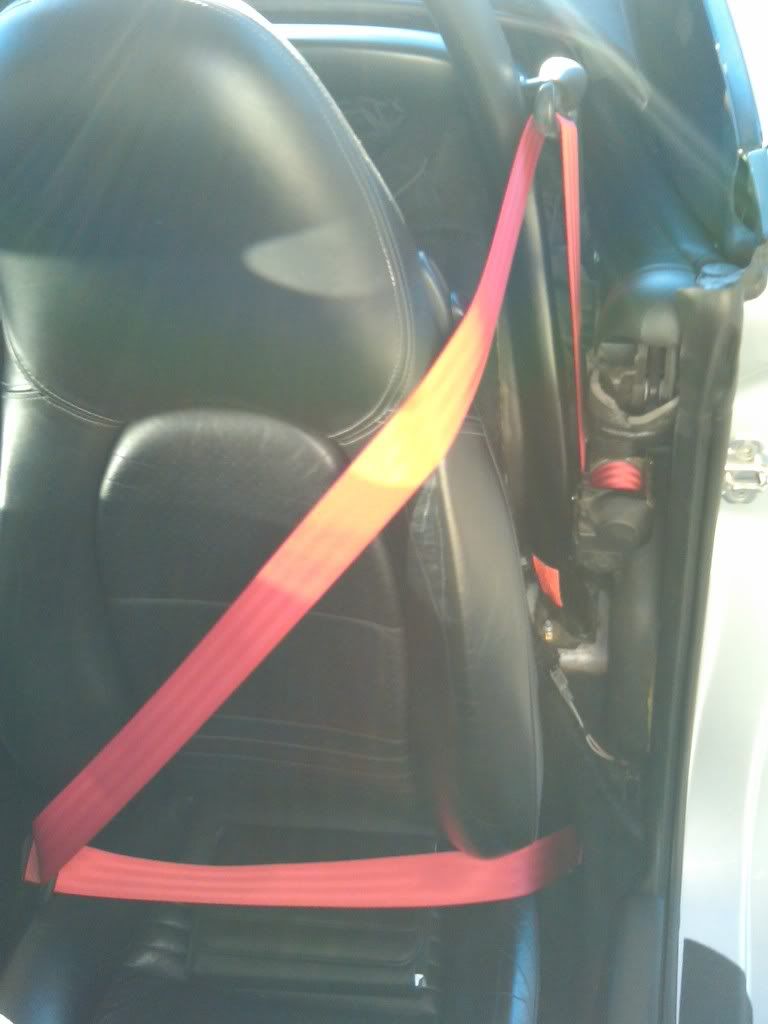
The Process of putting them back in is easy.

if all of the orientation is correct just put them in the way they came out.

Just take a look at your old belts and notice which direction the fabric rolled. In my car and in my spare set of belts the belt wound up with the underside of the belt on the inside (spindle side) and the top of the belt outside.

This means that if your shop paid attention to detail the underside is the side that the flap is on at the two ends.

so this is the TOP


and this is the bottom


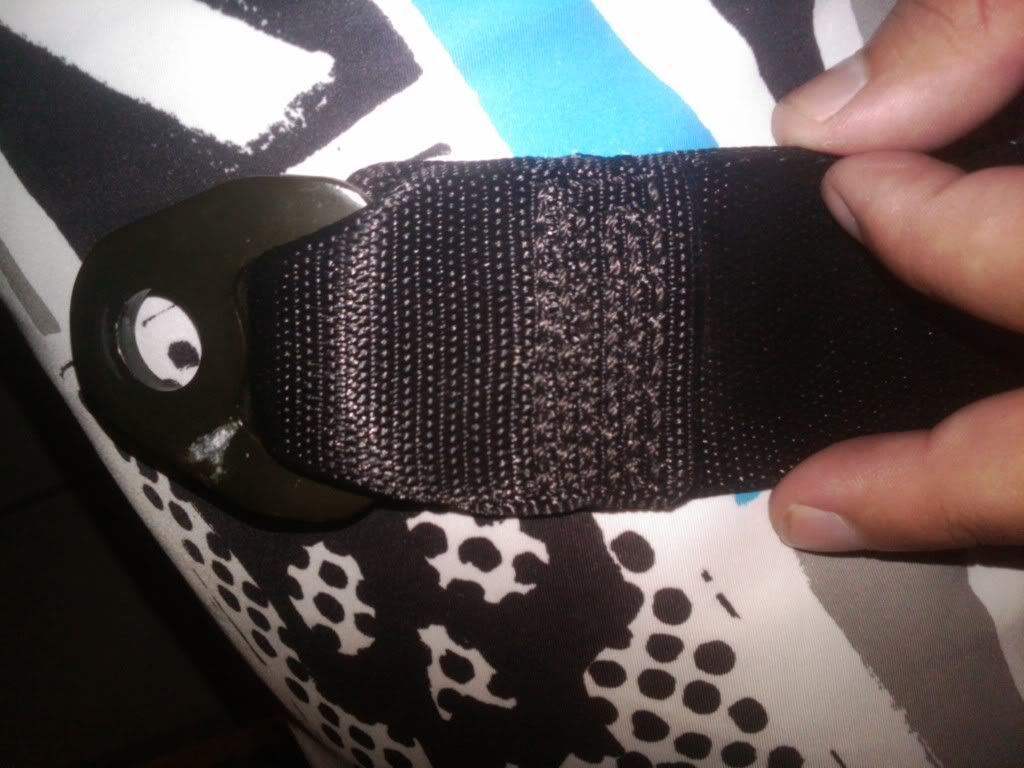
and the same goes for the spindle pin side.

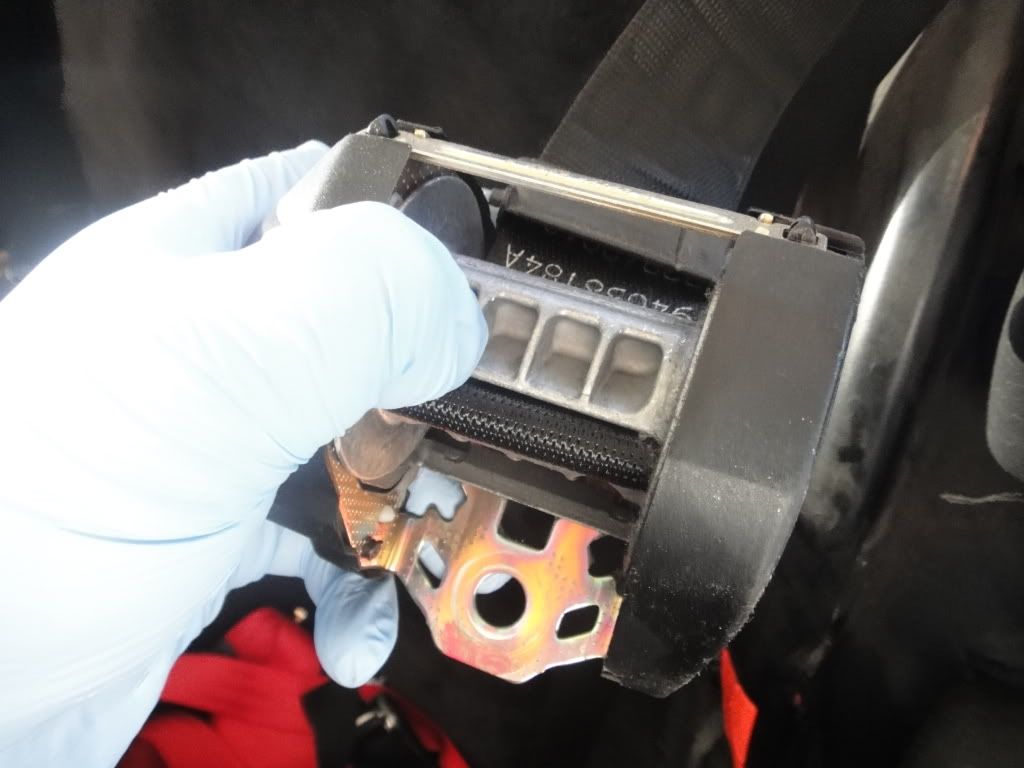
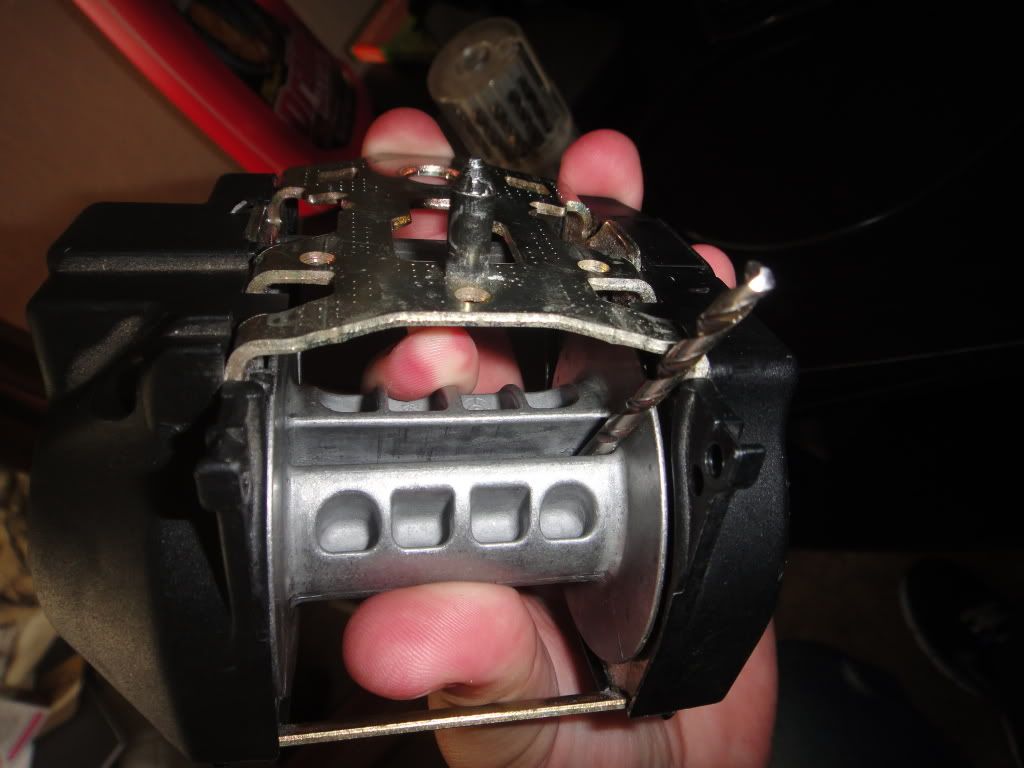
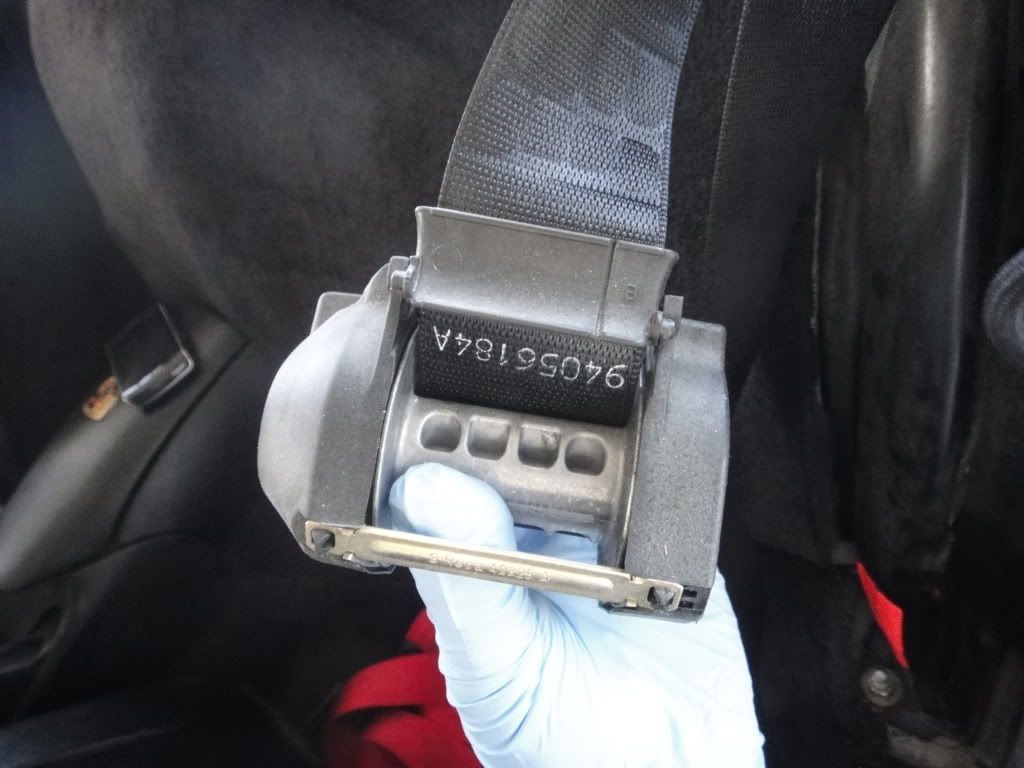
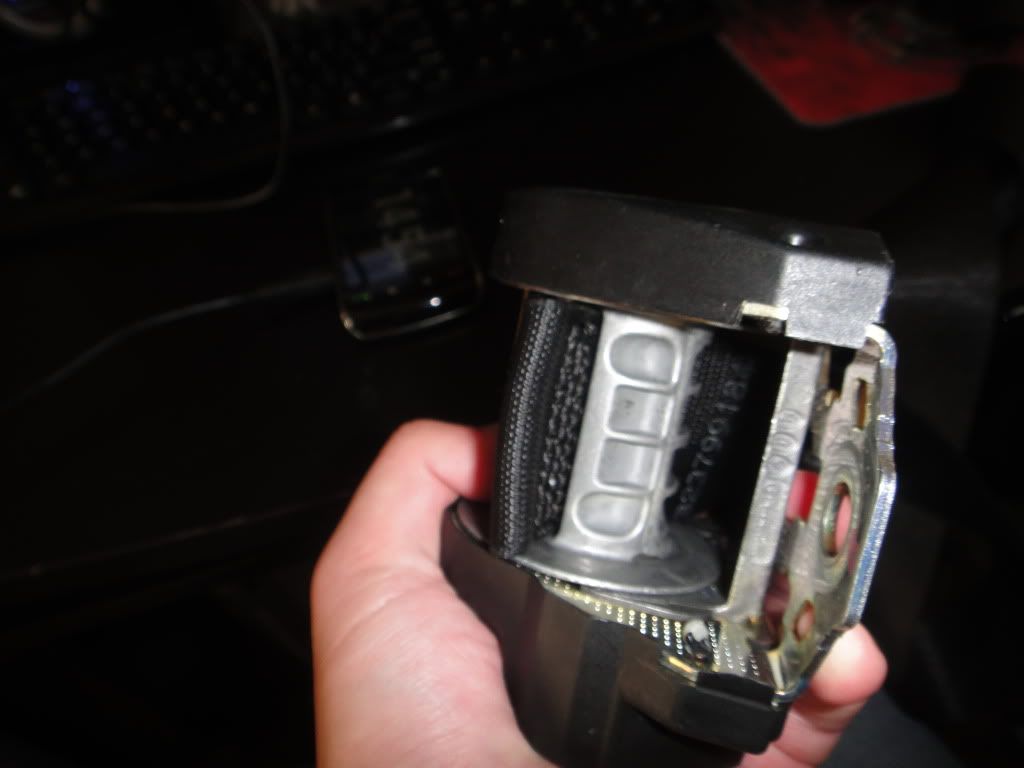
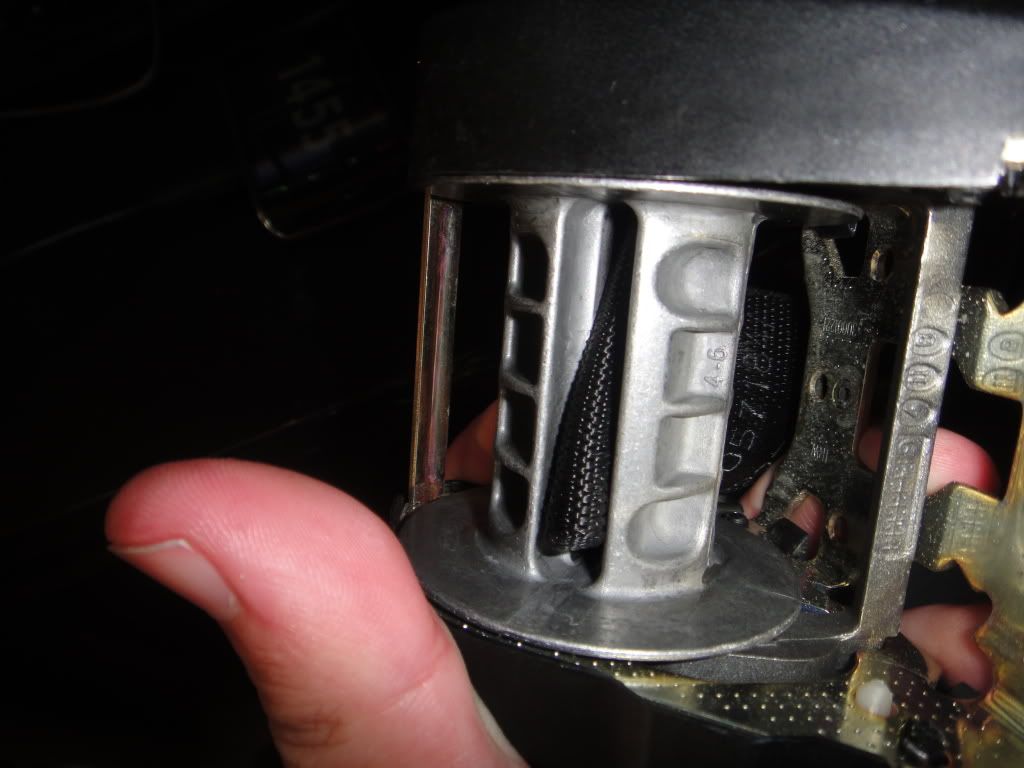
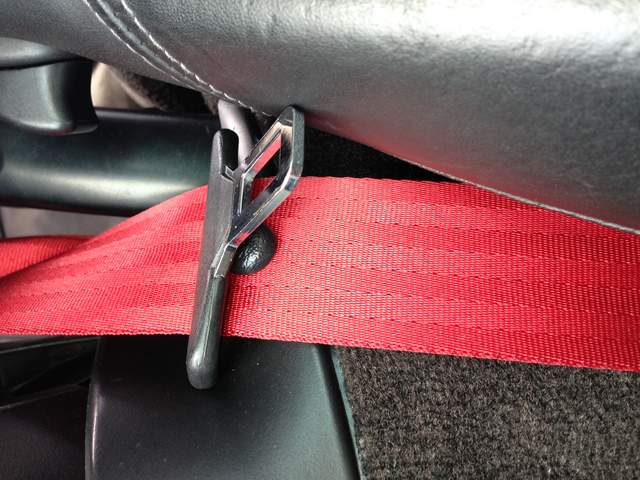
Take your spindle as in this picture with your stopper in place:


Grab your new belt and put the plastic feeder piece on the belt like in this picture:


remove the stopper but FIRMLY HOLD THE SPINDLE do not let it spin.

With the other hand take your new belt and with the BOTTOM of the belt (IE once again the side with the sewn tab on it as noted before) facing you, because remember you are holding the spindle like in the picture.

Push the loop through.

Once the loop is through put in your spindle pin. pull tight

Now let the spindle reel back up.

Repeat for the other side.

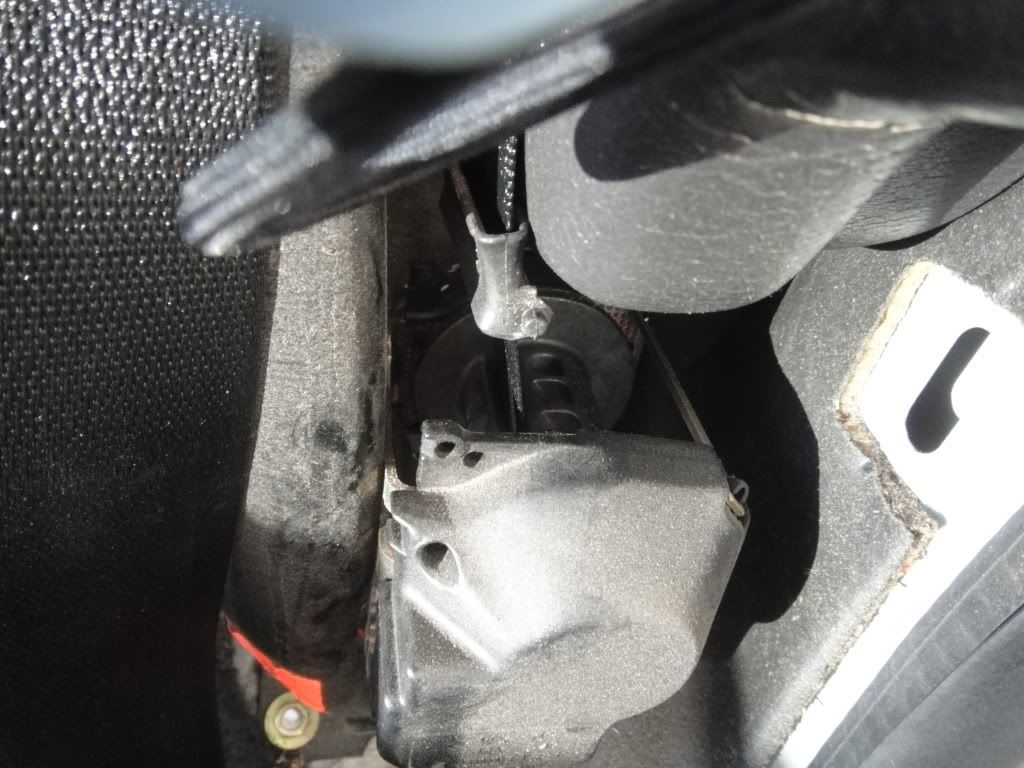
it should look like this.


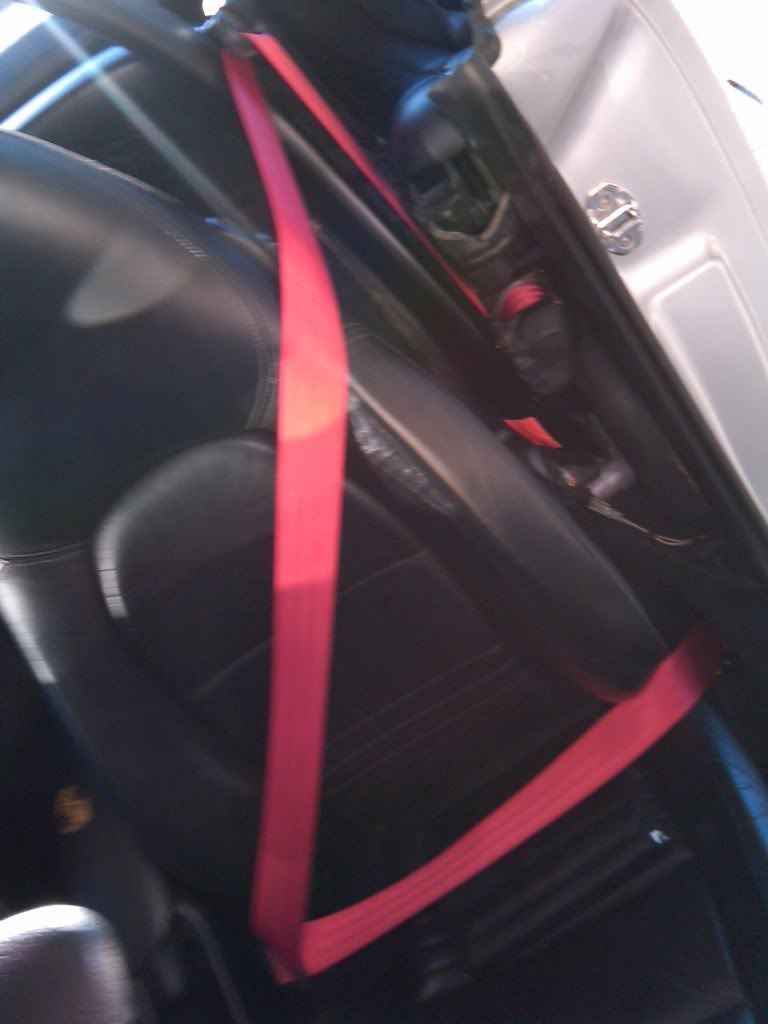
now put your car back together.

and the finished product courtesy of a friend of mine as a passenger.


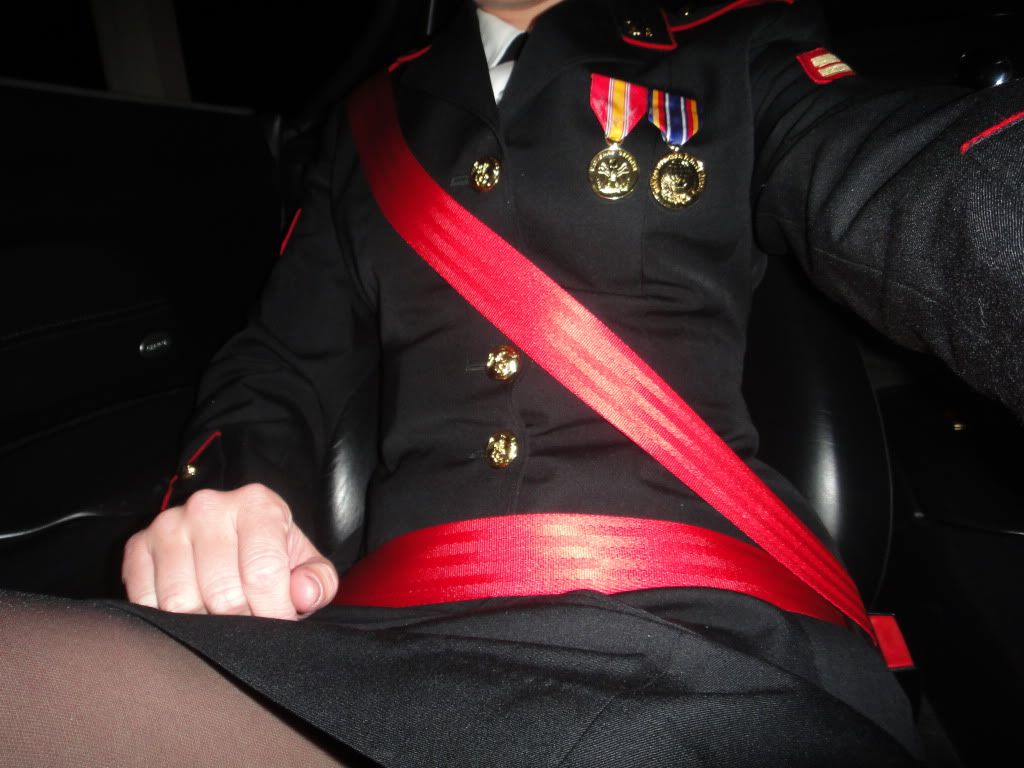
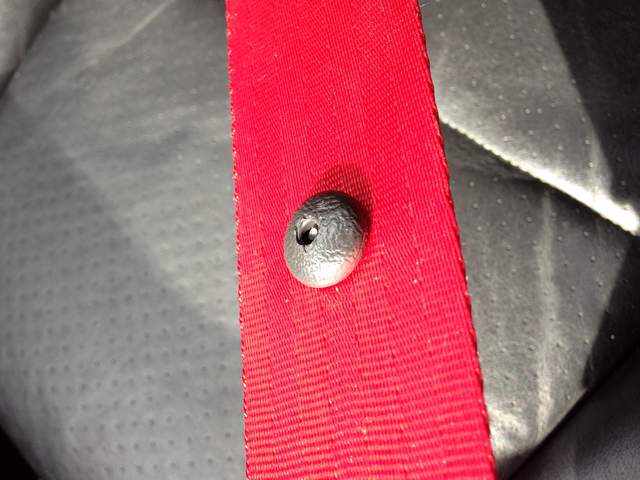
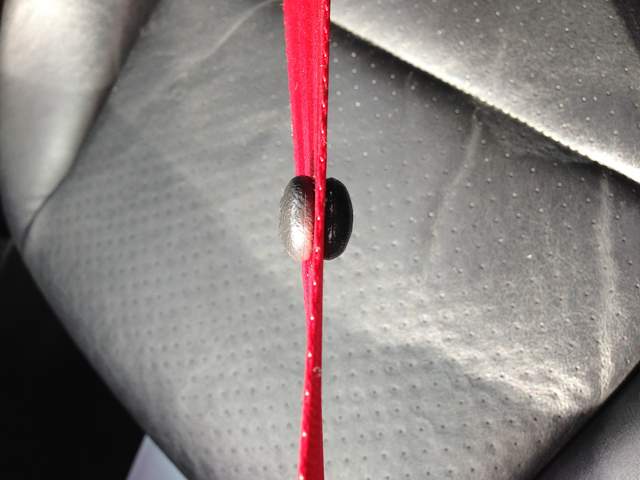
Final note. do not forget your buckle stoppers. and post up your final pics.


This is the first rendition of the DIY let me know of any serious mistakes and concerns and ill fix it. also ask questions and i will edit the tuturial to address it.
Lobo1186 is offline   Reply With Quote
Old 11-12-2010, 07:43 PM   #7
Registered User
 
Join Date: Apr 2010
Location: Boston, MA
Posts: 172
Nice

Wow, mine comes with Yellow, and I'd much rather have the red. How m uch was the total cost? it looks kinda hectic; how long did it take you?
__________________
Blue 2003 Boxster S
GT2 Front bumper
GT3 Side Skirts
19" MHT Rims
Evo Intake, De-Snorkeled
CVstarBoxster is offline   Reply With Quote
Old 11-12-2010, 08:42 PM   #8
Registered User
 
Join Date: Sep 2009
Location: The City
Posts: 1,084
Garage
It does look hectic doesn't it! Honestly, it is not I just have a way with making things overly detailed.

The total cost was about 70 dollars. Maybe 38 and some change for the red fabric.

To break it down barney style:

Remove current seat-belts
Separate belts from spindles
Bring new fabric and old belts and hardware to shoe store to get changed over.
Put new belts in spindles
Install back into car.

I should have just made it one post and those 5 lines.
Lobo1186 is offline   Reply With Quote
Old 11-12-2010, 11:18 PM   #9
JTP
Registered User
 
Join Date: Aug 2009
Location: MD
Posts: 628
That looks very nice and a great write up.
I'm curious though, is the stitching on the original seatbelt something that is approved by a manufacturing or government standard? In the event of an accident and the occupants are injured, could either Porsche or an insurance company say since the seat belts were modified they are not liable to cover the cost of injuries? The stitching by a shoe repair shop could be as strong or stronger than the factory stitching but I'm wondering about any legal rammifications in the off chance of an accident.
JTP is offline   Reply With Quote
Old 11-13-2010, 08:06 AM   #10
Registered User
 
Join Date: Sep 2009
Location: The City
Posts: 1,084
Garage
idk. but considering everything people do to their cars that make it unsafe or illegal I dont see how they could deny coverage. Of course if your belt breaks u have no recourse against porsche as the belts are not theirs.

So to answer your question I have no idea but I imagine the insurance company would still cover you since you could not be wearing a seat-belt at all and they will still cover you.

maybe a car insurance person on here could chime in.
Lobo1186 is offline   Reply With Quote
Old 03-02-2013, 09:38 PM   #11
Registered User
 
Join Date: Aug 2012
Location: Oklahoma
Posts: 28
Garage
Older thread, but I just wanted to say thanks for the details on this how-to. Installed red belts today and they turned out great.

All said, this project ran just under $100. The new belt material was around $75 and the stitching at a shoe repair shop was $18 and they said they do seat belts all the time. They were also open on Saturday morning and were able to have it done for me in an hour and a half, which eliminated down time with the car...

Just a note: I had to use an 8mm wrench on the carpeted cover instead of a 7mm, and using a 17mm wrench on the retracting mechanism instead of a socket was much easier. I couldn't fit a socket in that small space on the mechanism.

Also, I know people are nervous about compromising safety for looks, but seat belt replacement seems to be pretty common practice, and old belts do wear out from even the effects of UV light. My advice would be definitely please don't try to just sew these at home. Take them to an experienced shop. I feel very confident in the work done on mine.
TheProspector is offline   Reply With Quote
Old 03-03-2013, 04:29 PM   #12
Registered User
 
Join Date: Sep 2009
Location: The City
Posts: 1,084
Garage
Glad you like them!
Lobo1186 is offline   Reply With Quote
Old 03-04-2013, 11:28 AM   #13
Registered User
 
Join Date: Sep 2006
Location: California
Posts: 713
Did you install the buckle stoppers? If so, can you explain how to install those?
__________________
http://farm4.static.flickr.com/3420/...90927559_o.jpg

Some stuff for sale: M030 S 24mm front sway bar, M030 base 19.6mm rear sway bar, 996 GT3 OEM Porsche Motorsport front strut mounts monoball "camber plates"

WTB: looking for some 5-7mm spacers with extended bolts
chaudanova is offline   Reply With Quote
Old 03-04-2013, 08:46 PM   #14
Registered User
 
Join Date: Aug 2012
Location: Oklahoma
Posts: 28
Garage
If you mean the little round "nubs" on the seatbelt that keep the buckle from falling down when not in use, then yes.

I just ordered 2 from the same place as I got the belt material. Each consist of 2 halves: one that has a hollow middle and the other with a sharp spike. I measured up on my old belts from the bottom of the nylon to the original stop. This measurement was approx 24". They install by pushing the spiked half through the nylon (I pushed mine all the way through with the help of a flathead screwdriver.) Then push the other half onto the spike. It will hold in place. I cut off the sharp excess protruding and used adjustable pliers to clamp down and ensure they were seated all the way. Then used a lighter to melt and smooth the cut spike.

They are a little larger than the original buckle stops, but not a big deal.

Let me know if you'd like a close up of anything.
TheProspector is offline   Reply With Quote
Old 03-05-2013, 02:40 PM   #15
Registered User
 
Join Date: Sep 2006
Location: California
Posts: 713
Quote:
Originally Posted by TheProspector View Post
If you mean the little round "nubs" on the seatbelt that keep the buckle from falling down when not in use, then yes.

I just ordered 2 from the same place as I got the belt material. Each consist of 2 halves: one that has a hollow middle and the other with a sharp spike. I measured up on my old belts from the bottom of the nylon to the original stop. This measurement was approx 24". They install by pushing the spiked half through the nylon (I pushed mine all the way through with the help of a flathead screwdriver.) Then push the other half onto the spike. It will hold in place. I cut off the sharp excess protruding and used adjustable pliers to clamp down and ensure they were seated all the way. Then used a lighter to melt and smooth the cut spike.

They are a little larger than the original buckle stops, but not a big deal.

Let me know if you'd like a close up of anything.
Thank you very much for the explanation. I appreciate it! Yes, if you get the chance, could you please post a close up picture of the new installed/uninstalled buckle stops?

Thanks in advance!
__________________
http://farm4.static.flickr.com/3420/...90927559_o.jpg

Some stuff for sale: M030 S 24mm front sway bar, M030 base 19.6mm rear sway bar, 996 GT3 OEM Porsche Motorsport front strut mounts monoball "camber plates"

WTB: looking for some 5-7mm spacers with extended bolts
chaudanova is offline   Reply With Quote
Old 03-13-2013, 02:10 PM   #16
Registered User
 
Join Date: Aug 2012
Location: Oklahoma
Posts: 28
Garage
I'm sorry for the delay in adding photos to this of the buckle stops, so here they are!


Last edited by TheProspector; 03-13-2013 at 03:04 PM.
TheProspector is offline   Reply With Quote
Old 04-14-2022, 08:23 AM   #17
Registered User
 
Join Date: Aug 2020
Location: California
Posts: 3
thank you for this DIY it was helpful!

Thank you for this DIY it was helpful when I swapped out my tired black belts for new red ones to match my Guards Red.
I actually couldn't find belts for my model year 2003 Boxster but did find some for the earlier Boxster without the connection to the airbag sensor. I was able to swap the black belt in the original retractor to the red belt taken out of the replacement retractor (with the help from this DIY post)so I still have the functions per my model year plus shiny new red belts!
It took only ~30 minutes. And no trips to the shoemaker. All the hardware fit except for the new supplied retractor which didn't have the explosive charge. I had to add a washer to the shoulder anchor point as the new plastic anchor trim was 1 mm thinner than the original plastic anchor trim. The swap of the new belt for the old into the old retractor was easy. I would recommend pulling the belt to all the way extended and locking with a screwdriver before removing the retractor from the car.

source of new belt set up for 2000 Boxster
eBay
2pcs Red Retractable 3 Point Fix Safety Seat Belt Vehicle Seatbelt Fit Juke
Total: $65.59

43marcus is offline   Reply With Quote
Post Reply


Thread Tools
Display Modes

Posting Rules
You may not post new threads
You may not post replies
You may not post attachments
You may not edit your posts

BB code is On
Smilies are On
[IMG] code is On
HTML code is On
Trackbacks are On
Pingbacks are On
Refbacks are On


All times are GMT -8. The time now is 05:32 AM.


Powered by vBulletin® Version 3.8.7
Copyright ©2000 - 2024, vBulletin Solutions, Inc.
Content Relevant URLs by vBSEO 3.6.0
Copyright 2024 Pelican Parts, LLC - Posts may be archived for display on the Pelican Parts Website -    DMCA Registered Agent Contact Page