It was a Royal PITA to change out the Cam Adjuster but I kept thinking that pulling the engine was much worse.
Since some may consider doing the RandR of the Camshafts and the Vario Adjuster in the car, let me share how it went.
The removal is pretty simple. Drive pulley at TDC and a 5/16 x 4" bolt in to keep it there. I removed the coils and valve cover and followed the steps in the excellent Pelican DIY (
Camshaft Upgrade / Chain Tensioner Replacement by Wayne Dempsey) I took the two cams with the adjuster and timing chain attached onto a workbench and there removed the adjuster assy from the timing chain and cams by compressing it with a bar clamp. The Vario Adjuster in my 1998 986 2.5L has a 10-32 Righthand thread hole at the bottom, so a 4" x 10-32 SAE bolt will hold the adjuster in the "compressed" position when you install it back under the timing chain. If you can't find one, like I couldn't, a 6-32 threaded rod with nuts and washers will do the trick. $1.00 at the local hardware store.
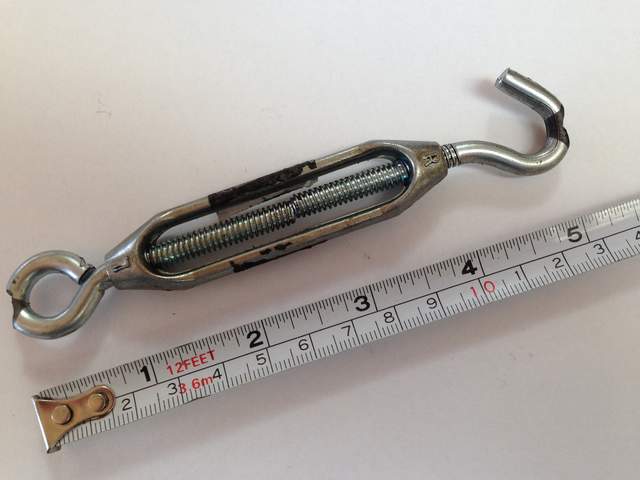
After cleaning and installing the two plastic pads, new solenoid and a new timing chain it was time to put the cam assembly back into the head, which is the tricky part. You're fighting gravity and can't really see what you're doing. (I've heard this before...) Line up the sprocket end of the cams with their respective bearing cut outs in the head and hold them in place. It is hard to push the cams in by hand since you are pushing against the valve springs while lying on your back. I have the locator tool P253 from Pelican that holds the Exhaust cam in the TDC position, but it doesn't push the Intake Cam into place against the valve springs, so I bought a 5" turn buckle (see photo) and ground grooves* in each end to get it to seat and exert enough force to put on the Intake bearing cap next to the sprocket.
I kept the three long bolts that mount the Adjuster, the Exhaust bearing cap bolts and the expensive Cam locator tool loose until I had seated the top (Intake) bearing cap. Then I tightened everything all up, removed my turnbuckle and replaced the valve cover etc.
*There is a ledge on the car's frame that you can use to push against with the turn buckle to force the cam nearly all the way into the bearing cutouts in the head. Somewhere I read that people have snapped their camshafts, which seems a bit dubious, but I hand tightened the turnbuckle and got the cam to go far enough in to attach the bearing cap.
I believe there is a tool set for $350 that has two tools to hold the cams in place, or if you have two extra bearing caps, they'd do so as well, but in my case, I'd already bought the Pelican camshaft securing tool for $185, so I thought I'd improvise and in this case it worked.
Hope that's helpful. As stated in my first post I'd gotten a P1324 error code that the cam on bank 2 was out of position. As I discovered, I caught it just in time as the timing chain was rubbing on the adjuster and the plastic pad that the chain normally rides on was in tiny pieces in the oil pan.
Here's the turnbuckle, $1.50 at the local hardware store.


 Threaded Mode


