 10-04-2015, 07:35 AM
|
#1
|
|
Project Addicted
Join Date: Aug 2015
Location: Eastern Shore, MD
Posts: 623
|
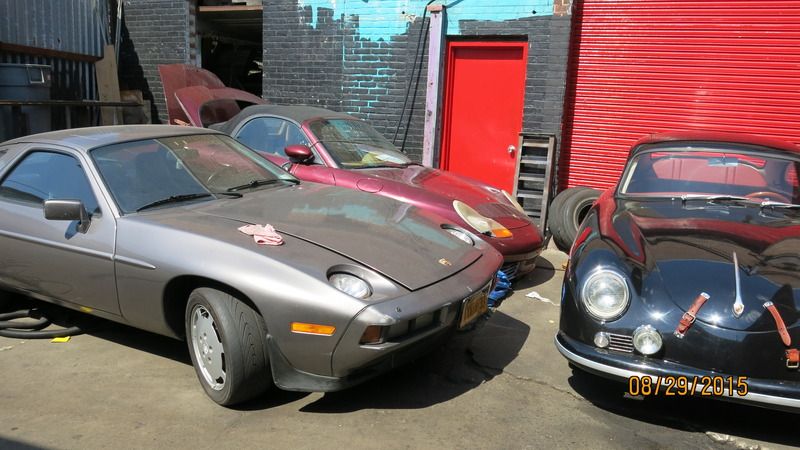
1st Boxster 7th Porsche, we now have 4 in the family
My daughter picked up a 2000 Boxster about 1 month ago to replace her '86-944 daily
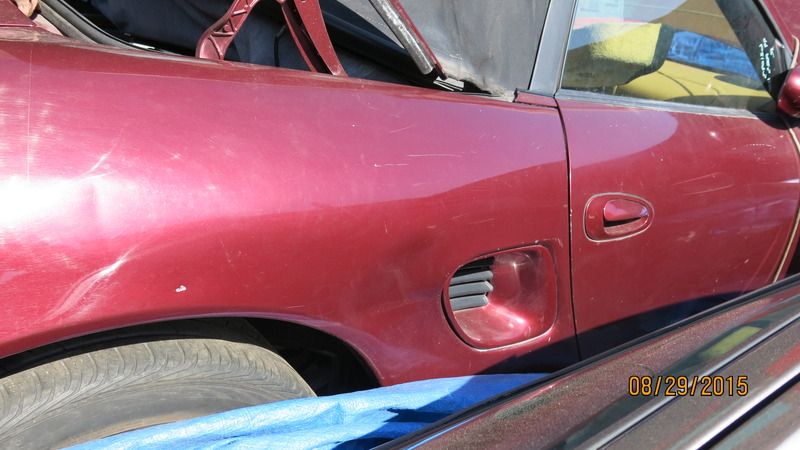
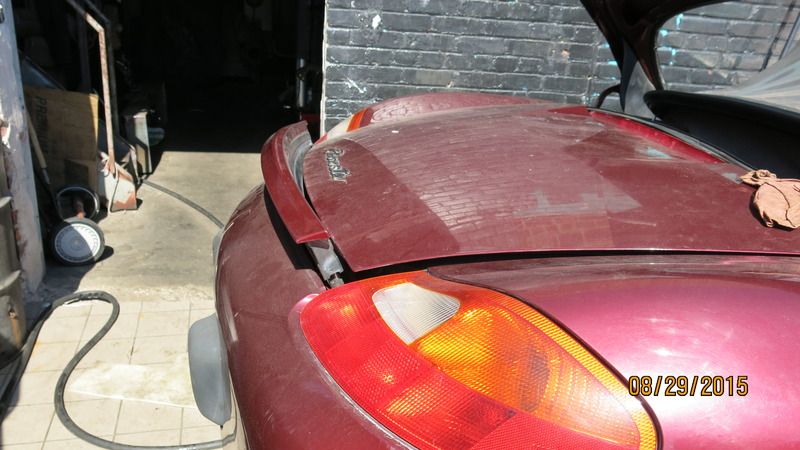
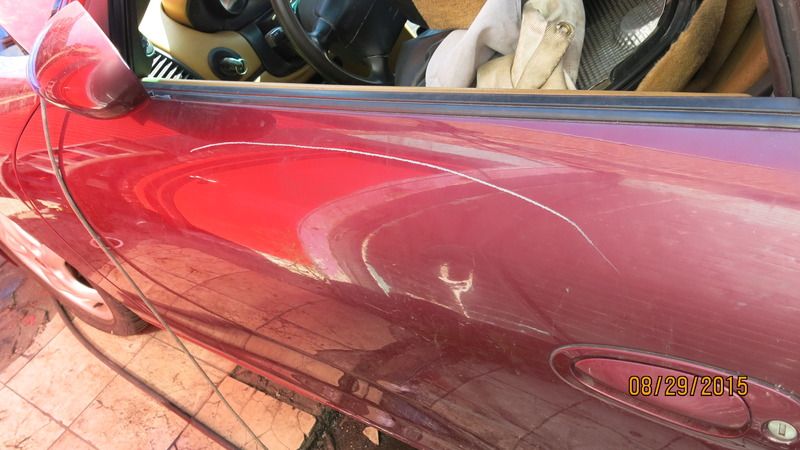
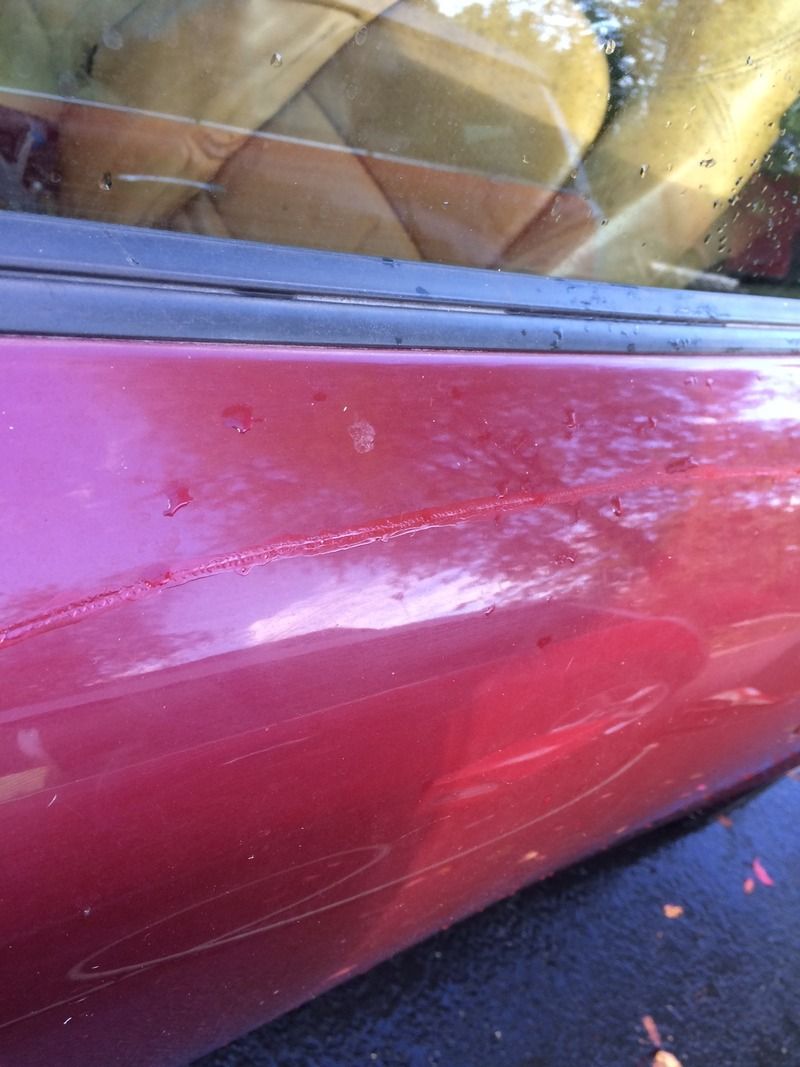
driver. We are in NY and she's in DC and the car was in Queens, so I went down, looked at it and made a deal for it. It was DIRT cheap ~$3000 for a running driving Boxster. This is a very tatty ratty car. The paint is terrible from a tarp being on it for months, tied loosely and micro scratched the hell out of every panel. It has some dents and bumps, along with being keyed on a few places, the worst on the drivers door.
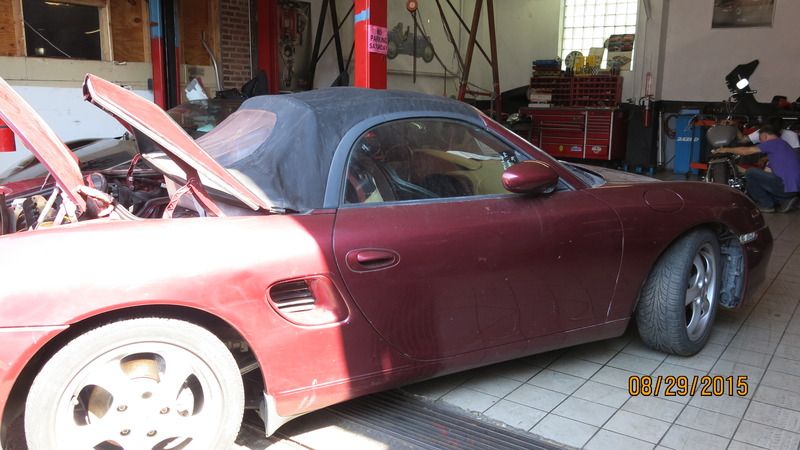
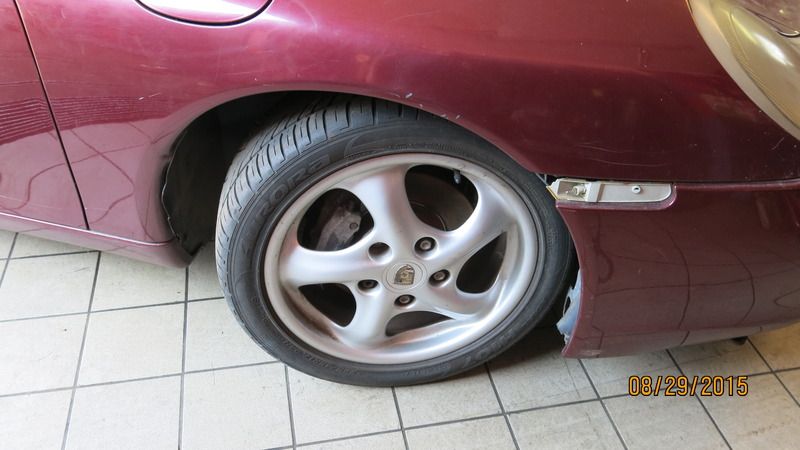
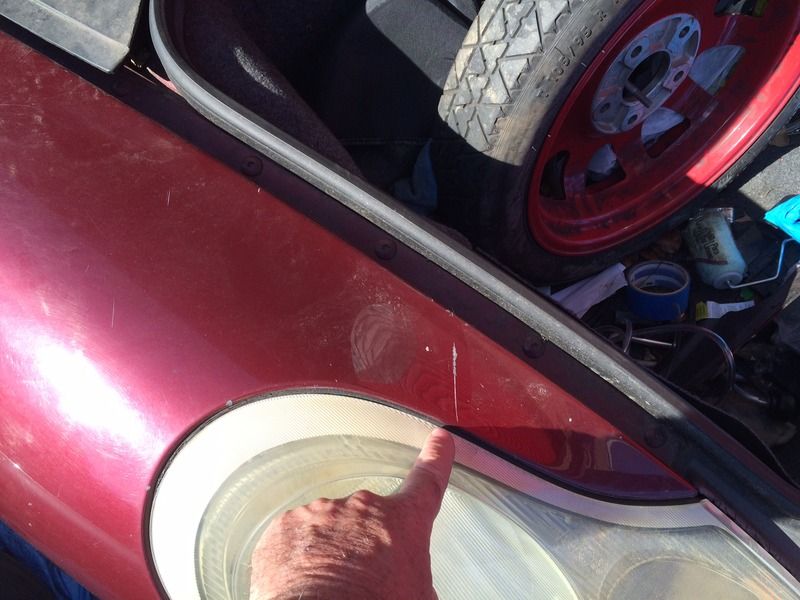
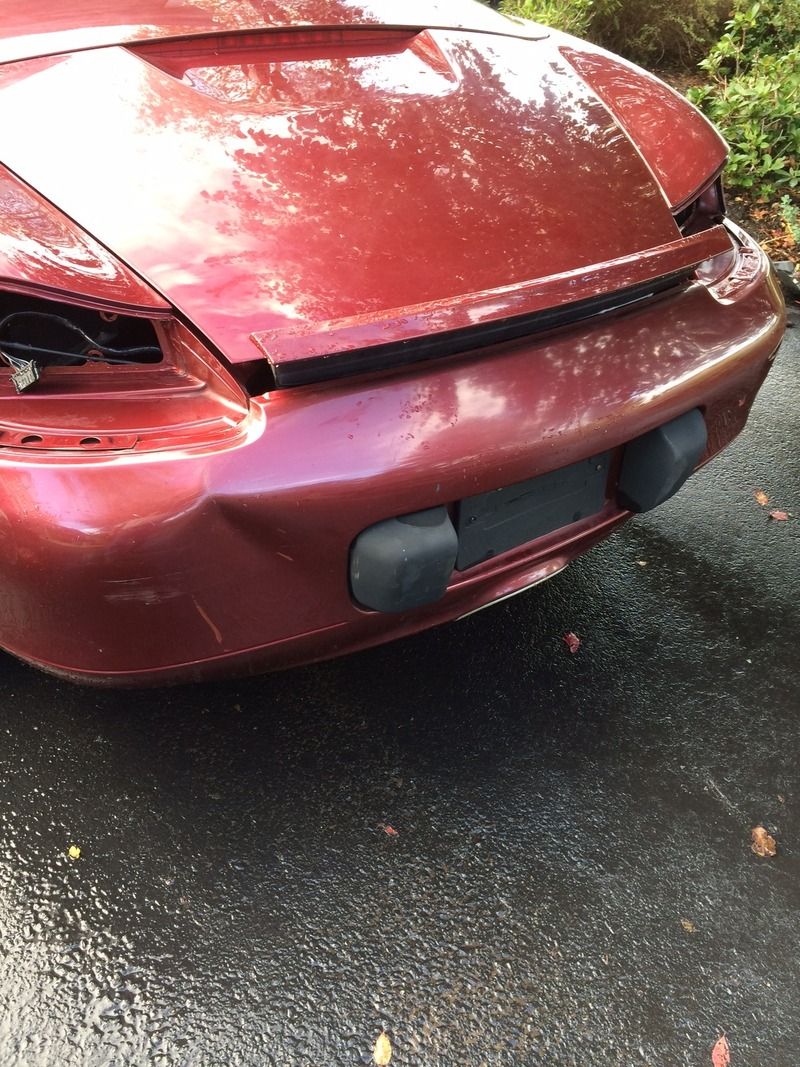
The 2nd previous owner had the top rod ends break with the top down and couldn't figure out how to pull it up. He parked it and put the blue harbor fright tarp on it and left it. Well, it didn't take long before the UV and local kids sliced the tarp and the car got rained on. This destroyed the alarm system and made the car a non runner. It was picked up by the 1-PO and repairs were started; alarm, ECU, ignition switch and key were all found used as as set and replaced. At the same time the car received a full brake rebuild; rotors calipers, pads and flush. The engine got new plugs, tubes, 3 new coils, cam position sensors, battery and a few other bits to make it a good runner.
When I got there to look at it, it wouldn't start. Not good for negotiating and making a sale! It seemed like it was out of fuel , so I went and got 5 gallons but still no fire. We didn't hear a fuel pump running so that was looked into and it was determined that the pump relay had given up and that was replaced. The car started up instantly and ran pretty good but not smooth with a few pops thru the intake or exhaust.
Now that it was a runner, I took it for a quick drive in the city, no plates, no insurance no brains.... Ran pretty good but I knew the computer was going to take time to relearn proper running settings. Nothing electric worked, nothing. No dash, no windows, no locks, no lights, NADA. Interior was thrashed and the seats needed to be replaced. Overall the interior looked like a Mongoose and Badger had been fighting in it!! But, under it all I figured there was a decent car at the right price.
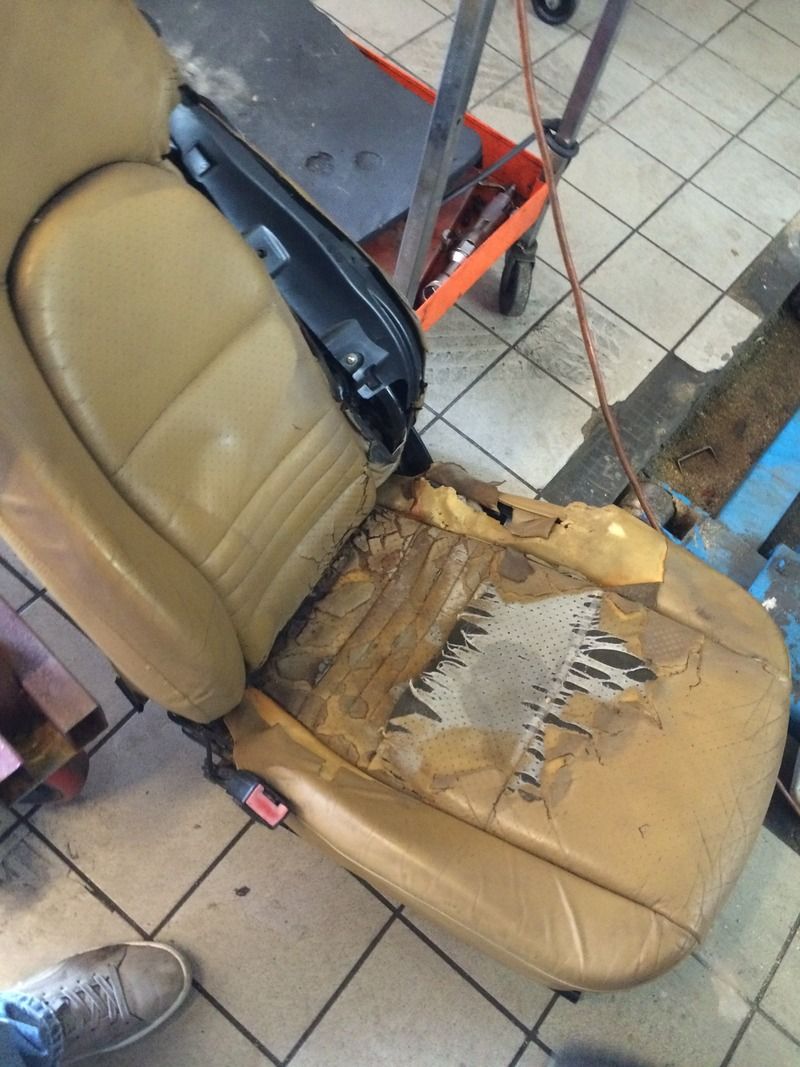
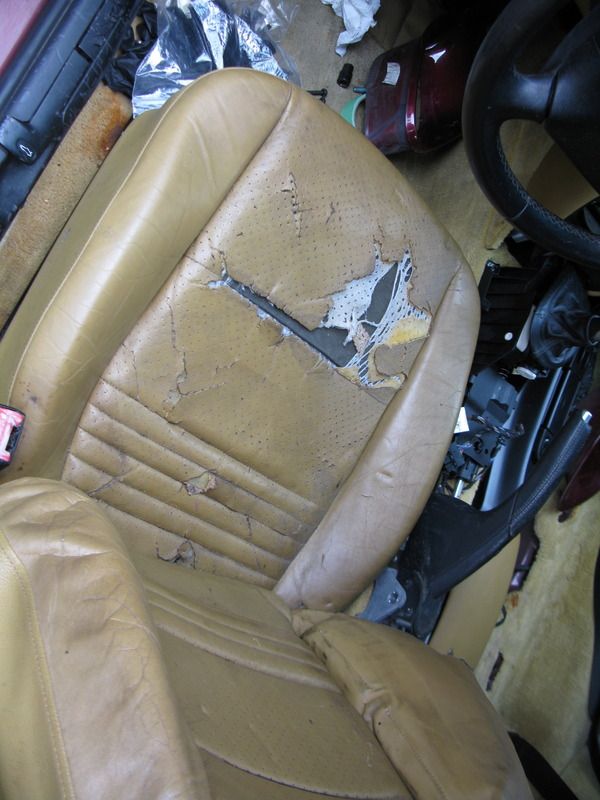
I sat and figured what it would need to make it a runner and a 10 footer on the exterior. This would move my daughter up to a 15 year old car from a 30 year old car, convertible top and one of the sweetest handling cars ever. She was paying for everything, so done on the cheep (Yankee raised) I figured $1500 should make it decent and reliable. The last PO had put about $1500 in parts into it already and the car had good bones, so she ran a car fax and bought it...Cheep.
Obvious absolute first needs:
Tires, Seats, Top Fixed and MANY electrical parts.
Optional needs:
IMS, Clutch (unknown age), interior bits and bobs, new muffler from Top Speed, new rear lights as one was broken.
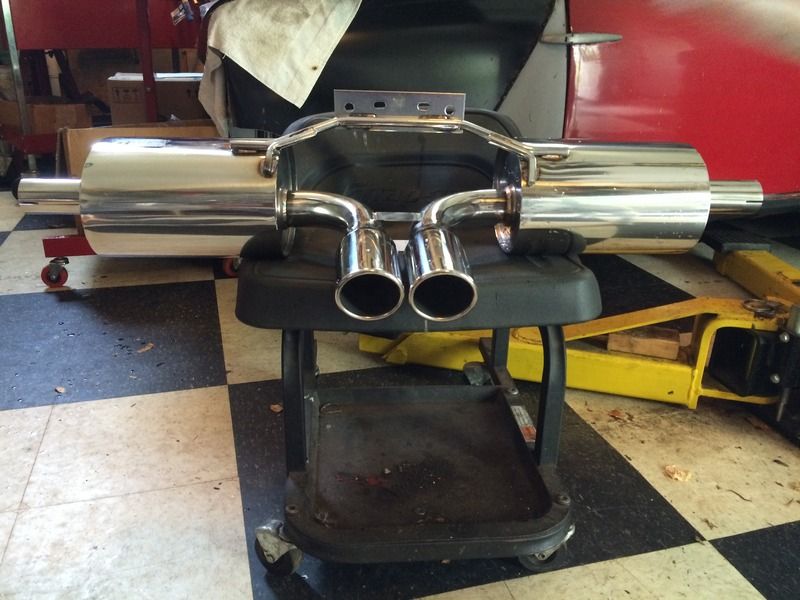
Tires ordered over labor day on sale from Discount Tires Direct. Woody (itsnotanova) supplied many of the electrical and interior bits for an AMAZING low price and delivered FAST to NY. Buy from him if you need parts, OK!
So the work began. Got the top fixed with used rods from Woody along with the new plastic ball ends from Source it on Ebay. This got the top working 100% but revealed the windows were not working right. The windows are complicated to understand but after much research, a new drivers regulator and some adjustment, they were goo 100% too. I pulled the dash and found that it wasn't plugged in!! all 3 plugs were just laying in there, plugged all in and wonder of wonders, that dash now worked! Central locking, not so much. Fiddled with that and gave up. Hey, she has a key to unlock the door :-)
I had the console out to recover the all messed up ( Mongoose & Badger death match) rubbery coating with Plasti-Dip spray and see if that was going to look good and last. Upon installing the console and plugging in the wires that connect to it and the cubby lock, well the central locking started to work 100%. It was the 3 wire plug to the cubby lock that was keeping it from working!!
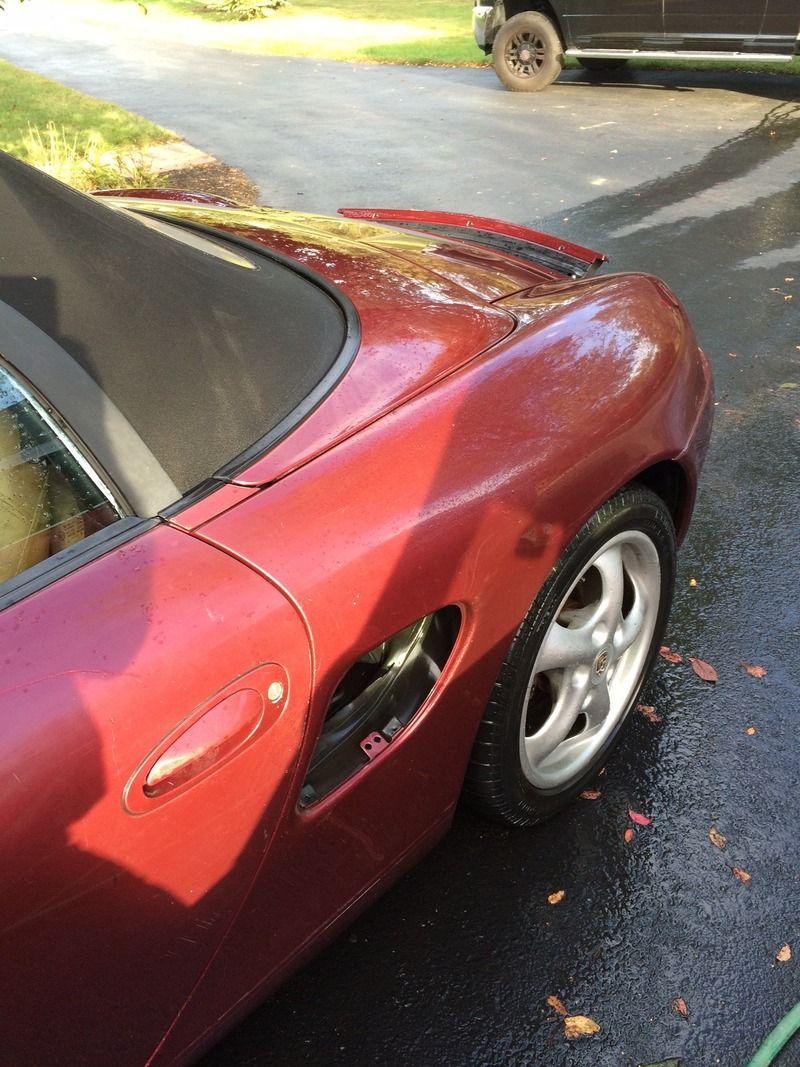
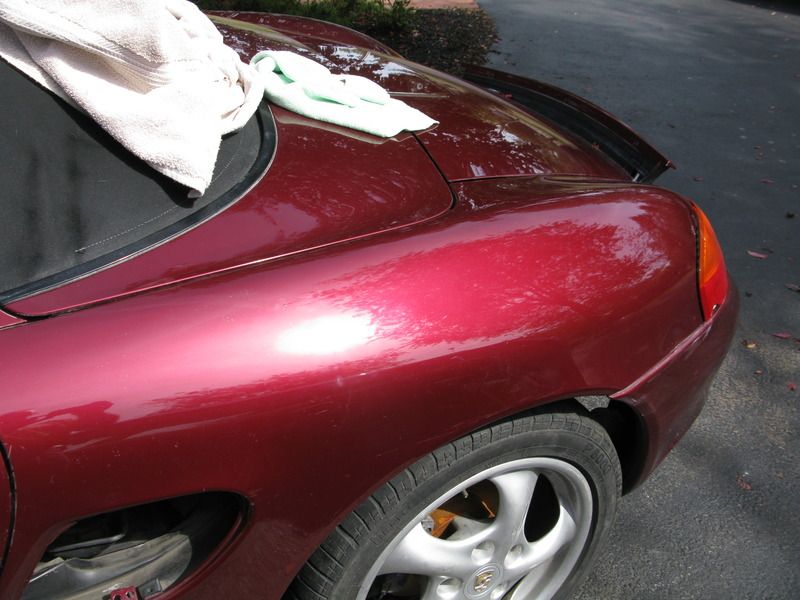
Now most electrical issues were sorted, top was working beautifully, locking was working, engine running better ( a few quick rides around the area. Country livin; no police!), time to get busy on the exterior. Ordered touch up paint from automotive in Arena Red and began the slow process of filling the HUGE key marks in the door and other areas. 3-4 coats with color and then fill the rest up to level with clear to give it a near factory look. Wet sand back to level, fill some small areas with more clear and polish. Well the paint is really hard and using my orbital, a hard pad and some heavy compound, the paint is just beautiful!! Of course this reveals more defects and so the process begins again, fill color and clear, sand polish. We were hoping to get it to a 10 footer in appearance, but the excellent quality of paint Porsche used at the factory and a really good polisher we look to get it to a 5 footer. This is a MASSIVE improvement over the paint on day 1.
New seats in Black not Beige have been bought from a forum member; Thanks Ed!!! Parts for the clutch and IMS had arrived, so it was time to move the Box into the garage and get it up on the lift for some major heart surgery.
Pictures and more of the story to come later. Uploads are going VERY slow today :-(
__________________
______
Jon
1966 912, 1976 911
1986 944, 2000 Boxster
Last edited by jcslocum; 10-04-2015 at 11:33 AM.
|

|

|
 10-04-2015, 07:50 AM
|
#2
|
|
Certified Boxster Addict
Join Date: Nov 2010
Location: Los Angeles
Posts: 7,669
|
Great story! I am sure that you'll have a big following on this project. Post up some pic's when you can, we'd all love to see what you started with!
__________________
1999 996 C2 - sold - bought back - sold for more
1997 Spec Boxster BSR #254
1979 911 SC
POC Licensed DE/TT Instructor
|

|

|
 10-04-2015, 10:04 AM
|
#3
|
|
Registered User
Join Date: Feb 2006
Location: Virginia
Posts: 1,754
|
Since your daughter is in DC, you may find this seller a convenient source for parts: Parting Out - 1998 Porsche Boxster 986
However, I would hate to take any business away from Woody.
__________________
2000 Arctic Silver/Black, Hard Top, On Board Computer
PNP Rear Speakers, HAES 6-Channel Amp, Avic Z140BH,
Painted Bumperettes, 2004 (OEM) Top, Homelink integrated in dash with Targa switch, 997 Shifter, Carrera Gauge Cluster with silver gauge faces, heated 997 adaptive sports seats, Litronics, silver console
|

|

|
 10-04-2015, 11:37 AM
|
#4
|
|
Project Addicted
Join Date: Aug 2015
Location: Eastern Shore, MD
Posts: 623
|
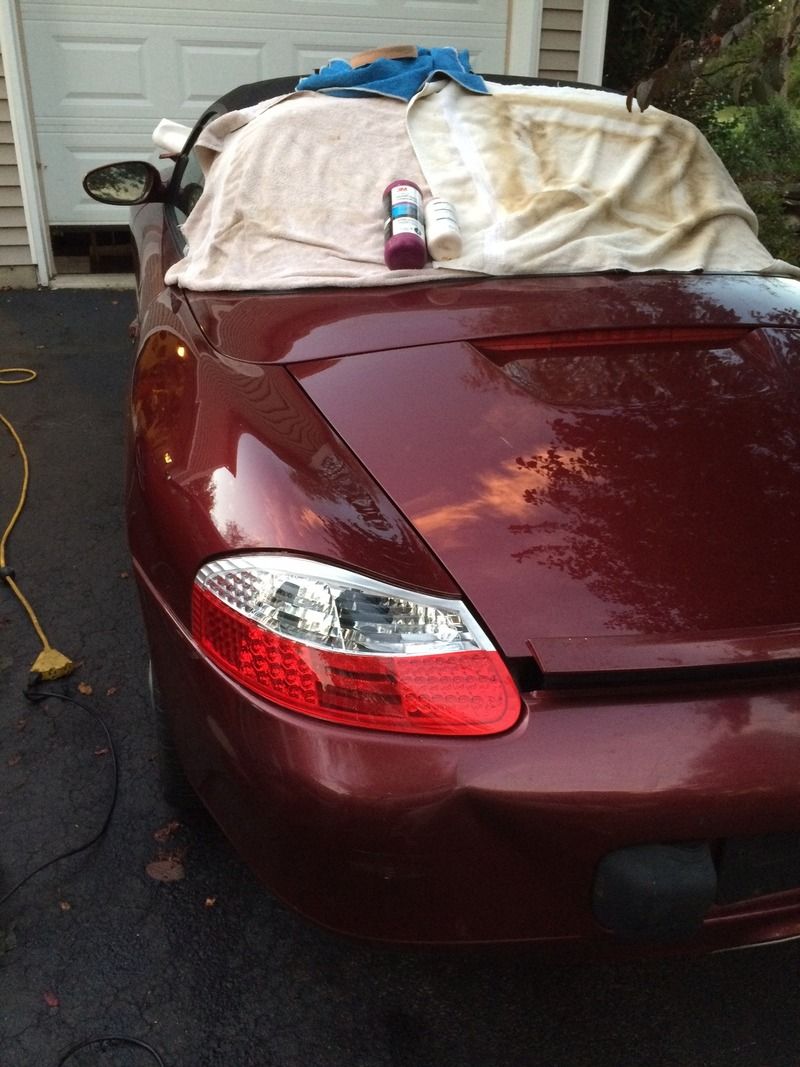
New rear lights:
Big key scratch in door getting filled.
Washed and Clayed but not polished
Polished not waxed yet. Need to do the full car first:
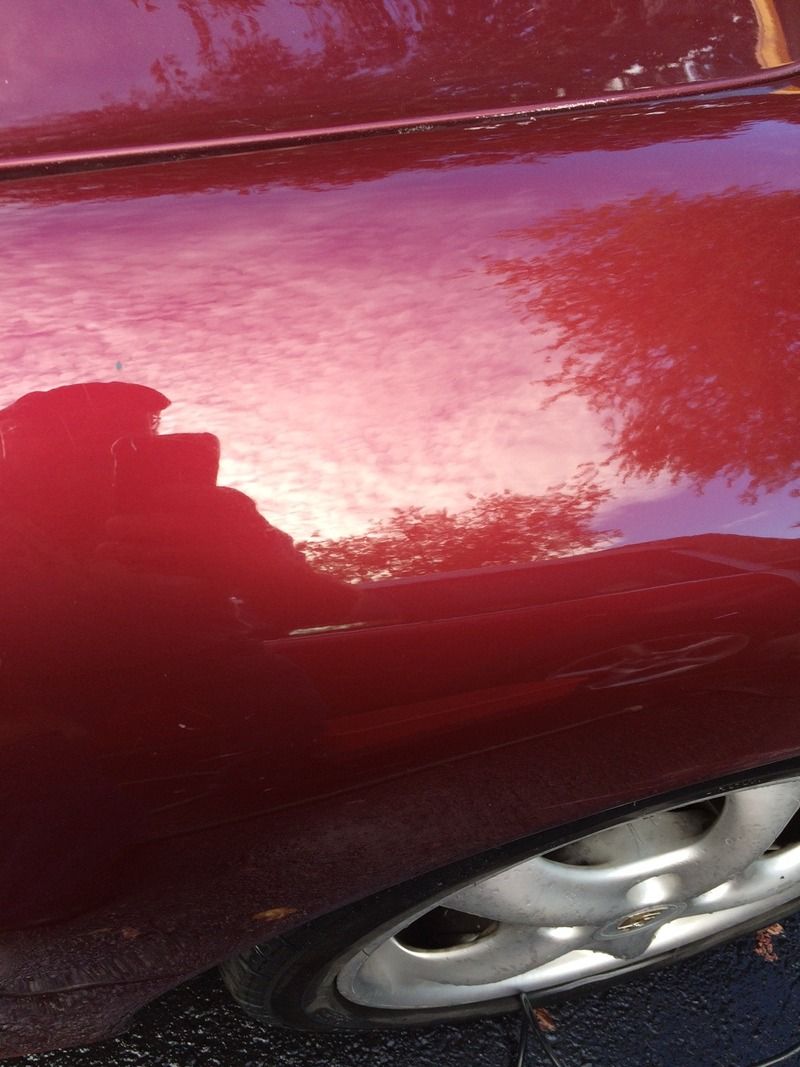
More to come as I get the pics uploaded. Bad internet day here in the sticks!!
__________________
______
Jon
1966 912, 1976 911
1986 944, 2000 Boxster
Last edited by jcslocum; 10-04-2015 at 11:50 AM.
|

|

|
 10-04-2015, 12:01 PM
|
#5
|
|
Registered User
Join Date: Sep 2013
Location: Chandler, AZ
Posts: 1,796
|
Nice work. Looks like your daughter will end up with a nice Boxster for very used Honda Accord money.
__________________
03 Carrera
02 Boxster S Guards Red, black interior with matching hardtop
89 Carrera 4
89 944 S2
78 911SC
|

|

|
 10-04-2015, 04:14 PM
|
#6
|
|
2003 Base 5-speed
Join Date: Jul 2015
Location: Stoneham, MA
Posts: 949
|
Ditto..........
Nice work! There's just something about seeing someone rescuing these cars fromthe crusher that makes me feel good.  to you, sir!
|

|

|
 10-04-2015, 05:08 PM
|
#7
|
|
Registered User
Join Date: May 2013
Location: Oklahoma City
Posts: 856
|
I'm loving this car already!
I did my own rat-rescue last year and still driving it with 151,000 on the dial and still kicking. 
I look forward to the updates and stories on this one. She's looking great!
__________________
"Remember, I'm pulling for ya! We're all in this together."
|

|

|
 10-04-2015, 05:49 PM
|
#8
|
|
Registered User
Join Date: Nov 2012
Location: SW Okla
Posts: 1,117
|
I love projects like this.
Have fun, don't get frustrated and post lots of pictures about what you are doing!

__________________
I think I have a Porsche problem...
|

|

|
 10-04-2015, 09:25 PM
|
#9
|
|
Registered User
Join Date: Sep 2002
Location: Northern NJ
Posts: 633
|
Great story. You need to find a guy gutting a 986 and just buy the entire interior., carpets and all. It's amazing what a full compound and polish will do to old tired paint. Great story and turn out. i guess boosters are now barn finds.
Great post.
__________________
LB/GG/MB 02 2.7 sold
MB/GG 02 996TT
|

|

|
 10-05-2015, 04:34 AM
|
#10
|
|
Project Addicted
Join Date: Aug 2015
Location: Eastern Shore, MD
Posts: 623
|
Quote:
Originally Posted by KevinH1990

|
Woody has been great. But the car is in NY at the moment getting freshened up so any parts have to be shipped here anyway. When woody doesn't have something, we troll CL, so thanks much for the lead!
__________________
______
Jon
1966 912, 1976 911
1986 944, 2000 Boxster
|

|

|
 10-05-2015, 05:44 AM
|
#11
|
|
Project Addicted
Join Date: Aug 2015
Location: Eastern Shore, MD
Posts: 623
|
Here are some more small projects that have been done when frustrated getting the electrics to work or waiting for parts to come.
Interior all messed up filthy, even the small stuff!
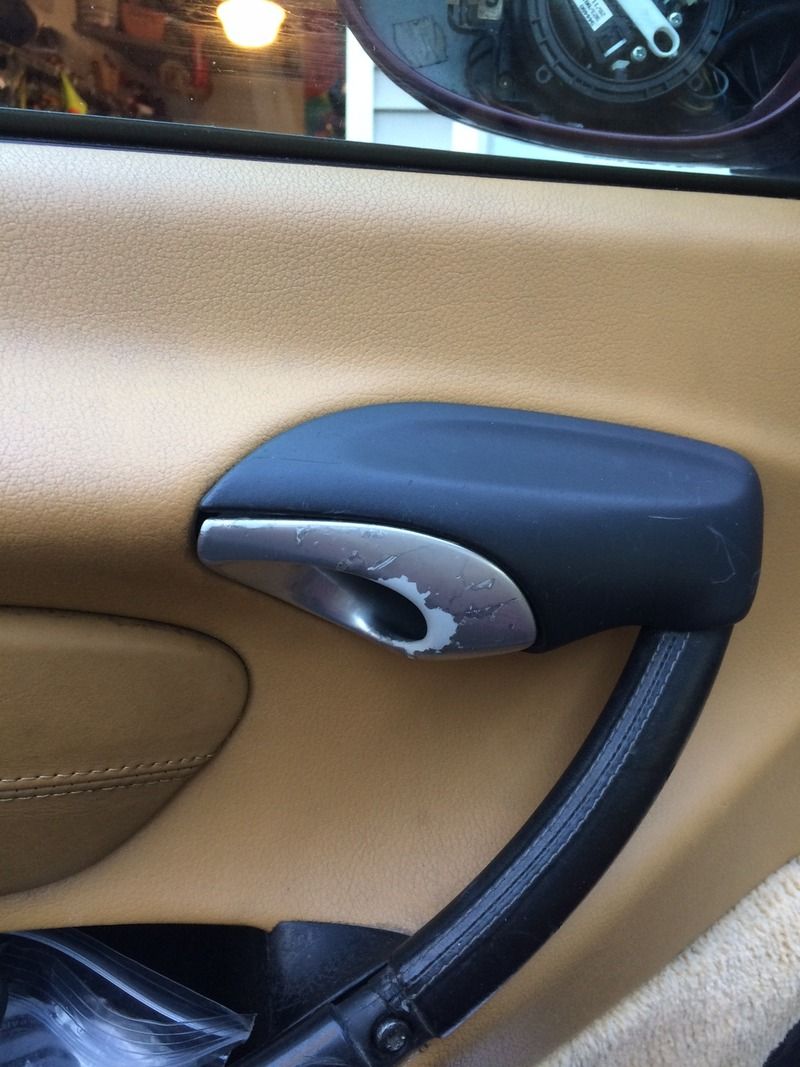
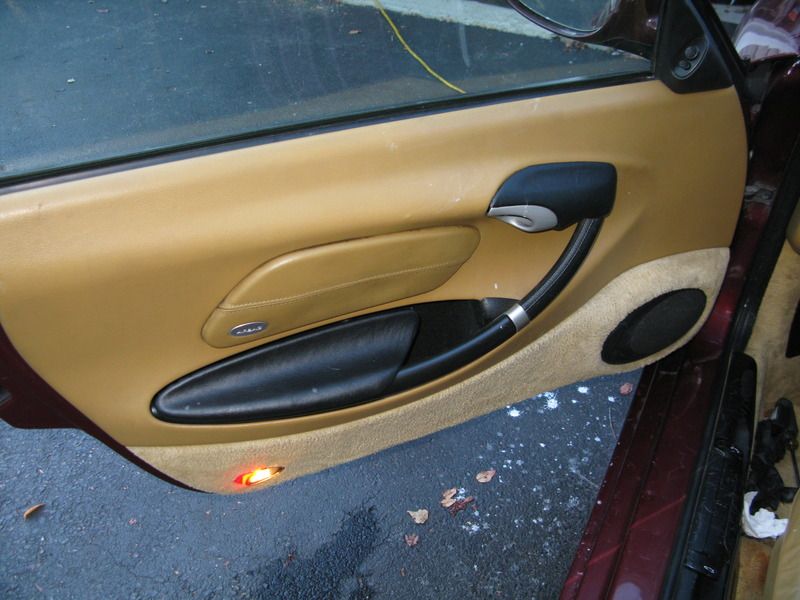
Barb, Allie's mom and resident seamstress and all around renaissance gal, covered the arm rest and handle cover in leather.
We all think the Boxster has some weak styling cues, so in order to add a bit of excitment to what I think are some boring slab sides with too much Arena Red, I painted the vent grills to match the wheels.
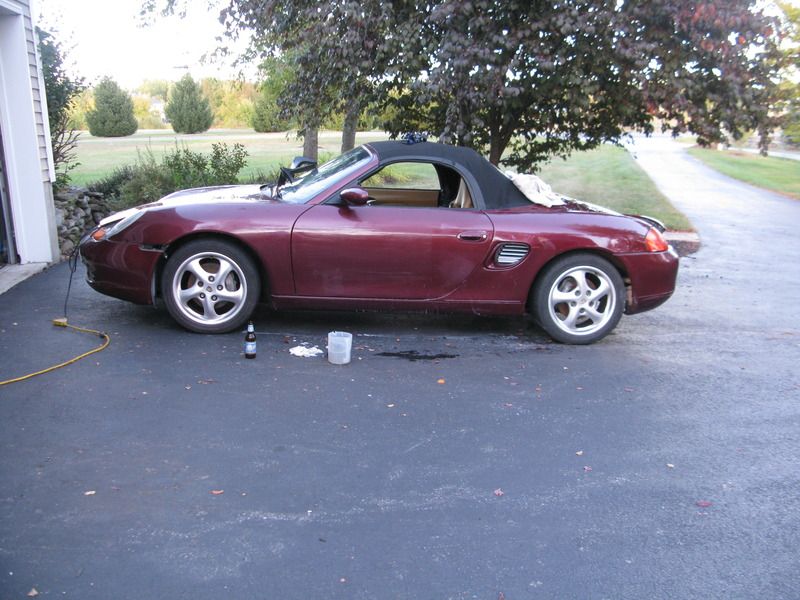
A small thing, but it adds a bit of visual interest and color. I also have polished up the very cloudy/milky headlights and we will add the smoked side marker lights too. The orange doesn't go well with the red. I have some light window tint and will try this on the front orange areas to see if that helps... You never know and I had it laying around.
I also fixed the cubby cover hinge. The hinge was snapped off and I thought it was part of the lid, so when I ordered on from Woody to replace the cover that had been shredded in the vermin death match, that I would get the hinge too. Well, no, that NOT how it works, the hinge is part of the console! Luckily Porsche make a nice hinge repair kit that is very well thought out and is quite easy to install.
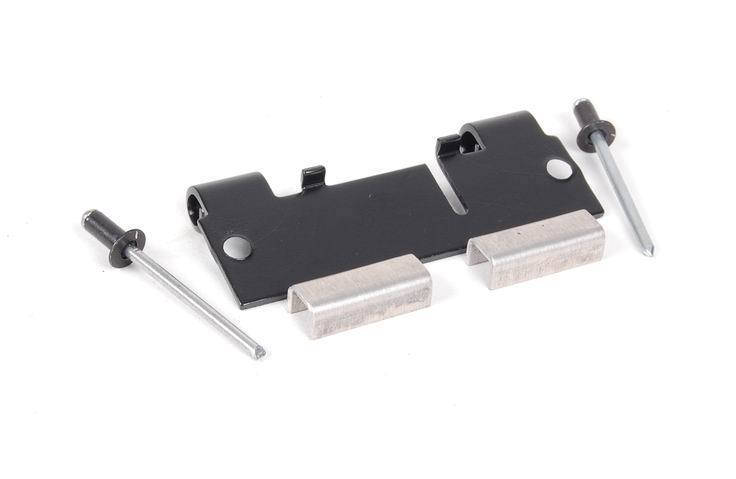
A new metal hinge is good. 10 minutes to install and the cubby is all fixed!
The ignition switch was also acting up. Everything operated properly )once Igit things working from other issues) but it didn't return from the start position to the ON position and when the key was pulled out, the bell sometimes continued to ding. I pulled the dashboard vent and the duct out and it then took about 5 minutes to replace. Right hand in the duct hole and one hand up from under the dash. I used a small flat edged screw driver bit in a 1/4" drive ratchet and the screws backed out very easily. Pop new switch in, and Audi switch for something like 7 bucks, and tighten up again with the ratchet. Getting and using small screwdriver in there and then rotating it was just too much work!!
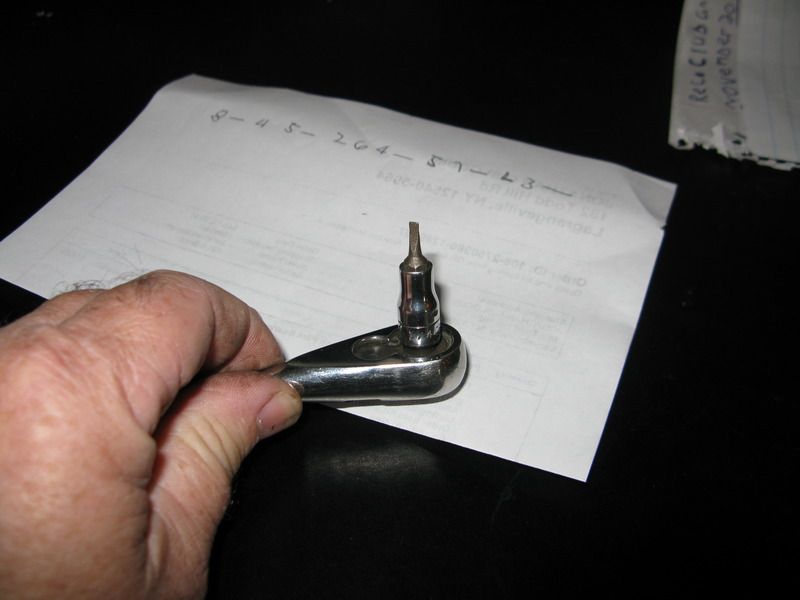
New ignition switch works like it should and might have fixed some other issues I didn't even know about... yet.
The headlights were working except for the low beams. Well I thought this was going to be the rotary light switch, so one of the goodies Woody had sent me was a new (used) working switch. Well, that wasn't the problem! Some PO had installed HID lamps and the rest of that stuff and both were burned out!! Who would have figured both would go bad. I only figured this out fully once I pulled the headlights and started checking the plug for voltage. 2 new H7 bulbs and we were back in business with lights!
A full interior would have busted the budget of $1500 and as a cheep yank, that just isn't done unless it's a critical mission or safety part. Most of the interior has cleaned up exceptionally well and new seats will be the only thing needed. Porsche uses good quality stuff inside except for the rubbery crap and the sticky radio knobs.
The next post will be about the IMS replacement that was done this weekend.
__________________
______
Jon
1966 912, 1976 911
1986 944, 2000 Boxster
Last edited by jcslocum; 10-05-2015 at 05:50 AM.
|

|

|
 10-05-2015, 06:54 AM
|
#12
|
|
Registered User
Join Date: Jun 2012
Location: Bedford, TX
Posts: 2,755
|
Fantastic! Your daughter is a lucky girl, almost as lucky as this Boxster! Great to see a car like this go to a good home 
__________________
______________________________________________
2001 Boxster S Lapis Blue
TS Cat Bypass Pipes and exhaust
iPad Mini Dash Install
DEPO Tail Lights
|

|

|
 10-05-2015, 07:47 AM
|
#13
|
|
Registered User
Join Date: Nov 2004
Location: New Jersey
Posts: 8,709
|
How the heck did someone let a fairly modern car get that out of shape?
And who were these kids that did all this damage? ISIS recruits? Good lord...
I'm curious to see what you come up with on the cloudy headlight lenses.
I had to replace one of mine and now they don't match, the older one has a developed light greenish 'eye lid'. I'm hesitant to spend more $400 on used parts like.
__________________
GT3 Recaro Seats - Boxster Red
GT3 Aero / Carrera 18" 5 spoke / Potenza RE-11
Fabspeed Headers & Noise Maker
BORN: March 2000 - FINLAND
IMS#1 REPLACED: April 2010 - NEW JERSEY -- LNE DUAL ROW
|

|

|
 10-05-2015, 08:17 AM
|
#14
|
|
Project Addicted
Join Date: Aug 2015
Location: Eastern Shore, MD
Posts: 623
|
I'm the lucky dad!! She's a great gal and has been my garage buddy since a baby. We have 4 girls and they can all change a tire but Allie is a real gearhead. She has an instagram account @theporschegirl where she updates some of the work she does. She's a little bit famous on Pelican for building her own 3.4 engine for her hot rod '76 911.
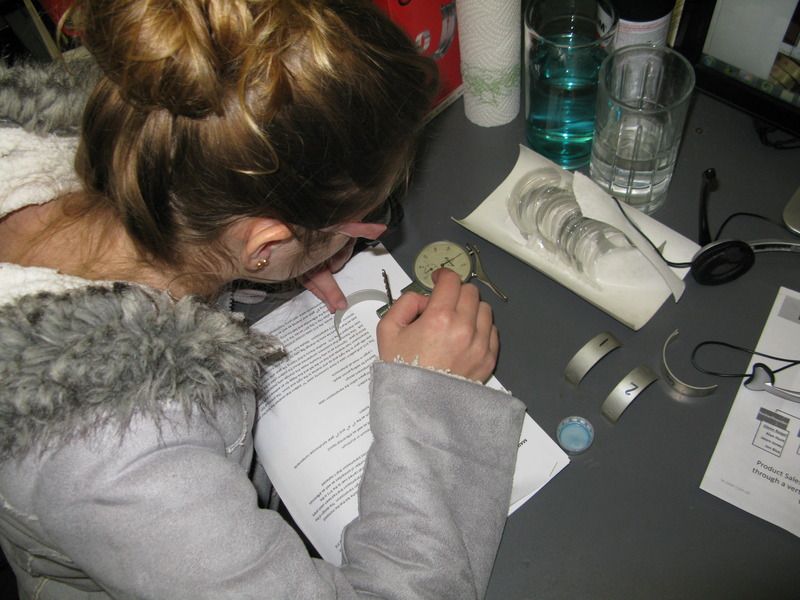
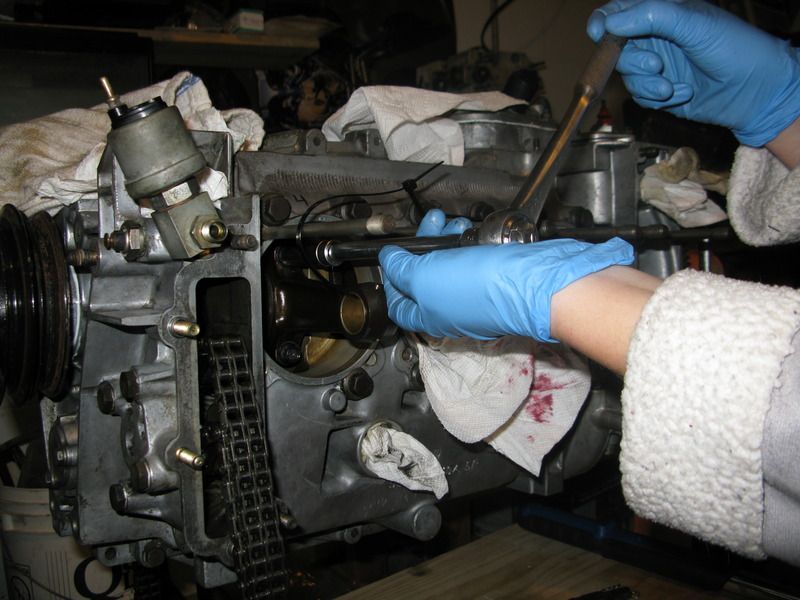
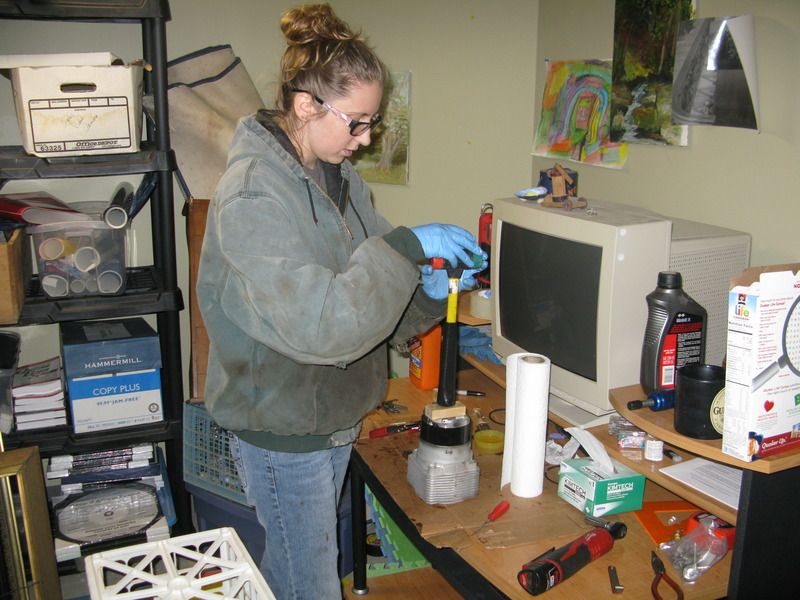
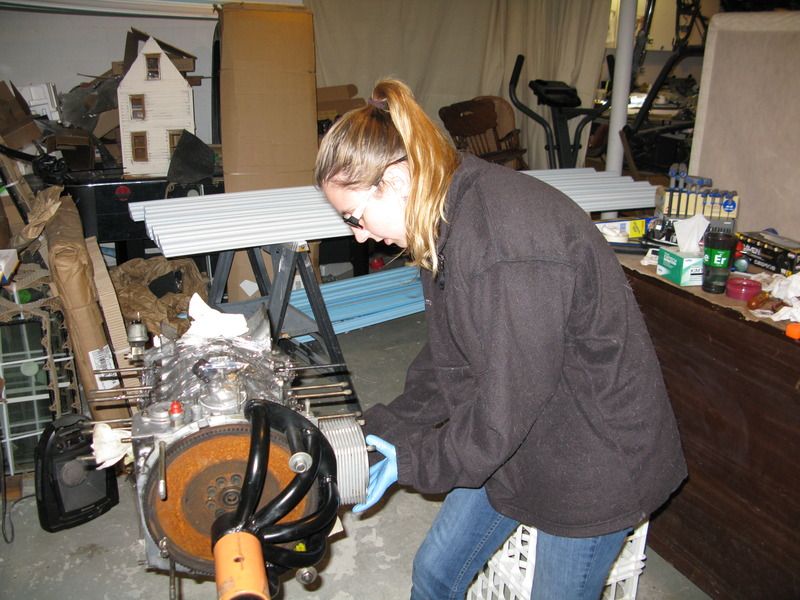
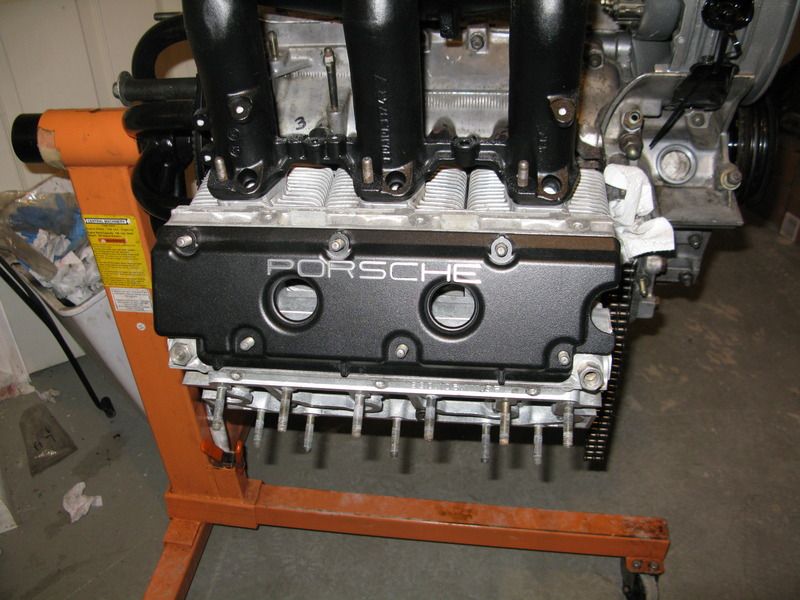
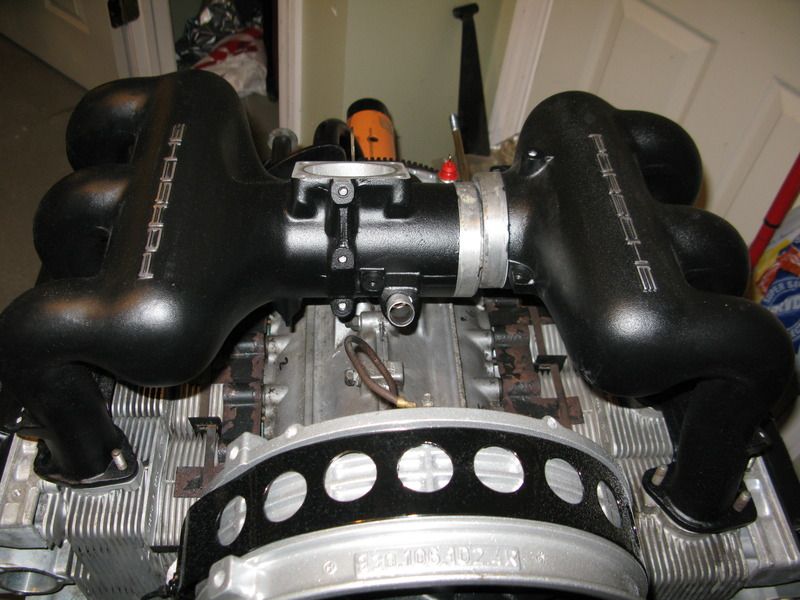
She is also an excellent welder with TIG, MIG and Gas. She does all of her own maintenance on her 944 too and helps me with my projects by doing all of the welding.
If the car was in better shape and in DC she would be doing all of the work. But I have the time and she has the small budget, so the work gets done here for now.
The car was parked on the street in Brooklyn so the kids are just local kids with an easy target that didn't move and the owner didn't care about. Sad but true and it worked in our favor. There are not many cars that can be bought this cheap, have so much potential and intrinsic value. She will keep it for a few years, sell it on and try to move up to a Cayman or 911 as DD and keep her 911 as a play car.
The downside to this is that it makes dating quite hard!! She meets guys that want to talk cars and they tell her about the new LED washer nozzles, Soup Can muffler and huge stereo amps and she has to bite her tongue and not talk about building engines and welding on cars. It's a bit intimidating for guys her age.....
__________________
______
Jon
1966 912, 1976 911
1986 944, 2000 Boxster
Last edited by jcslocum; 10-05-2015 at 08:20 AM.
|

|

|
 10-07-2015, 03:05 PM
|
#15
|
|
Project Addicted
Join Date: Aug 2015
Location: Eastern Shore, MD
Posts: 623
|
Work on the Boxster continued this past weekend. Time to replace the IMS bearing as it was an unknown and no risks will be taken. Pulled the muffler out and 1/2 of the bolts broke off as well as a shower of dirt and road stuff fell from all around. Wear safety glasses when working on the ultra HEAVY muffler!! Got out my hex bit and removed the CV joint bolts with a 12" extension and my wonderful 3/8" cordless Milwaukee impact gun. Zip, Zip,Zip and they were out. No sweat.
Tried to drain the trans oil before dropping it but it has a stupid security triple square drain plug!!! Who thought this was a good idea?? Triple square is rare enough in that size but a security tool is needed too?? Really? Have kids been stealing boxster trans plugs?? Do folks just take them out for fun like the do restroom stalls? This genius idea had me putting quarters in the swear jar and caused a trip to the store to buy one.
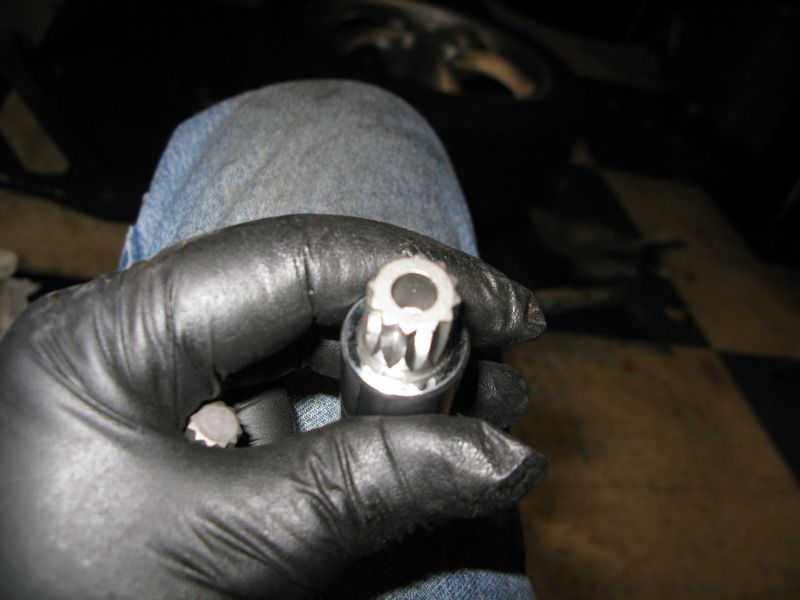
I found what I needed with about 1 inch of dust on it, hanging on a peg board over where the store cat sleeps. Got home, drained oil, made a mess, put more quarters in the swear jar, took apart the shift linkage. Shift linkage was sloppy due to the pivot pin at the back being loose in the bracket. 122K of shifting had caused the staking of crimp they out on the part to wiggle and allow lots of movement. I re-staked it and it was once again nice and tight. I lubed up the pins and got it back together.
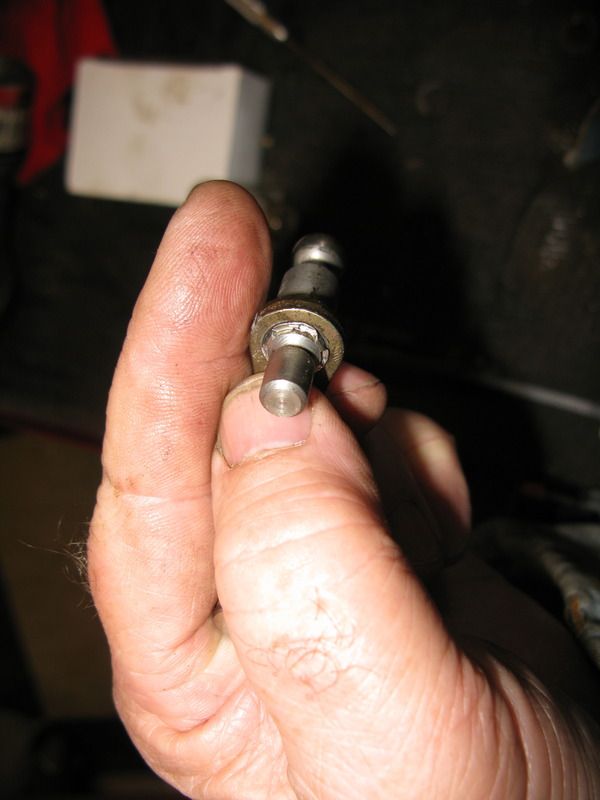
I like to fix this stuff as I go so It doesn't get left to the last minute or skipped altogether. Bad memory and all that :-)
Time to drop the trans but first had to make a support for the engine. I was not going to use a jack stand to hold the engine up. I wanted to use the lift to drop the car, pull the trans on a cart and then lift the car to remove. I had some stuff laying around that worked perfectly.
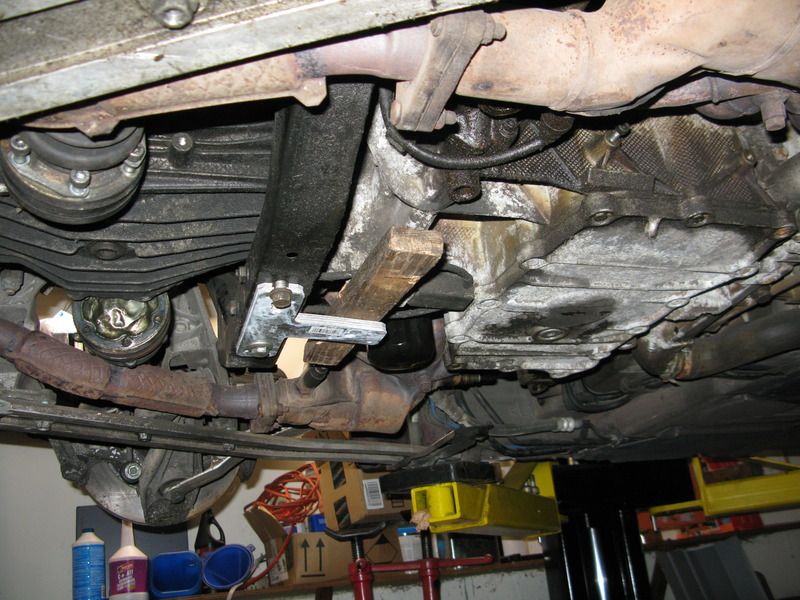
Unbolt the trans mounts and begin pulling the trans bolts, except for the easy to reach 2 on each side. I once again run into the same genius that designed the drain plug as he has used a single triple square bolt to hold 1 position on the trans too!!! At least it wasn't a security style bolt head. I happen to have this smaller size in the tool box BUT it's so tight that it won't fit. My bit needs to be cut down to fit, so grab the grinder with a thin disc and get blacksmithing. Once out, I call my better 7/8ths to come and run the lift as I will be struggling under the car to get the trans disengaged. Cart in position, lift dropping, trans sitting on piece of plywood and we run right into Herr bolt doofus again!! One position has a stud thru a hole in the engine. This limits the amount of shaking and pushing you can do, which makes the trans much harder to get loose and pull back. After a few more deposits into the swear jar, the trans pops loose and the car is lifted away. Trans is sitting on "Ike" may favorite tool cart :-)
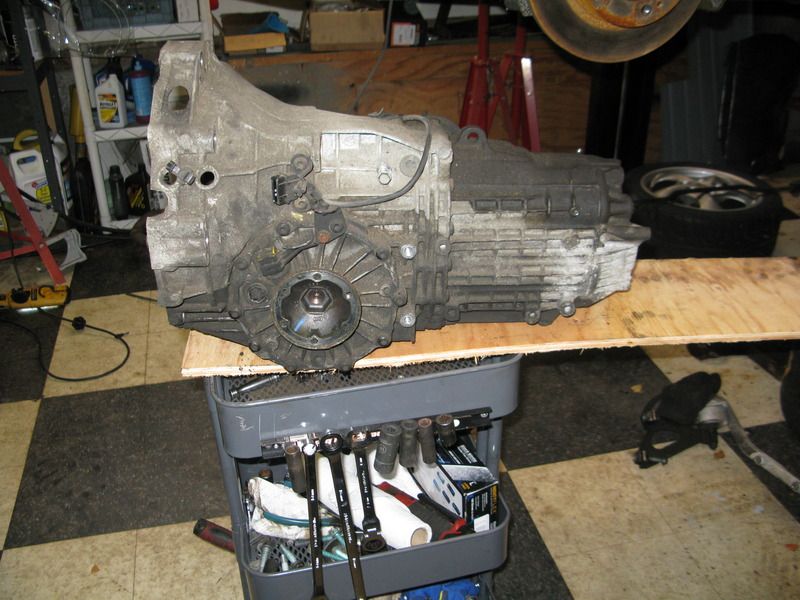
Ike is a great helper. He can hold a light just where I want it, can take up to 300 lbs. on his back and not get tired, he doesn't take breaks, get tired or drink my beer. The only downside is he's a mute and does not contribute to the swear jar which is my beer money.
Trans out of the way, pull the pressure plate and get a look at the clutch. Clutch looks just OK, has a manufacturing date of 2009 but when measured it about 0.045 thou thinner than a new disc. I'm not doing all of this work to put a more the 50% worn clutch back in. I'm a cheep yank but value my time more than that. We had a new clutch in already so it was no loss or added expense. I got to looking at the flywheel and it has more movement than I wanted to see and I'm not super familiar with the dual mass flywheels. I went to the google and found that 15mm is the wear limit at the outer edge. I made some marks and measure it to be about 25mm movement total.
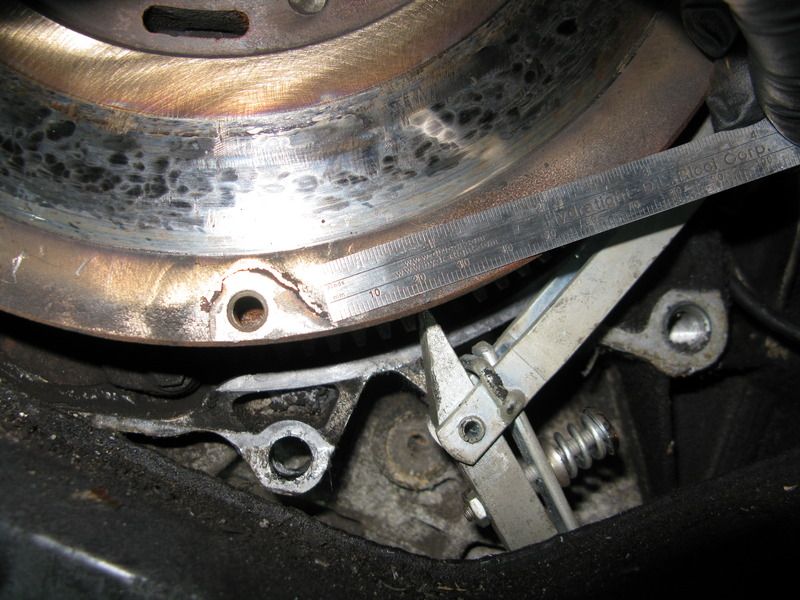
Now this wasn't in the budget! These bugger are expensive, so I found a slightly used one on fleabay for $50 and it was one state away, so it could get here quick. made the buy and it should be here tomorrow. On to the bearing part of the story.
__________________
______
Jon
1966 912, 1976 911
1986 944, 2000 Boxster
Last edited by jcslocum; 10-08-2015 at 06:27 AM.
|

|

|
 10-07-2015, 05:21 PM
|
#16
|
|
Registered User
Join Date: Sep 2013
Location: Chandler, AZ
Posts: 1,796
|
Nice work.
How did the transmission mount look? Most are shot at this stage but yours may have been replaced at some point. You may want to replace it anyways since you are already in there. Just trying to help you spend your money/save work later.
__________________
03 Carrera
02 Boxster S Guards Red, black interior with matching hardtop
89 Carrera 4
89 944 S2
78 911SC
|

|

|
 10-07-2015, 07:56 PM
|
#17
|
|
Project Addicted
Join Date: Aug 2015
Location: Eastern Shore, MD
Posts: 623
|
Trans mounts seem ok. No oil leaks and no tears in the rubber, The engine mount on the other hand is SHOT. We have the new bushing to go in after trans gets back in.
On to the Infamous bearing!!
Impact gun to take off the Flywheel and this reveals a bone dry rear main seal. I like this and we do have a new one but I will leave well enough alone.
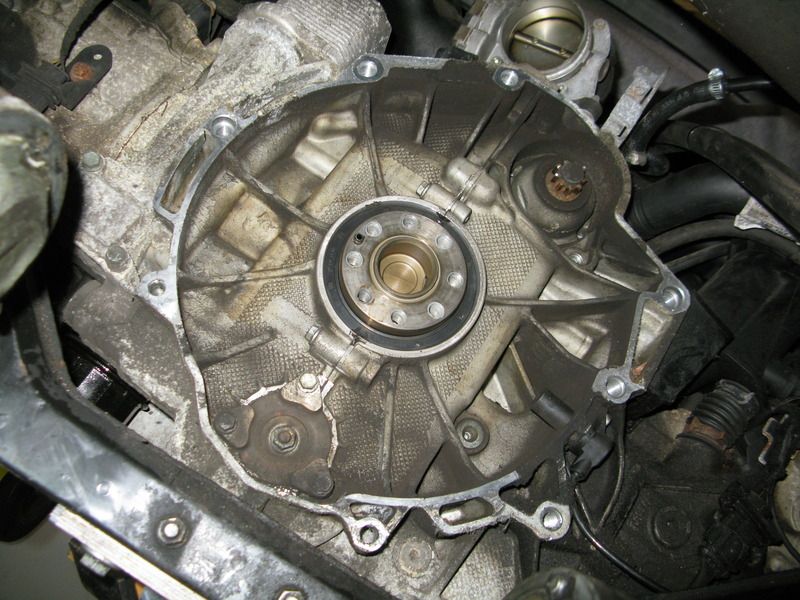
IMS cover is also dry, wonder what that means. Pull the cover and get assaulted buy very foul smelling oil. It's really BAD!! What a stink. Missus 7/8ths comes out and asks what died in the shop. I tell her it must be a rotting bearing hidden away in here...
This is where my really cheep Yankee nature hits head on with a bit of talent and cleverness. I'm just not buying a bearing puller for a couple of hundred bucks. I'm sorry but that is just how it is. I try to buy the BEST tools I can find for my hobby but I can't do it. So, I got my new bearing and did some measuring and found that a pipe of 2" ID will allow the bearing to be pulled and fit onto the shoulder of the shaft. I picked up some 8mm threaded rod and what are called "coupling" nuts. These nuts are for joining threaded rod and are about 8 times taller than a regular nut. So, armed with my $2.79 piece of 2" ID exhaust pipe, $3 worth of threaded rod, 80 cents worth of coupling nuts I have a IMS bearing puller. After seeing the cover I know that our 2000 has the double row bearing and I have my doubts that this will work with the wire ring they use as a keeper on the OD if the bearing. But, I have about 6 bucks invested and know I can make it heavier if I have a failure. I will admit that this was not 100% plug and play puller time. The bearing stud is an 8mm fine thread, while the nut is 8mm coarse. No biggie tho, I yank out my 8mm 1.0 tap and rethread the coupling nut on one side. This is what it looks like:
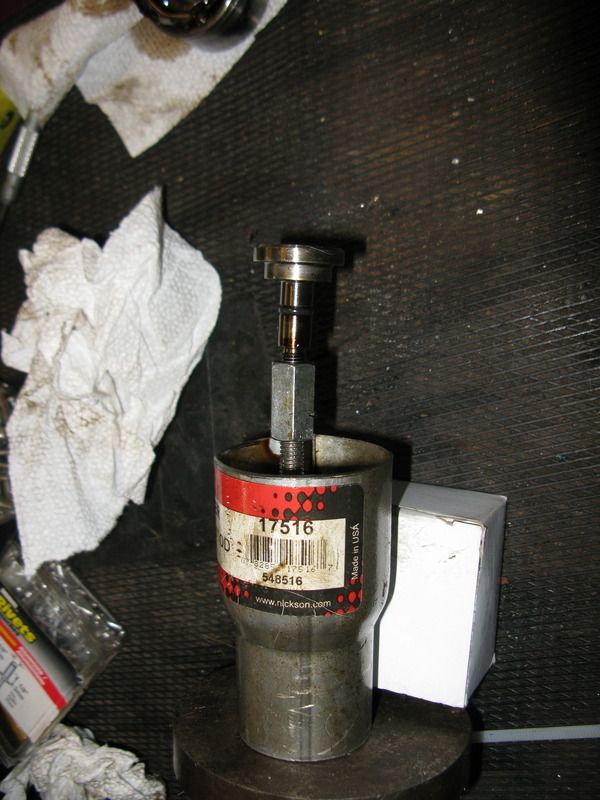
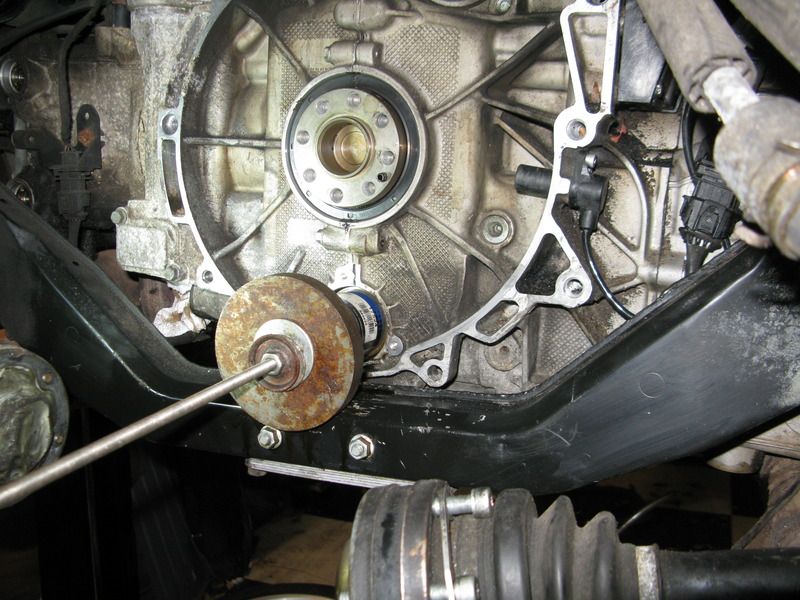
A simple tool with some discarded steel and some washers. Install the coupling nut onto the bearing stud first, then thread the rod on and build the puller onto it. Lube up the threaded rod coupling nut to keep the friction low. I used a moly paste that I have laying around. It's the same gunk used in the CV joints, very slippery stuff. Perfect for this application.
Center the puller in int hole on the shaft shoulder and begin the tightening process. It takes a bit to load everything up but eventually it will get quite hard to turn. This is when you go get a drink refill and let the load sit there. Come back after 3-5 minutes and tighten it up some more. Lets it sit with the load on there. My next step was to loosen the puller fully and then tighten again. I have learned this over the years that is takes time under load as well as the dropping of the load to break the corrosion and bond that the 2 metal parts have formed. On the second tightening sequence, I get up to about the same load and POP the bearing comes loose. I continue to crank away at a very low load until the bearing comes free of the shaft. Now I have really let the stink out!! Holy COW does this stuff smell bad!!! I put my finger into the shaft to get some of the oil and it/s stinky, sludgy, thick and a bit gritty. It's BAD stuff.
I clean all that mess out and get ready to do the install. I had placed my bearing in the freezer with the aluminum install driver mounted. I wrapped a rag around it so my hand wont begin to warm it when I pull it for the 8 second walk to the garage. I grab the trusty heat gun and begin heating the IMS at the 8, 4 and 12 o'clock positions for about 20 seconds each. When I started the shaft was 62 degrees as measure by a laser thermometer.
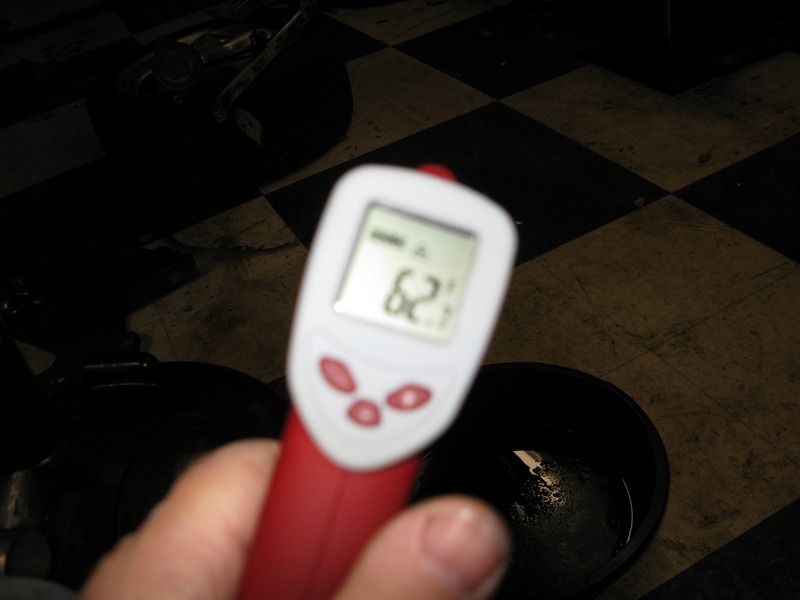
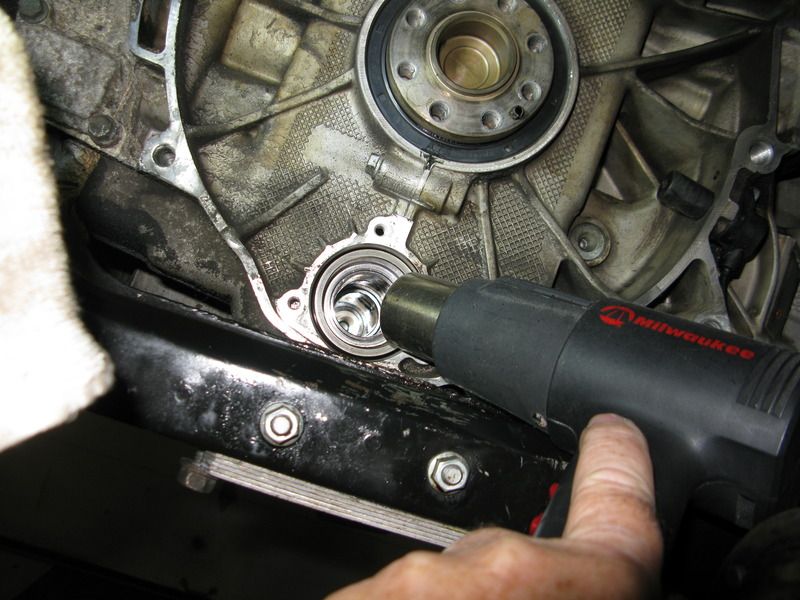
When the shaft reached a temp of 170 in all 3 places, about 4 minutes, I shut down the heat and quickly trotted to the freezer for my bearing, grabbed it and ran back out to the shop. I introduced Mr. Bearing to Mr Shaft and the bearing slid right in. NO hammering required. Like is was greased up with butter! My freezer had gotten it down to -3 degrees over the 24 hours it was in there. The temp difference allowed for a clear fit and then as soon as the temps equalized, the bearing was locked in place. I had followed instruction to quickly apply some Loctite to the OD of the bearing. Some grease on the the cover seal and that was mounted and I used the 3 bolts to bring it fully into position and then torque everything up properly.
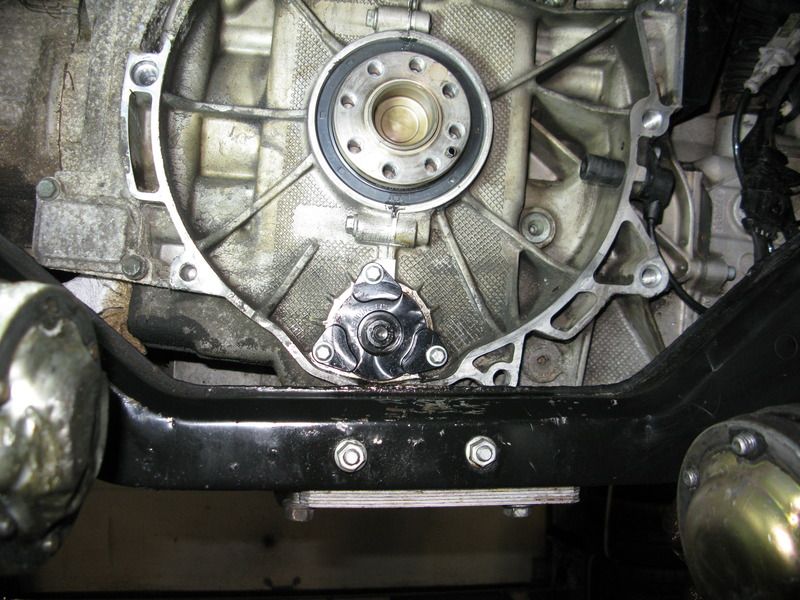
I used an EPS roller bearing for this application. I like the roller design here where the radial loads are high and the ability to oil feed it. They make a nice complete kit with bearing, bolts, driver, oil pump shaft, sharpened punch to pop a 3mm hole in the oil cover and good instructions. I'm not interested in a bearing Jihad over what is better. This is what I choose for my own reasons, some revealed here. I don't care if you use a toilet paper roll to replace yours. It's your car, you do with it as you please.
Now I wait for the flywheel to arrive to begin the assembly process. Probably tomorrow night.
Thanks for reading....so far :-)
__________________
______
Jon
1966 912, 1976 911
1986 944, 2000 Boxster
Last edited by jcslocum; 08-02-2016 at 06:39 AM.
|

|

|
 10-07-2015, 08:43 PM
|
#18
|
|
Registered User
Join Date: Nov 2012
Location: SW Okla
Posts: 1,117
|
This is a great read - more!
__________________
I think I have a Porsche problem...
|

|

|
 10-07-2015, 10:20 PM
|
#19
|
|
Registered User
Join Date: Oct 2014
Location: Portland, OR
Posts: 53
|
Yeah, please keep it coming. I'm riveted!
Sent from my iPhone using Tapatalk
__________________
2000 Boxster S 6 speed Guards Red
|

|

|
 10-08-2015, 07:32 AM
|
#20
|
|
Project Addicted
Join Date: Aug 2015
Location: Eastern Shore, MD
Posts: 623
|
Riveted??? I think you have to read more or get out more :-)
Bearing Autopsy and some other random thoughts...
So bearing is out and has been living in a septic tank for a while. It smells bad.
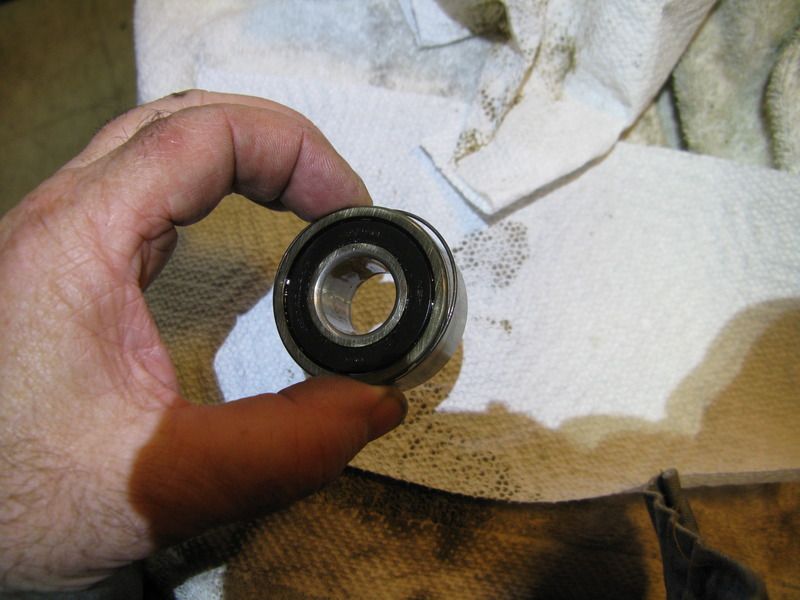
Simple double row ball bearing with plastic outer seals. The bearing turns nice and smooth, no feeling of a gritty nature. I popped the seals out and there is ZERO grease inside and the balls are a bit "brown-ish" so you know that have been running with the gunky oil inside for a while. If you look to the 2-3 o'clock position, you can see the wire ring that is used as a keeper to hold the bearing in it's proper location. There is a bevel or lead on the shaft to shrink the keeper into the groove in the bearing OD and then it pops out into the groove in the shaft when you install it, staying somewhat centered to hold the bearing from drifting AND holding the shaft in place as well via the bearing stud.
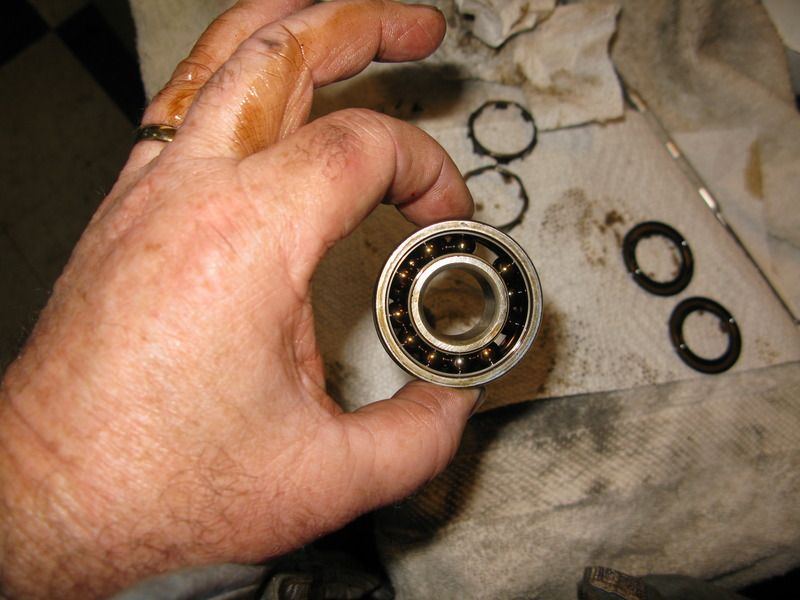
Not a good situation! My thinking on the gunky oil is that it just sits in the shaft hollow and cooks. When I loosened the nut on the original bearing, the stud part was sucked into the shaft with a pop. This was a surprise and it took a bit of time with a magnet to fish it back out thru the bearing to mount the puller. The heating and cooling if the air in the hollow is what sucks the oil in and because it can hold a good vacuum while cold the oil isn't getting out. So it sits in there, getting heated and re-heated and the volatiles just get cooked out and ruins the oil. When it's hot, I guess some of the oil gets pushed out into the bearing melting the grease and putting in some grit. this cycle just continues and when the oil is changed, this cooked oil can't drain out. The shaft hollow was not full but had maybe 1/2" of gunky oil in it. If I had been thinking way in advance, I could have caught a bunch of this oil and sent it out to Blackstone for analysis. This might have been interesting data to see and digest.
When getting ready and doing the disassembly, taking the 2 chain tensioners out of the engine. This is a 5 chain engine so you remove the chain tensioner on the pass side that goes in vertically and the IMS chain tensioner on the drivers side that goes in horizontally. The tensioner for the IMS chain did NOT pop out upon removal! The vertical tensioner nearly shot out, so I sat and looked at it and then began wiggling the moving part and it then popped out. The moving pin (for lack of a better description) has a flat machined on it and that flat must stop somewhere up the pin where it stays as a round shape. There is obviously a spring in there behind the pin and some seals and stuff too as it's hydraulically activated as well. The body is cross drilled and the pin is pushed in with the spring behind it and a solid steel tiny little pin is drive thru to trap the big moving pin inside of the tensioner body. Well, from sitting in the horizontal position the little pin has worn a bit of a notch into the big pin and that was catching it in place. So the IMS chain might not have been tensioned properly when running. I ordered a new tensioner to replace this one and they are not big $$, somewhere in the $110 range.
The trans is 16" tall so this work can certainly be done on the ground in your garage and not have to lift the car too high.
I will take a few pics of the tensioner later and add them.
__________________
______
Jon
1966 912, 1976 911
1986 944, 2000 Boxster
|

|

|
 Posting Rules
|
You may not post new threads
You may not post replies
You may not post attachments
You may not edit your posts
HTML code is On
|
|
|
All times are GMT -8. The time now is 05:53 AM.
| |