Go Back   986 Forum - The Community for Porsche Boxster & Cayman Owners > Porsche Boxster & Cayman Forums > Boxster General Discussions

Post Reply
 
LinkBack Thread Tools Display Modes
Old 03-31-2013, 11:11 PM   #1
Registered User
 
Join Date: Aug 2012
Location: Oklahoma
Posts: 28
Garage
New glass top installed over the long weekend!

This has been on my long list of things to do, but has also been the one I was most dreading... The plastic window had a few stress tears where it folded and was sewn, plus it was getting hard to see out of clearly. Also, it's been leaking water when it rained from several places other than the obvious plastic tears... It would stink in the car a day after it rained. The back storage compartment's cubby behind the driver headrest would have water just sitting in it. Took me awhile to find where it was wet inside... Obviously leaking from the top upper plastic window.

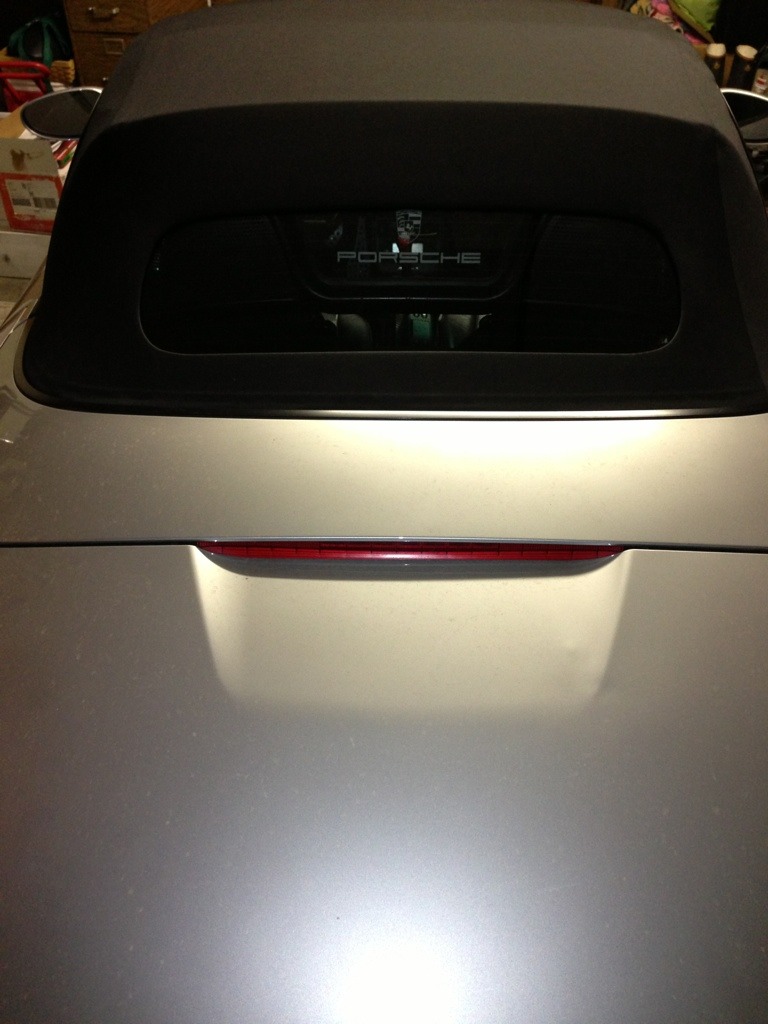
I've had the replacement top from autotopsdirect.com for awhile, but was just putting it off and waiting until I had some time (and the courage). Finally had this past Friday off, so I figured 3 days was long enough and tackled it. It looks so good and I'm very happy that I went with the glass instead of plastic. I'd read a lot of pros/cons and am very happy with my choice.

The removal and installment went really well and I was able to do it by myself. I can't say how many hours it took me because I really spread out the work over the weekend. If I got to a point where I was starting to get frustrated or needed a break, I would just stop. If I had to do another one, I feel like it would be more of a breeze, as I would be more familiar with the process and know what to expect and how it goes together. It wasn't hard, just unfamiliar work. If anyone has specific questions about it, let me know.

I'm very much looking forward to no leaks, no musty smell (if was def the top, not the drains), seeing clearly out of the window, defrost, no chop, no worries of the plastic cracking in cold weather.

Name:  ImageUploadedByTapatalk1364800289.029698.jpg
Views: 669
Size:  138.2 KB


Last edited by TheProspector; 03-31-2013 at 11:16 PM.
TheProspector is offline   Reply With Quote
Old 04-01-2013, 01:29 AM   #2
Usercpy
 
ilikeching's Avatar
 
Join Date: Aug 2012
Posts: 205
Garage
Hi, congrats with new top, i had same issue as you with water leak from plastic window and musty smell from carpets, changed to new top and now no leaks.
If you had this problem over long time i've would check under the footrest carpet for any moist or maybe rust wich have developed over long period.

check this thread:
http://986forum.com/forums/general-discussions/36755-interior-water-leak-problem.html
__________________
http://www.flickr.com/photos/flickr_ching/
ilikeching is offline   Reply With Quote
Old 04-01-2013, 06:47 AM   #3
Registered User
 
Perfectlap's Avatar
 
Join Date: Nov 2004
Location: New Jersey
Posts: 8,709
Looks great. Too bad your in Oklahoma! I'd be your second customer.

I had the plastic window replaced and regret it. The $400 would have been better spent towards a whole new top. Maybe I could have pulled off a new top and installation all in for $1000. Now I'll really have to shop smart.
__________________
GT3 Recaro Seats - Boxster Red
GT3 Aero / Carrera 18" 5 spoke / Potenza RE-11
Fabspeed Headers & Noise Maker
BORN: March 2000 - FINLAND
IMS#1 REPLACED: April 2010 - NEW JERSEY -- LNE DUAL ROW
Perfectlap is offline   Reply With Quote
Old 04-01-2013, 07:02 AM   #4
Registered User
 
Join Date: Aug 2012
Location: Oklahoma
Posts: 28
Garage
Quote:
Originally Posted by ilikeching View Post
Hi, congrats with new top, i had same issue as you with water leak from plastic window and musty smell from carpets, changed to new top and now no leaks.
If you had this problem over long time i've would check under the footrest carpet for any moist or maybe rust wich have developed over long period.

check this thread:
http://986forum.com/forums/general-discussions/36755-interior-water-leak-problem.html
Thank you for the link. Since the first time I noticed the stank after washing or rain, I did a lot of reading about drains, the under seat hazards of water damage, etc. and did a lot of feeling around. It was frustrating because I was sure it had to be a drain because the only noticeable crack in the plastic window wasn't the location of much water leakage. Checking the drains and seeing they were clear, it really was by chance that I stuck my hand in the "behind the headrest" open storage cubby where I felt standing water. It was like water would leak in right above the driver's side rollbar and drip down into it and stand there.

I will note that I noticed a little bit of wind noise from the front drivers side of the top this morning driving to work that wasn't there before. I'm going to make sure everything is seated properly after work since we're expecting rain in the next few days.

Quote:
Originally Posted by Perfectlap View Post
Looks great. Too bad your in Oklahoma! I'd be your second customer.

I had the plastic window replaced and regret it. The $400 would have been better spent towards a whole new top. Maybe I could have pulled off a new top and installation all in for $1000. Now I'll really have to shop smart.
Taking the top to a shop to replace just the plastic window with a new one was my first thought until I read up on it.

I'd gladly install one. I think in just doing it the one time, I know a few tricks and esp what to expect, I could get through it with no problem. I was really surprised that there wasn't much stretching and pulling to get things tight when doing this. That was my biggest expectation... It's actually easy to get things too tight, causing the top not to close all the way.

Last edited by TheProspector; 04-01-2013 at 07:12 AM.
TheProspector is offline   Reply With Quote
Old 04-01-2013, 07:45 AM   #5
Registered User
 
Join Date: Jun 2007
Location: Maryland
Posts: 240
I'm kicking myself for not going with the glass when I did mine a couple years ago. The haze is VERY noticible in my plastic window after taking off the hardtop last week.
Wret is offline   Reply With Quote
Old 04-01-2013, 11:07 AM   #6
1999 base
 
Meir's Avatar
 
Join Date: Dec 2011
Location: Coral Springs FL
Posts: 1,617
Garage
that looks good.
i have an intention of installing a new glass top in a month or two.
few questions.
which write up did you use? (pelican, mike's, both?)
on mike's write up, he is talking about replacing some foam part:


did you need to do that in your case?

on the pelican write up, Wayne mentioned some plastic rivets that tend to break.
what was your experience with it? (if someone can provide a part number, it will be great)


did you need any specialty tools for the job?
did you needed to use any other parts that did not came with the new top?

thanks in advance.
Meir.
Meir is offline   Reply With Quote
Old 04-01-2013, 01:08 PM   #7
Registered User
 
Join Date: Aug 2012
Location: Oklahoma
Posts: 28
Garage
Quote:
Originally Posted by Meir View Post
that looks good.
i have an intention of installing a new glass top in a month or two.
few questions.
which write up did you use? (pelican, mike's, both?)
on mike's write up, he is talking about replacing some foam part:


did you need to do that in your case?

on the pelican write up, Wayne mentioned some plastic rivets that tend to break.
what was your experience with it? (if someone can provide a part number, it will be great)


did you need any specialty tools for the job?
did you needed to use any other parts that did not came with the new top?

thanks in advance.
Meir.
Hey Meir,

When I purchased my top from autotopsdirect, they granted me access to their 40 page install pdf document. That's really all I used... Don't get too intimidated by the install. Just take your time and you should be fine.

Regarding the foam strip, I don't see a need for it. The new top comes with a cardboard type piece that gets glued into that front channel.

As far as the plastic rivets that Pelican mentions: YES, this was my experience as well... In my install, this part was the most difficult part for several reasons. The "how to" from autotops is great, except for the steps involving this part. They don't have decent pictures (a diagram would've been nice) and it lacks a good explanation of what you're trying to do. Getting the top both on and off this part was the most frustrating part. This is where a little experience would come into play and more research than I did.

If I had to do it over again, I would buy new plastic pieces with the rivets just to have a new part since they are so fragile. Mine were slightly broken before I even touched them, so either someone in the past had messed with it, or they are that fragile just sitting there... My experience says you're in there anyway, if they are relatively cheap parts, might as well replace.

The biggest tip I have is to take those pieces completely out for the install. Autotops suggests that you just take out the one screw that holds the tension cable in, but I would also take out the screw on the opposite side of it and pop the 2 rivets out, and pull the piece up and out. You are supposed to fold a flap of canvas under that piece and it's just too difficult to get to with it on the car. So I say, take them out, slide the new canvas into the slots, fold the canvas/plastic end under the "J channel" and hold that part tucked under as you reinstall the plastic piece. Then pop the 2 rivets back in, and screw in the front screw with the cable eyelet as well as the rear screw that holds the back of that plastic piece in.

I hope this helps/makes sense. It will once you are involved in the removal/install.

If you don't get new plastic parts, don't sweat it, just be careful and mindful when you pop them out. I don't think Porsche would've engineered them to really hold much on their own being plastic. It seems the tension of the top itself really hold the parts on. So, if you get new parts, great, if not, don't worry, just be mindful. I'm just basing buying new on hindsight and "while you're there" mentality.

As far as parts, no, it comes with everything. Your autotopsdirect pdf will give you a list of tools you need. Just the 3M yellow spray adhesive. Autozone carried it. Just make sure you get that exact adhesive. Other than that, rubber mallet or hammer if you're careful, scissors, torx drivers, screw driver (flat and Phillips), an pliers. You will need a longer torx 25 driver (I believe) for that aforementioned plastic part. I had just a short collapsible set and it was too short to get to that front cable screw. Also, the new cable eyelets needed to be made larger to fit the screw, and it was easier to drill the hole in the canvas rather than using a pick like they mention. So I used a drill bit and driver for both. Worked great.

Again, hope that helps anyone's install.

Last edited by TheProspector; 04-01-2013 at 01:16 PM.
TheProspector is offline   Reply With Quote
Old 04-01-2013, 01:12 PM   #8
Moderator
 
Join Date: Feb 2012
Location: DFW
Posts: 782
Garage
This is encouraging. I'm going to have to get the top fixed on mine, and am ordering a glass top, just never got around to it.
Kenny Boxster is offline   Reply With Quote
Old 04-01-2013, 01:59 PM   #9
1999 base
 
Meir's Avatar
 
Join Date: Dec 2011
Location: Coral Springs FL
Posts: 1,617
Garage
hi TP, thank you very much for your detailed explanation.
i'm sure its gonna help me (and others) a lot.
i manage to convince my friend to give me a hand with the installation, so my intention is to finish it in one day.
i read the pelican and mike's instructions several times, and i'm sure ill be able to tackle it. i just don't want to get stuck on a stupid plastic rivet.
its hard for me to imagine where these rivets are located.
from what i read there is one on each side?
Murphy low say, that if i get it, i wont need it so i intent to get it.
will you be kind and direct me to the part in the diagram, so i can order the correct part?


is it part 13,12&11?

once again, thank you very much.

Meir.
Meir is offline   Reply With Quote
Old 04-01-2013, 02:13 PM   #10
1999 base
 
Meir's Avatar
 
Join Date: Dec 2011
Location: Coral Springs FL
Posts: 1,617
Garage
i think i get it.
its part 13 (the rivet)
and part 12.


correct?
Meir is offline   Reply With Quote
Old 04-01-2013, 06:11 PM   #11
Registered User
 
Join Date: Aug 2012
Location: Oklahoma
Posts: 28
Garage
Quote:
Originally Posted by Meir View Post
i think i get it.
its part 13 (the rivet)
and part 12.


correct?
Yes, that's exactly correct. You'll need 4 of #13 and a left and right of #12. Do you have a price for them? I'm just curious. Again, if they're not $, I'd just get them. My car only had 1 of the #13 part still on the car. I have no idea where the other 3 are. It really holds fine with the old parts, but again, while you're in there...

To anyone else, part #11 just sits under part #12 and should be fine to use again.
TheProspector is offline   Reply With Quote
Old 04-01-2013, 06:19 PM   #12
Registered User
 
Join Date: Aug 2012
Location: Oklahoma
Posts: 28
Garage
I'd also like to add that today was the first day I drove my car around with the new glass top, and I just wanted to add that I'm so happy that I went with glass. I never realized how much I couldn't see out of my plastic window. Backing out of the lot at work, I'd kinda forgotten about the glass and was a little startled that I could actually see out of the back. So worth it to upgrade to glass.

I'm a tall guy at 6'3" and I can't see people's faces in the cars behind me, just to give you an idea of the loss of vision. I can see cars easily and feel much safer on the road than I did, just is a smaller window by 6" top to bottom and 2" left to right. So it's different, but so much better, IMHO.
TheProspector is offline   Reply With Quote
Old 04-01-2013, 06:30 PM   #13
1999 base
 
Meir's Avatar
 
Join Date: Dec 2011
Location: Coral Springs FL
Posts: 1,617
Garage
Thanks again TP.
The parts are listed for $2.5 for the rivet, and $11 for each plastic part (12) on the auto Atlanta website.
So it's no brainer for me. Can probably get it even cheaper from sunset imports, along with some other parts I need.

Last edited by Meir; 04-01-2013 at 06:35 PM.
Meir is offline   Reply With Quote
Old 04-02-2013, 04:39 AM   #14
Registered User
 
Join Date: Oct 2006
Location: VA & NC
Posts: 44
Garage
Great post OP!

How much less room do you have when the top is in the engine-access position, compared to your older top?

Thanks
grtc68 is offline   Reply With Quote
Old 04-02-2013, 08:45 AM   #15
Registered User
 
Join Date: Aug 2012
Location: Oklahoma
Posts: 28
Garage
Quote:
Originally Posted by grtc68 View Post
Great post OP!

How much less room do you have when the top is in the engine-access position, compared to your older top?

Thanks
This had been my real only concern when debating glass vs plastic. I don't know just yet. When installing the top, you work your way from the rear to the front. So once the back is glued and secured down, I pretty much left it since you're supposed to keep it closed for at least a week. I didn't want to pull on any glue before it cured.

I've read that many people with a glass top use a ratchet type of tie down or bungee cable that holds the glass up when they're accessing the engine. I'll post a picture here when I try.
TheProspector is offline   Reply With Quote
Old 04-02-2013, 08:47 AM   #16
1999 base
 
Meir's Avatar
 
Join Date: Dec 2011
Location: Coral Springs FL
Posts: 1,617
Garage
TP. i took a tour in your garage, and noticed you own a 02S.
so maybe you can help me with another question i have.
how can i remove the head liner, and will i be able to do it before removing the top?
spent 3 hours last night searching the web for some DIY for removing the head liner with no success.
i'm thinking about sending it to the dry cleaner , and install it beck after the new top is in.
also, i need to replace those robbers, that attach the liner at the bottom (the ones that have a plastic hook) corners. it lost its elasticity, and cause the hooks to rattle.
can someone tell me the name of these rubber bands so i can Google it?
thanks.


Last edited by Meir; 04-02-2013 at 09:15 AM.
Meir is offline   Reply With Quote
Old 04-02-2013, 09:53 AM   #17
Registered User
 
Join Date: Aug 2012
Location: Oklahoma
Posts: 28
Garage
Quote:
Originally Posted by Meir View Post
TP. i took a tour in your garage, and noticed you own a 02S.
so maybe you can help me with another question i have.
how can i remove the head liner, and will i be able to do it before removing the top?
spent 3 hours last night searching the web for some DIY for removing the head liner with no success.
i'm thinking about sending it to the dry cleaner , and install it beck after the new top is in.
also, i need to replace those robbers, that attach the liner at the bottom (the ones that have a plastic hook) corners. it lost its elasticity, and cause the hooks to rattle.
can someone tell me the name of these rubber bands so i can Google it?
thanks.

Yes, proud owner of an 02 S!

Unfortunately, I don't have any information on the headliner. My passenger side elastic is missing the hook and I'm going to try to find another way to secure it down. Both of mine have no elasticity anymore as well.

If it were me, I'd leave the headliner in, and just clean it as best you can from there. I wouldn't mess with removing it, dry cleaning, reinstalling, etc..., but I don't know how dirty yours is. It seems like somewhat delicate fabric as well.
TheProspector is offline   Reply With Quote
Old 04-02-2013, 10:23 AM   #18
1999 base
 
Meir's Avatar
 
Join Date: Dec 2011
Location: Coral Springs FL
Posts: 1,617
Garage
Quote:
Originally Posted by TheProspector View Post
Yes, proud owner of an 02 S!

Unfortunately, I don't have any information on the headliner. My passenger side elastic is missing the hook and I'm going to try to find another way to secure it down. Both of mine have no elasticity anymore as well.

If it were me, I'd leave the headliner in, and just clean it as best you can from there. I wouldn't mess with removing it, dry cleaning, reinstalling, etc..., but I don't know how dirty yours is. It seems like somewhat delicate fabric as well.

thanks again.
mine is not dirty at all. in fact it is in great shape.
beside cleaning it, i was thinking to sow in new "elastic ribbons" (found the correct word for it ). i will take your recombination, and leave it on the frame.
will ask my wife to do the sewing, and give it a nice clean with a vacuum.
so from what you are saying, the head liner does not interfere with the top installation.
Meir is offline   Reply With Quote
Old 04-02-2013, 10:30 AM   #19
Registered User
 
Join Date: Aug 2012
Location: Oklahoma
Posts: 28
Garage
Quote:
Originally Posted by Meir View Post
thanks again.
mine is not dirty at all. in fact it is in great shape.
beside cleaning it, i was thinking to sow in new "elastic ribbons" (found the correct word for it ). i will take your recombination, and leave it on the frame.
will ask my wife to do the sewing, and give it a nice clean with a vacuum.
so from what you are saying, the head liner does not interfere with the top installation.
Nope, no interference at all. Good luck with it!
TheProspector is offline   Reply With Quote
Old 04-02-2013, 05:36 PM   #20
Registered User
 
Join Date: May 2012
Location: Northern California
Posts: 319
Garage
Meir,
I replaced all the plastic parts (11-13) because I was in there anyway.
If you want to replace the foam seals the P/N for the kit is 000-043-300-45. I paid about $55 for the kit which includes some parts you won't need/use but got the foam & some other little rubber pieces to replace.
Take your time & follow Mike Focke's instructions posted here, they are the most detailed & complete.
If I can be any help let me know.

Bryan topping is offline   Reply With Quote
Post Reply


Thread Tools
Display Modes

Posting Rules
You may not post new threads
You may not post replies
You may not post attachments
You may not edit your posts

BB code is On
Smilies are On
[IMG] code is On
HTML code is On
Trackbacks are On
Pingbacks are On
Refbacks are On


All times are GMT -8. The time now is 03:16 PM.


Powered by vBulletin® Version 3.8.7
Copyright ©2000 - 2024, vBulletin Solutions, Inc.
Content Relevant URLs by vBSEO 3.6.0
Copyright 2024 Pelican Parts, LLC - Posts may be archived for display on the Pelican Parts Website -    DMCA Registered Agent Contact Page