 08-11-2012, 09:15 AM
|
#41
|
|
Doc
Join Date: Jul 2010
Location: SoCal
Posts: 69
|
It's not entirely clear to me, but your description of the waterpump replacement seems to indicate that you replaced your waterpump with one with a metal impeller?
I hope you didn't, as that would be a really bad idea...
|

|

|
|
08-11-2012, 09:39 AM
|
#42
|
|
Theoretical propagandist
Join Date: Dec 2011
Location: Pacific Northwest
Posts: 793
|
Fluellen, sorry that seemed a little vague on my part. It is the new composite one from Pelican not the old plastic variation that came with the car. Yes, the metal ones have the tendency to eat the engines up. I know on the 928's they have a new setup that allows the metal impellers to be used as there is a secondary bearing used on a rather robust set up. I was reading that on their forum the other night. No such luck for the boxsters yet.
__________________
When life throws you curves, aim for the apex...
|
|
|
|
|
08-11-2012, 09:44 AM
|
#43
|
|
Doc
Join Date: Jul 2010
Location: SoCal
Posts: 69
|
Yeah, I figured you know what you are doing... cool!
Would you mind at the end of your project to share a brief summary of what all you replaced, and the approximate overall cost in parts?
|
|
|
|
|
08-11-2012, 05:07 PM
|
#44
|
|
Theoretical propagandist
Join Date: Dec 2011
Location: Pacific Northwest
Posts: 793
|
Fluellen I will be glad to. As a matter of fact I can post that before I get to the end as I have a spreadsheet I have been tracking my parts/pieces.
__________________
When life throws you curves, aim for the apex...
|
|
|
|
|
08-11-2012, 06:42 PM
|
#45
|
|
Registered User
Join Date: Oct 2008
Location: O.C. CA
Posts: 3,709
|
Great work Eric. The nut on your IMSB looks big, will it come off with a 13mm wrench or is that the big 22mm size?
|
|
|
|
|
08-11-2012, 06:48 PM
|
#46
|
|
Theoretical propagandist
Join Date: Dec 2011
Location: Pacific Northwest
Posts: 793
|
Byprodriver, it is the small 13mm version.
I will post a bunch of pictures of what I pull out either later today or hopefully this weekend.
__________________
When life throws you curves, aim for the apex...
Last edited by Eric G; 08-12-2012 at 08:41 AM.
|
|
|
|
|
08-12-2012, 07:07 AM
|
#47
|
|
Registered User
Join Date: May 2011
Location: Maine, USA
Posts: 126
|
Great thread! Thanks.
|
|
|
|
|
08-12-2012, 03:27 PM
|
#48
|
|
Theoretical propagandist
Join Date: Dec 2011
Location: Pacific Northwest
Posts: 793
|
This was a really good day compared to yesterday. I have spent the better part 7 months getting ready to do the build on my 98'. Reading books, articles, forum postings, tech articles getting active in my PCA region again. All working at bettering my knowledge on this little 2.5L engine.
Yesterday was the culmination that you can over prepare and loose site of what you are trying to do. In essence to much data is not a good thing. Yesterday showed me that as I was befuddled by the fact of how the 3 chain cam lock tool would not work for the 5 chain engine.
Slept on it last night and that was when the clarity of the engine design and the engineering drawings ran through my head and how loads are being transferred around and why you won't find slots on all the cam ends.
With sanity restored and some kind PM's from folks, this morning was the day. Pulled the three remaining caps from the engine, rotated the engine to TDC, observed the slots in their respective positions, verified with Insite's thread on cam timing that my cams were indeed in the correct position.
Inserted the pin into the pully locking the front of the crank, installed a bar across the back of the crank locking it down there. Went and installed the to cam locks from LN's kit and then marked the cams with a marker to verify position.


Through out this I kept going back to each of my cams and verifying that no movement had occurred.
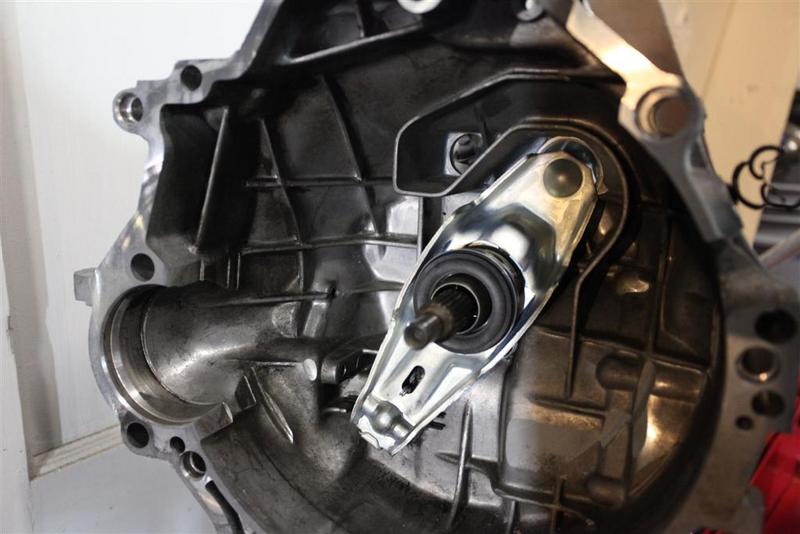
Since I am replacing all my cam tensioners I pulled all three out of the engine and on the IMS tensioner (that is the one behind the driver seat on the top) I did not have to remove the AC unit as there was enough room to remove it.
Well, everything seems great as no cams moved and we are ready to go. Using LN's directions which really are simple and easy (but I must stress need to be followed to the letter) to use. Just as Jake said, the bearing plate comes right out with no force at all. Just as a triple check, I downloaded a copy of Bentley's video using the LN tool and had that running in the back ground.
Note: When the bearing comes free it will make you think you broke something as the snap of the internal retaining ring sounds just like a bolt shearing off, but the bearing dropped out just like it's suppose to and the gush of oil did follow.
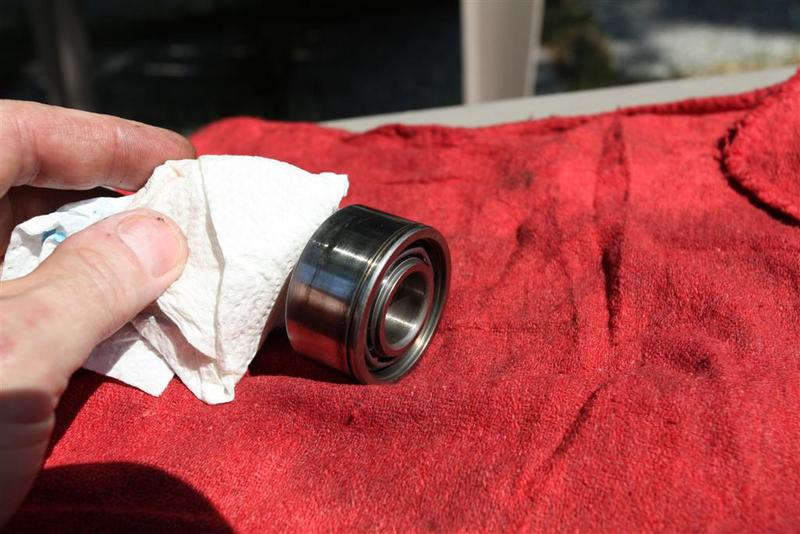
Once the bearing was out I had to see what condition it was in. Well, I think Jake calls this Stage 1 failure (someone can correct me if I am off) but there was no grease, it was filled with engine oil and while is spins freely, if you shake it side to side you can hear and feel bearings rattling. I believe that I caught this at the correct time.
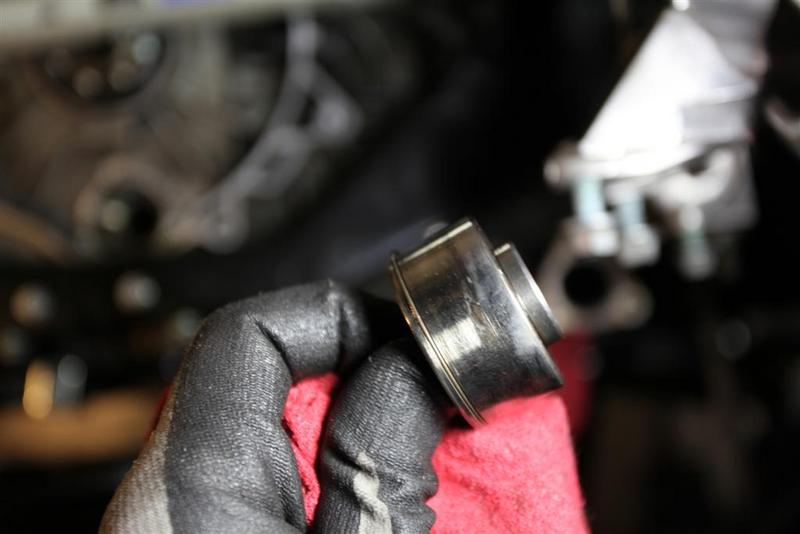
On the bearing there appears to be two spiral discolorations that go about one third around the bearing. Looks like bluing on metal...but not that dark. Either way the bearing is out and I know it was only a matter of time. I have several people that are interested in seeing the bearing, so I will send it to those that have asked as it will go in their database.
Jake, are you interested in receiving this for review? If so I can make you the last stop for this bearing. Just let me know.
Well, I pulled the new bearing out of the freezer, installed it in the jig, hand tapped it into place (easy breezy), installed the spiroloc as per the instructions and all of the other parts and pieces. For my sealing material a friend of mine who rebuilds aircraft engines (and 928's) gave me aviation sealer as it is impervious to oil, gas and other solvents, does not dry out but will not move from its placement as my thread sealer on the bolts. The bracket slide right back into place and everything buttoned up like the instructions said they should. I pulled all my bracing off, rotated the engine 720 degrees and the timing marks came right back to where they were suppose to be.
What a relief...I am taking the rest of the day off and going out on the river for some relaxing down time. Again, on this task...thank you to all who had input. It was appreciated.

In closing these are a couple shots of the bearing in the sun light as I try to capture the discoloration on the outer race.

__________________
When life throws you curves, aim for the apex...
|
|
|
|
|
08-13-2012, 05:27 PM
|
#49
|
|
Theoretical propagandist
Join Date: Dec 2011
Location: Pacific Northwest
Posts: 793
|
Hardest part about a build is that as you are the short side of a project is that you need to stay with your plan and not allow excitement to push you quicker than what you want. There are a million ways to screw things up by rushing passing bolts that need to be tightened, hoses connected or electrical connections attached.
Today's plan was to get the flywheel, clutch assembly and the throwout bearing, and components installed and or replaced.


I would have put the transmission back in place, but I am stuck waiting for the third section of my oil filling tube that was broken. They folks at Pelican had some promising news tonight in that the parts may be in and can be shipped tomorrow (fingers crossed). Still, progress was made and tasks were completed and parts installed.
Well, that's all for today...
__________________
When life throws you curves, aim for the apex...
|
|
|
|
|
08-14-2012, 07:49 AM
|
#50
|
|
Carnut
Join Date: May 2010
Location: Utah
Posts: 775
|
Thanks for the update! I always enjoy reading. And learning!
With all the work you are doing I am just wondering if you ever thought about an engine swap in the first place....... 3.4?
__________________
'14 Boxster
|
|
|
|
|
08-14-2012, 09:00 AM
|
#51
|
|
Theoretical propagandist
Join Date: Dec 2011
Location: Pacific Northwest
Posts: 793
|
Andy, thank you for the kind words...trust me this is a learning process on my part as well. Every time you dig into a car for the first time you are learning.
The 3.4 question has rattled around in my mind as well for awhile...heck even the idea of what Scott is doing at Renegade Motors in Vegas is on my radar screen. But there is a special connection with this car as it has allowed me to go back and capture a feeling I had when I was growing up and still lived on our ranch in NM.
In high school my car was a used 74 Limited MG Midget Mk III with a 1.2L engine that I rebuilt and drove everywhere and I mean everywhere. The fun I am having in the car with this engine is enough right now. As my speed fix still comes from my race bike and Hayabusa's. I think in the end I will only change power plants should anything catastrophic happen to this one and I am hoping that is a long ways away.
__________________
When life throws you curves, aim for the apex...
|
|
|
|
|
08-14-2012, 01:20 PM
|
#52
|
|
Homeboy981
Join Date: Jan 2012
Location: Sherman, TX
Posts: 663
|
Good work Eric! I always look forward to the posts. I am learning a ton from you, as I am just starting to compile parts. Your work is helping a lot. You said it took 6 months worth of research, effort and parts ordering to culminate in the completion of your dream car.
There are a bunch of us watching to see that happen. And hoping we can do the repairs on our terms - like you are doing. Hopefully we will catch the IMS as you did - JUST BEFORE any bits went down the tubes!
Keep the pics coming! We always look forward to the next installment in the saga of
"How the Porsche Turns!"
__________________
2002 Porsche Boxtser S - Silver & Chrome - Died from IMS failure AFTER IMS was replaced!
|
|
|
|
|
08-15-2012, 06:40 PM
|
#53
|
|
Theoretical propagandist
Join Date: Dec 2011
Location: Pacific Northwest
Posts: 793
|
Today's update does not come with pictures as I have to hold something close to the vest when it is done. Today was paint day. No, not the whole car, but some nice enhancements to the overall presentation of the car. Spent the last two days sanding and prepping and shot it today.
Also, picking up the rims at the beginning next week. Custom Coating Specialists are a firm that covers the PNW and their powder coating work is incredible and at a price that is stunningly affordable. Also picked up all the fluids for reloading the engine/transmission/radiator this weekend. My overall goal (hopefully) is to have the transmission and exhaust system installed as well as the new convertible top on.
I am believing that desire and reality will match up as I am planning on taking the next couple of days off to see what I can push through.
__________________
When life throws you curves, aim for the apex...
|
|
|
|
|
08-19-2012, 07:55 PM
|
#54
|
|
Theoretical propagandist
Join Date: Dec 2011
Location: Pacific Northwest
Posts: 793
|
Drawing close to the end...
As of today I am drawing close to the end of the build, I have installed all but the final few parts. I have to install the rear suspension and then the new Gahh top. After today the next set of pictures will be the completed car once I get the rims back and the car polished and purty.
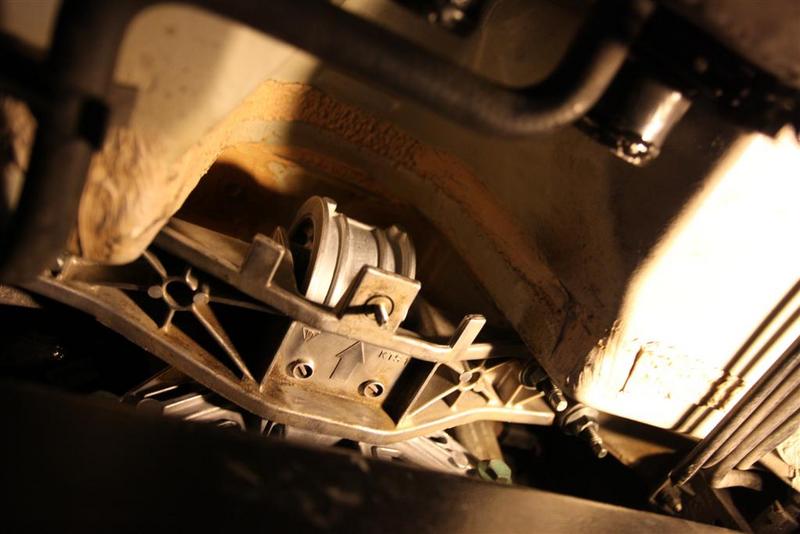
But, I digress, here is where I am as of today. I finally got the third tube in for the oil filler and got that installed. Oh my god that was a pain in the butt as someone decided that one of the bolts needs to be positioned such that you have little to no space to secure it down. Needless to say, it was more of an effort then I had planned. But with the oil tube finally in place, I could then install the AOS. The plan is to button the car up in reverse from the hardest parts to easiest to install. With the AOS done, I can put the transmission back. But a bright shinny caught my eye. I was looking at the power steering unit and realize I have a bleed tube that appears to be going nowhere and there is old fluid residue everywhere. So before I move on I start looking around the engine to see where it could go...no luck. I get back on line and search Pelican and come across a picture in the 101 projects, and low and behold there is a picture of of the exact thing I am looking for...
The Purple arrow Wayne shows the tube and stated he spent the better part of two hours looking for where this goes. Turns out, Porsche designed this tube to simply bleed all over the engine! I clean up the mess and install an extension to this tube and route it down around the engine so no fluid will be landing on the engine.
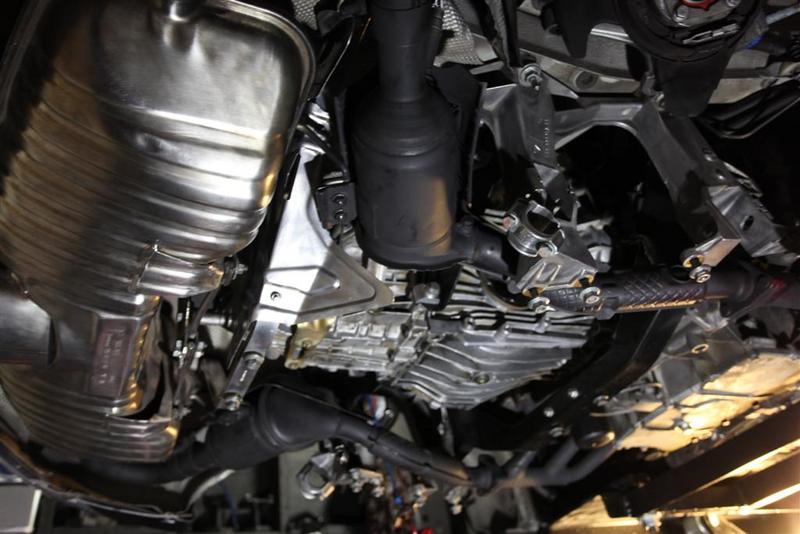
Back to installing the transmission, actually, installing it was rather simple, just need to take the time to match the splines up and using a transmission jack which allows for proper alignment and it slips right in.
Once the transmission was in, I was able to install the clutch slave. I will say that the simplest thing I have ever used was the power bleeder. It took less then 5 minutes to bleed the entire clutch...wished I had this thing years ago. Best 60 bucks I have ever spent.
With the clutch bled, it was time to install the exhaust. Now taking it out with the bumper on was no problem as gravity was on my side all the way. Somehow it just does not seem to work the same in reverse. So to prevent from having to remove the bumper, I found that taking one side off allows the rest of the exhaust system back in place and then reattach the other side. To do this I removed the right side cat at the U junction (leaving the U connected to the muffler and then only having to slip it back on with the joint favoring an easy installation. With the muffler installed I decided that an easy installation would be the front motor mount.
OK, this was said with great tongue in cheek. Yes the task can be easy, but it seems anything I think is easy is quite the opposite and for all the wrong reasons. Why? Well, I am using a scissor lift and right where I need to remove the brace I have a cross member. A little wiggling (OK, a lot) and I was able to get the mount out. For this task I followed Wayne's directions and it worked like a "T". When I got the mount out I was torn. Did I have any indication while still driving it...nope.

With the mount done, took time for a break for lunch and decided on how far I wanted to get for the day. I would hang the axles and finish the suspension tomorrow.
These shot show where I am at (minus the axles) as the batteries ran dry on the camera.
So, getting to this point, I feel it might be helpful to post up a summary of what I did and what I have found:
Starting from the front of the car going toward the tail end:
Drivers side radiator: Small leak on at the mounting lug, symptoms occasional fluid by tire on hot days. Seems the bumper was tapped and cracked the mount.
Grill guards on radiator intake Protection from debris build up in radiators.
Canister Purge valve: Code from Durametric
Horn Old horn was to quite, replaced with Stebulis air horn
Front suspension and rear complete suspension and sway bar bushings Struts were completely shot with no dampening, bushing were worn and cracked.
Wheel bearings Replaced all four wheel bearings with a tool that allowed the job to be completed in only 5 hours for all four wheels!
Rotors and pads Worn to maximum extent possible.
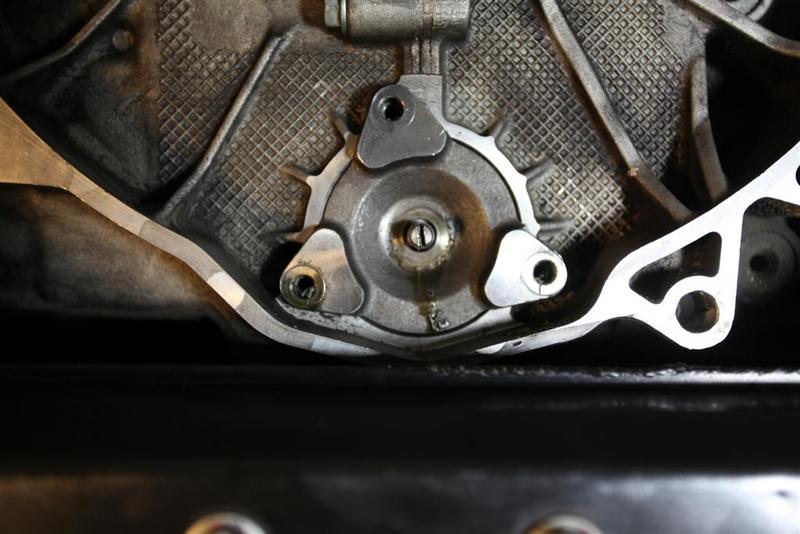
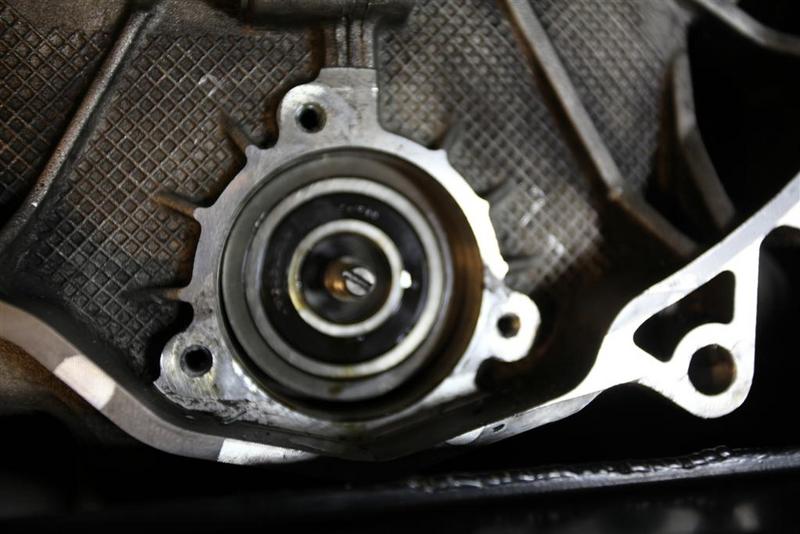
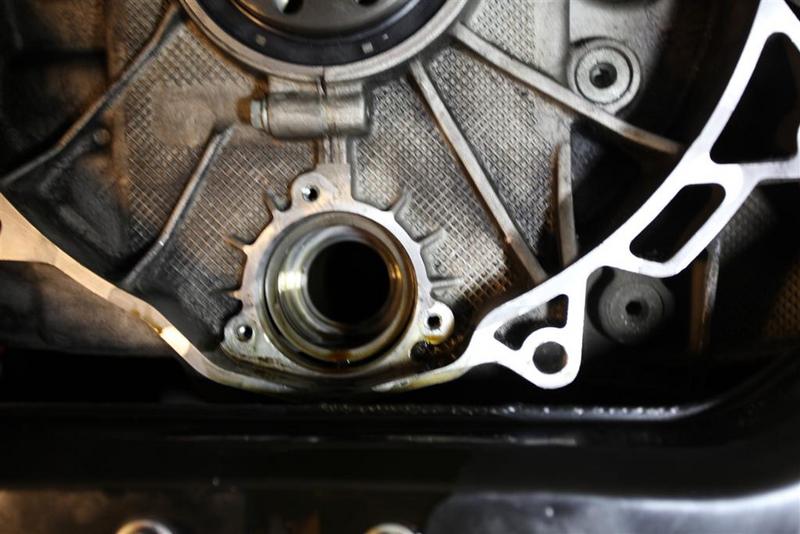
Water pump and low temp thermostat: No symptoms, just an upgrade. Old components were working
Fan Belt:Replaced older belt
AOSSaw increased oil build up in the throttle body and small puffs of smoke in the morning.
Spark plugs/tube/coils Plugs were clean but replaced with new, tubes showed signs of moderate to severe leaks, coils replaced as preventative measure.
Rear Main Seal (RMS) Seal had failed and was leaking
IMS No visible leakage, but bearing was in stage 1 failure in that there was no grease and bearing was filled with engine oil.
All three cam chain tensioners Under harmonic analysis there was a large signal to noise ratio, when removed all three showed signs of internal spring failure when compared to new tensioners.
Clutch, pressure plate, throughout bearing, dual mass flywheel While there were no symptoms, they were all roasted and were close to failure.
Super clutch kit from Pelican This is offered from Pelican and replaced all the other parts associated with the clutch components
Clutch Master and Slave cylinders Replaced as part of a preventative measure
Clutch fluid line and connector This is required with upgrading the slave cylinder (will add about $320 to add these two parts)
CV joints and all boots and axle nuts Preventative replacement.
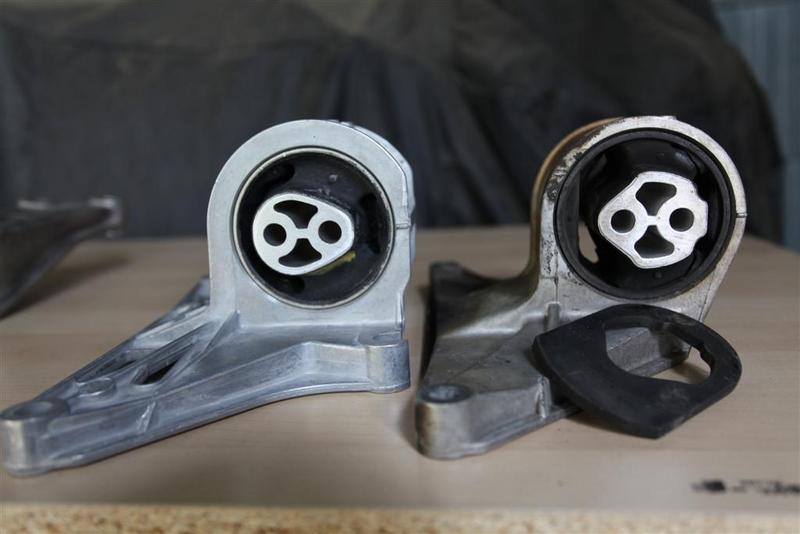
Transmission and Engine mounts All were shot but showed no signs of failure (I may not have recognized the signs???)
Oil filter housing Upgrading a 14 year old component
Radiator Reservoir While there was no leakage the tank was severely aged and showed spiderwebs cracks.
New JDM seats with lowered mounting bracket Considered to be an upgrade from OEM seats providing better seating position.
JDM performance steering wheel Personal choice allowing better driving position
Gahh new top (soft window) Replacing older top which is beginning to show cracking in window.
Conversion of top Converted top to manual while retaining power clam shell operation (personal choice).
Sirius radio Upgraded for personal choice
LCD control panel for heater/AC Replaced due to failure of switches and LCD (nice replacement for $57 verses the $750 OEM replacement cost!
Various pieces and parts as well as tools to aide in the work process
Alignment Once my wheels are back from powder coating she will get her patas set straight so she runs true.
This pretty much covers what I have done, maybe a minus a few things...
Total time to do this has run about 7 months which has involved collecting data form Mike, Pedro and Wayne. The purchase of the Bentley Manual, the UK service manual, 101 Projects and a number of threads from members on this board that have been critically important. Actual time working on the car...I am guessing based on real working time to be about 150 hours. Total cost in parts is around $7500.00 with a majority coming from Pelican but some components items were purchased new from some members here, Part Geek and a few from EBay and Casper Labs for some tooling.
__________________
When life throws you curves, aim for the apex...
Last edited by Eric G; 08-20-2012 at 04:07 PM.
|
|
|
|
|
08-19-2012, 07:57 PM
|
#55
|
|
Theoretical propagandist
Join Date: Dec 2011
Location: Pacific Northwest
Posts: 793
|
For Fluellen as there was a request for the parts list...this is not all of them but what I purchased from Pelican:
Cam chain tensioner 900-123-147-30-OEM Sealing Ring, 27 X 32, each
Cam chain tensioner 900-380-019-02-M100 HEX NUT M8 X 1
Cam chain tensioner 996-105-017-02-M100 SHAFT BASE
Cam chain tensioner 996-105-180-57-OEM Chain Tensioner, For Intermediate Shaft
Cam chain tensioner 996-105-186-01-OEM Chain Tensioner, For Cylinders 1-3
Cam chain tensioner 996-105-188-01-OEM Chain Tensioner, For Cylinders 4-6
Cam chain tensioner 999-707-344-40-OEM O-ring, 18.77 X 1.78, Each
Clutch 012-141-180-B-M100 Guide Tube For Clutch Release
Clutch 012-141-719-E-M100 Release Bearing Lever, Boxster (1997-04), Each
Clutch 012-141-741-M100 Retaining Spring for Clutch Release Lever, 986 Boxster/Boxster S (1997-04)
Clutch 012-141-751-C-M100 Pivot Piece for Clutch Release Lever, 986 Boxster/Boxster S (1997-04)
Clutch 012-141-777-D-M100 Ball Pin for Clutch Release Lever, 986 Boxster/Boxster S (1997-04)
Clutch 034-105-313-A-M5040 Pilot Bearing, Boxster/Boxster S (1997-04), Each
Clutch 8E0-721-257-M-M5038 Clutch Slave Cylinder
Clutch 900-067-131-03-M260 Pressure Plate Bolt, 8 X 16 mm, 6 Per Car, 996 Carrera 2/4 (1999-04), Boxster/Boxster S (1997-04), Each
Clutch 996-423-171-06-M33 Clutch Master Cylinder, 996 Carrera 2/4 (1998-04), Boxster/Boxster S (1997-04), Each
Clutch 997-101-212-01-M17 Flywheel Seal, 996 Carrera 2/4 (1999-04), Boxster/Boxster S (1997-04), Each
Clutch 999-073-092-02-M260 Flywheel Bolt - M10 x 50mm
Clutch 999-230-541-10-M100 Union for Clutch Fluid Pipe, Boxster (1997-04), Each
Clutch I3020-377426-OES Clutch Fluid Hose, Boxster, From Chassis Number 98XS620221 To Chassis Number 98XU624362 1999, Each
Clutch N-903-542-01-M100 RUBBER O-RING
Cooling system 996-106-011-56-M244 Water Pump with Composite Impeller (requires one 996-106-340-54-M30 gasket)
Cooling system 996-106-013-59-M902 Water Thermostat, Low Temperature (begins opening at 160 deg F) with Cover and Gasket
Cooling system 996-106-147-08-OEM Coolant Expansion Tank, Boxster/Boxster S (1997-04), Each
Cooling system 996-106-340-54-M30 Water Pump Gasket, 996 (1999-2004), Boxster/Boxster S (1997-2004)
Engine components 016-311-113-C-M213 Main Shaft Seal for Manual Transmission
Engine components 987-375-023-05-M100 Engine Mount, One Per Car, Each
Engine components 996-105-325-52-M100 Spark Plug Tube (Note: Does Not Include O-Rings)
Engine components 996-107-023-04-M100 Oil Separator, Boxster (1997-02) 1997-99 models up to 1999 engine# 65X 01419 also use (1) 996-107-145-06-M100 vent line and (1) 999-707-446-40-M100 o-ring, Boxster S (2000-02)
Engine components 996-107-225-60-M45 Hengst (OEM) Oil Filter Insert (Filter Cartridge and Seal)
Engine components 997-602-107-00-M47 Ignition Coil (sold per each, 6 required)
Engine components 999-512-630-00-M100 Oil Separator Hose Clamp, Lower (35 X 12)
Engine components 999-707-215-40-M17 Outer Spark Plug Tube O-Ring, 27.94 X 5.33 (6 Per Car) Boxster/Boxster S (1997-2004), Each
Engine components 999-701-789-40-OEM Seal for Air Oil Separator (Inside Oil Sump), Boxster/Boxster S (1997-04), Each
Engine components OEM-99610715006 Genuine Porsche Part: OIL FILLING PIPE
Engine components 996-104-215-54-M100 Camshaft End Plug 6 Per Car, 996 Carrera 2/4 1999-04, Boxster/Boxster S 1997-04, Each
Engine components 900-377-011-01-OEM M10 hex nut, each
Engine components 999-072-008-09-OEM STUD M 10 X 30, each
Engine components 999-218-088-09-OEM 999-072-008-09-OEM
Engine components 999-707-343-41-M17 Inner Spark Plug Tube O-Ring, 25.07 X 2.62 (6 Per Car) Boxster/Boxster S (1997-2004)
Steering 996-347-131-04-M80 Outer Tie Rod End (sold per each, 2 per car), 996/996 Turbo (1999-2004), Boxster/Boxster S (1997-04)
Steering 996-347-191-04-OEM Tie Rod/Steering Rack Boot, for original rack #996-347-011-06 or #996-347-011-07 (2 Per Car, sold individually)
Suspension 900-380-005-01-OEM Rear Shock Absorber Mounting Nut, For Securing Mount to Chassis, 6 Per Car, Boxster/Boxster S (1997-2004), Each
Suspension 900-380-012-01-OEM Shock Top Nut, M14 x 1.5
Suspension 986-331-043-07-M80 Control Arm Link (Track Arm), Rear Suspension, Left and Right, each, Boxster/Boxster S (1997-04)
Suspension 987-333-059-00-OEM Rear Shock Absorber Mount, 2 Per Car, Boxster/Boxster S (1997-04), Each
Suspension 996-333-792-24-OEM Rear Sway Bar Bushing, Stock Rubber, 18.7 mm (sold per each, 2 required), 996 (1999-2004), Boxster (1999-03)
Suspension 996-333-792-25-OEM Rear Sway Bar Bushing, Stock Rubber, 19.8 mm (sold per each, 2 required), 996 (1999-2004), M 030 Boxster (1997-99)
Suspension 996-341-043-06-M80 Control Arm Link, Front/Rear Suspension - Front Lower, Left and Right, each, 911 Carrera 2/4 (1999-05), 911 Turbo (2001-05), Front - Boxster/Boxster S (1997-04)
Suspension 996-341-053-17-M80 Control Arm, Front/Rear Suspension - Lower, Left or Right
Suspension 996-343-069-04-M80 Front Sway Bar Droplink, left front: 996 (1999-2005); left front or left rear: Boxster/Boxster S (1997-2004)
Suspension 996-343-070-04-M80 Sway Bar Droplink (sold per each), right front 996 (1999-2005), right rear or right front Boxster/Boxster S (1997-2004)
Suspension 996-343-107-03-OEM Upper Shock Stop Plate (sold per each, 2 per shock), front 996/996 Turbo (1999-2004), front or rear Boxster/Boxster S (1997-2004)
Suspension 996-343-301-02-M58 Rubber Bump Stop (Bushing), Front Strut, 986 Boxster/Boxster S (1997-04), 987 Boxster/Boxster S (2005- ), Cayman/Cayman S, 996 Carrera/Carrera 4 (1999-05), 911 Turbo (2001-05, except GT2), 997 Carrera/Carrera S with M475 PASM (2005- )
Suspension 996-343-505-00-M737 Protection Boot for Front Shock Absorber Left/Right (2 Per Car)
Suspension 996-343-515-05-M100 Front Shock Absorber Mount, Lower Rubber Bushing, 2 Per Car, 996 Carrera 2 (1999-04), Boxster/Boxster S (1997-04), Each
Suspension 996-343-792-14-OEM Front Sway Bar Bushing, Stock Rubber (sold per each, 2 required), 996 (1999-2003)
Suspension 996-347-322-03-M80 Inner Tie Rod (sold per each, 2 per car), 996/996 Turbo (1999-2004), Boxster S (2000-04)
Suspension 997-331-045-04-M80 Control Arm Link, Rear Suspension - Rear Lower, Left and Right, each, 911 Carrera 2/4 (1999-05), 911 Turbo (2001-05), Boxster/Boxster S (1997-04)
Suspension 997-343-018-01-M69 Shock Absorber Mount, Front, Upper Plate (2 per car, sold individually)
Suspension 999-084-447-01-OEM Front Shock Absorber Mounting Nut, For Securing Mount to Chassis, 6 Per Car, 996 Carrera 2/4 (1999-04), 996 Turbo (2001-2004), Boxster/Boxster S (1997-2004), Each
Suspension OEM-98633328501 Sealing ring Brand: Genuine Porsche
Suspension OEM-98633330101 Genuine Porsche Part: SHOCK RUBBER BUFFER
Suspension OEM-98633350402 Compensating plate, 3,0 MM Brand: Genuine Porsche
Suspension OEM-98633350501 Genuine Porsche Part: SHOCK BELLOWS
Suspension OEM-98633350902 Genuine Porsche Part: SHOCK MOUNT RING
Suspension OEM-99634351100 Compensating plate, 3,0 MM Brand: Genuine Porsche
Suspension OEM-99634351101 Compensating plate, 6,5 MM Brand: Genuine Porsche
Suspension OEM-99634351300 Cone washer Brand: Genuine Porsche
Suspension OEM-99634351701EM0 Support ring Brand: Genuine Porsche
Tools & Misc 996-721-151-00-M100 Factory Tow Hook, 911 Carrera 2/4 (1995-04), 911 Turbo (2001-05), Boxster/Boxster S (1997-04), 924/924S/924 Turbo all, each
Tools & Misc PEL-TOL-P222 Magnetic Box V Wrench (17mm)
Tools & Misc PEL-TOL-ST0229 16mm XZN Triple Square (Tamper Proof) Drain Plug Removal Tool for 5-Speed Manual Transmission, 1/2 in drive, Boxster (1997-04)
Tools & Misc PEL-TOL-T136 Clutch Alignment Tool, (Spline count = 23; Pilot diameter = 14.9 mm; Spline diameter = 23.8 mm)
Tools & Misc SCHW-P-648 Fuel Line Pliers (adjustable), fits newer BMW, Audi/VW, Porsche
Tools & Misc PEL-IMS-1 Pelican M96 Intermediate Shaft Bearing (IMS) Retrofit Kit, for either Single or Dual Row IMS
Tools & Misc LN-106-08-13 LN Engineering Intermediate Shaft Bearing (IMS) Puller/Counterstay, for extraction of single or dual-row bearing intermediate shaft bearings safely. Includes: puller, driver, 5 chain and 3 chain engine cam locks, TDC lock pin, and broken stud easy-out.
Tools & Misc PEL-0100 European Power Bleeder Kit, Porsche All
Tools & Misc 005773-0-M84 17mm Transmission Drain Plug Removal Tool (3/8 inch drive)
Wheels & Axles 016-409-399-B-M5213 Seal for Differential Output Shaft (45 x 60 x 8 mm)
Wheels & Axles 900-041-013-01-OEM Circlip - CV Joint (sold per each, 2 per axle), Boxster (1997-2003), Expandable Oil Return Tube Circlip (for 2 piece tube, sold per each, 4 required), 911/911 Turbo (1974-89)
Wheels & Axles 911-332-257-00-M395 CV Boot Clamp, 73mm (sold per each), 911 (1985-89), 911 Carrera 4 front inner and rear (1989-98), 928 (1982-95), 911 Turbo (1991-94), 944S2/Turbo, 996 (1999-02), 996 Turbo rear (2001-05), Boxster (1997-02), Boxster S (2000-04), 987 Boxster/Boxster S (2005- )
Wheels & Axles 928-332-257-01-M395 Axle Boot Clamp (34 mm), 911 (1985-98), 928 (1982-95), 911 Turbo (1991-94), 944S2/Turbo, 996 (1999-02), 996 Turbo rear (2001-05), Boxster (1997-02), Boxster S (2000-04), 987 Boxster/Boxster S (2005- )
Wheels & Axles 928-332-293-02-M60 CV Joint Boot, Inner or Outer (sold per each)
Wheels & Axles 951-332-901-00-M60 CV Joint Kit w/boot (25 splines), 944S2/968 All, 944 Turbo from 88, Boxster (1997-02)
Wheels & Axles 964-332-267-01-OEM CV Joint Splined End Cap
Wheels & Axles 996-332-257-00-M395 CLIP
Wheels & Axles 996-332-957-00-M395 Axle Boot Clamp (70.8 - 74 mm), Rear Inner/Outer
Wheels & Axles 999-053-041-04-M34 Wheel Bearing
Wheels & Axles 999-084-641-01-M100 Hub Tension Flange Nut, M22 x 1.5, front or rear (sold per each)
__________________
When life throws you curves, aim for the apex...
|
|
|
|
|
08-20-2012, 06:25 AM
|
#56
|
|
Registered User
Join Date: May 2011
Location: Maine, USA
Posts: 126
|
Great info!
|
|
|
|
|
08-20-2012, 03:01 PM
|
#57
|
|
Homeboy981
Join Date: Jan 2012
Location: Sherman, TX
Posts: 663
|
Eric G (or should it be 'Gee Eric you have been busy'),
I was excited about this project, and hoped to follow some of it.
And then, DANG, saw the parts list! OMG! I almost fainted and my wife saw it and said, "You're not doing all that!"
But, on the QT
.thanks for the list!
Looks like you have the "perfect car" now!
And GOOD WORK BTW!
Thanks for the pics too! Good Thread
.
__________________
2002 Porsche Boxtser S - Silver & Chrome - Died from IMS failure AFTER IMS was replaced!
|
|
|
|
|
08-20-2012, 04:06 PM
|
#58
|
|
Theoretical propagandist
Join Date: Dec 2011
Location: Pacific Northwest
Posts: 793
|
Homeboy...take the car on like an eating an elephant, one bite at a time. Look at things that can be grouped together such as "what can you do if you replace the IMS/RMS and the tranny is out"? If you attack it from that perspective, you can divvy it up into pieces and then spread the cost out over a couple of years. Also, if you look through the parts list, there are a lot of things that can be taken off if you want to reuse components (things that don't have to be replaced).
If you really want to do this shoot me a PM of what your looking to do and we can develop a list of things you absolutely need vs. would like to have. I will bet we can pair this down to a very manageable cost.
Also, if you have not gotten acquainted with the Pelican Parts Project builder... take the time to do so. By building subcategories and going through your build and then sort on the subcategories the system will cost out each of those areas. Then you can simply move each category to the shopping cart when you are ready to purchase a group of parts.
__________________
When life throws you curves, aim for the apex...
|
|
|
|
|
08-22-2012, 11:33 AM
|
#59
|
|
Registered User
Join Date: Apr 2009
Location: Orlando
Posts: 1,266
|
Yikes...are you building a whole new Boxster.
__________________
http://i768.photobucket.com/albums/x...6/PC120055.jpg
Old Hippie Young Heart
2000 S/3.2 Liter/Tiptronic/Boxster S Sport Package/Cruise Control/Slate Grey Metallic
Red Special Leather Interior/Red Floor Mats/Red Hand Painted Instrument Dials/Roll Bar/Windstop
Small Carbon Package/Leather Wrap Carbon Wheel/Center Console Exterior Color/Alum Carbon Shift Knob
AM/FM Radio w/CD Player & Changer/Digital Sound Package/18" Turbo Wheels/Wheel Caps w/Colored Crest
|
|
|
|
|
08-23-2012, 06:20 AM
|
#60
|
|
Theoretical propagandist
Join Date: Dec 2011
Location: Pacific Northwest
Posts: 793
|
...almost  I need to get to Jake's class on the M96 motor as that would be the next portion of this project (when it is needed) would be to do a total tear down and refurbishment. Right now I am half way through the top replacement and hope to have that done either tonight or the next. Big thing is that right now I am just itching to get her wheels back, aligned and out on the road for a test drive on the suspension. I am hoping it feels like butter!
__________________
When life throws you curves, aim for the apex...
|
|
|
|
 Posting Rules
|
You may not post new threads
You may not post replies
You may not post attachments
You may not edit your posts
HTML code is On
|
|
|
All times are GMT -8. The time now is 03:13 AM.
| |


 Esmeralda
 Gadget
 Sasha
Sasha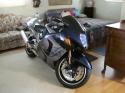 Gertrude
 Bernice
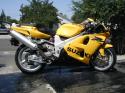 Mrs. T
 Mean Motor Scooter
 "Bernie" - PONZI that 'made off' with my money!
 Linear Mode


