 09-26-2020, 10:43 PM
|
#1
|
|
Registered User
Join Date: Oct 2018
Location: North Cali
Posts: 858
|
Quote:
Originally Posted by Qingdao

I think you are supposed to bolt that vise to a work bench... I could be wrong. LOL
I typically burn the old bushings out in this type of scenario.
|
Yeah, that vise has been like that since I moved here from my previous place... Maybe once the Porsche engine is off the bench!
If I burned out the bushing I`d end up with a steel cyilinder in an aluminum bore that I still would have to press out.
|

|

|
|
09-27-2020, 02:23 PM
|
#2
|
|
Registered User
Join Date: Jul 2019
Location: Charleston
Posts: 559
|
Quote:
Originally Posted by Homeoboxter
Yeah, that vise has been like that since I moved here from my previous place... Maybe once the Porsche engine is off the bench!
If I burned out the bushing I`d end up with a steel cyilinder in an aluminum bore that I still would have to press out.
|
Ah, Why didn't you get the mount thats already in the aluminium housing? I just replaced one on a customer's car.
__________________
'99 supercharged 4.3 chevy Boxsterado
'98 PP13B powered "RX986"
This hairdresser only cuts mullets
|
|
|
|
|
09-27-2020, 09:16 PM
|
#3
|
|
Registered User
Join Date: Oct 2018
Location: North Cali
Posts: 858
|
Quote:
Originally Posted by Qingdao
Ah, Why didn't you get the mount thats already in the aluminium housing? I just replaced one on a customer's car.
|
Because it costs 5 times more than the insert only 
|
|
|
|
|
09-29-2020, 10:59 PM
|
#4
|
|
Registered User
Join Date: Oct 2018
Location: North Cali
Posts: 858
|
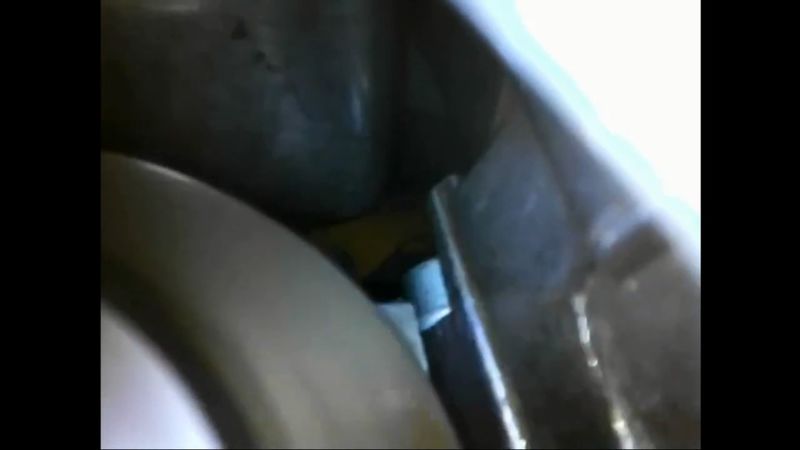
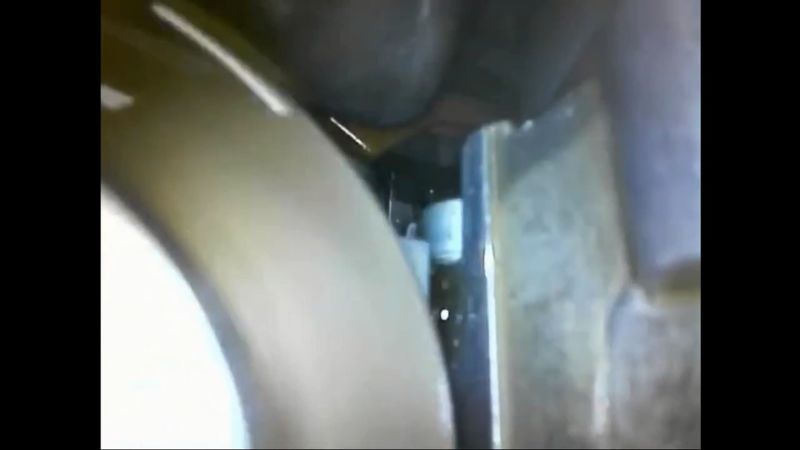
Variocam test
There are plenty of threads here on how variocam operation can be tested with the durametric or similar diagnostic tool, but I wanted to make sure they work before putting the engine back in the car. So I used a simple borescope camera to capture the switchover of the variocam units while the engine was driven by the starter on my work bench. I inserted the camera through the hole for the green plug over the intake camshaft, on the scavanging pump side. I used 12V to switch the solenoids on. Here are some pictures, looks like they both work fine 
Ths is just for guidance if it`s unclear what we are looking at:
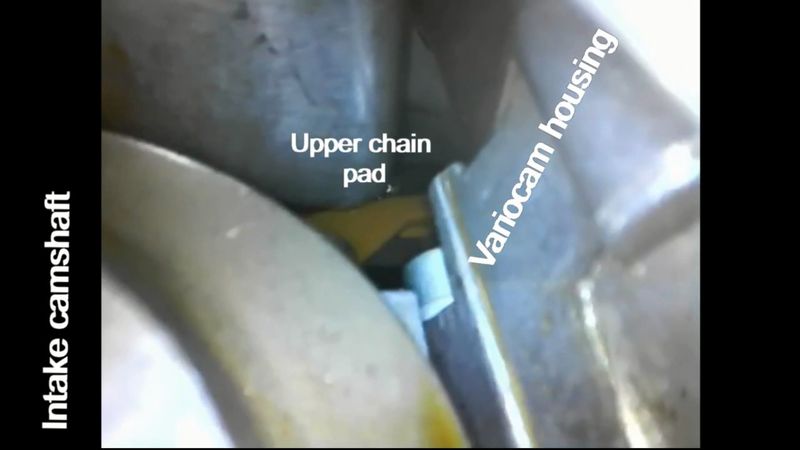
Variocam at bank 1-3 at rest:

Variocam 1-3 actuates:
Variocam bank 4-6 at rest:

Variocam 4-6 actuates:
The video is available here, if interested:
https://www.youtube.com/watch?v=xmNduI2lRbA
|
|
|
|
|
10-02-2020, 05:47 PM
|
#5
|
|
Registered User
Join Date: Sep 2008
Location: Florida
Posts: 2,497
|
Quote:
Originally Posted by Homeoboxter
Yeah, that vise has been like that since I moved here from my previous place... Maybe once the Porsche engine is off the bench!
If I burned out the bushing I`d end up with a steel cyilinder in an aluminum bore that I still would have to press out.
|
For next time, mount insert removal is easy if you cut the rubber out and then use a hack saw on the remaining aluminum. saw a couple of cuts and the aluminum comes out in a couple of pieces. About 30 minutes total.
|
|
|
|
|
10-02-2020, 07:42 PM
|
#6
|
|
Registered User
Join Date: Oct 2018
Location: North Cali
Posts: 858
|
Quote:
Originally Posted by dghii
For next time, mount insert removal is easy if you cut the rubber out and then use a hack saw on the remaining aluminum. saw a couple of cuts and the aluminum comes out in a couple of pieces. About 30 minutes total.
|
Thanks for the tip, but the mount insert on this car was made of steel. So was the replacement. Steel insert in an aluminum housing. I can`t see how it`s possible to cut the insert out easily without damaging the aluminum bore. Scroll back, only the core part of the mount is aluminum, then rubber, then steel. And the steel shell is pressed into the aluminum housing. Maybe there are different versions? 
|
|
|
|
|
10-02-2020, 11:33 PM
|
#7
|
|
Registered User
Join Date: Jul 2019
Location: Finland
Posts: 356
|
Quote:
Originally Posted by Homeoboxter
Thanks for the tip, but the mount insert on this car was made of steel. So was the replacement. Steel insert in an aluminum housing. I can`t see how it`s possible to cut the insert out easily without damaging the aluminum bore. Scroll back, only the core part of the mount is aluminum, then rubber, then steel. And the steel shell is pressed into the aluminum housing. Maybe there are different versions? |
I had same dilemma last year. Purchased the engine mount bushing only and attempted to change it to the aluminium housing... plenty of fight on this stage and I finally ended up ordering a new housing with new bushing installed. I stil have the ole housing and the separate bushing waiting for next round
__________________
2001 996 C2 Manual
|

|
|
|
10-03-2020, 11:40 AM
|
#8
|
|
Registered User
Join Date: Mar 2018
Location: Fort Langley
Posts: 253
|
Just read the entire thread. All posts and pictures. Well done and thanks for taking the time to post the journey!
__________________
----------------------------
98 Boxster - Ocean Blue metallic. Bringing it back to life and having fun doing it!
20 Harley Streetbob -
|
|
|
|
|
10-03-2020, 08:09 PM
|
#9
|
|
Registered User
Join Date: Oct 2018
Location: North Cali
Posts: 858
|
Quote:
Originally Posted by Zzorro
Just read the entire thread. All posts and pictures. Well done and thanks for taking the time to post the journey!
|
Wow, that`s a lot of reading Thanks for stopping by!
|
|
|
|
|
10-04-2020, 07:59 AM
|
#10
|
|
Registered User
Join Date: Sep 2008
Location: Florida
Posts: 2,497
|
Quote:
Originally Posted by Homeoboxter
Thanks for the tip, but the mount insert on this car was made of steel. So was the replacement. Steel insert in an aluminum housing. I can`t see how it`s possible to cut the insert out easily without damaging the aluminum bore. Scroll back, only the core part of the mount is aluminum, then rubber, then steel. And the steel shell is pressed into the aluminum housing. Maybe there are different versions? |
Ive done this twice....one on my car and once for a friend. It wasnt tough to do at all and I didnt score the inside bore of the mount. Just used a hand tool hack saw. When the cut was almost through, I used a screwdriver and hammer to chisel out the weakens, cut area.
I would have given up if it was hard to do!
|
|
|
|
|
10-05-2020, 01:59 PM
|
#11
|
|
Registered User
Join Date: Oct 2018
Location: North Cali
Posts: 858
|
Quote:
Originally Posted by dghii
Ive done this twice....one on my car and once for a friend. It wasnt tough to do at all and I didnt score the inside bore of the mount. Just used a hand tool hack saw. When the cut was almost through, I used a screwdriver and hammer to chisel out the weakens, cut area.
I would have given up if it was hard to do!
|
Thanks, I`ll give it a try next time! Not too soon though, hopefully this one will last for another good 100k miles! 
|
|
|
|
|
10-12-2020, 09:30 PM
|
#12
|
|
Registered User
Join Date: Oct 2018
Location: North Cali
Posts: 858
|
I had some time over the weekend to prepare the engine bay for the power plant. Poor thing was quite abandoned in the past two years. I was gonna put the engine back on in a couple weeks, lol.

Back of the coolant tank. Someone else has been here before me, who replaced the spring clamp.
Oil filler tube. Doesn`t look right.

I pulled the coolant tank if I was there anyway. Probably it`s replaced somewhere in the past. No sign of cracks, I`ll just put it back.
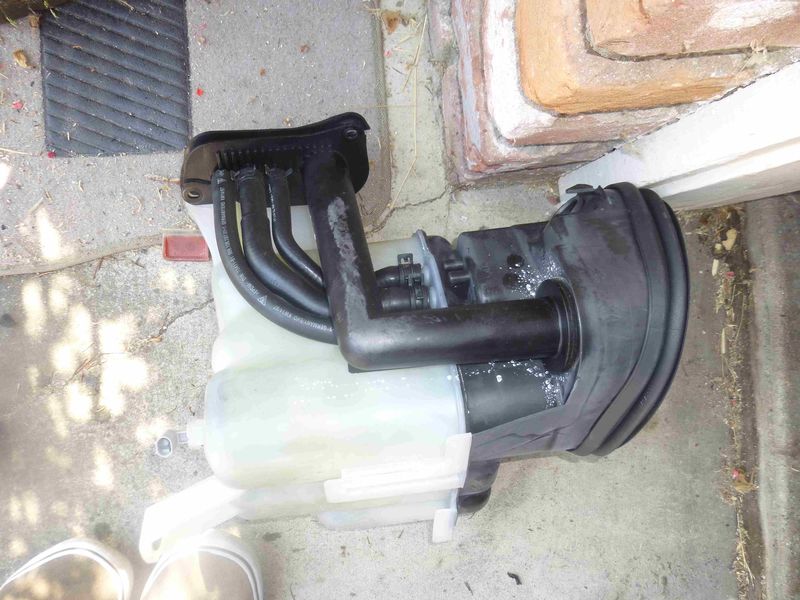

Almost there
|
|
|
|
|
12-20-2020, 07:52 AM
|
#13
|
|
Registered User
Join Date: Mar 2020
Location: Phoenix
Posts: 122
|
Quote:
Originally Posted by Homeoboxter
Oil filler tube. Doesn`t look right.
Almost there |
I bet there are a lot more of these out there than people realize, which is why the motors are so nasty inside. Im guessing mine is like that after only 70k miles by the oil vapor smell I frequently pick up. Sad they couldnt use a better material. I could fix it but dont feel like digging just yet, wait for a bigger problem.
Love the thread, thanks,
|
|
|
|
|
08-14-2022, 04:37 PM
|
#14
|
|
Registered User
Join Date: Oct 2018
Location: North Cali
Posts: 858
|
End of story
|
|
|
|
|
08-28-2024, 10:53 AM
|
#15
|
|
Registered User
Join Date: Aug 2024
Posts: 104
|
wow if all this work is, as in his words (an armature hobby mechanic) i think im at least 30 years of hobby mechanic experience away from being able to do this to THIS extent. I did also follow up on that post with the failure.
Truthfully it was not even at fault to your own which was the hugest downside. A lack of online information regarding the rings really does make all the more difference between a very successful rebuild and catastrophic failure. An unfortunate ending but a very successful process i will be using towards one day taking out my current 2.5L and swapping a used one in
|
|
|
|
| Thread Tools |
|
|
| Display Modes |
 Hybrid Mode Hybrid Mode
|
 Posting Rules
|
You may not post new threads
You may not post replies
You may not post attachments
You may not edit your posts
HTML code is Off
|
|
|
All times are GMT -8. The time now is 12:26 AM.
| |


 Boxster


