 07-05-2019, 07:35 PM
|
#81
|
|
Registered User
Join Date: Oct 2018
Location: North Cali
Posts: 858
|
100000 miles expressed in brush wear:
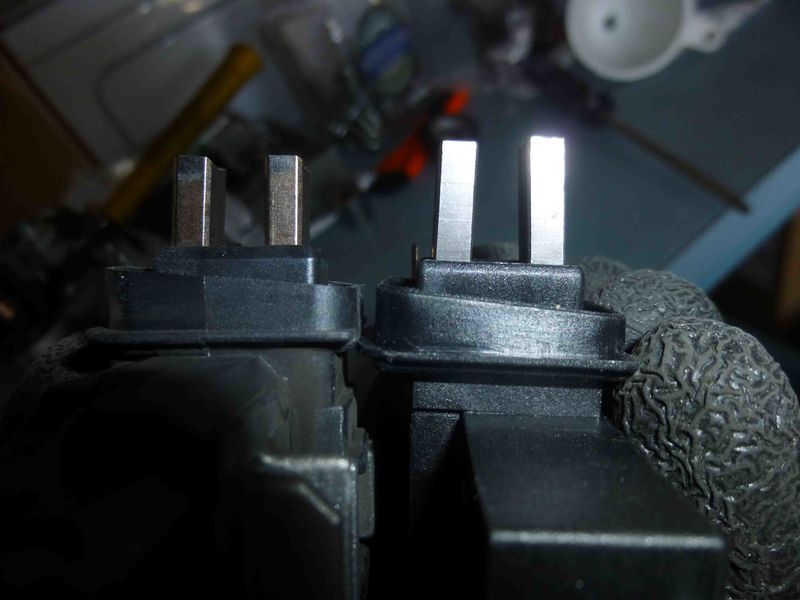
I decided the put the original brush set back as it`s one unit with the rectifier and the quality of the aftermarket version seems worse than the original. There`s still a lot of meat left in these brushes.
Done.
Last edited by Homeoboxter; 07-06-2019 at 05:48 PM.
|

|

|
|
07-06-2019, 03:35 PM
|
#82
|
|
Registered User
Join Date: Jul 2019
Location: Charleston
Posts: 563
|
Very impressive work. Are you going to "nut and bolt" restore the whole car or just the engine and periphery?
__________________
'99 supercharged 4.3 chevy Boxsterado
'98 PP13B powered "RX986"
This hairdresser only cuts mullets
|

|
|
|
07-06-2019, 05:47 PM
|
#83
|
|
Registered User
Join Date: Oct 2018
Location: North Cali
Posts: 858
|
Quote:
Originally Posted by Qingdao

Very impressive work. Are you going to "nut and bolt" restore the whole car or just the engine and periphery?
|
Huh, I really hope I don`t have to touch anything else, but probably that`s a very naive assumption  The rest of the car seems ok though, apart from the 11 years rest.
|
|
|
|
|
07-07-2019, 10:32 AM
|
#84
|
|
Registered User
Join Date: Jun 2014
Location: LB, Germany
Posts: 1,529
|
Quote:
Originally Posted by Homeoboxter
Hi Markus,
No, I haven`t yet, but I was gonna drop it off at some machine shop to have it checked. Or I`ll just place it down on a glass table and meaure the gaps all around with a feeler gauge. I`m kind of far from that stage yet though.
Best,
Greg
|
Hi Greg,
first step is always to measure all parts, especially the cylinder heads. Because this is an full alloy engine you have to check for flatness, warps and if anything is straight.
You can check the head surface by using a steel ruler. Put the ruler on the head and put a torch behind the ruler so it shines in your direction. If you can see light come through between the head surface and the ruler, in general the head needs to be resurfaced.
Now it depends how much material needs to be machined from the head and if the head is warped in any way. Most time you can compensate with a thicker cylinder head seal, but if not the struggle begins, because than you have to reseat the valves, sometimes adjust the valve length and so on. Good thing on a M96 engine is that you can adjust the cam position / timing.
So before doing anything else first step is to do measurements and check if everything is straight. 
Hope this is helpful.
Regards, Markus
__________________
My Porsche keyfob, instrument cluster and alarm ecu repair service: https://sportwagendoktor.de
|
|
|
|
|
07-08-2019, 01:32 PM
|
#85
|
|
Registered User
Join Date: Oct 2018
Location: North Cali
Posts: 858
|
Quote:
Originally Posted by Smallblock454
Hi Greg,
first step is always to measure all parts, especially the cylinder heads. Because this is an full alloy engine you have to check for flatness, warps and if anything is straight.
You can check the head surface by using a steel ruler. Put the ruler on the head and put a torch behind the ruler so it shines in your direction. If you can see light come through between the head surface and the ruler, in general the head needs to be resurfaced.
Now it depends how much material needs to be machined from the head and if the head is warped in any way. Most time you can compensate with a thicker cylinder head seal, but if not the struggle begins, because than you have to reseat the valves, sometimes adjust the valve length and so on. Good thing on a M96 engine is that you can adjust the cam position / timing.
So before doing anything else first step is to do measurements and check if everything is straight.
Hope this is helpful.
Regards, Markus |
Hey Markus, thanks for the useful tips, I`ll do the measurements soon.
Best,
Greg
|
|
|
|
|
08-12-2019, 09:11 PM
|
#86
|
|
Registered User
Join Date: Oct 2018
Location: North Cali
Posts: 858
|
|
|
|
|
|
08-12-2019, 10:57 PM
|
#87
|
|
Registered User
Join Date: Oct 2018
Location: North Cali
Posts: 858
|
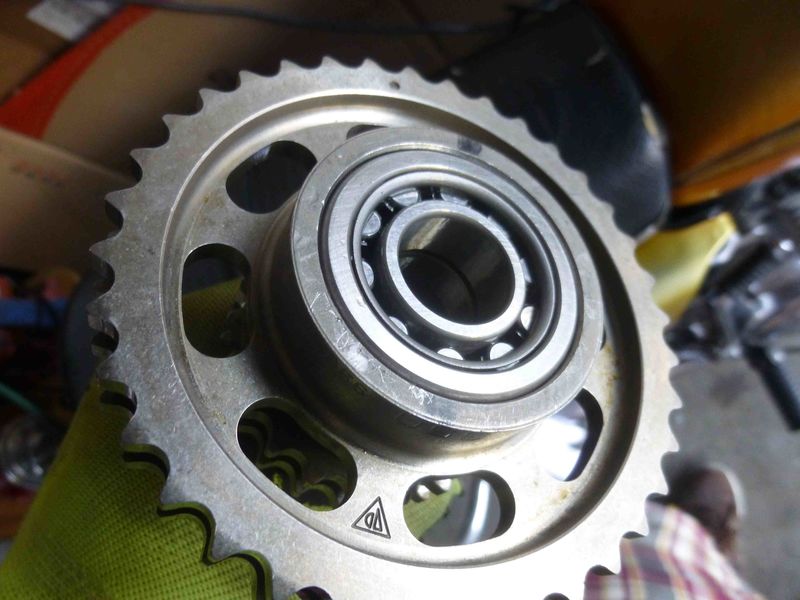
The whole unit is submerged in oil normally that I think is sufficient for lubrication. However, oil has to find its way around the IMS that spins in the engine case.

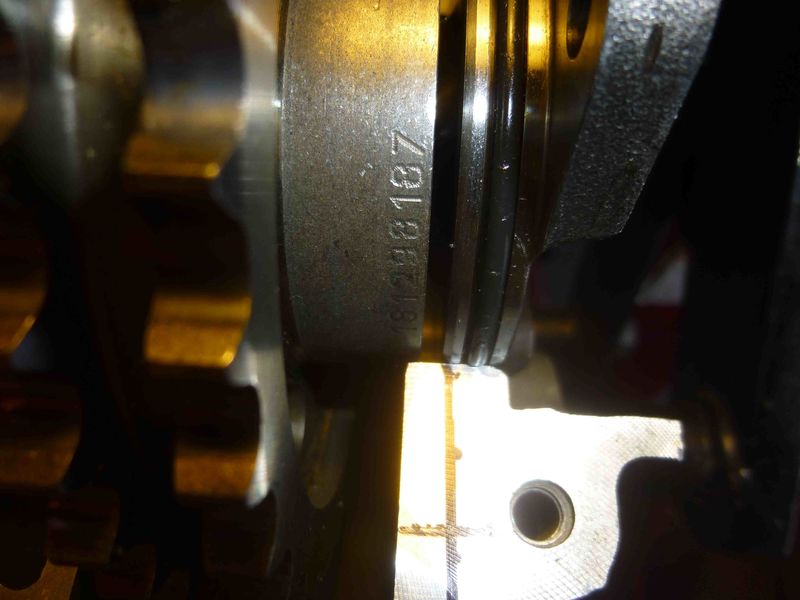
Here`s a closer view. At high RPM and at certain viscosities much of the oil may be scattered off from the shaft due to centrifugal force. This may increase the chance that the bearing is not amply lubricated at all times.
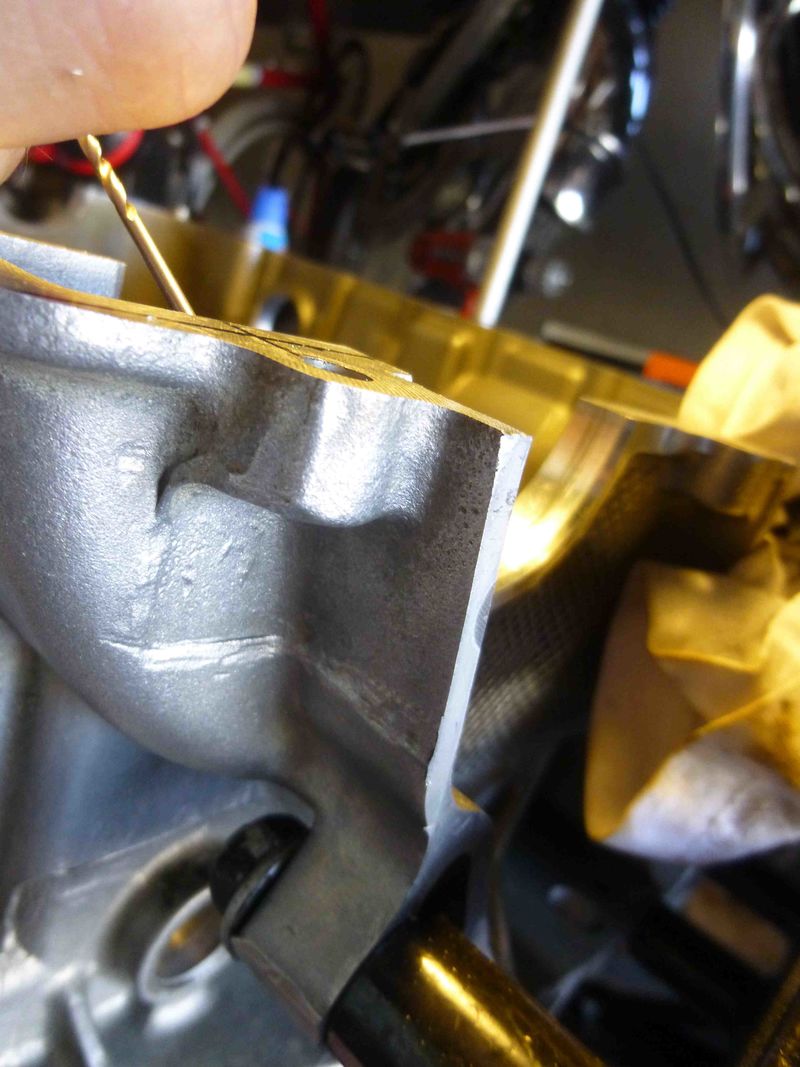
Probably it`s overkill, but to overcome this possibility, I thought a bypass oil channel in the engine case could set the same oil level behind the IMS in all circumstances. So, after a few second hesitation I decided to drill an oil gallery in the engine case. There`s not much room here, so I fabricated a mini drill to do the job:
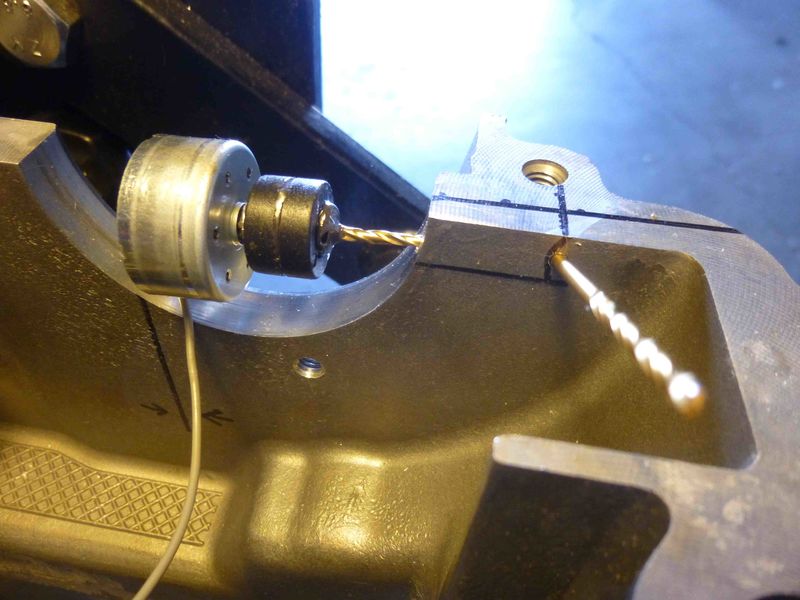
Engine case wall is pretty thick here, so there`s plenty of room for a little oil gallery.
In situ position. Horizontal lines indicate the oil level at min and max sign at the dipstick.
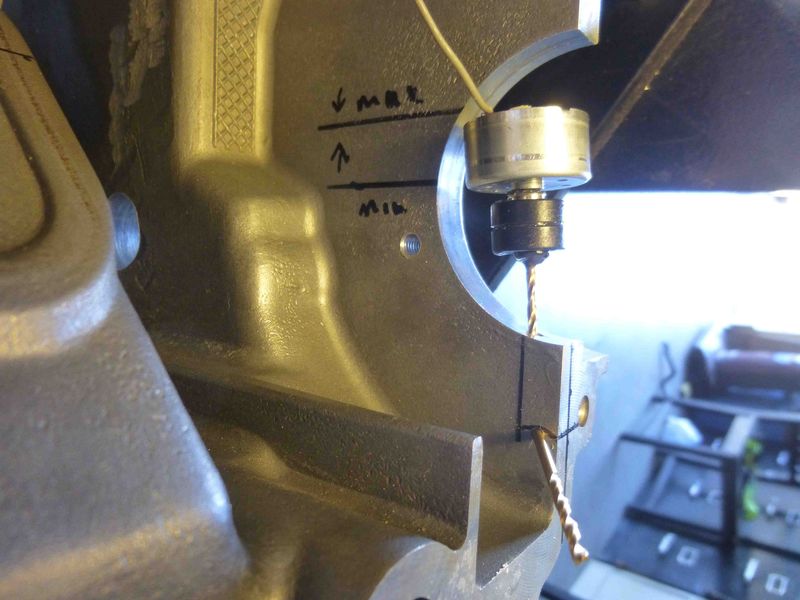
Oil should easily reach the stationary center parts of the IMSB unit via this hole.

The oil gallery actively contributes to the better lubrication of the IMSB as well: the spinning sprocket generates a high oil pressure in its cavity that forces oil into the gallery and thus the back of the IMS.
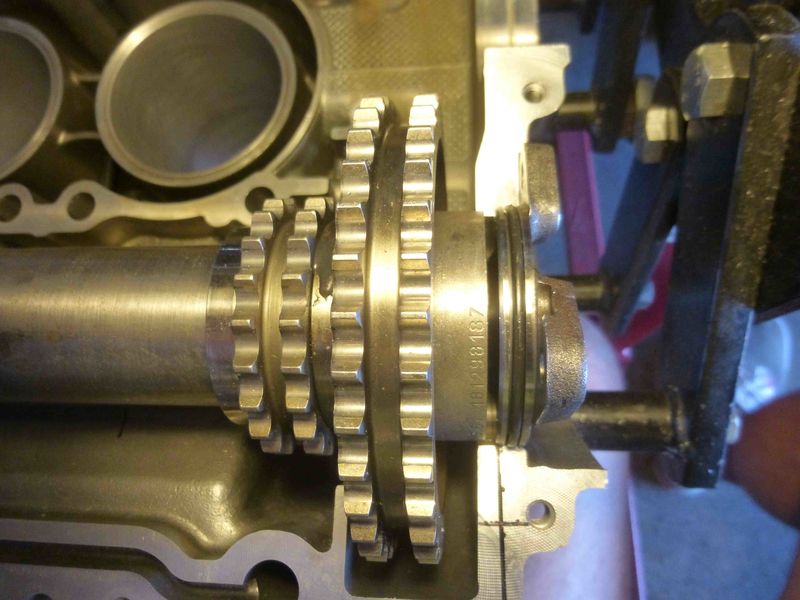
Oil within the IMS gets depleted via this small hole drilled on the sprocket.
|
|
|
|
|
08-13-2019, 01:07 AM
|
#88
|
|
Custom User Title Here
Join Date: Mar 2012
Location: Ft. Leonard Wood
Posts: 6,169
|
It’s always great to see people try new things. Can’t say I agree with using two different bearings (as an engineer, I see many issues with this...a larger roller bearing seems better to me as thrust forces in this application should be minimal), but I am interested to see how your oil gallery works out.
Of course, it will take at least a few years and tens of thousands of miles, plus pulling the bearings for inspection for a definitive answer, but I hope to be around for that.
Very innovative. I will be watching with interest.
I hope your theory pans out 
Last edited by particlewave; 08-13-2019 at 01:12 AM.
|
|
|
|
|
08-13-2019, 07:30 AM
|
#89
|
|
Registered User
Join Date: Oct 2018
Location: North Cali
Posts: 858
|
Quote:
Originally Posted by particlewave
Its always great to see people try new things. Cant say I agree with using two different bearings (as an engineer, I see many issues with this...a larger roller bearing seems better to me as thrust forces in this application should be minimal), but I am interested to see how your oil gallery works out.
Of course, it will take at least a few years and tens of thousands of miles, plus pulling the bearings for inspection for a definitive answer, but I hope to be around for that.
Very innovative. I will be watching with interest.
I hope your theory pans out |
Thanks! I think I will have to replace the DMF in about 5-10k miles, so I`ll have a chance to inspect the bearings as well. Hopefully it won`t fall apart before that
|
|
|
|
|
01-08-2020, 10:03 PM
|
#90
|
|
Registered User
Join Date: Oct 2018
Location: North Cali
Posts: 858
|
|
|
|
|
|
01-11-2020, 03:02 PM
|
#91
|
|
Registered User
Join Date: Oct 2015
Location: IN
Posts: 16
|
Back to work!
Glad to see an update. I was wondering what was going on.
|
|
|
|
|
01-14-2020, 03:49 PM
|
#92
|
|
Registered User
Join Date: Oct 2018
Location: North Cali
Posts: 858
|
Yeah, every project is getting delayed since the little one arrived. Hopefully the Boxster will run at least when he gets the license Thanks for keeping track of the progress!
Quote:
Originally Posted by Hirsch990
Glad to see an update. I was wondering what was going on.
|
|
|
|
|
|
01-14-2020, 07:27 PM
|
#93
|
|
Registered User
Join Date: Oct 2018
Location: North Cali
Posts: 858
|
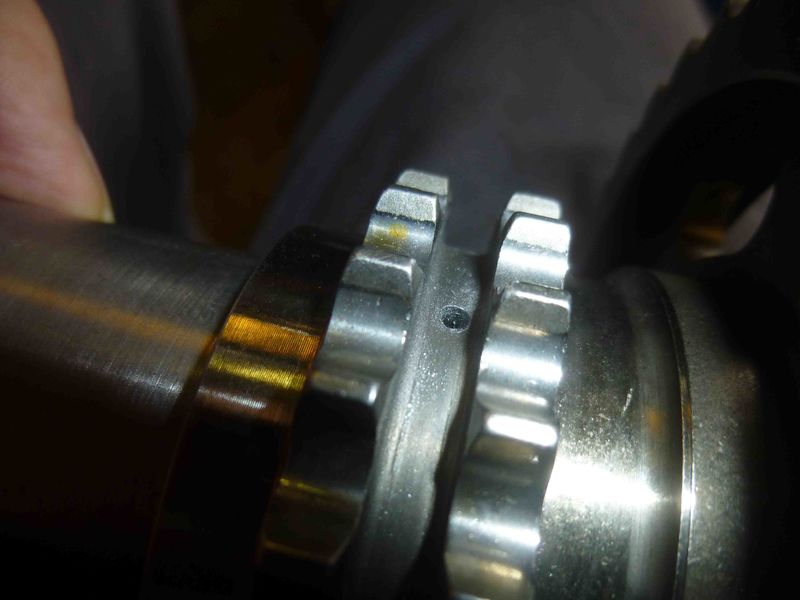
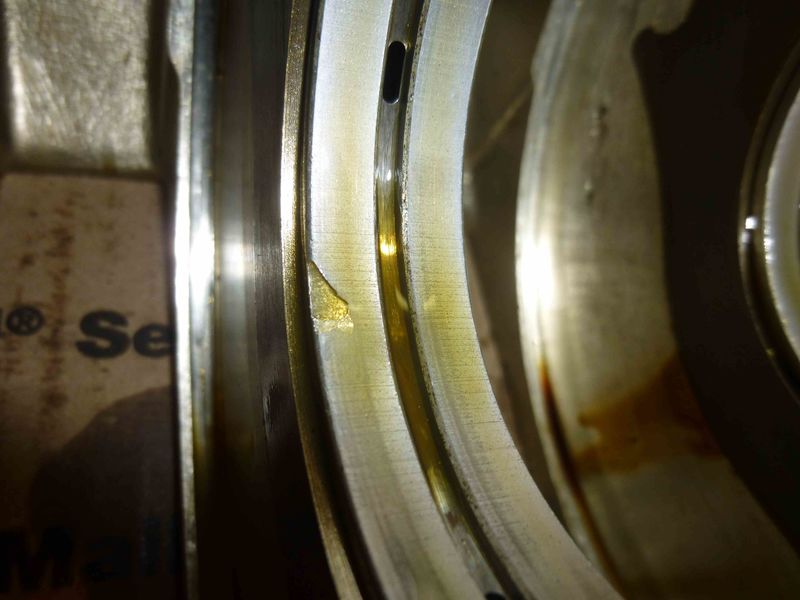
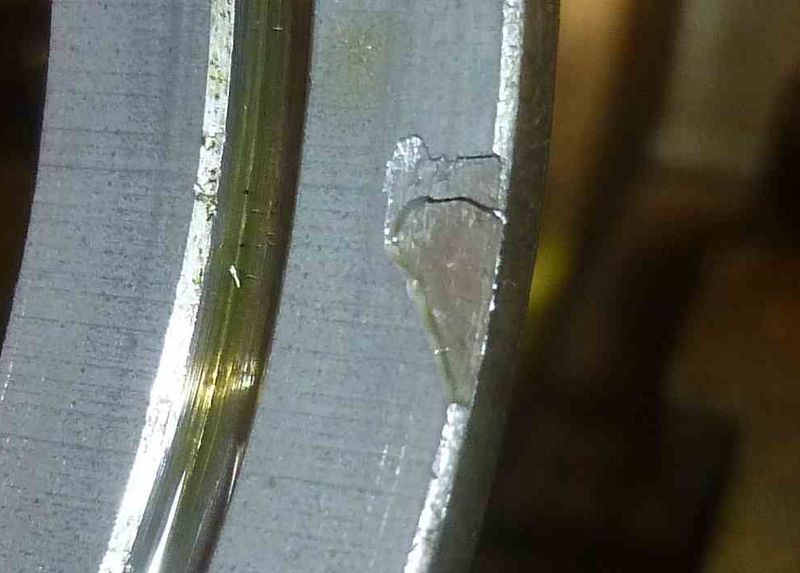
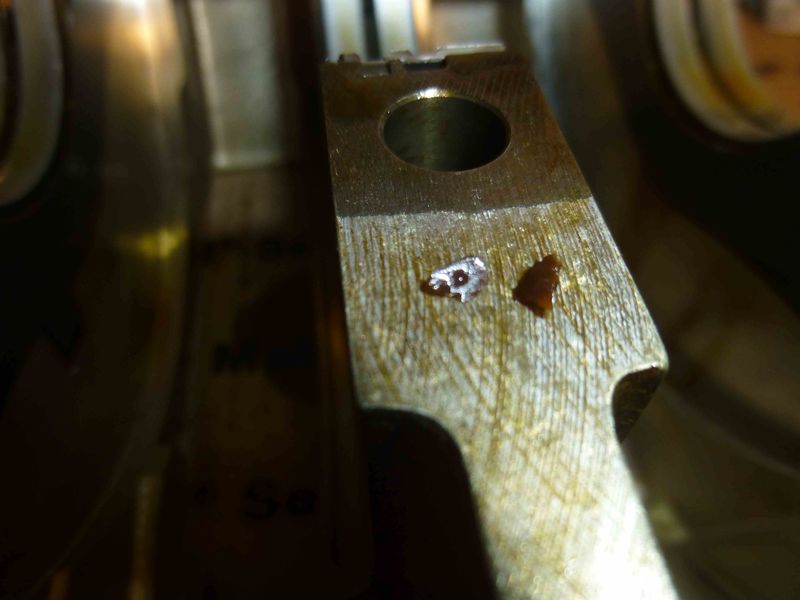
Crank issues
Update: I was a bit too optimistic last time when I said everything inside the crank bearing housing was in perfect condition. I lifted off the crankshaft and took a second look. I discovered a few things:
1) The most shocking is this by far:
I assume this piece was already missing in the factory, otherwise I can`t really see how it could have escaped from here without getting jammed in between the journal and the bearing. Must have been a late Friday session on the assembly line when this got through quality control. Actually, if it was just fine for 100k miles, I might as well put it back, right?
2) I still could find pieces from the plastic chain tensioner pad that fell apart. This little thingy is a real pain in the butt. Make sure you replace yours in time! Makes a lot more sense to replace these regularly than any IMS update.
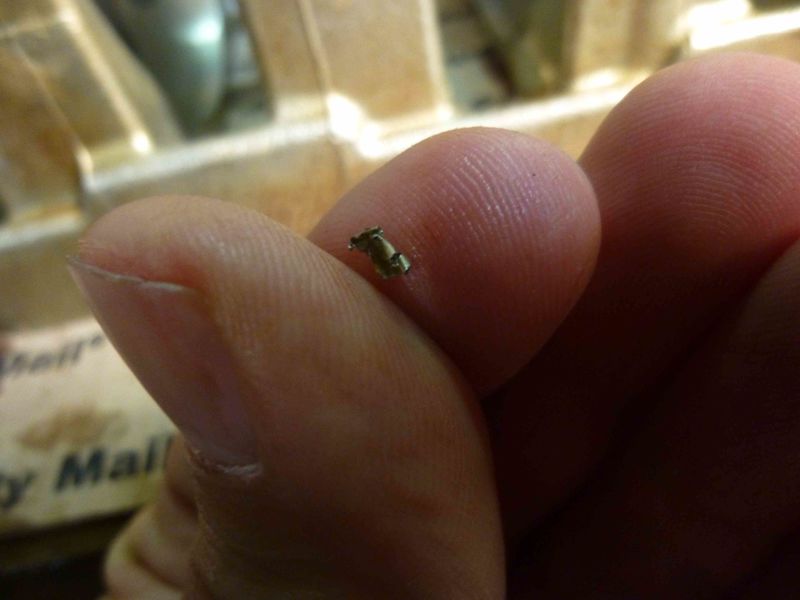
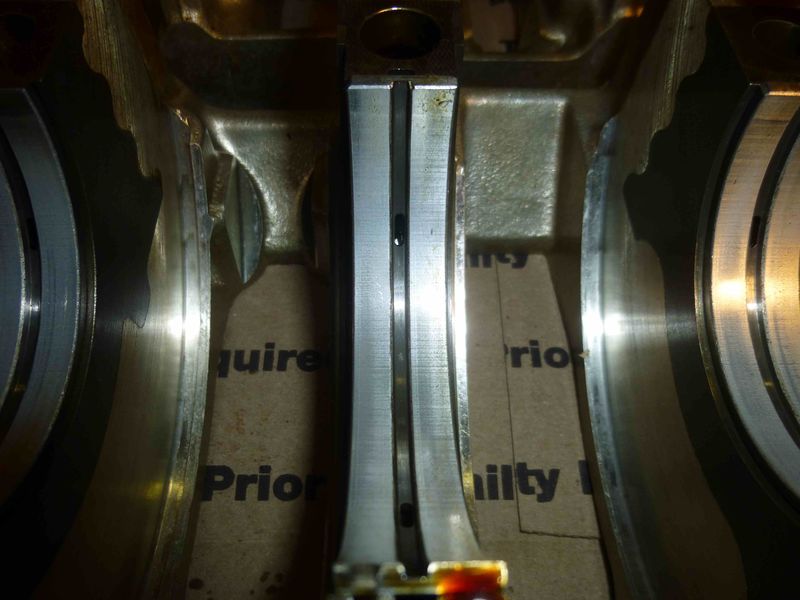
3) One of the thrust washers seems a bit more worn than it should be. Looks like it got mixed with some plastic from somewhere, or just burnt, I don`t know.

The other one, that`s not pushed by the crank when the clutch is being operated, seems brand new.
4) When the casing was machined, these ugly burrs should`ve been removed I guess. They come off easily and can cause damage anywhere they get to. German precision, where did you go?

More to come once I received the parts.
|
|
|
|
|
01-15-2020, 04:47 PM
|
#94
|
|
Registered User
Join Date: Jul 2019
Location: Charleston
Posts: 563
|
Quote:
Originally Posted by Homeoboxter
...4) When the casing was machined, these ugly burrs should`ve been removed I guess. They come off easily and can cause damage anywhere they get to. German precision, where did you go?
...
|
I interviewed for a position at Mercedes Benz Vans last year (its a local production facility). One of the interviewers said "Perfection is an unobtainable goal; we just do the best we can." LOL
__________________
'99 supercharged 4.3 chevy Boxsterado
'98 PP13B powered "RX986"
This hairdresser only cuts mullets
|
|
|
|
|
01-16-2020, 02:10 PM
|
#95
|
|
Registered User
Join Date: Oct 2018
Location: North Cali
Posts: 858
|
Quote:
Originally Posted by Qingdao
I interviewed for a position at Mercedes Benz Vans last year (its a local production facility). One of the interviewers said "Perfection is an unobtainable goal; we just do the best we can." LOL
|
So I assume you didn`t take the job
|
|
|
|
|
02-19-2020, 10:32 PM
|
#96
|
|
Registered User
Join Date: Oct 2018
Location: North Cali
Posts: 858
|
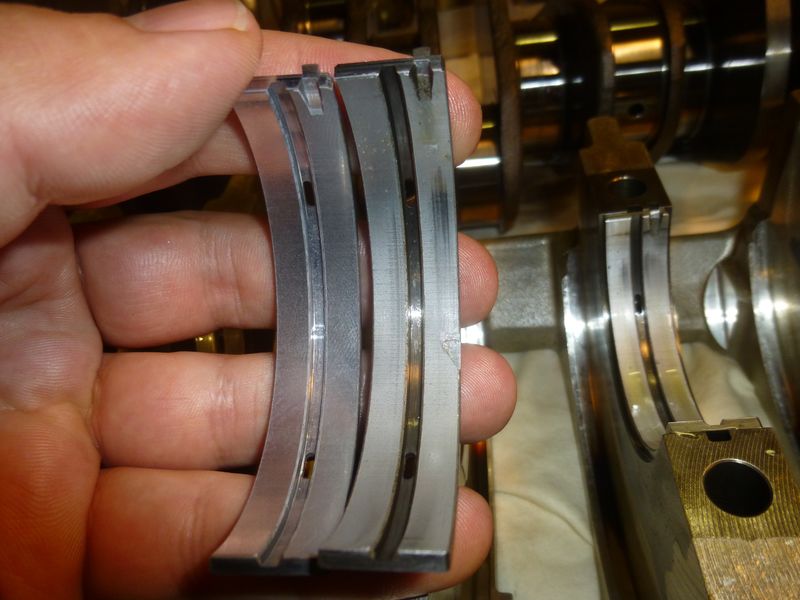
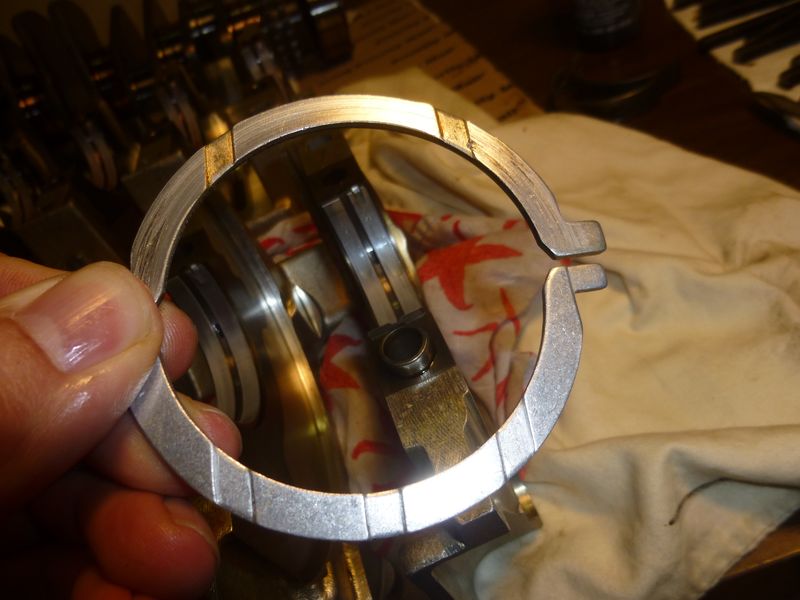
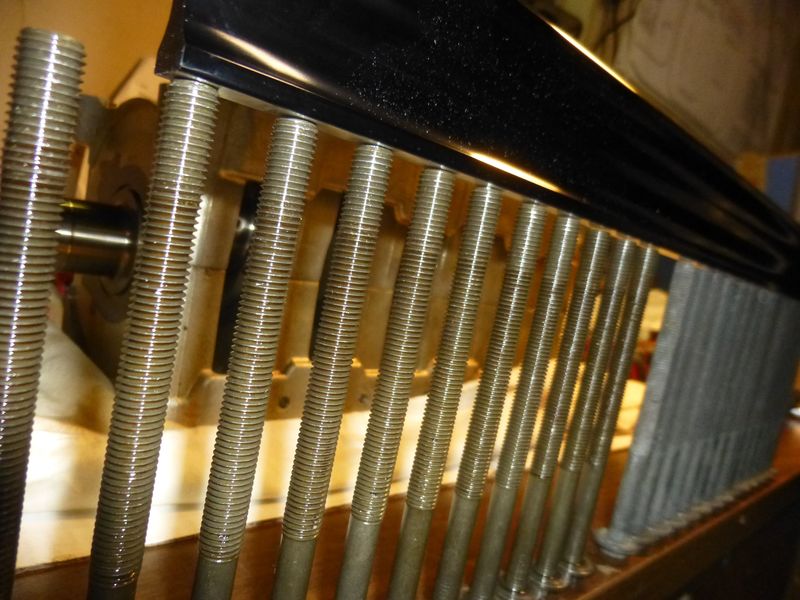
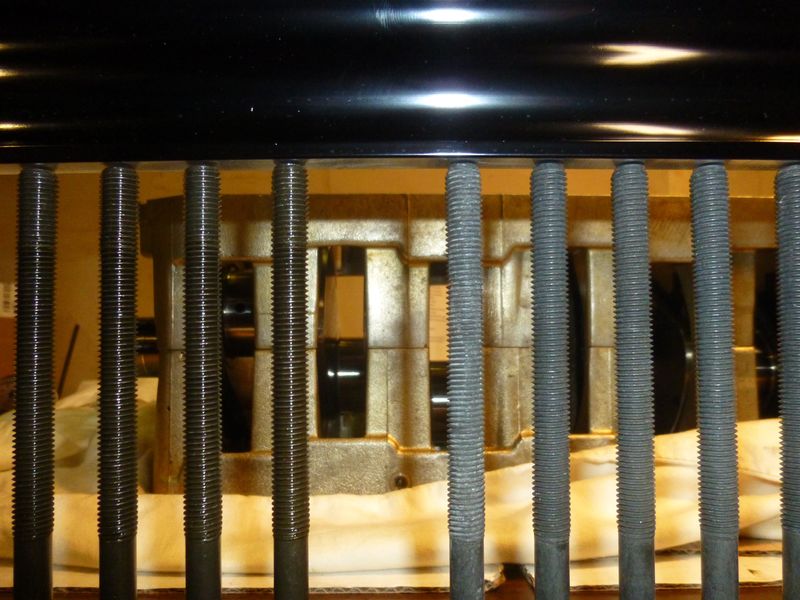
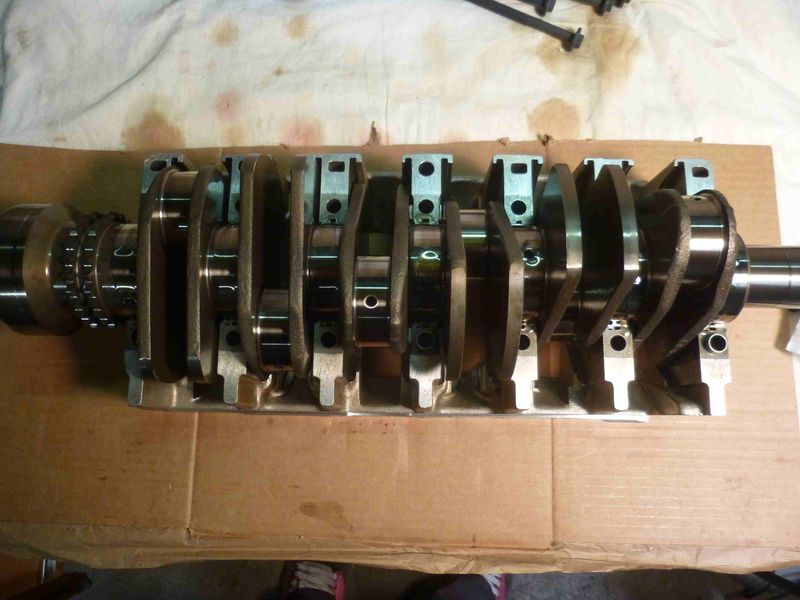
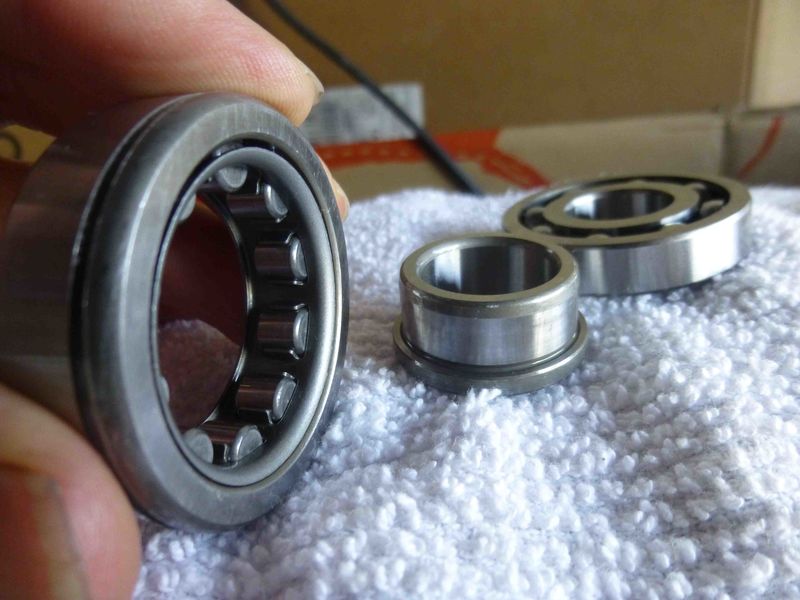
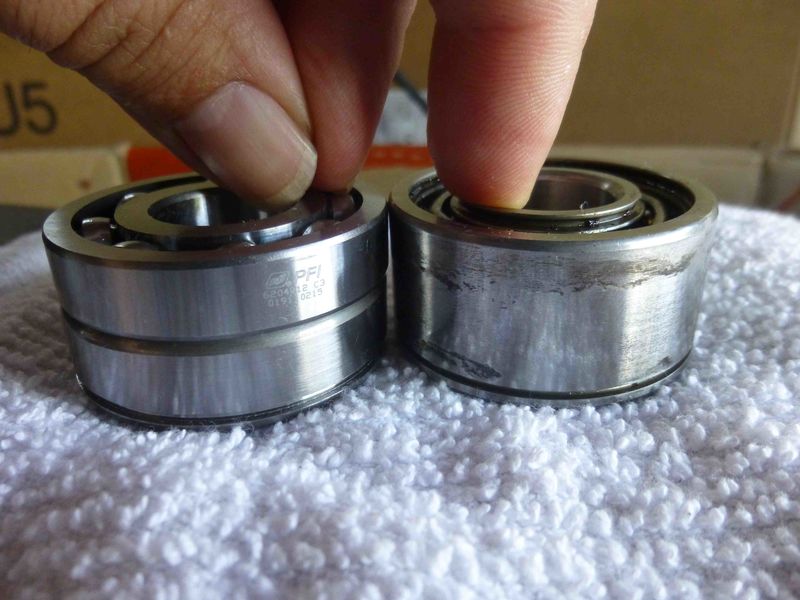
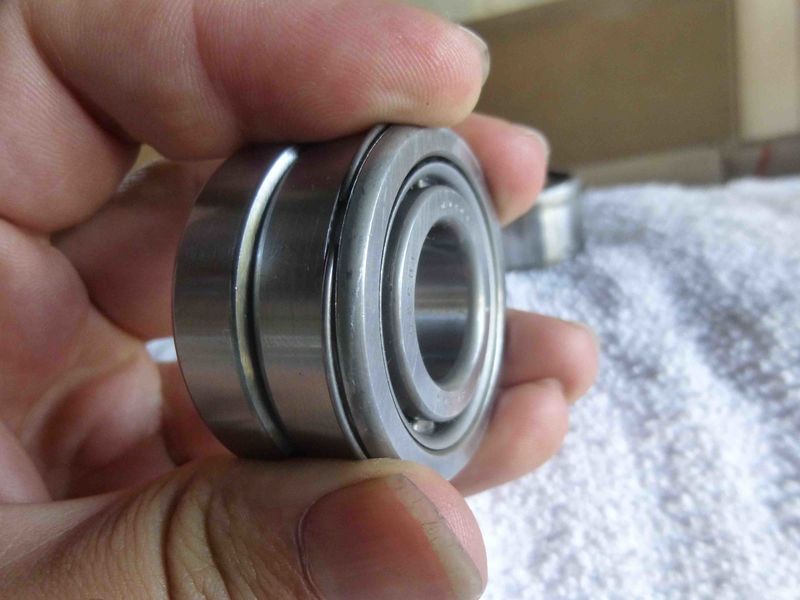
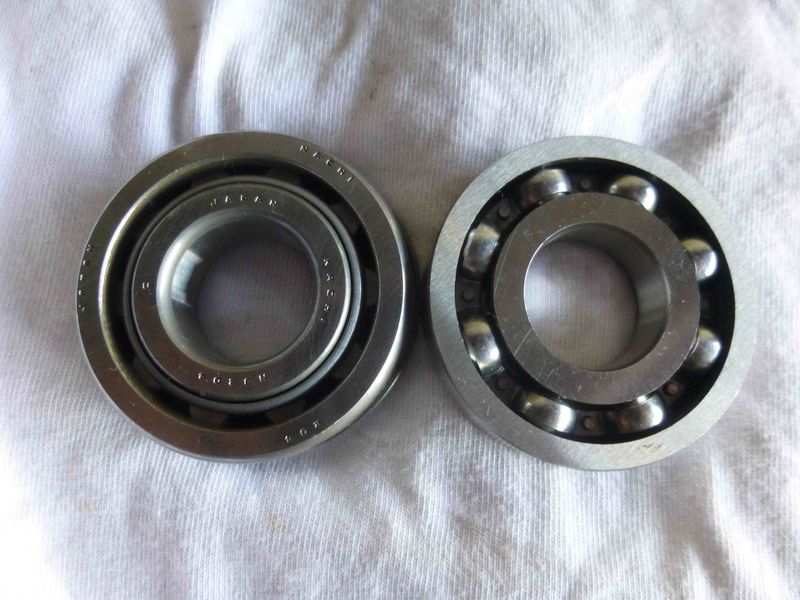
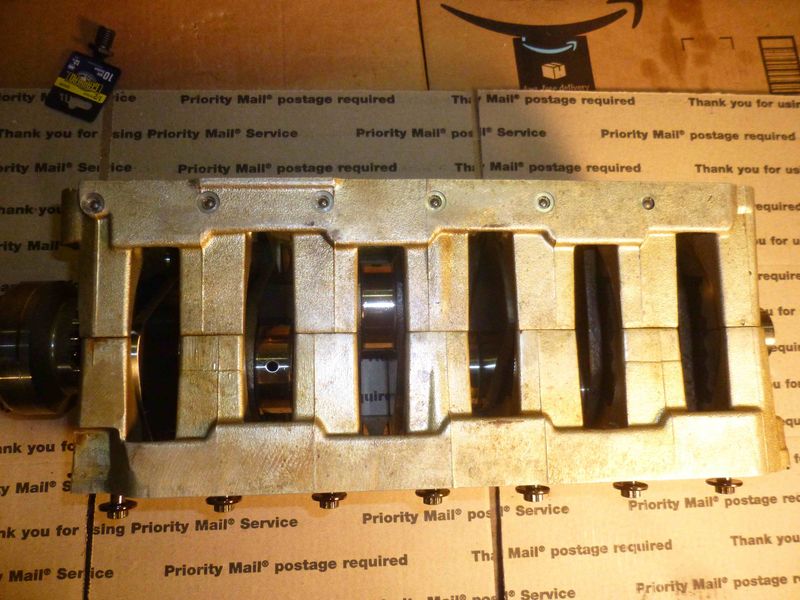
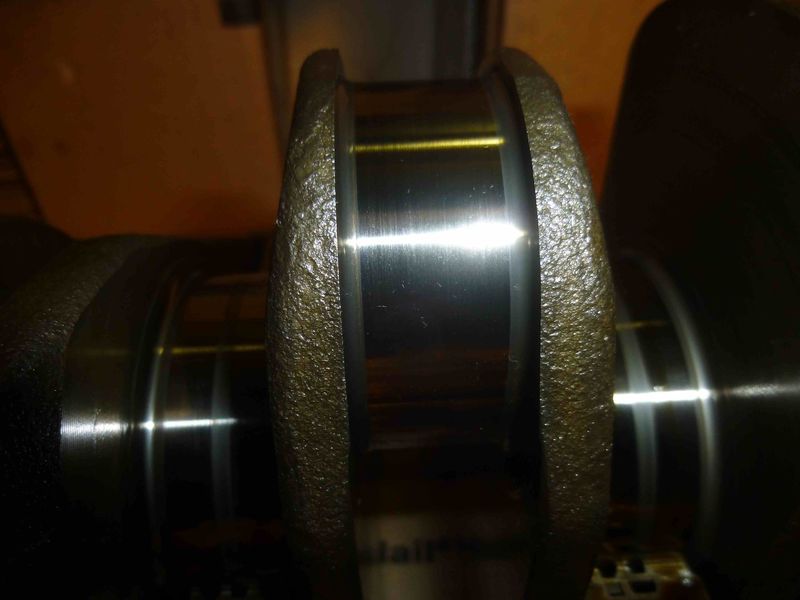
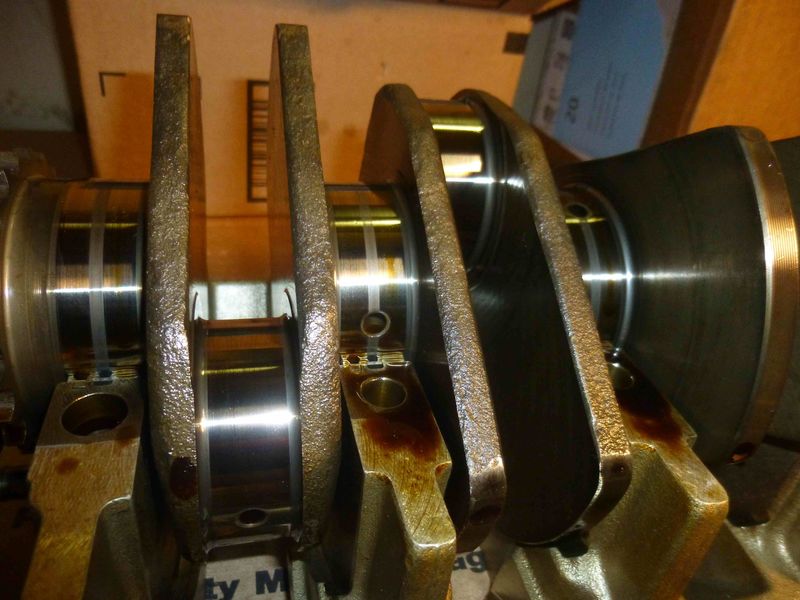
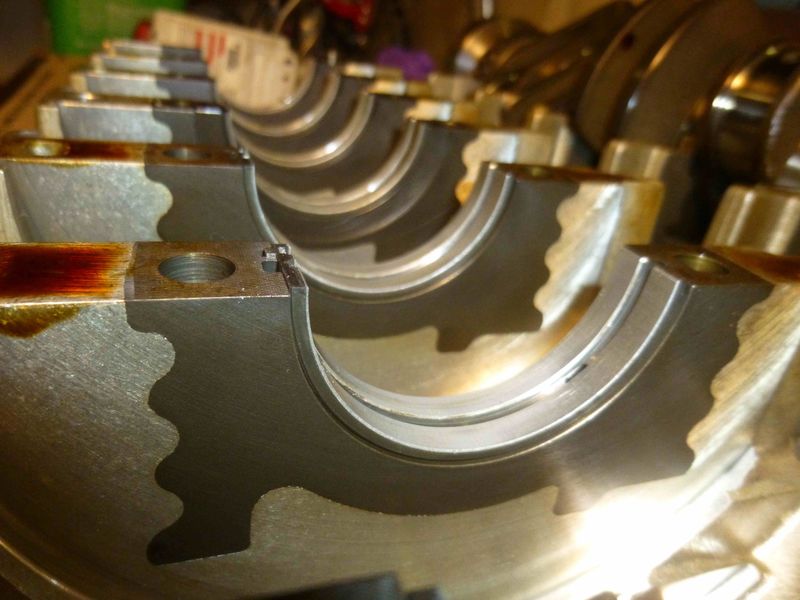
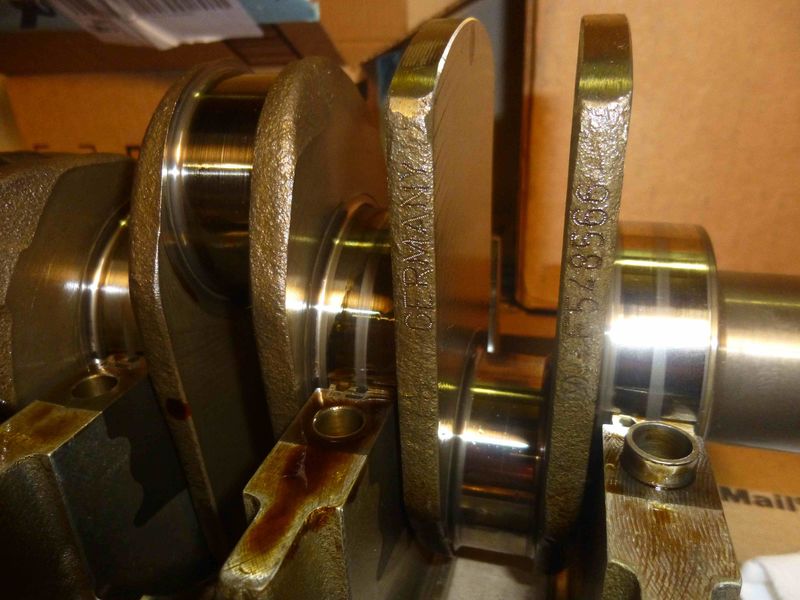
Crankshaft assembling
I received all the parts for the crankshaft assembly, so I put it all together last night. A pair of new bearings, oil spray jets, one thrust washer and new bolts.
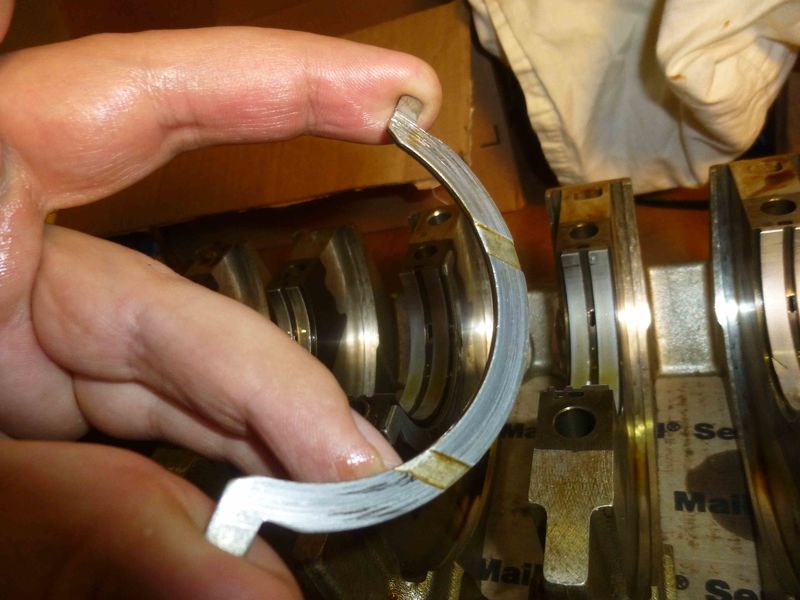
Old vs new bearing shell:
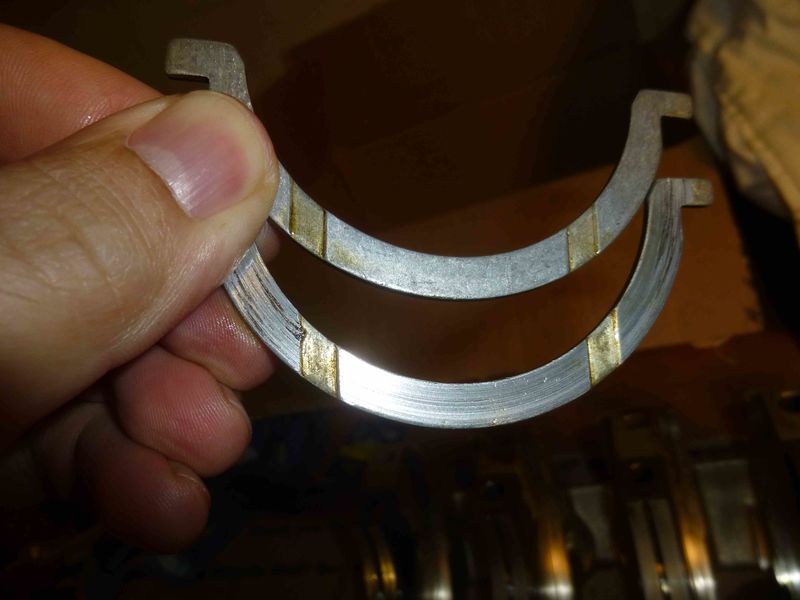
Old vs new thrust washer: the new one has three of those oil pockets, otherwise it`s identical. This was the only version available.
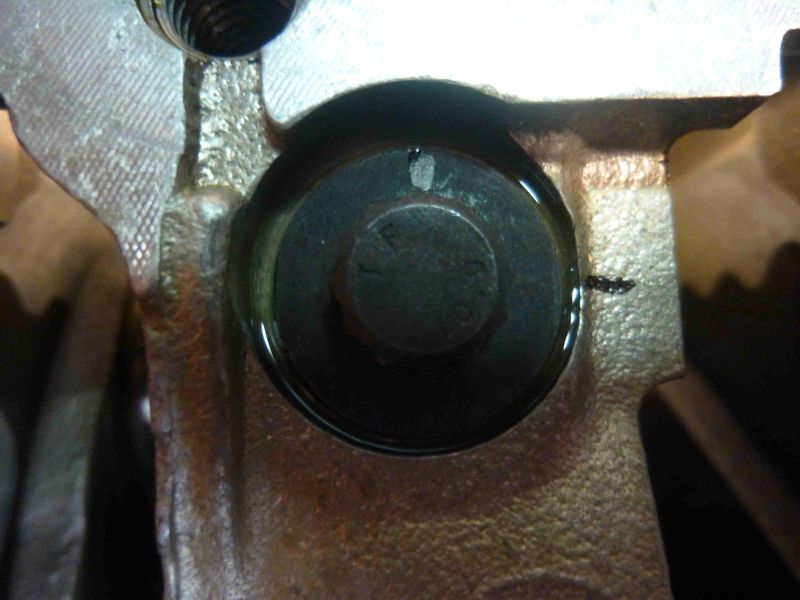
The 14 bolts for the bearing carrier are the TTY (torque to yield) type, so it should be replaced at every reassembly. Out of curiosity, I quickly looked at how much the old bolts were stretched by lining them up on my work bench and placing my straight edge on top. No difference. I might as well just reuse them, it`s more reassuring to use new bolts though.
I flushed the oil galleries of the bearing housing and the crankshaft oil channels thoroughly by injecting gas using a large syringe.
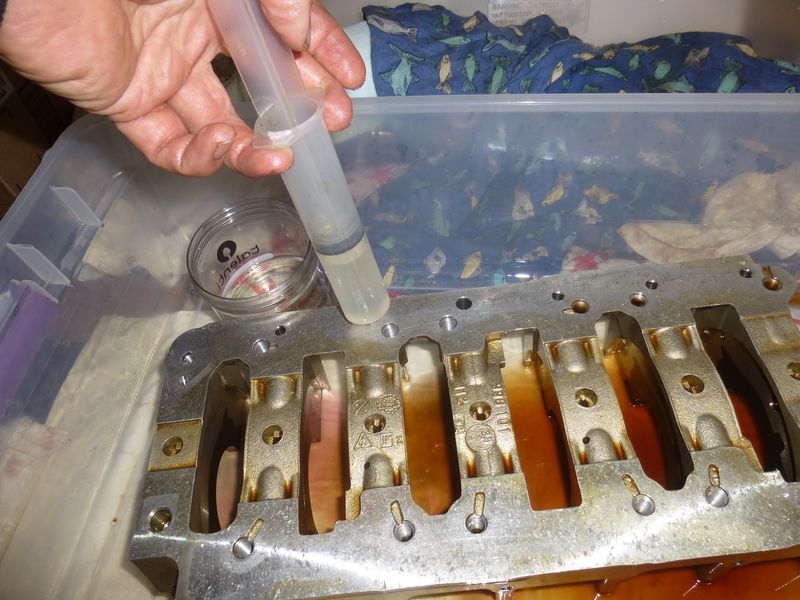
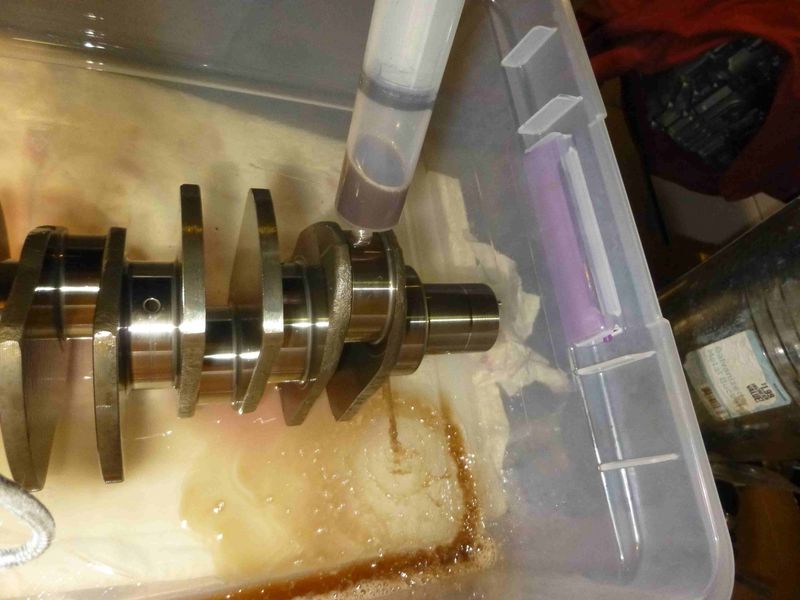
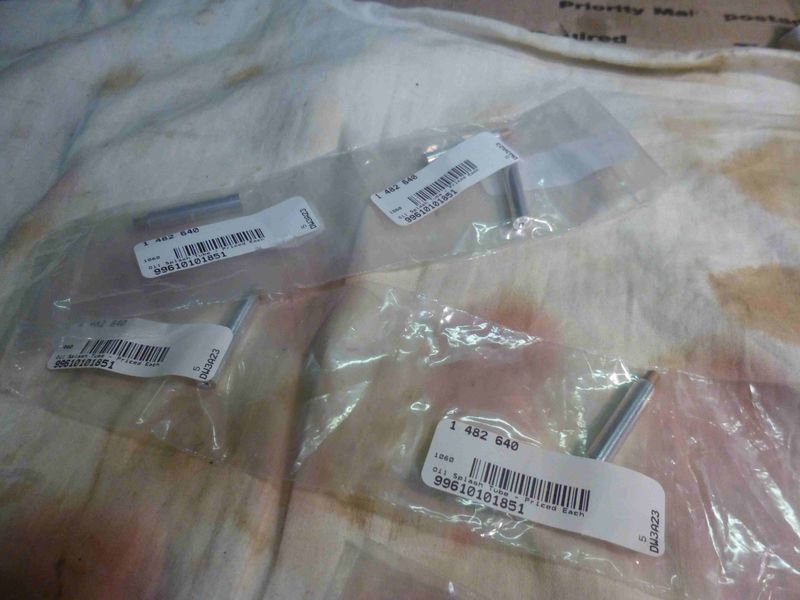
New oil spray jets/splash valves.
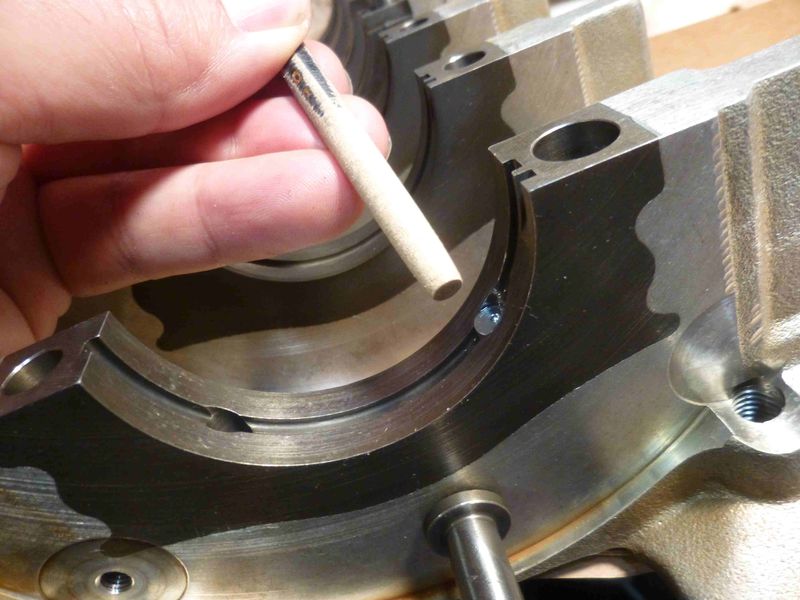
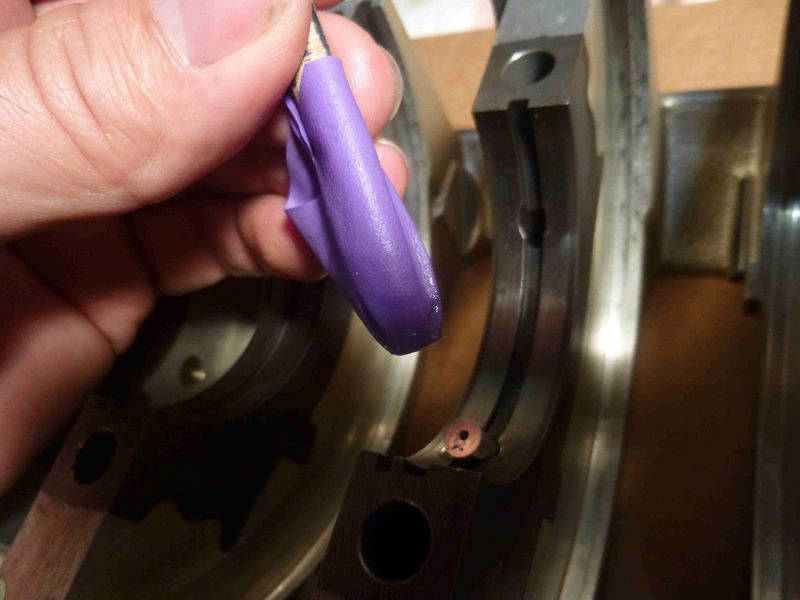
I don`t what`s the proper way to guide the splash valves into their bore without damaging them, I used a pencil that I sanded off to match the size of the jets. To avoid filling the little hole with graphite ( don`t ask how I know this) I wrapped it in a piece of rubber glove material.
Looking good.
|
|
|
|
|
02-19-2020, 10:45 PM
|
#97
|
|
Registered User
Join Date: Oct 2018
Location: North Cali
Posts: 858
|
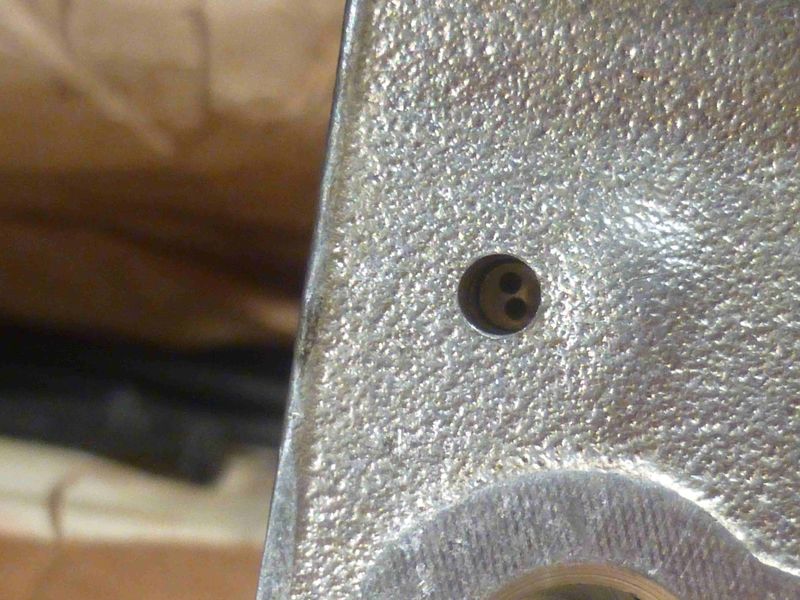
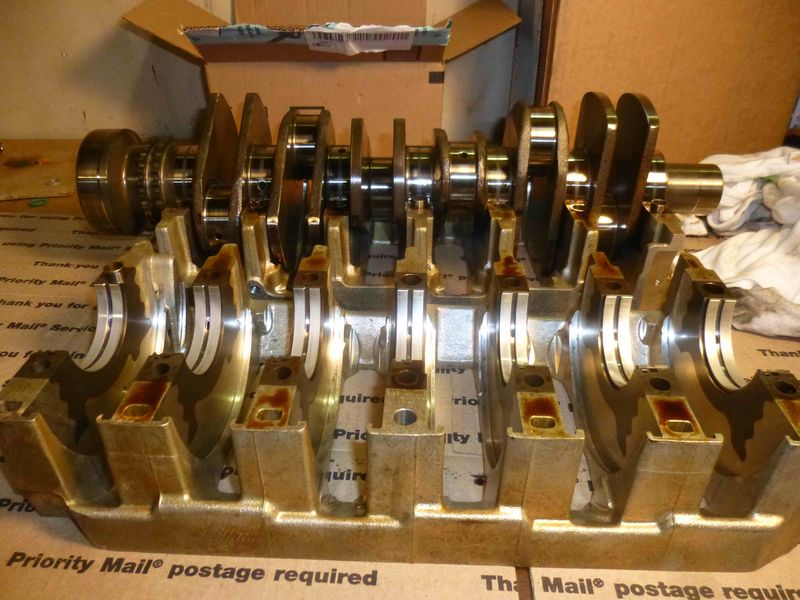
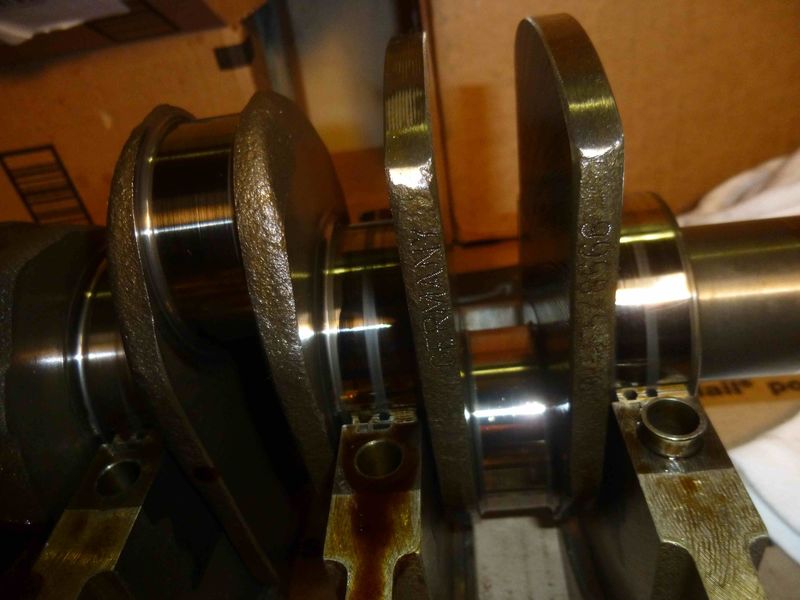
Feeding side of the splash valve:

One more shot of the thrust washer:
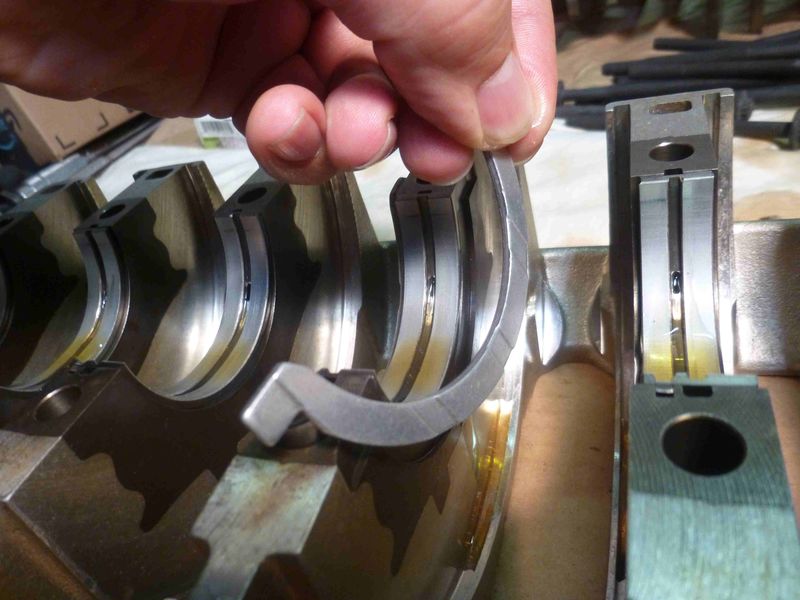
Crank in.
Torqued to 20Nm followed by a 90 degrees turn.
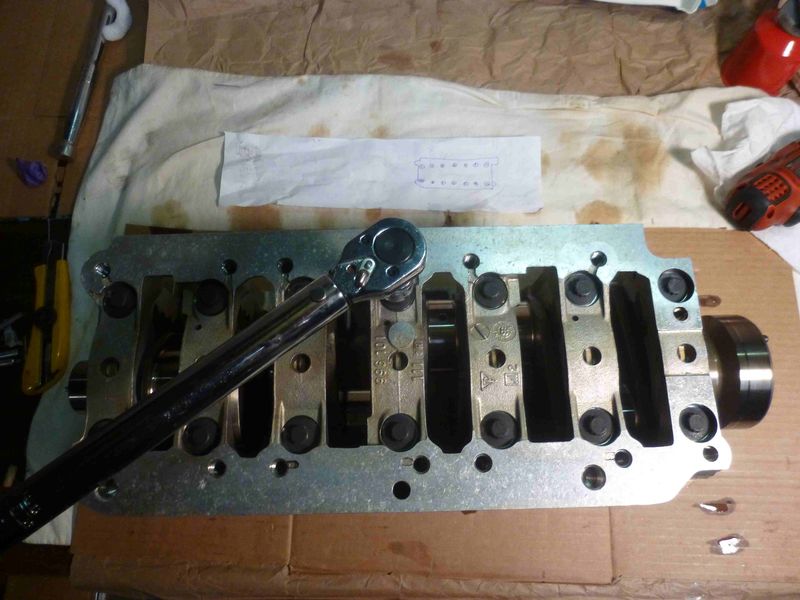
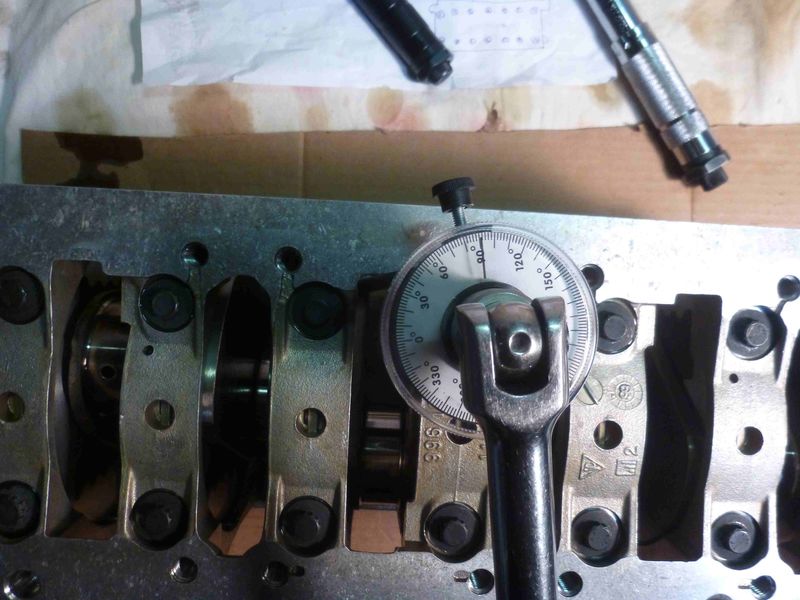
I also marked the bolts so I know for sure if I`m done with the turn.
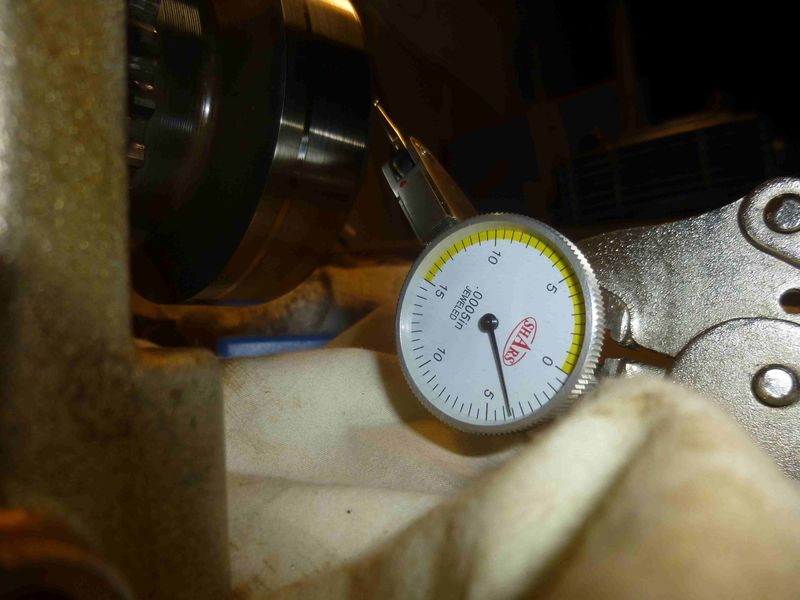
Endfloat is within spec.
Good to go I guess. Conrods, IMS and chains next time when I get there.

|
|
|
|
|
02-20-2020, 04:49 AM
|
#98
|
|
Who's askin'?
Join Date: Mar 2018
Location: Utah
Posts: 2,448
|
Dood.... making me itch!
Nice work. I enjoy following. I'm not sure of there's any moment quite so satisfying as firing up a motor that you've had down to its nuthin's.
Keep posting!
Sent from my SM-G970U using Tapatalk
|
|
|
|
|
02-20-2020, 06:15 AM
|
#99
|
|
Registered User
Join Date: Mar 2017
Location: Los Angeles
Posts: 356
|
Great thread! Very impressed with your level of detail, as I had no idea what is required to do this job correctly. I now know enough to drive my Indy crazy next time I bring him my car. Keep us posted, please.
|
|
|
|
|
02-20-2020, 09:17 AM
|
#100
|
|
Registered User
Join Date: Oct 2018
Location: North Cali
Posts: 858
|
Quote:
Originally Posted by maytag
Dood.... making me itch!
Nice work. I enjoy following. I'm not sure of there's any moment quite so satisfying as firing up a motor that you've had down to its nuthin's.
Keep posting!
Sent from my SM-G970U using Tapatalk
|
Unless the moment when you drive a Porsche for the first time ever
|
|
|
|
 Posting Rules
|
You may not post new threads
You may not post replies
You may not post attachments
You may not edit your posts
HTML code is Off
|
|
|
All times are GMT -8. The time now is 10:02 AM.
| |


 Boxster


 2017
2017  Linear Mode


