 05-28-2021, 06:05 AM
|
#441
|
|
WALDMEISTER
Join Date: Sep 2013
Location: Germany
Posts: 1,381
|
Really, BRAN? ")
hmmm...
__________________
Original Owner | PORSCHE Boxster 2.7L (MY01) | Seal Gray
|

|

|
|
05-29-2021, 07:27 AM
|
#442
|
|
WALDMEISTER
Join Date: Sep 2013
Location: Germany
Posts: 1,381
|
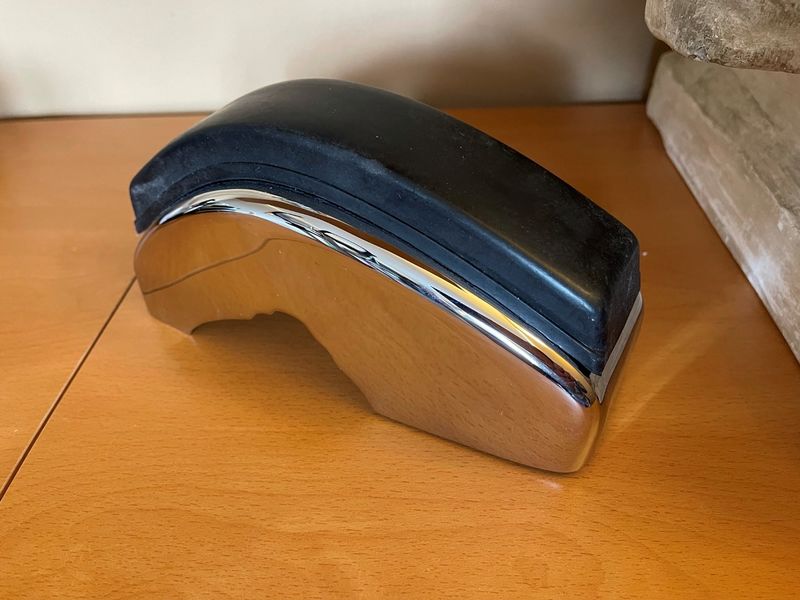
Safari Boxster - WIP mock up 
Those brand new 911 bumper horns need heavy modifications...might take a while, first I got to repair my speedster humps and finish the blinker grill inlays.
Formfitting is the simplest task, but an attachment through the TOW mount is a whole different story,
(so that they can be easily installed/de-installed, and act as real bumpers).
Additionally, I want to integrate my front parking sensors into them, OF COURSE).
Why keep it simple, right? lol 
__________________
Original Owner | PORSCHE Boxster 2.7L (MY01) | Seal Gray
Last edited by BRAN; 05-29-2021 at 02:59 PM.
|
|
|
|
|
06-08-2021, 11:39 AM
|
#443
|
|
WALDMEISTER
Join Date: Sep 2013
Location: Germany
Posts: 1,381
|
First mesh is done...as I have no welding equipment. it's not 100% perfect, but I am okay with it.
__________________
Original Owner | PORSCHE Boxster 2.7L (MY01) | Seal Gray
Last edited by BRAN; 12-05-2021 at 03:03 AM.
|
|
|
|
|
06-08-2021, 11:41 AM
|
#444
|
|
Registered User
Join Date: Jun 2012
Location: Bedford, TX
Posts: 2,755
|
Nice
__________________
______________________________________________
2001 Boxster S Lapis Blue
TS Cat Bypass Pipes and exhaust
iPad Mini Dash Install
DEPO Tail Lights
|
|
|
|
|
06-14-2021, 08:12 AM
|
#445
|
|
WALDMEISTER
Join Date: Sep 2013
Location: Germany
Posts: 1,381
|
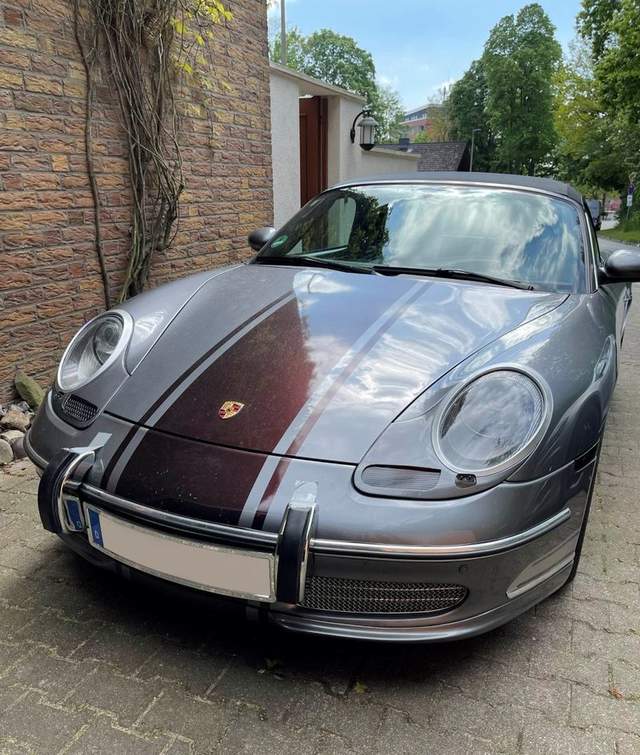
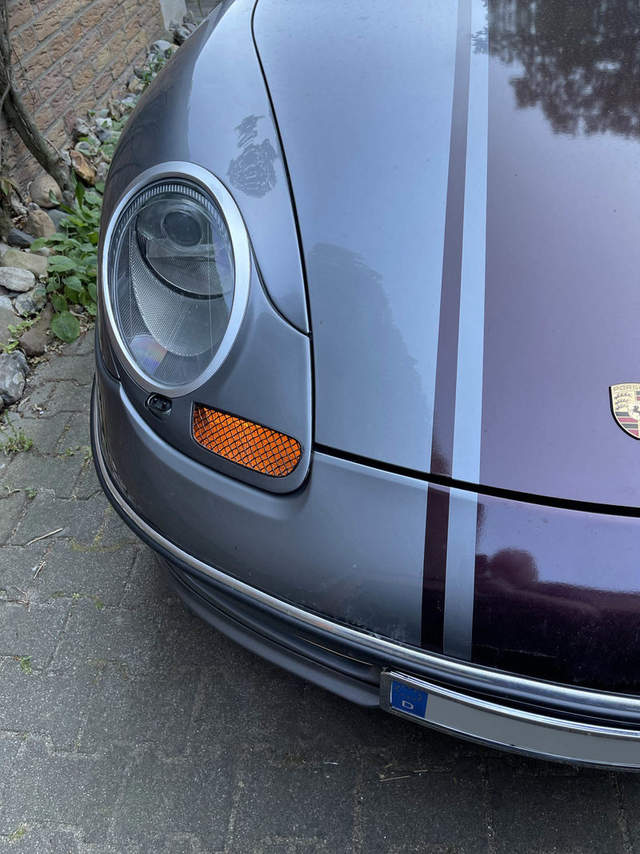
the blinker inlay grills just need some minor touch ups and done...
__________________
Original Owner | PORSCHE Boxster 2.7L (MY01) | Seal Gray
Last edited by BRAN; 12-05-2021 at 03:03 AM.
|
|
|
|
|
06-16-2021, 02:19 PM
|
#446
|
|
Registered User
Join Date: Apr 2017
Location: Indiana
Posts: 1,512
|
Quote:
Originally Posted by BRAN

the blinker inlay grills just need some minor touch ups and done... |
😬 but wont that reduce the airflow to your blinkers 😉
|
|
|
|
|
06-17-2021, 11:24 AM
|
#447
|
|
WALDMEISTER
Join Date: Sep 2013
Location: Germany
Posts: 1,381
|
Yes it does...that is why I used hollow copper frames for water cooling. Flawless.
But indeed, they look more like air intakes than blinkers. Mission accomplished
__________________
Original Owner | PORSCHE Boxster 2.7L (MY01) | Seal Gray
|
|
|
|
|
06-27-2021, 11:52 AM
|
#448
|
|
WALDMEISTER
Join Date: Sep 2013
Location: Germany
Posts: 1,381
|
here in Germany we will be facing a switch from analog to digital radio end of 2022.
That means:
You'll got to have a DAB+ (digital) radio and a DAB+ digital antenna to receive digital radio stations, or.....silence.
Problem #1:
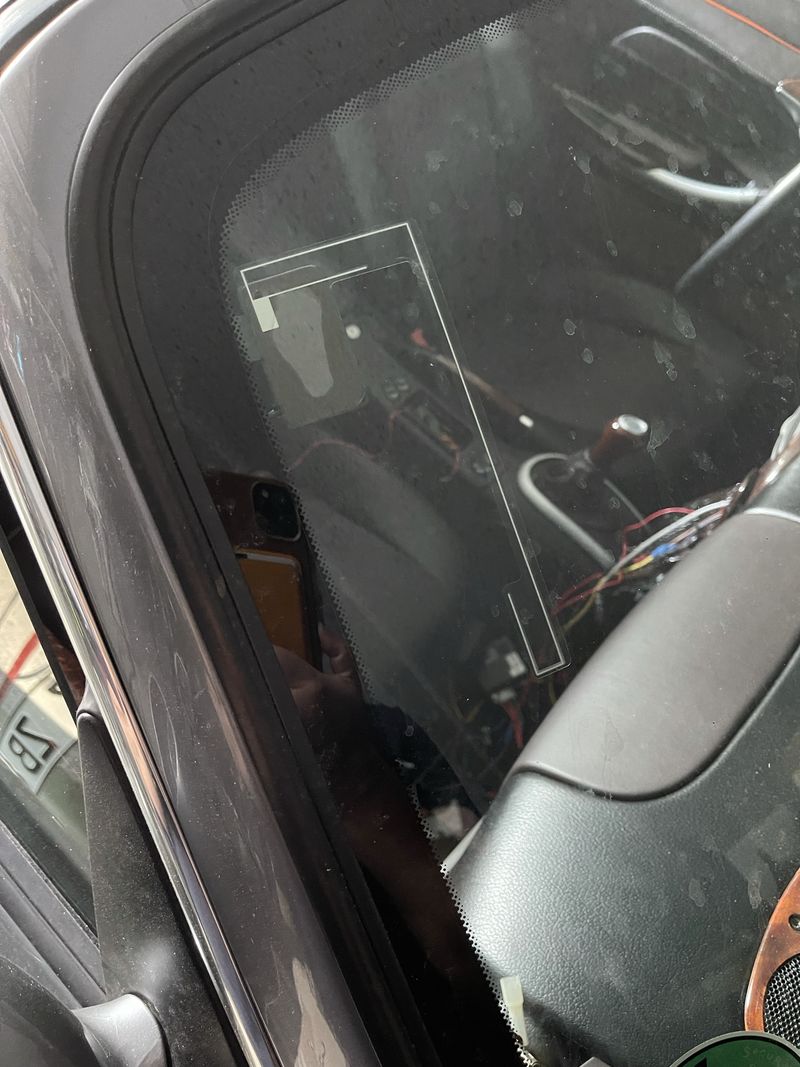
Our windscreen integrated antenna and its little trustworthy amplifier don't really meet the required specifications to receive DAB+ radio.
So normally you have to install a 2nd antenna for DAB+, but tbh they look really bad on the windshield (or you can install an external DAB+ antenna, but who in their right mind would do that to a Boxster).
Solution #1 (WIP):
Either get a new DAB+ antenna and try to install that under the front bumper, OR use a splitter/amplifier with our old integrated windshield antenna.
Advice: Don't get those cheap chinese knock-offs (been there, done that...not so great). So I bought a professional splitter from a german company.
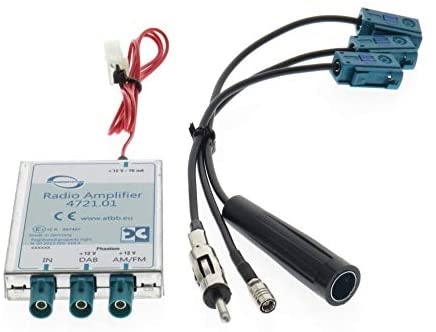
This will use the existing analog antenna and will split the signal into a digital & analog signal.
Problem #2:
We have an active (always thought it was passive) radio antenna with an amplifier (location: right a pillar) which filters some required frequencies.
Solution #2 (WIP):
Somehow create a workaround, to get rid of the Porsche amplifier and ONLY use the antenna as a passiv antenna with that new splitter (they recommend passive antennas anyways).
On the right side it should be the antenna cable. Uninstalling the amplifier was not a biggie, but creating a new z-coded antenna connector cable will be the next step.
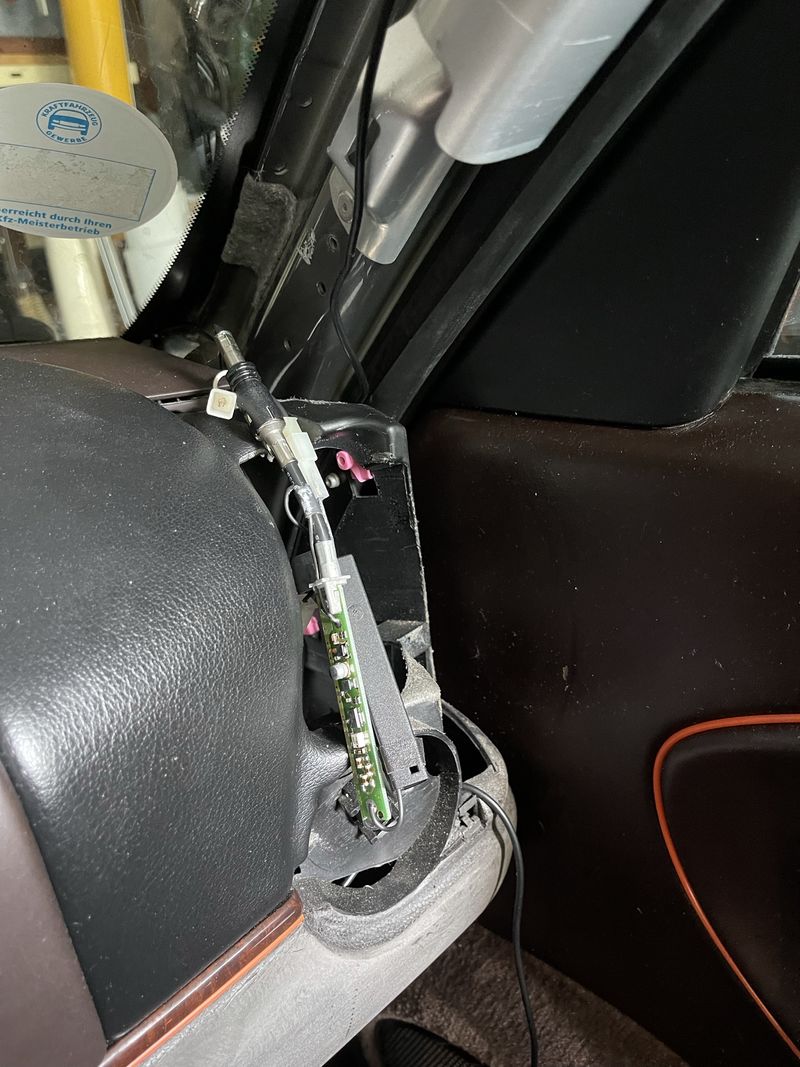
Let's see, how that goes. And of course, no real infos on the net, as no one has documented this kind of approach yet. If it works, I will be (one of) the first to reuse our old antenna for digital radio.
And again, why can't stuff be simple just once?
Cuz...
__________________
Original Owner | PORSCHE Boxster 2.7L (MY01) | Seal Gray
Last edited by BRAN; 06-27-2021 at 11:31 PM.
|
|
|
|
|
07-04-2021, 11:53 AM
|
#449
|
|
WALDMEISTER
Join Date: Sep 2013
Location: Germany
Posts: 1,381
|
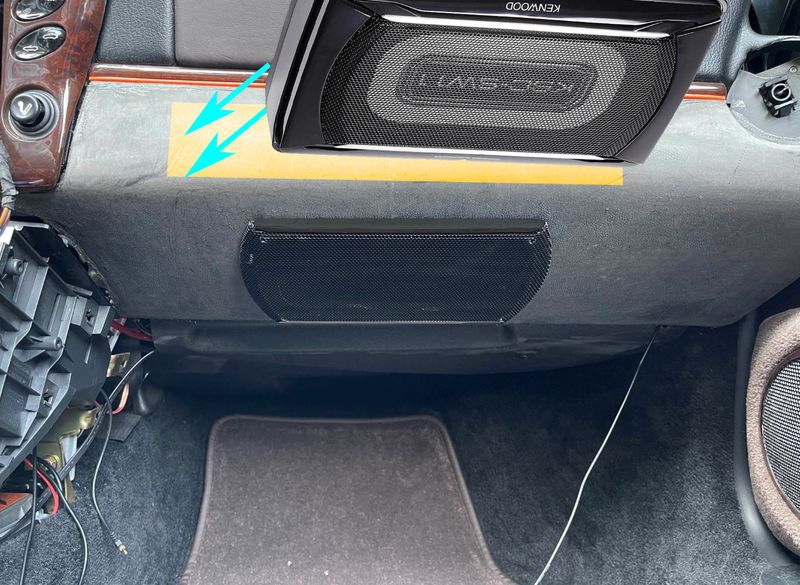
The Kennwood KSC-SW11 150watts sub is sitting right below the airbag frame and on top of the airduct. It is basically "framed" and held in place by those.
Additionally I used foam in critical areas the keep it from moving. Test drives proofed the concept.
I placed it up side down, so that the air duct can cool the amplifier area (if needed) and the sound waves can easily push through the mesh below (WIP). Air flow keeps it cooler to boot.
Probably the smallest active sub available. Mission "SOUND" accomplished. The boxster can now easily compete with the sound packages in modern cars.
That is all I wanted. Barely visible, but noticable (not quite the shaker, but who wants that BS).
__________________
Original Owner | PORSCHE Boxster 2.7L (MY01) | Seal Gray
Last edited by BRAN; 07-10-2021 at 01:30 PM.
|
|
|
|
|
07-10-2021, 01:29 PM
|
#450
|
|
WALDMEISTER
Join Date: Sep 2013
Location: Germany
Posts: 1,381
|
UPDATE: Project AM/FM antenna --> DAB+
Although I got okay results, I neither could get the stability nor the amount of digital channels I was striving for.
Conclusion: Even with the best equipment, you cannot convert an anolog antenna to a digital one.
At best it equals lesser quality DAB+ antennas.
Not good enough for me. Project dropped!
__________________
Original Owner | PORSCHE Boxster 2.7L (MY01) | Seal Gray
|
|
|
|
|
07-10-2021, 07:39 PM
|
#451
|
|
Registered User
Join Date: Oct 2020
Location: KY
Posts: 1,213
|
Hey bran, did you do a writeup of installing the gear indicator? I'm curious how you did it. I remember you mentioned mounting the display as a bit of a pain. I'm really curious about how the guage actually works. I've seen universal devices which make contact between the shifter and a hot contact for each lead, and that seems really complicated.
Sent from my SM-T595 using Tapatalk
__________________
2000 Box Base, Renegade Stage 1 performance mods complete, more to come
When the owners manual says that the laws of physics can't be broken by this car, I took it as a challenge...
|
|
|
|
|
07-11-2021, 07:53 AM
|
#452
|
|
WALDMEISTER
Join Date: Sep 2013
Location: Germany
Posts: 1,381
|
Quote:
Originally Posted by ike84
Hey bran, did you do a writeup of installing the gear indicator? I'm curious how you did it. I remember you mentioned mounting the display as a bit of a pain. I'm really curious about how the guage actually works. I've seen universal devices which make contact between the shifter and a hot contact for each lead, and that seems really complicated.
Sent from my SM-T595 using Tapatalk
|
Sorry no, but a little post write-up out of my memory might help.
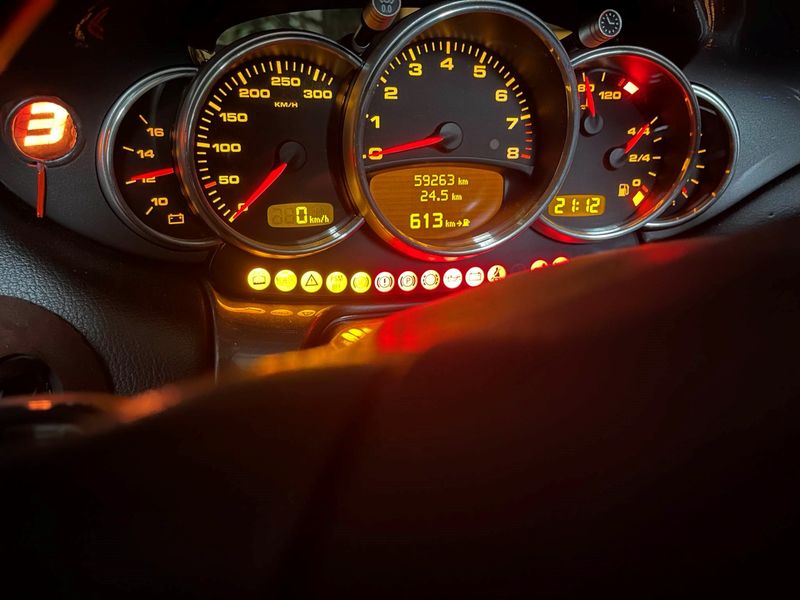
The indicator works absolutley perfect, although it relies on an analog sensor (I guess). Shifts are recognized and displayed within a second. I thought it might be only for fun, but honestly, after the wow effect was gone...I realised that I still regularly check my gears, e.g. when not quite sure or entering a sharper turn. Really usefull and looks cool to boot, ....and yes I am 50+ and face memory loss from time to time )
One little sensor will be attached with zip ties to the gear lever (you've got to desinstall the shifter knob first). The 2nd sensor (a little reference box) needs to be attached to the car frame (I placed it right next to the airbag controller box). It needs to sit absolutely tight to have error free indications, so I manufactured metal frame and used the existing screws you will find in that air bag controller area. Tape is just not good enough long term.
Of course it needs power, but there are more than enough options to steal power in the center consol area.
After the reference box and the movement sensor are tightly fitted, you can start to program each gear in the indicator (no worries, they have a good manual)
How did I manage to get the huge indicator LED in that tiny spot? I disassembled the LED housing and used tiny neodym magnets glued to several little spots in the dashhousing and on the LED indicator (which I probably had to safely trim down to its core to be able to fit in that spot.
This way, I can flip the LED aside, if I need access to the main screw which attaches the gauges housing! That was the TRICKY part and took quite some time to figure out a solution.
So in case I need access to the screw, I flip the plastic see through frame aside, pull that orange metall pin and bingo...the indicator will unhook from the magnets and I will have free access to the screw behing it. Putting it back is as easy, as the magnets will force it back into place, when i push the orange metal pin.
https://www.gaslock.de/en/innovation/indy-cator/
__________________
Original Owner | PORSCHE Boxster 2.7L (MY01) | Seal Gray
Last edited by BRAN; 07-11-2021 at 09:50 AM.
|
|
|
|
|
07-11-2021, 08:01 AM
|
#453
|
|
WALDMEISTER
Join Date: Sep 2013
Location: Germany
Posts: 1,381
|
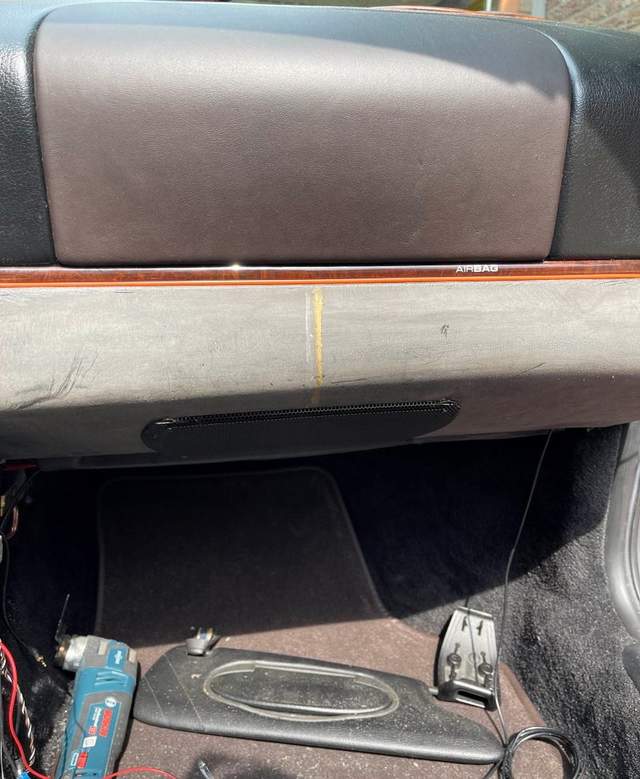
Slowly getting to the point, where I can start looking for cocoa leather and cover the buttom part. Jeeez another trade I have to look into...saddler
Recommendations are welcome, e.g. leather or leather with little padding, etc...it will be different from vinyl wrapping...for sure
__________________
Original Owner | PORSCHE Boxster 2.7L (MY01) | Seal Gray
Last edited by BRAN; 07-12-2021 at 01:52 AM.
|
|
|
|
|
07-12-2021, 08:44 PM
|
#454
|
|
Registered User
Join Date: Oct 2020
Location: KY
Posts: 1,213
|
Quote:
Originally Posted by BRAN
Sorry no, but a little post write-up out of my memory might help.
The indicator works absolutley perfect, although it relies on an analog sensor (I guess). Shifts are recognized and displayed within a second. I thought it might be only for fun, but honestly, after the wow effect was gone...I realised that I still regularly check my gears, e.g. when not quite sure or entering a sharper turn. Really usefull and looks cool to boot, ....and yes I am 50+ and face memory loss from time to time )
One little sensor will be attached with zip ties to the gear lever (you've got to desinstall the shifter knob first). The 2nd sensor (a little reference box) needs to be attached to the car frame (I placed it right next to the airbag controller box). It needs to sit absolutely tight to have error free indications, so I manufactured metal frame and used the existing screws you will find in that air bag controller area. Tape is just not good enough long term.
Of course it needs power, but there are more than enough options to steal power in the center consol area.
After the reference box and the movement sensor are tightly fitted, you can start to program each gear in the indicator (no worries, they have a good manual)
How did I manage to get the huge indicator LED in that tiny spot? I disassembled the LED housing and used tiny neodym magnets glued to several little spots in the dashhousing and on the LED indicator (which I probably had to safely trim down to its core to be able to fit in that spot.
This way, I can flip the LED aside, if I need access to the main screw which attaches the gauges housing! That was the TRICKY part and took quite some time to figure out a solution.
So in case I need access to the screw, I flip the plastic see through frame aside, pull that orange metall pin and bingo...the indicator will unhook from the magnets and I will have free access to the screw behing it. Putting it back is as easy, as the magnets will force it back into place, when i push the orange metal pin.
https://www.gaslock.de/en/innovation/indy-cator/ |
Thanks bran, that's a huge help!
Sent from my SO-02K using Tapatalk
__________________
2000 Box Base, Renegade Stage 1 performance mods complete, more to come
When the owners manual says that the laws of physics can't be broken by this car, I took it as a challenge...
|
|
|
|
|
07-25-2021, 02:10 PM
|
#455
|
|
Registered User
Join Date: Jul 2013
Location: Bastrop, Tx
Posts: 2,644
|
I saw on the news about all the flooding going on over there. I hope you and your family are doing okay?
__________________
Woody
|
|
|
|
|
07-27-2021, 09:30 AM
|
#456
|
|
WALDMEISTER
Join Date: Sep 2013
Location: Germany
Posts: 1,381
|
Quote:
Originally Posted by itsnotanova
I saw on the news about all the flooding going on over there. I hope you and your family are doing okay?
|
Hey Woody, we're good here! Thank you.
Yup, they really had bad flooding in the western region of Germany.
Luckily, I live up North next to the Elbe river, and floodings were pretty common here. 10 years ago, authotities pushed hard to get our dikes and wetlands future proof, so it will need a tsunami to break them. But you never know.
__________________
Original Owner | PORSCHE Boxster 2.7L (MY01) | Seal Gray
|
|
|
|
|
08-03-2021, 12:41 PM
|
#457
|
|
Registered User
Join Date: Apr 2017
Location: Indiana
Posts: 1,512
|
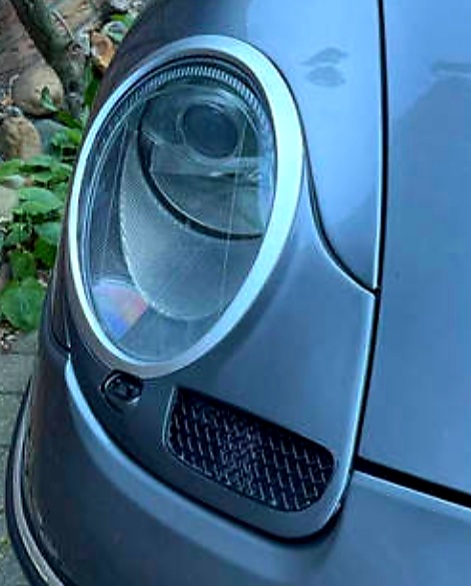
Hi Bran, when you bought your headlight covers did you paint the ring silver or did the company that you bought them from? Wondering what color that is. Thanks
|
|
|
|
|
08-04-2021, 03:30 PM
|
#458
|
|
WALDMEISTER
Join Date: Sep 2013
Location: Germany
Posts: 1,381
|
Quote:
Originally Posted by JBauer
Hi Bran, when you bought your headlight covers did you paint the ring silver or did the company that you bought them from? Wondering what color that is. Thanks
|
Hi JB,
a few years ago, I had to pick a silver color for my side air intakes at my local paintshop, so I picked a pretty basic silver out of the middle of their 50 different shades of silver color palette.
Not sure what color coding that was, but that is the color I told them to use for the trim rings. It is a pretty basic (metallic) silver, if that helps
__________________
Original Owner | PORSCHE Boxster 2.7L (MY01) | Seal Gray
|
|
|
|
|
08-07-2021, 09:00 AM
|
#459
|
|
Registered User
Join Date: Apr 2017
Location: Indiana
Posts: 1,512
|
Quote:
Originally Posted by BRAN
Hi JB,
a few years ago, I had to pick a silver color for my side air intakes at my local paintshop, so I picked a pretty basic silver out of the middle of their 50 different shades of silver color palette.
Not sure what color coding that was, but that is the color I told them to use for the trim rings. It is a pretty basic (metallic) silver, if that helps |
Thanks for the input. The seller recommends Artic silver. I immediately ordered a can and when I got it it was bad. 🙄
Went and bought some duplicolor silver and this is what it is. Looks OK I guess.
Not installed just laying on them. 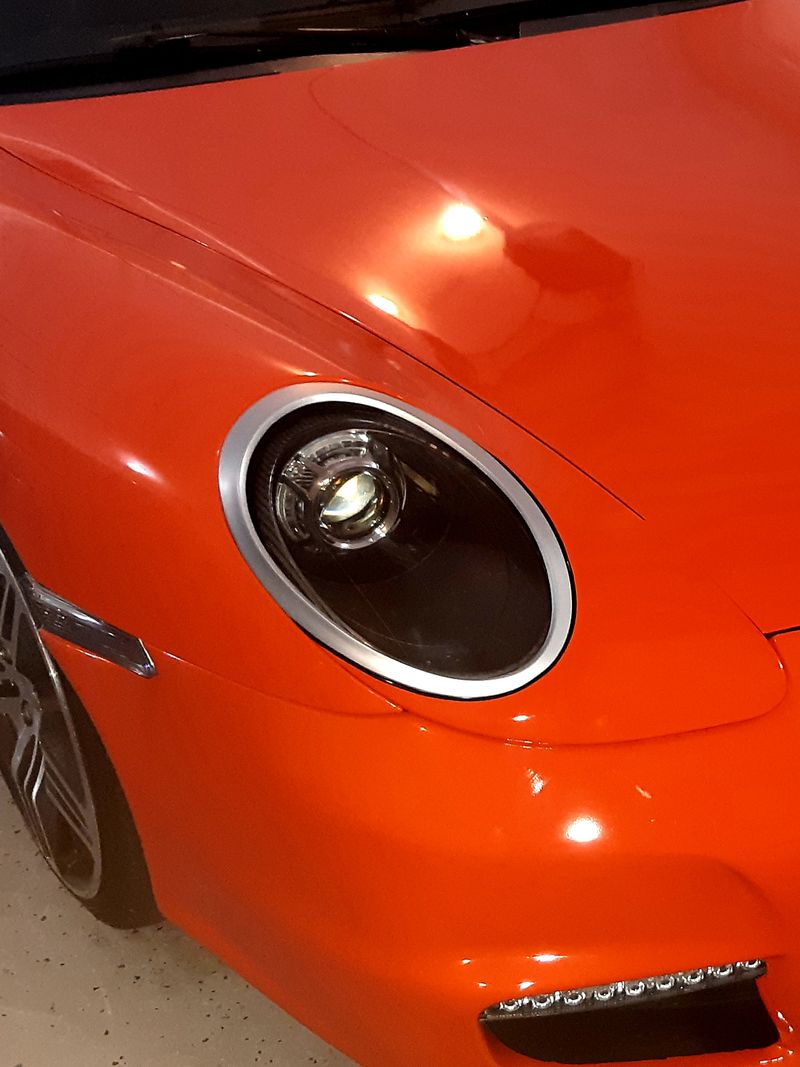 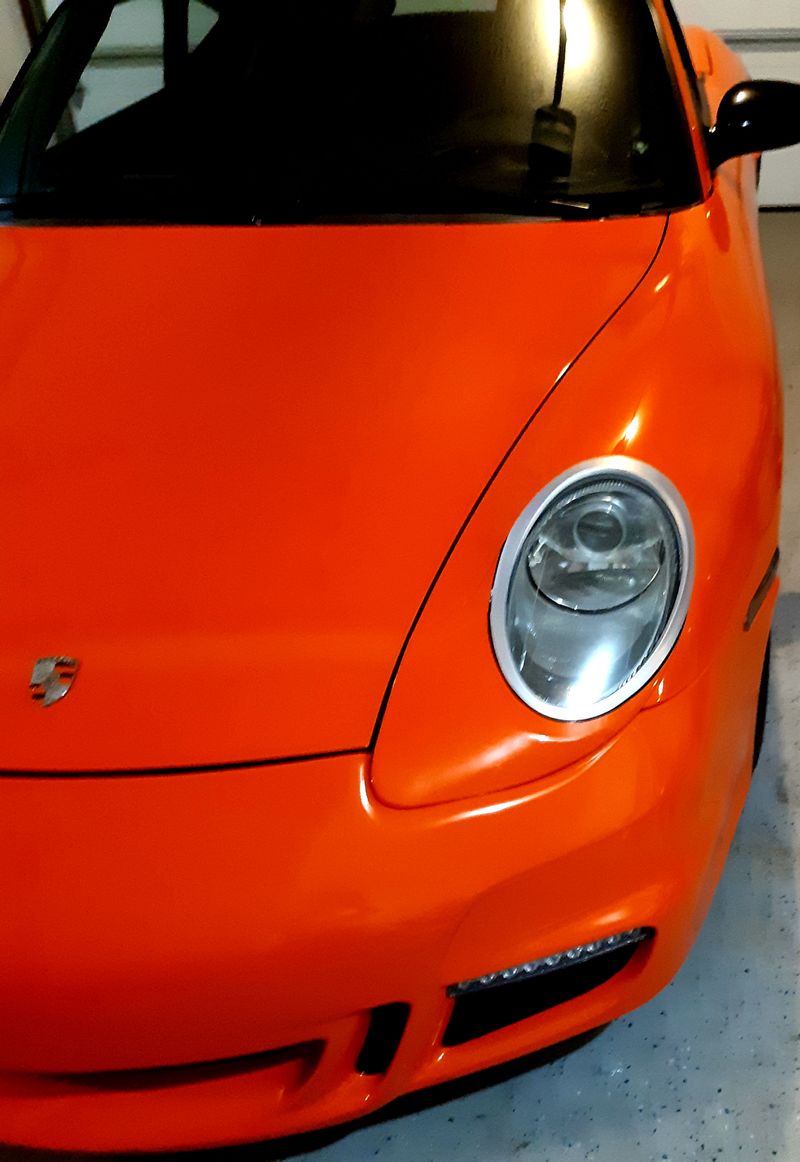
|
|
|
|
|
08-09-2021, 05:18 AM
|
#460
|
|
WALDMEISTER
Join Date: Sep 2013
Location: Germany
Posts: 1,381
|
Well, I think you nailed it. They look better, than mine
__________________
Original Owner | PORSCHE Boxster 2.7L (MY01) | Seal Gray
|
|
|
|
 Posting Rules
|
You may not post new threads
You may not post replies
You may not post attachments
You may not edit your posts
HTML code is Off
|
|
|
All times are GMT -8. The time now is 01:17 PM.
| |


 "GRAY"
 2001 Boxster S
 Linear Mode


