 09-04-2016, 07:58 AM
|
#1
|
|
Registered User
Join Date: Jul 2016
Location: Napoleon, OH
Posts: 93
|
shift knob paint?
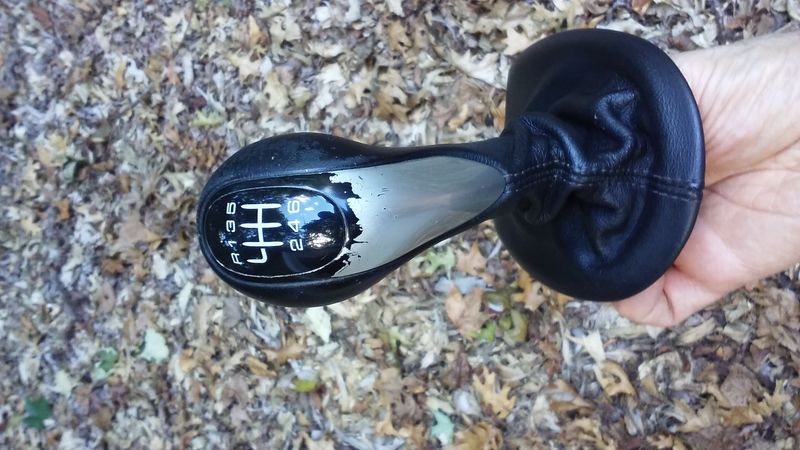
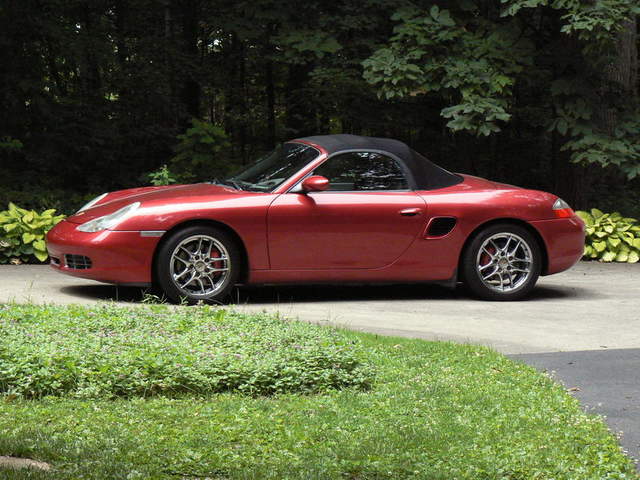
Some of the silver paint has worn off the hard plastic bit of my Boxster's shift knob. The obvious fix would seem to be to remove the worn plastic piece and either repaint it silver or remove the remaining paint and just leave it shiny black. Examining the knob & boot assembly doesn't reveal an easy way to take it apart. Am I missing something or can it not be dissembled? Do I have any other options?
cheers- dj
|

|

|
 09-04-2016, 08:19 AM
|
#2
|
|
Ben-Auto-Design
Join Date: Oct 2014
Location: French Riviera
Posts: 827
|
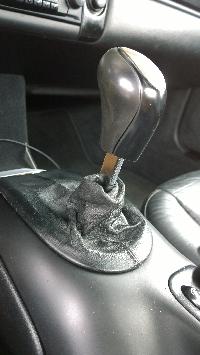
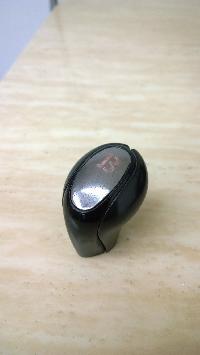
You have to pull on it very hard and at an angle to remove it.
start from the bottom part, it's the easiest to lift first!
You have plenty of options, I took the most radical:
__________________
ASE certified Automotive Master Technician.
Porsche Tech in France.
www.benautodesign.fr
Ben-Auto-Design : Performance parts for 9X6 / 9X7
1982 928 S Euro
|

|

|
 09-04-2016, 11:06 AM
|
#3
|
|
Registered User
Join Date: Apr 2016
Location: Tannersville PA
Posts: 471
|
I thought the silver part with the pattern pries out of the know and then the leather boot parts can be removed as 1 piece.
|

|

|
 09-04-2016, 11:15 AM
|
#4
|
|
Registered User
Join Date: May 2015
Location: Greater Seattle, WA
Posts: 534
|
I went though this process of restoring my similar 2001 boxster shift knob, and that silver-painted plastic trim piece is simply pressed in to the hard rubber knob frame. The leather is wrapped around the frame and tucks in underneath the trim piece. The shift pattern insert is glued (with a thick, flexible and removable-grade adhesive) onto the trim piece.
The silver-painted plastic trim piece just pries off/away from the rubber frame. I'd recommend starting at the bottom area on one of the sides, and once you have a start, work the gap gently around the rest of perimeter, a little bit at a time.
Be very careful if using metal tool not to dig into the plastic edge, or the leather. Using wood or plastic will be safer. I think I used a butter knife very carefully, to get it started also. One I had it started, I recall stuffing in a bunch of toothpicks into the gap, whereever I could.
When you get the trim piece removed, it will be much more flexible, which makes it easier to pop off the shift pattern insert piece.
I'll see if I can find pictures of the process. I do have a readily available picture of the completed job (I also refinished the leather).
I refinished my trim piece using a silver paint as basecoat, and then clearcoated it with a 2-part clear. Turned out nice and should be very durable (probably more so than original!) The shift pattern insert is a transparent acrylic-like material (with painted black and white background and insert pattern at the back, so to restore that, I mostly just polished the front face, and added some extra black paint back there to touch up the black background.
__________________
2001 Boxster
|

|

|
 09-04-2016, 11:37 AM
|
#5
|
|
Registered User
Join Date: May 2015
Location: Greater Seattle, WA
Posts: 534
|
I found the pics... Hope they help!
1. "before" picture
2. pieces disassembled
3. closest silver color matching paint found
4. leather dyes used
5. trim piece, base-coated
6. trim piece, clear-coated
__________________
2001 Boxster
Last edited by jakeru; 09-04-2016 at 12:01 PM.
|

|

|
 09-04-2016, 11:38 AM
|
#6
|
|
Registered User
Join Date: May 2015
Location: Greater Seattle, WA
Posts: 534
|
(Forum only allows posting one picture at a time)
__________________
2001 Boxster
|

|

|
 09-04-2016, 11:40 AM
|
#7
|
|
Registered User
Join Date: May 2015
Location: Greater Seattle, WA
Posts: 534
|
(Forum only allows posting one picture at a time.)
__________________
2001 Boxster
|

|

|
 09-04-2016, 11:42 AM
|
#8
|
|
Registered User
Join Date: May 2015
Location: Greater Seattle, WA
Posts: 534
|
(Forum only allows posting one picture at a time. )
__________________
2001 Boxster
|

|

|
 09-04-2016, 11:44 AM
|
#9
|
|
Registered User
Join Date: May 2015
Location: Greater Seattle, WA
Posts: 534
|
Forum only allows posting one picture at a time)
__________________
2001 Boxster
|

|

|
 09-04-2016, 11:46 AM
|
#10
|
|
Registered User
Join Date: May 2015
Location: Greater Seattle, WA
Posts: 534
|
( Forum only allows posting one picture at a time.)
__________________
2001 Boxster
|

|

|
 09-04-2016, 04:05 PM
|
#11
|
|
2003 Base 5-speed
Join Date: Jul 2015
Location: Stoneham, MA
Posts: 949
|
shift knob paint?
Nice work, Jake. I took the easy - and expensive - way out and bought a new shift and boot from Suncoast.
By the way, I have the original (2003 5-speed) Savanna Beige shifter that I'd happy to make available as a donor if someone wants to restore it like Jake did. Of course, you probably already have your own donor.
Sent from my iPad using Tapatalk
|

|

|
 09-04-2016, 04:51 PM
|
#12
|
|
Registered User
Join Date: Jul 2016
Location: Napoleon, OH
Posts: 93
|
Thanks!
Jake; Thanks for the photos. Now that I see how it's put together I should be able to take mine apart & fix it.
cheers - dj
|

|

|
 09-04-2016, 05:44 PM
|
#13
|
|
Custom User Title Here
Join Date: Mar 2012
Location: Ft. Leonard Wood
Posts: 6,169
|
Quote:
Originally Posted by jakeru

(Forum only allows posting one picture at a time)
|
Quote:
Originally Posted by jakeru

(Forum only allows posting one picture at a time.)
|
Quote:
Originally Posted by jakeru

(Forum only allows posting one picture at a time. )
|
Quote:
Originally Posted by jakeru

Forum only allows posting one picture at a time)
|
Quote:
Originally Posted by jakeru

( Forum only allows posting one picture at a time.)
|
Nonsense! You can add up to ten pictures per post. Try harder next time 
Nice results, by the way 
Last edited by particlewave; 09-04-2016 at 05:49 PM.
|

|

|
 09-07-2016, 02:54 PM
|
#14
|
|
Registered User
Join Date: Jul 2016
Location: Napoleon, OH
Posts: 93
|
easy!
After seeing what needed to be done it was pretty easy to take the worn silver insert out on the shift knob. Here's a photo the knob's component pieces along with one of the fancy plastic and leather safe prying tools that helped get it apart.[

With the hard plastic insert separated from the rest of the knob I removed the remaining silver paint with acetone then cleaned and polished the black plastic. Here is the result.
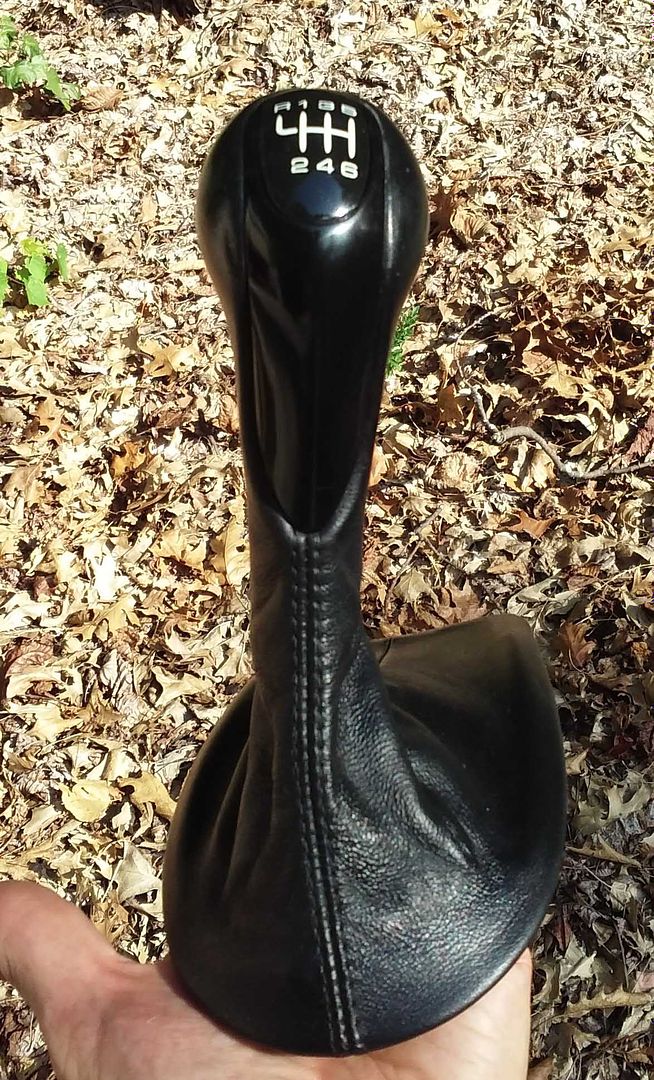
The all black knob does look a bit Darth Vader-ish so I may go back and repaint it silver later but it does look a darn sight better than it did!
cheers - dj
|

|

|
 09-07-2016, 09:11 PM
|
#15
|
|
Registered User
Join Date: May 2015
Location: Greater Seattle, WA
Posts: 534
|
Quote:
Originally Posted by particlewave

Nonsense! You can add up to ten pictures per post. Try harder next time  |
Incorrect. I reported the forum image uploading problems here, and the problem has *not* yet been fixed: http://986forum.com/forums/site-assistance-feedback-here/59886-image-uploader-problems-using-ios.html
Quote:
Originally Posted by grc0456

Nice work, Jake. I took the easy - and expensive - way out and bought a new shift and boot from Suncoast.
By the way, I have the original (2003 5-speed) Savanna Beige shifter that I'd happy to make available as a donor if someone wants to restore it like Jake did. Of course, you probably already have your own donor.
|
Thanks, grc! I gotta say that refinished savanna beige steering wheel I saw you posted in another thread looked pretty darned good, too! 
Quote:
Originally Posted by A 986 S

Jake; Thanks for the photos. Now that I see how it's put together I should be able to take mine apart & fix it.
|
Glad they were helpful. Please let us know how your project goes!
__________________
2001 Boxster
Last edited by jakeru; 09-07-2016 at 09:32 PM.
|

|

|
 09-08-2016, 11:20 AM
|
#16
|
|
2003 Base 5-speed
Join Date: Jul 2015
Location: Stoneham, MA
Posts: 949
|
Thanks, Jake. The key with the kit I used (Leather Magic) is the prep stage. It's fairly frightening as it removes most of the existing color and looks crappy. But you need to give something for the new paint to adhere to. But then, after cleaning thoroughly, and layering on a few coats of the color - it comes out pretty nice. It also "sealed" some of the loose stichting on the wheel.
We'll see how it holds up. Can always do it again I suppose. Thinking I may redo the seats, or at least the bolsters, every year or two anyway.
PS: Does your Box now say it is your father? 
|

|

|
 09-08-2016, 05:20 PM
|
#17
|
|
Registered User
Join Date: Feb 2015
Location: QC
Posts: 415
|
Quote:
Originally Posted by A 986 S

After seeing what needed to be done it was pretty easy to take the worn silver insert out on the shift knob. Here's a photo the knob's component pieces along with one of the fancy plastic and leather safe prying tools that helped get it apart.[

With the hard plastic insert separated from the rest of the knob I removed the remaining silver paint with acetone then cleaned and polished the black plastic. Here is the result.

The all black knob does look a bit Darth Vader-ish so I may go back and repaint it silver later but it does look a darn sight better than it did!
cheers - dj |
Looking good, have you thought of getting rid of the silver on the door pulls to match?
|

|

|
 10-20-2016, 06:27 AM
|
#18
|
|
Registered User
Join Date: Aug 2016
Location: Arizona
Posts: 75
|
Tiptronic shift knob
I want to do the same to my Tiptronic shift knob. Does anybody know how the silver plastic piece comes off of it? Thanks for the tip on the paint color, I bought one.
Thanks,
__________________
Bill
02 Boxster S
01 Carrera Cab
91 BMW 850i
71 MGB GT
|

|

|
 12-16-2017, 07:09 AM
|
#19
|
|
Porschephile
Join Date: Jun 2007
Location: Portland, Maine
Posts: 343
|
Help! Need some assistance!
This is the post I was looking for. Asking for some input from anyone who was disassembled and reassembled one of these knobs. I sold my original knob and did a little restoration project. The end result will be a knob that is NLA from Porsche. I actually like the look and feel of the stock knob. Sold the premium metal one with the crest because I didnít like the feel. The GT3 and turbo have a similar knob but the insert is one piece without the additional black plastic pattern insert. Still available but only in black leather. I needed graphite gray. Porsche made this part but only in 1999 for the 996 and itís NLA. So I bought a beat up part on flea bay with this one piece insert. Sent it to Dallas Custom Wheel and now I have this...
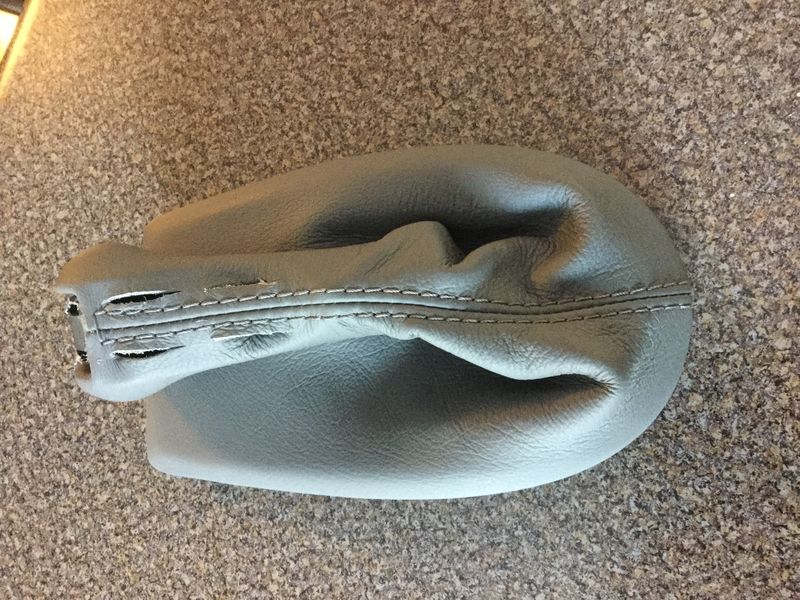
I stripped the original insert down and did about 10 light coats of what I thought was a close match to alumalook. Wet sanded in between coats. Filled in the pattern with black and the three good coats of clear.

Hereís the problem. I canít get the insert back in! Seems like it would be pretty straight forward. But itís not. Anyone have thoughts? Any tips/tricks? This sucker wonít go back together and I donít want to mark up the insert by forcing it. Iím sure the answer is going to be force it back in but looking for some one with experience before I damage it.
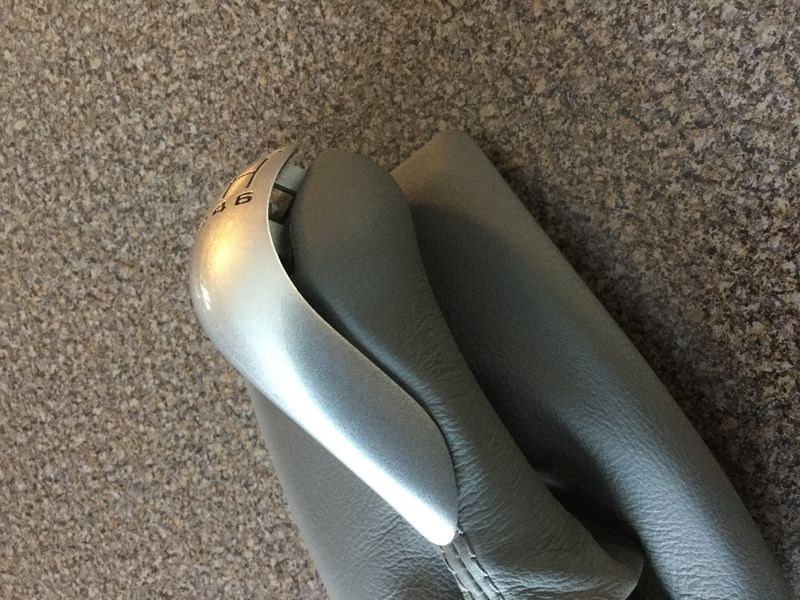
Thatís as far as I can get it back in putting a ton of pressure on it.
__________________
2004 Porsche Boxster S
Portland, Maine
|

|

|
 12-16-2017, 08:39 AM
|
#20
|
|
Registered User
Join Date: Oct 2014
Location: California Central Coast
Posts: 1,476
|
Start from the other end. Push the shift pattern in first then move down the handle.
|

|

|
 Posting Rules
|
You may not post new threads
You may not post replies
You may not post attachments
You may not edit your posts
HTML code is On
|
|
|
All times are GMT -8. The time now is 04:15 PM.
| |