Check your work
When you think you have the settings perfect:
turn the engine over many times by hand- Jake suggested 20 times !
And then re-check the timing.
You may be surprised to observe that the timing marks have now moved slightly out of perfection.
If you think this is excessive worrying, just think about re-timing after it is all back in the car because you got a timing error code ! And that assumes your laziness caused no damage to the valves.
To stop the engine bouncing on the engine stand while I was cranking, I used a simple mechanical floor trans jack+big block of scrap redwood under the sump plate.It would have been smoother before I had put the spark plugs in ! Noob error.
The Inlet Camshaft Notch Angle controversy - The notch is just a rough indication you have the correct TDC position (pin it) when combined with inserting Porsche tool 9624 in the exhaust Cam half(actually 3/8 & 5/8) moon slots.
It is very difficult to eye-ball the exact angle of the Inlet Cam Notch with the engine in the car. Worse the Cam angle is 1/2 the crank angle. So fretting about 3 o'clock or 2.45 (90 degrees +/-) is not very useful
Better to use Durametric to give you an Actual Value. The Durametric value is in Crankshaft degrees. But it 'reads' the reluctor ring at the sprocket end of the cam not the actual Camshaft lobes position. So it is an indirect reading. Very unlikely the relutor ring is damaged/moved.Easy to visually verify with the Cam Cover off.
If you must eyeball the Notch to judge if there is a timing issue, remove 9624. Rotate the crankshaft to the position where the Notch is perfectly 90 degrees.The Exh Cam 1/2 moon will be slightly off perfect. Then measure at the crankshaft pulley how far BTDC the TDC mark is. The only relible "Go/no-Go gauge" is the 9612 tool. If the engine is in the car you'll have to remove the black 'puck' to use it to verify - because there is no direct line of sight for the EX Cam notches. See here for more:
https://www.renntech.org/forums/topic/51555-cranks-but-no-start-misfire/
The Porsche FSM diagram of the position & orientation of the Inlet Cam Notch is at page 15-23 & 15-69 for Bank 2, 4-6(faces inward). For 1-3 it is 15-23 & 15-51(faces outward). They all show the Notch slightly off 90 degrees.
If you have perfect Exhaust Cam timing(9612 tool fits) at the correct TDC position but the Inlet Notch is very different from the FSM - you have a problem !
The relationship between the Exh cam and Inlet cam is controlled by the short chain linking the Exh+Inlet sprockets There is NO adjustment.The only adjustment(4 bolts) is on the Exh cam sprocket, none on the Inlet Sprocket..It varies only with the action of the Variocam Actuator+Solenoid aka Tensioning Element. At idle the advance is not active.Above around 2k rpm it starts kicking in .Durametric should show you this on a graph.
What goes wrong?
The Solenoid fails or wiring/DME for it
The Actuator leaks/worn/dirt plug/sticks midway or does not move
The dreaded Deviation greater than +/- 6 degrees
The 4 Exh Camshaft Sprocket bolts became loose and timing slips.
Camshaft Position Sensor fails
You get the Bank 1 and Bank 2 Instructions(notch + half moon - muddled) !
That diagnosis is a separate Thread.
Here are some great photos from Nutrod to replace those lost from Insite/Image Host:
http://www.nutrod.com/Nutrod/Pics/Pages/Install_Head_4-6.html
This may also help"
https://rennlist.com/forums/996-forum/594122-how-to-set-cam-timing-on-996-a-2.html
If you get confused ,use a simple drawing like the one in this link to clarify your question:
https://www.renntech.org/forums/topic/51555-cranks-but-no-start-misfire/


 Boxster
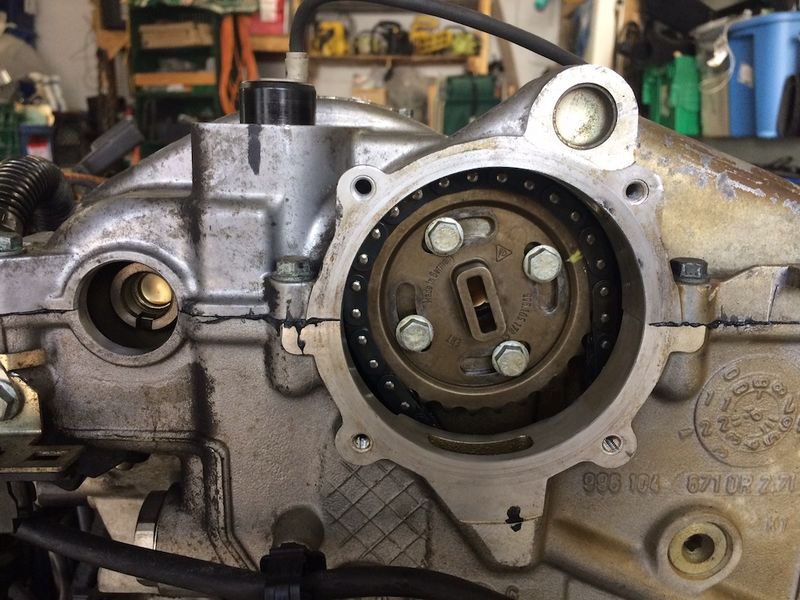
 i was confusing it with green loctite 638) I will proceed with my blue as it is all I have and in sure it will work fine as it is medium strength
 Linear Mode


