Location: Montreal, QC. (currently expat to Shanghai)
Posts: 3,249
Quick Update:
Ouch, already feeling better at least to know that I'm not alone lolll Get well soon fellas, this virus is by far the worst of all (in the lightweight virus category anyway).
Quick Update:
Good news; we are nearly there lolll I think we've done all the fixtures (jigs) that we needed to get these parts done to the tolerance we need (i.e. less than 0.05mm). IN fact, we did so well that most of the parts are ranging between 0.01~0.03mm. So... anything vibrating in your wheel I promise you its not The Great Porsche Center Caps - its the wheels themselves - or the road
Some of you might think I am 'really' picky. The thing is I know for sure that some of my mates will drive their P car on the Int'l Circuit here in Shanghai and its a fast one (+320km/hr). As I know them well they just won't bother removing those caps so "they-have-to-work". Besides... I just don't want to end up being "the talk" at the track, not even for an afternoon!
So that precision/fit challenge is completed - finally lolll All we need to do now is 1,600+ holes and off they go to anodizing (this coming week).
In the Media this week:
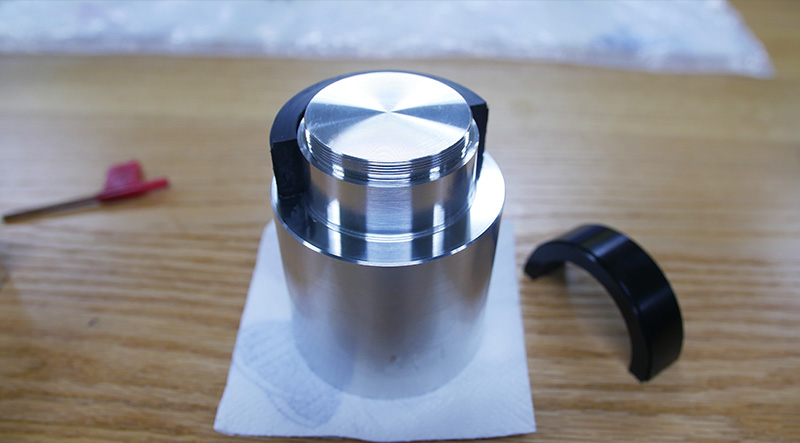
^ Looks weird, I know. Those are the precision threads I was talking about a week+ ago. The first turning operation for the main cap.
^ Again! Needed a fixture done for turning the other side of the cap, the side facing the world. Parallelism, always... those two spacers made out of Acetal are also precision machined... and so is the fixture :/ Took me almost 1 day to make this item lolll
^ More of the same, shows the rough piece of stock that precisely screw/thread on the fixture. Those same you saw on the green floor (pic 1)
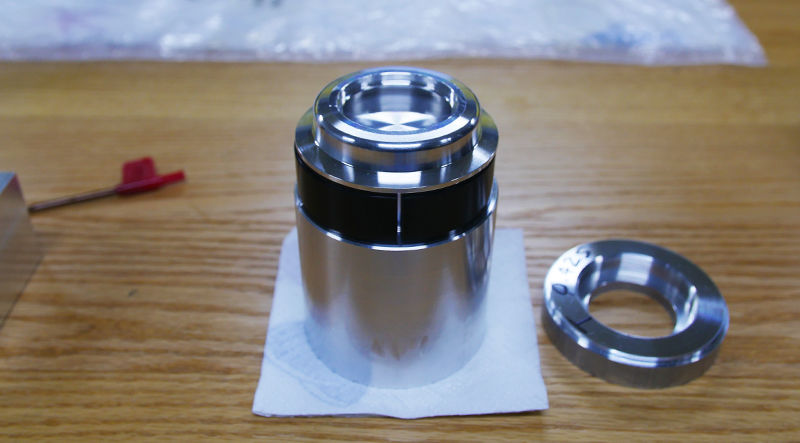
^ More of the same, again (not creative this week huh). That's what comes out of it. I'm attaching a Youtube vid below to show how this works.
Notice how violent the first operation removes the metal... that screw the cap thigh to the fixture and this is where those Acetal spacers comes handy! The only way to unlock this part after machining really.
^ And finally, on the workbench. If all my parts would end up with quality surface finishes like this I'd do this everyday lolll Look sooo nice in person.
All the above, real-life!
__________________
______________________________
'97 Boxster base model 2.5L, Guards Red/Tan leather, with a new but old Alpine am/fm radio.


![Custom Center Caps for Porsche Wheel [from CAD, prototyping to finish]](/forums/iconimages/diy-project-guides/custom-center-caps-porsche-wheel-%5B-cad-prototyping-finish%5D_ltr.gif)


 Threaded Mode


