03-13-2020, 09:12 AM
|
#1
|
Registered User
Join Date: Oct 2018
Location: North Cali
Posts: 816
|
Crank case bolts tightening sequence
Hi All,
I`m assembling the engine housing and I was wondering if anyone knows the crank case/engine halves-bolts tightening sequence, I assume there`s a specific pattern but I couldn`t find anything about it on the web. Thanks!
Last edited by Homeoboxter; 03-13-2020 at 10:51 AM.
|
|
|
03-13-2020, 10:47 AM
|
#3
|
Registered User
Join Date: Oct 2018
Location: North Cali
Posts: 816
|
Quote:
Originally Posted by Starter986
|
Yeah, this part is done already and I found these too. Sorry, I wasn`t clear, I meant the engine case halves, not the main bearing housing, or carrier. They are bolted with a bunch of M6 bolts.
|
|
|
03-13-2020, 10:53 AM
|
#4
|
Registered User
Join Date: Oct 2018
Location: North Cali
Posts: 816
|
Quote:
Originally Posted by Starter986
|
I rephrased the post, I hope it`s more clear now.
|
|
|
03-13-2020, 12:18 PM
|
#5
|
Motorist & Coffee Drinker
Join Date: Jul 2014
Location: Oklahoma
Posts: 3,889
|
Is this what you want? Note: I will probably delete these pics from Flickr after a day or two.
Oops, left off the last pic when I first posted:
__________________
I am not an attorney, mechanic, or member of the clergy. Following any advice given in my posts is done at your own peril.
Last edited by 78F350; 03-13-2020 at 01:48 PM.
Reason: added third pic
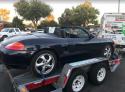
|
|
|
03-13-2020, 01:32 PM
|
#6
|
1998 Boxster Silver/Red
Join Date: Sep 2017
Location: 92262
Posts: 3,070
|
HB, it looks like you've been pointed in the right direction by one of our wiser-minds.
Best wishes getting all together!
__________________
1998 Porsche Boxster
|
|
|
03-13-2020, 03:40 PM
|
#7
|
Registered User
Join Date: Oct 2018
Location: North Cali
Posts: 816
|
Quote:
Originally Posted by 78F350
Is this what you want? Note: I will probably delete these pics from Flickr after a day or two.
Oops, left off the last pic when I first posted:

|
Exactly, thanks!
The manual mentions an illustration of where exactly to apply the silicone bead, can you post that too if possible? How can you get this manual btw? Thanks again.
|
|
|
03-13-2020, 03:42 PM
|
#8
|
Registered User
Join Date: Oct 2018
Location: North Cali
Posts: 816
|
Quote:
Originally Posted by Starter986
HB, it looks like you've been pointed in the right direction by one of our wiser-minds.
Best wishes getting all together! 
|
Yep! Thanks!
|
|
|
03-13-2020, 04:18 PM
|
#9
|
Motorist & Coffee Drinker
Join Date: Jul 2014
Location: Oklahoma
Posts: 3,889
|
Quote:
Originally Posted by Homeoboxter
Exactly, thanks!
The manual mentions an illustration of where exactly to apply the silicone bead, can you post that too if possible? How can you get this manual btw? Thanks again.
|
I'll find/post the other illustration tomorrow.
I found my set of manuals on local Craigslist about five years ago. There's usually a couple on eBay, but its not cheap:
https://www.ebay.com/itm/1997-99-Boxster-Boxster-S-Factory-Workshop-Manuals/283699713245?hash=item420dd214dd:g:ZZEAAOSwGIVd6Em 3
There's also some copies that you can download scattered across the internet. Porsche stopped updating this version years ago, but for most tasks it's the best source of info, outside of having a dealership subscription.
__________________
I am not an attorney, mechanic, or member of the clergy. Following any advice given in my posts is done at your own peril.
|
|
|
03-13-2020, 08:05 PM
|
#10
|
Registered User
Join Date: Oct 2018
Location: North Cali
Posts: 816
|
That`s insane. Thanks for posting the illustration, I appreciate it.
|
|
|
03-13-2020, 08:31 PM
|
#11
|
Registered User
Join Date: Oct 2018
Location: North Cali
Posts: 816
|
Nevermind, I found it. It`s for the 987 but it`s the same I guess.
|
|
|
03-13-2020, 09:13 PM
|
#12
|
Registered User
Join Date: Oct 2018
Location: North Cali
Posts: 816
|
|
|
|
03-14-2020, 12:03 AM
|
#13
|
Registered User
Join Date: Oct 2018
Location: North Cali
Posts: 816
|
Quote:
Originally Posted by 78F350
|
Now that I`m looking at this 987 factory manual, looks like the connecting rod specs are different from what I used on my 2.5 engine. I have a chart with all torque settings that I found here on the forum, and it was a bit confusing because there were two angles listed, 90 and 110 degrees after the 20Nm tightening, I had a thread about it a few weeks back. If you still have the chance, would you mind looking at the conrod bolt tightening specs in your manual? Unfortunately I couldn`t find the manual for the 2.5 Boxster. Thank you for your time!
|
|
|
03-14-2020, 05:19 AM
|
#14
|
Motorist & Coffee Drinker
Join Date: Jul 2014
Location: Oklahoma
Posts: 3,889
|
Quote:
Originally Posted by Homeoboxter
Now that I`m looking at this 987 factory manual, looks like the connecting rod specs are different from what I used on my 2.5 engine. I have a chart with all torque settings that I found here on the forum, and it was a bit confusing because there were two angles listed, 90 and 110 degrees after the 20Nm tightening, I had a thread about it a few weeks back. If you still have the chance, would you mind looking at the conrod bolt tightening specs in your manual? Unfortunately I couldn`t find the manual for the 2.5 Boxster. Thank you for your time!
|
For the silicone bead, my manual shows the same path, but mirror image (opposite side).
For the rod bolts on a 2.5L, I expect that 90* is fine, but:
There is a table that shows all the engine bolt torques for the M96/20 2.5L, M96/21 3.2L, and M96/22 2.7L supplement 42 dated from 2000 says,
"Connecting rod screws with connecting-rod designation...7R
Initial tightening: 20 (15)
Final tightening: 1x90*
Connecting rod screws with connecting-rod designation...7R
Initial tightening: 20 (15)
Final tightening: 1x110*"
(yes, it says the same thing for both sections except for the final tightening. Is the 7R a typo in one of them?)
__________________________________
There is a table that shows all the engine bolt torques for the M96/23 2.7L and M96/24 3.2L supplement 64 dated from 2003 says, "Con-rod bolts (replace): initial tightening + final tightening || 20 (15) + 110* torque angle."
__________________________________
In the section that details the work, supplement 18 printed in 1998, it says:
(following initial tightening to 20 NM)
"2. Final tightening 1 x 90* turn"
__________________
I am not an attorney, mechanic, or member of the clergy. Following any advice given in my posts is done at your own peril.
|
|
|
03-14-2020, 08:25 AM
|
#15
|
Registered User
Join Date: Oct 2018
Location: North Cali
Posts: 816
|
Quote:
Originally Posted by 78F350
For the silicone bead, my manual shows the same path, but mirror image (opposite side).
For the rod bolts on a 2.5L, I expect that 90* is fine, but:
There is a table that shows all the engine bolt torques for the M96/20 2.5L, M96/21 3.2L, and M96/22 2.7L supplement 42 dated from 2000 says,
"Connecting rod screws with connecting-rod designation...7R
Initial tightening: 20 (15)
Final tightening: 1x90*
Connecting rod screws with connecting-rod designation...7R
Initial tightening: 20 (15)
Final tightening: 1x110*"
(yes, it says the same thing for both sections except for the final tightening. Is the 7R a typo in one of them?)
__________________________________
There is a table that shows all the engine bolt torques for the M96/23 2.7L and M96/24 3.2L supplement 64 dated from 2003 says, "Con-rod bolts (replace): initial tightening + final tightening || 20 (15) + 110* torque angle."
__________________________________
In the section that details the work, supplement 18 printed in 1998, it says:
(following initial tightening to 20 NM)
"2. Final tightening 1 x 90* turn"
|
Thanks. Yes, it`s the same confusion regarding "7R" that we tried to disentangle in a previous thread. Strange though, because I think the 2.5 and 2.7 rod bolts are the same (at least they are listed for all years), but the newer models` bolts need 110*. So they just increased the clamping force (from 90 to 110) in the newer models without changing the bolts?
Also, the 987 manual`s respective section says the bolts should be angle-tightened twice:
"First, screw in connecting rod bolts to the required torque and tighten to the specified torque angle. Then loosen the bolts again. The final tightening is performed again with an initial tightening per the torque and the concluding tightening is performed with the torque angle wrench. --> Initial tightening: 20 (15 ftlb.) Nm ; -->
Torque angle, final tightening: 110 ° "
What a mess.
|
|
|
Thread Tools |
|
Display Modes |
Linear Mode
|
Posting Rules
|
You may not post new threads
You may not post replies
You may not post attachments
You may not edit your posts
HTML code is On
|
|
|
All times are GMT -8. The time now is 03:14 AM.
| |