Quote:
Originally Posted by JFP in PA

I have to ask, are you using the LN method to install the IMS, or the one Wayne espouses on Pelican with the bolts pushing on the IMS gear?
|
Yes. Those bolts are pushing on the (IMS gear - you mean crankshaft flange)
.they ARE NOT in THE HOLES - which is where mine are now.
I am using the LNE method. I am stuck on Item# 17.
The 3 nuts (that are 'micro coated') secure on to the solid part of the Crankshaft or AGAINST IT, don't they?
Hence, the need for such a low torque amount, it is supposed to be a 'friction fit' against the crank, isn't it?
I will grab a pic, maybe that will explain the dilemma.
Thanks.


 "Bernie" - PONZI that 'made off' with my money!

 Jägermobile
 Jagermobiles
 Jager4Smobile
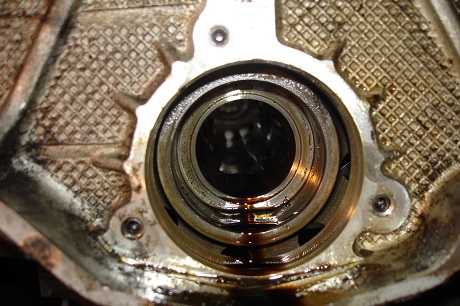
 boxster S

 Hybrid Mode


