 02-06-2016, 01:58 PM
|
#1
|
|
Registered User
Join Date: Apr 2010
Location: Canada
Posts: 3,153
|
gsr makes (made?) the bumper you are referring to. note that you lose the oem tow point if you delete the oem bumper (the gsr unit had a built-in tow hook). rennline sells a tow hook that bolts to where the bumper shock used to bolt to the frame. if you want to keep the oem bumper but still do the bsr-style vent in the rear bumper cover you can drill the rear bumper - a row of 4 or 5" holes.
|

|

|
|
02-06-2016, 02:23 PM
|
#2
|
|
Registered User
Join Date: Sep 2009
Location: toronto
Posts: 2,668
|
Yes I was imagining a row of 3/4 lighting holes along the bumper.....might even look good showing in silver behind the grill!
How are the bumperette brackets removed or can they be?
__________________
986 00S
|
|
|
|
|
02-06-2016, 03:37 PM
|
#3
|
|
Registered User
Join Date: Apr 2010
Location: Canada
Posts: 3,153
|
they come off easy, or you can get a row bumper.
|
|
|
|
|
02-06-2016, 04:18 PM
|
#4
|
|
Registered User
Join Date: Feb 2015
Location: QC
Posts: 415
|
It crossed my mind when I was removing the bumperettes that a 1"-11/2"round steel tube bumper might be easily made and bolt up if one were wanting to keep the bumper shocks and some protection while opening up the area for air flow. A hole saw in the aluminum bumper might be easier.
I made a panel to cover the bumperettes hole. Was also thinking about opening up the panel but have recently received a new louver tool at work and another on the way that will allow venting without exposing the inside view. If I ever get around to it...
Enjoying the thread 
|
|
|
|
|
02-06-2016, 06:06 PM
|
#5
|
|
Registered User
Join Date: Jul 2013
Location: Bastrop, Tx
Posts: 2,644
|
https://youtu.be/_TBHiW2ogl0
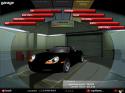
Taking the 996 out for a test spin. You can really tell the difference in power between a 986 and 996. I've been going up and down my street like crazy ever since I got the 996 in. Now I can't wait to see what it will do in a car with 500lbs less.
I plan on putting mesh in the hole I opened up on the bumper. In fact, if you look at those pics smallblock454 posted of the Gemballa 911. Mine will look just like that. You can see through it but the mesh helps hide everything behind it. My front bumper has that same diamond shaped mesh. I need to find some soon for the back because I'm about to start painting the black items. I also plan on going with the bolt on tow hooks like Radium King talked about.
__________________
Woody
|
|
|
|
|
02-12-2016, 06:00 AM
|
#6
|
|
Registered User
Join Date: Feb 2013
Location: Cranston RI
Posts: 902
|
YES! Very Pretty! This thing is gonna ROCK! I really hate you!
__________________
99 Porsche Boxster
|
|
|
|
|
02-19-2016, 07:19 AM
|
#7
|
|
Registered User
Join Date: Jul 2013
Location: Bastrop, Tx
Posts: 2,644
|

Painting day take two. This is what a polished turd looks like. Those wheels should have been thrown in the scrap pile but I decided to throw a coat of paint on them.

__________________
Woody
Last edited by itsnotanova; 02-19-2016 at 09:23 AM.
|
|
|
|
|
02-19-2016, 02:22 PM
|
#8
|
|
Registered User
Join Date: Mar 2015
Location: Santa Clara ca
Posts: 363
|
Paint!!!!
F- Yeah. Looks great. and on wheels whatever, right....
are you getting any heat into them to really cure the paint?
m
|
|
|
|
|
02-19-2016, 04:14 PM
|
#9
|
|
Registered User
Join Date: Jul 2013
Location: Bastrop, Tx
Posts: 2,644
|
Quote:
Originally Posted by Sassmatt72

F- Yeah. Looks great. and on wheels whatever, right....
are you getting any heat into them to really cure the paint?
m
|
They spent most the day out in the sun and we got to 83 today. I also was heavy on the hardner.
__________________
Woody
|
|
|
|
|
02-20-2016, 03:16 AM
|
#10
|
|
Registered User
Join Date: Sep 2013
Location: KRK, PL, EU
Posts: 255
|
Quote:
Originally Posted by itsnotanova
Painting day take two. This is what a polished turd looks like. Those wheels should have been thrown in the scrap pile but I decided to throw a coat of paint on them.
|
They look great. I guess you won't be taking them apart with those screws painted over.
Oh, and be careful about the lug bolt mounting surfaces - these should either be stripped of paint or only really thinly painted to get the right torque.
__________________
Past: 944 NA white '86
Present: 986 black '98
Future: 959 
|
|
|
|
|
02-20-2016, 06:28 AM
|
#11
|
|
Registered User
Join Date: Jul 2013
Location: Bastrop, Tx
Posts: 2,644
|
Thanks Guys
[QUOTE=PaulDash;484465]They look great. I guess you won't be taking them apart with those screws painted over.QUOTE]
The bolts are just for show and made out of a super cheap aluminum. The wheels are a one piece cast Chinese knock off. The wheels are semi-temporary and will never see a track or any kind of abuse. I bought them and didn't realize how cheap they were until I started to restore them.
__________________
Woody
|
|
|
|
|
02-21-2016, 03:30 AM
|
#12
|
|
Registered User
Join Date: Sep 2013
Location: KRK, PL, EU
Posts: 255
|
Quote:
Originally Posted by itsnotanova
The bolts are just for show and made out of a super cheap aluminum. The wheels are a one piece cast Chinese knock off.
|
Oh. Well now that they're painted you really can't tell. They do look nice. Let's see 'em mounted!
__________________
Past: 944 NA white '86
Present: 986 black '98
Future: 959
|
|
|
|
|
02-20-2016, 03:33 AM
|
#13
|
|
Registered User
Join Date: Feb 2013
Location: Cranston RI
Posts: 902
|
Those wheels are awesome
__________________
99 Porsche Boxster
|
|
|
|
|
02-22-2016, 07:10 AM
|
#14
|
|
Registered User
Join Date: Feb 2013
Location: Cranston RI
Posts: 902
|
Better to look marvelous than to feel marvelous
__________________
99 Porsche Boxster
|
|
|
|
|
02-22-2016, 04:25 PM
|
#15
|
|
Registered User
Join Date: Jul 2013
Location: Bastrop, Tx
Posts: 2,644
|
Paint day 2.5. Sorry if I'm over posting on the paint pics but I love painting. I'm hoping this is the last of paint days. I needed to repaint the trunk spoiler and roll bar. I also bought a Cayman S spoiler and needed to paint it too. I ended up saving a pair of clear headlights. They were very yellow and took lots of wet sanding. I painted over the silver eyebrow and trimmed them in black like the newer Porsches have. I then threw a coat of clear to bring them back to looking new again.

__________________
Woody
|
|
|
|
|
02-22-2016, 07:48 PM
|
#16
|
|
Registered User
Join Date: Jun 2012
Location: Bedford, TX
Posts: 2,755
|
Nice work Woody! The headlights look great! We never get tired of pics 
__________________
______________________________________________
2001 Boxster S Lapis Blue
TS Cat Bypass Pipes and exhaust
iPad Mini Dash Install
DEPO Tail Lights
|
|
|
|
|
02-22-2016, 09:20 PM
|
#17
|
|
Registered User
Join Date: May 2015
Location: Greater Seattle, WA
Posts: 534
|
The paint shots look great, Woody! What kind of paint are you using? 2 part or 1 part? Base+clear or just single stage?
The wheels look so glossy, I can't tell if you snapped it before the wet paint coat flashed dry, or if it really dried that glossy. Either way, looks great and very little orange peel from what I can tell.
I had some painting projects to do here recently out of rattle cans with my jam-packed one car garage, and I had to wait until the rain stopped and humidity wasn't "breath fog" bad, take part outside, spray, return to indoors small heated garage to cure (setup with a small electric heater and two 500 watt quartz IR heater lights), repeat next part and next coat, etc. did a bunch of interior parts in soft touch black this way, probably had to redo about half of them for various reasons. Once piece seems to have these arc-shaped crack blemishes no matter how many times I redo it. (Those reappearing blemishes are really starting to bug me, and I'm not going to reinstall the part with them!)
Another piece I refinished was an aluminum-look shift knob insert. Had some issues with the metallic base coat (I think was quick drying lacquer) being messed up some by the clear coat. Redid it and it seemed to turn out a bit better the next time, still not perfect but good enough, although the clear I used was matte, so want to to polish it a bit more as its not perfectly glossy yet. Hope I don't burn through, though, because I already did that on a previous attempt.
It's all in good fun, but using a wadded up tape ball as a shift knob is getting a bit old. 
__________________
2001 Boxster
Last edited by jakeru; 02-22-2016 at 09:24 PM.
|
|
|
|
|
02-23-2016, 03:51 AM
|
#18
|
|
Registered User
Join Date: Feb 2013
Location: Cranston RI
Posts: 902
|
Woody should open Boxster University! Build your own! and you could clear out some Boxster stuff you don't want
__________________
99 Porsche Boxster
|
|
|
|
|
02-23-2016, 06:44 AM
|
#19
|
|
Registered User
Join Date: Jul 2013
Location: Bastrop, Tx
Posts: 2,644
|
Quote:
Originally Posted by mikesz
Woody should open Boxster University! Build your own! and you could clear out some Boxster stuff you don't want
|
Lol, I'm not sure how good of a professor I would be. I consider myself an expert on how to dismantle them but that's about it. I guess I could teach that course? lol. I'm lost when it comes to diagnosing engine and electrical problems though. I wish Jake or JFP would start teaching those kind of classes.
Thanks Jakeru. The arena red base coat is spies hecker paint ($200 a quart!), and the clear coat is Nason. I went with SH base because it's suppose to match better with the factory color. At least that's what the counter guy told me. Nason is a generic brand from Dupont. There's not a lot of choices around here. If and when I repaint the whole car, I'll probably use SH for the base and clear. It's very difficult to get a good finish spraying a one stage metallic. I've done it, but only on cars that had a small budget for paint. Base coat/clear coat is the way to go for most paint jobs that you care about. Single stage paints do have their benefits too, and that's what I used for the black. I went single stage on the black because of the headlights and grill mesh. I needed single stage because I wanted to paint and not have to worry about going over with a clear within 24 hours. With a two stage paint you need to get the clear on within 24 hours. I ended up covering the single stage black with a clear though. I did that for two reasons. Mostly because I had lots of clear paint and darker single stage paints show scratches very easy. I painted a black truck in single stage once and it would take lots of buffing/polishing to remove swirl marks. I'd have to do that every few months and it got old quick.
The pic of the wheels are after they had dried. They are very glossy but all the lights inside my shop exacerbates the glossy look. They also have 1 coat of etching primer, 1 coat of building primer, 4 coats of black and 4 coats of clear. I had to put so many coats of paint on the because of all the angles of the spokes.
__________________
Woody
|
|
|
|
|
02-23-2016, 07:02 AM
|
#20
|
|
Registered User
Join Date: Jul 2013
Location: Bastrop, Tx
Posts: 2,644
|
One more thing Jakeru, I've been painting as a hobbyist for 27 years. All those years I was using those cheap syphon spray guns. I finally upgraded to a german made Sata gun. Oh my what a difference. It really is like going from a Hyundai to a Porsche. I highly recommend a good gun if you plan on painting more.
__________________
Woody
|
|
|
|
 Posting Rules
|
You may not post new threads
You may not post replies
You may not post attachments
You may not edit your posts
HTML code is Off
|
|
|
All times are GMT -8. The time now is 07:50 AM.
| |


 Butzi
Butzi

 1998 Porsche Boxster
 2001 Boxster S
 Hybrid Mode


