Go Back   986 Forum - The Community for Porsche Boxster & Cayman Owners > Porsche Boxster & Cayman Forums > Performance and Technical Chat

Post Reply
 
LinkBack Thread Tools Display Modes
Old 01-28-2021, 01:20 PM   #1
Registered User
 
elgyqc's Avatar
 
Join Date: Sep 2018
Location: Laval QC
Posts: 669
Garage
DIY Engine Mount Stop - 9A137525701 ?

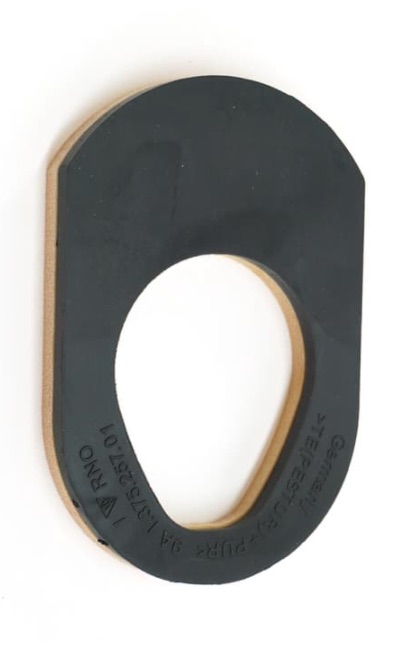
I am rebuilding the engine mount that came on the spare engine for my 2000 base that I recently received. The new cylindrical mount is here, I have yet to have it pressed into the carrier. There are supposed to be "Engine Mount Stops" (part number 9A137525701) on either side of the mount... this engine didn't have them. The stops are $30 and you need two of them. $60 US (that's about $90 where I live) is a bit much for 2 pieces of 8mm thick rubber.
Sooo... I started looking around for a piece of rubber tough enough to take the lateral forces that come from the mount and found... an old tire.
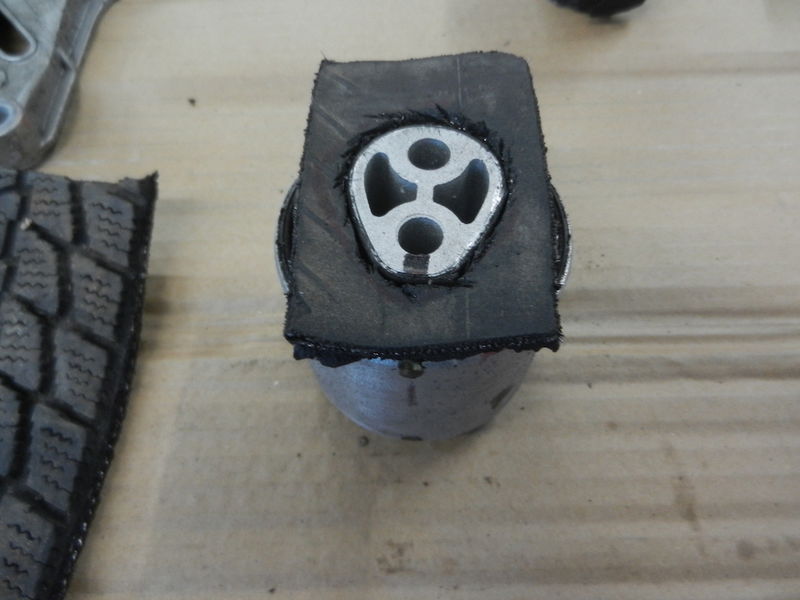
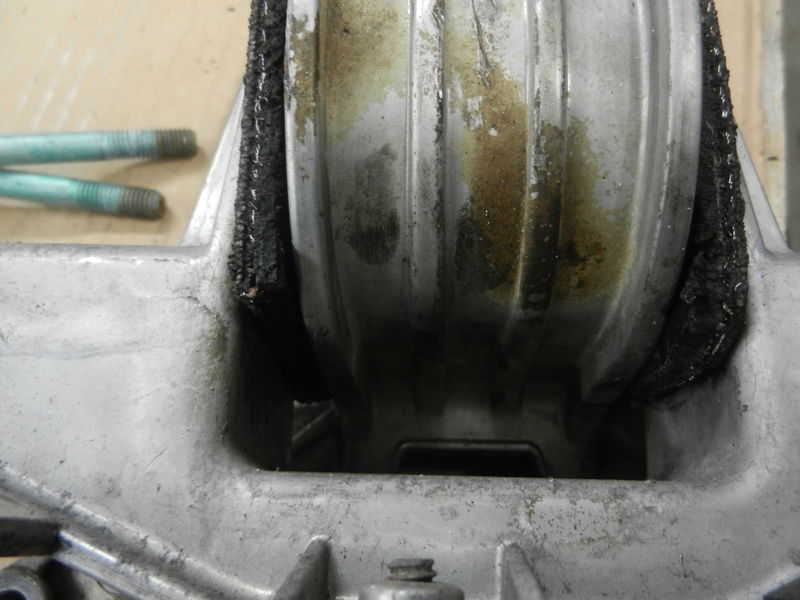
My first prototype from the tire's sidewall.

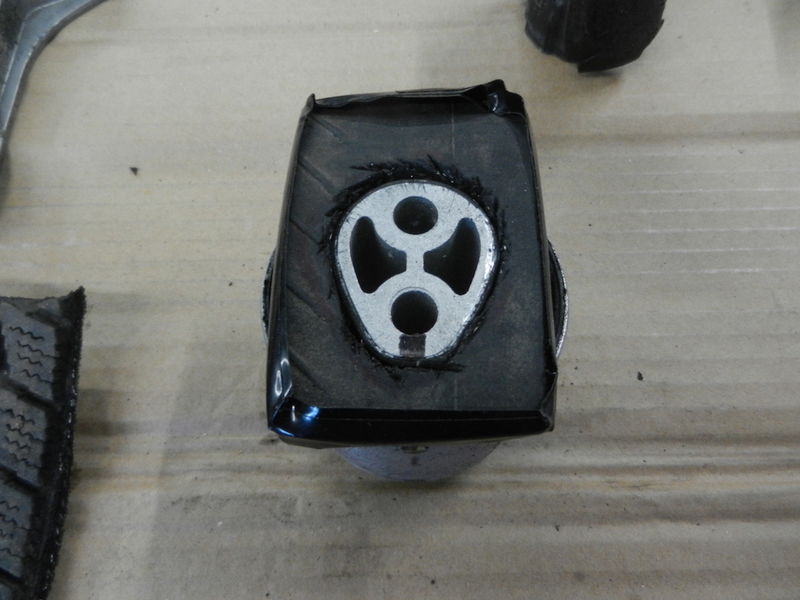
and the factory part

Yes the prototype is upside down, but also because it was taken from a tire sidewall the rubber is too thin on one side and too thick on the other.
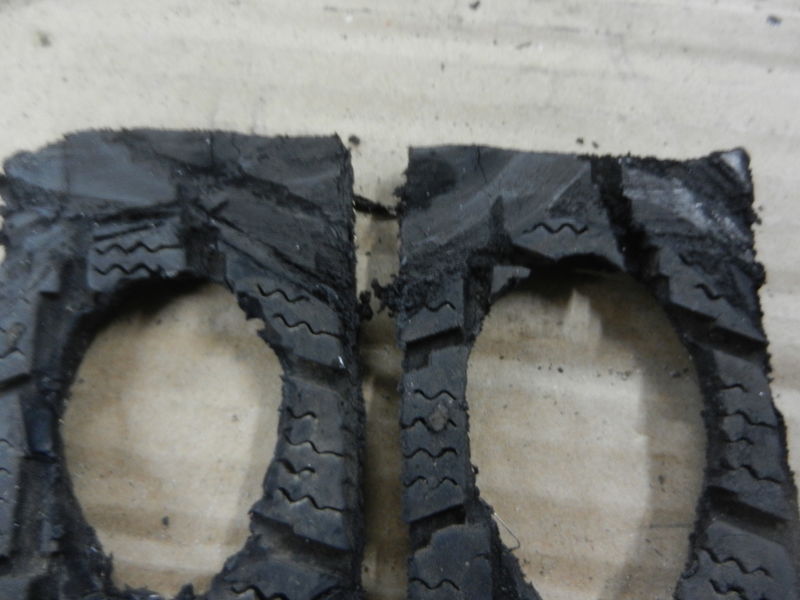
My next attempt will be cut from the tread area which as a larger area of uniform thickness and if I can cut off the tread blocks (unfortunately I don't have a bald tire) it should be about 8mm.
Any input is appreciated...

__________________
Grant
Arctic Silver 2000 Boxster S - bought with a broken engine, back on the road with the engine replaced
Green 2000 Boxster 5-speed and 1978 928 auto
1987 924S 5-speed (Sold) - Blue 2000 Boxster 5 spd (Sold)
elgyqc is offline   Reply With Quote
Old 01-29-2021, 04:41 AM   #2
edc
550 Anniversary
 
edc's Avatar
 
Join Date: Jul 2012
Location: Surrey, UK
Posts: 747
Garage
What about a tyre with a higher sidewall profile? Could you not also use the thin bits of the sidewall from the tyre you have ad flip one piece over so you end up with a flat section over 2 pieces.
edc is offline   Reply With Quote
Old 01-29-2021, 05:04 AM   #3
Registered User
 
Join Date: Dec 2016
Location: Clifton, NJ
Posts: 1,135
I used some dress shoe heel pads I had lying around. worked fine.
Quadcammer is offline   Reply With Quote
Old 01-29-2021, 01:07 PM   #4
Registered User
 
elgyqc's Avatar
 
Join Date: Sep 2018
Location: Laval QC
Posts: 669
Garage
Quote:
Originally Posted by edc View Post
What about a tyre with a higher sidewall profile? Could you not also use the thin bits of the sidewall from the tyre you have ad flip one piece over so you end up with a flat section over 2 pieces.
I'm working with the tire I had laying around... if you have a choice of tires your idea might work. Doubling the layers would make it flat, but too thick.

Quote:
Originally Posted by Quadcammer View Post
I used some dress shoe heel pads I had lying around. worked fine.
Good idea, but I don't have dress shoes let alone extra pads

Here is prototype #2 (which is actually finished product #1) cut from the tread. I cut the block out with my sawzall clone and the hole in the middle with my dremel clone.
Cutting through the steel plies with the dremel was a challenge, but it turned out OK.


I cut grooves in the tread blocks on the underside to seat the circumference of the mount so that the stop is close to flush with the outer ends of the aluminum insert. Also wrapped some electrical tape around it to cover the ends of the steel plies that are sticking out waiting to puncture any skin that gets too close.

__________________
Grant
Arctic Silver 2000 Boxster S - bought with a broken engine, back on the road with the engine replaced
Green 2000 Boxster 5-speed and 1978 928 auto
1987 924S 5-speed (Sold) - Blue 2000 Boxster 5 spd (Sold)
elgyqc is offline   Reply With Quote
Old 01-30-2021, 10:28 AM   #5
Registered User
 
Join Date: Oct 2020
Location: KY
Posts: 1,216
This is a great idea!! I am interested to know how it turns out. The factory stops are actual quite soft on the yellow side. This wears away completely over time, which leads to a lot of confusion when you pull out the mount and try to figure out why the thing is there to start with lol.
__________________
2000 Box Base, Renegade Stage 1 performance mods complete, more to come
When the owners manual says that the laws of physics can't be broken by this car, I took it as a challenge...
ike84 is offline   Reply With Quote
Old 02-01-2021, 01:53 PM   #6
Registered User
 
elgyqc's Avatar
 
Join Date: Sep 2018
Location: Laval QC
Posts: 669
Garage
I finally got my new mount pressed into the engine carrier and found that to install the stops I had to grind the tread blocks off the the ends that insert into the chassis carrier.


So it's ready to go... I think these stops will last a long time.
__________________
Grant
Arctic Silver 2000 Boxster S - bought with a broken engine, back on the road with the engine replaced
Green 2000 Boxster 5-speed and 1978 928 auto
1987 924S 5-speed (Sold) - Blue 2000 Boxster 5 spd (Sold)
elgyqc is offline   Reply With Quote
Old 02-08-2021, 05:38 PM   #7
Artist, 986S tinkerer
 
NewArt's Avatar
 
Join Date: Aug 2013
Location: Montreal, Canada
Posts: 1,821
I'm impressed Grant! Did you get that flux-capacitor controller fixed?
__________________
James now has: 2008 987S 6 speed
Crashed: 2010 987.2 pdk in speed yellow!
Sold to a cool racer chick: 2004 986 S
YouTube channel: the PORSCHE as seen by NewArt
www.youtube.com/channel/UCohdrH2xHTklM1thxk0KKOQ?
NewArt is offline   Reply With Quote
Old 11-13-2021, 04:26 AM   #8
Registered User
 
elgyqc's Avatar
 
Join Date: Sep 2018
Location: Laval QC
Posts: 669
Garage
An update... there is a bit of vibration when accelerating through 3000 RPM which may be due to my stops being too thick and/or too rigid. I can't be sure that the vibration is from these stops and it is a minor problem. Next time I will make them a bit thinner.
__________________
Grant
Arctic Silver 2000 Boxster S - bought with a broken engine, back on the road with the engine replaced
Green 2000 Boxster 5-speed and 1978 928 auto
1987 924S 5-speed (Sold) - Blue 2000 Boxster 5 spd (Sold)
elgyqc is offline   Reply With Quote
Old 11-15-2021, 02:43 PM   #9
edc
550 Anniversary
 
edc's Avatar
 
Join Date: Jul 2012
Location: Surrey, UK
Posts: 747
Garage
Just do a couple of burn outs to wear the tread down 😂
edc is offline   Reply With Quote
Old 11-16-2021, 12:53 AM   #10
Registered User
 
Join Date: Feb 2017
Location: Stockholm
Posts: 374
Garage
You´re not the only one questioning the cost for those two rubber parts.. At the end of the day I just didn´t wanna risk having to re-do it, so went with the oem.

Robert986 is offline   Reply With Quote
Post Reply


Thread Tools
Display Modes

Posting Rules
You may not post new threads
You may not post replies
You may not post attachments
You may not edit your posts

BB code is On
Smilies are On
[IMG] code is On
HTML code is On
Trackbacks are On
Pingbacks are On
Refbacks are On


All times are GMT -8. The time now is 05:06 AM.


Powered by vBulletin® Version 3.8.7
Copyright ©2000 - 2024, vBulletin Solutions, Inc.
Content Relevant URLs by vBSEO 3.6.0
Copyright 2024 Pelican Parts, LLC - Posts may be archived for display on the Pelican Parts Website -    DMCA Registered Agent Contact Page