 01-12-2018, 10:21 AM
|
#1
|
|
Registered User
Join Date: Mar 2013
Location: Scotland
Posts: 82
|
Anyone got the cam locking tools?
I am going to replace the RMS/IMSB/Clutch and exhaust on my Boxster.
I have a few weeks before I get really busy with work so I thought I would just go ahead and get it done..
So far I have replaced the Air/oil separator , plugs (coils OK) and fuel filter.
I have a 4 post car lift now so it makes things much easier than lying under the car (which I have been doing for 30years)
Does anyone in the UK have those brackets for locking off the cams?? and I also need the IMSB removal tool too!!
I know I could make them but it's time and there must be someone with those bits.
The only part of this job that worries me is the exhaust header bolts, they look well rusted in there.
I know I don't have to remove them but the 3 bolts further along are all completely gone and separating that flange will be hard without removing it from the car.
|

|

|
|
01-12-2018, 10:45 AM
|
#2
|
|
Registered User
Join Date: Feb 2005
Location: It's a kind of magic.....
Posts: 6,683
|
Quote:
Originally Posted by Troutman

I am going to replace the RMS/IMSB/Clutch and exhaust on my Boxster.
I have a few weeks before I get really busy with work so I thought I would just go ahead and get it done..
So far I have replaced the Air/oil separator , plugs (coils OK) and fuel filter.
I have a 4 post car lift now so it makes things much easier than lying under the car (which I have been doing for 30years)
Does anyone in the UK have those brackets for locking off the cams?? and I also need the IMSB removal tool too!!
I know I could make them but it's time and there must be someone with those bits.
The only part of this job that worries me is the exhaust header bolts, they look well rusted in there.
I know I don't have to remove them but the 3 bolts further along are all completely gone and separating that flange will be hard without removing it from the car.
|
Spray the exhaust flange bolts with a good penetrating oil and let them soak a couple of days. If that doesn't free them up, side cut the nuts with a cut off wheel and get new ones to reassemble.
__________________
Anything really new is invented only in ones youth. Later, one becomes more experienced, more famous and more stupid. - Albert Einstein
|

|
|
|
01-13-2018, 04:45 AM
|
#3
|
|
Registered User
Join Date: Mar 2013
Location: Scotland
Posts: 82
|
Yeah I know what you mean but there isn't anything left of them, I need to drill them out and to do that i really need it on the bench.
It's that top one, the other two are doable in the car.
I really need to undo the header bolts and remove the whole lot but those bolts are going to break off , I just know it.
|
|
|
|
|
01-13-2018, 09:01 AM
|
#4
|
|
Registered User
Join Date: Mar 2013
Location: Scotland
Posts: 82
|
As I thought 8 out of 12 snapped off 
I heated the engine up, gave the heads a load of taps with a steel bar and hammer and then tapped on a 1/2" socket, this fits very nicely on the rusted out 13mm heads.
Now i need to find the best way to remove these studs.
|
|
|
|
|
01-13-2018, 06:40 PM
|
#6
|
|
Registered User
Join Date: Dec 2009
Location: Orange County, CA
Posts: 2,026
|
It seems that you may have enough material to use a pair of vicegrips, but after soaking the studs for a couple of days with PBB and if you still get a stubborn stud, before risking snapping the remaining part off, you may want to use a butane small torch on the stud prior of the vicegrips.
Good luck!
Last edited by Gilles; 01-13-2018 at 06:44 PM.
|
|
|
|
|
01-14-2018, 12:43 AM
|
#7
|
|
Registered User
Join Date: Oct 2013
Location: Vancouver, BC
Posts: 91
|
Sorry to hear of your troubles.
At this point, if I was in your shoes, I would buy this:
https://www.stomskiracing.com/products/boxster-996-997-exhaust-bolt-repair-kit
It's a precise jig for drilling out the broken bolt - designed specifically for our engines..
The detailed video on the site is quite informative.
Good luck!
Last edited by Mig; 01-14-2018 at 12:46 AM.
|
|
|
|
|
01-14-2018, 01:11 AM
|
#8
|
|
Registered User
Join Date: Mar 2013
Location: Scotland
Posts: 82
|
I welded a new nut on to one of them and thought it might come but it snapped further in.
I need to get some left hand drill bits and build a bed I can lay on under the car and take time to drill them out...hopefully the bit might grab enough and shock them out. They are really stuck in there.
I'll carry on taking the gearbox out and keep spraying them with PB Blaster all week.
Last edited by Troutman; 01-14-2018 at 01:32 AM.
|
|
|
|
|
01-14-2018, 01:42 AM
|
#9
|
|
Registered User
Join Date: Mar 2013
Location: Scotland
Posts: 82
|
Quote:
Originally Posted by Mig
|
Great piece of kit but on the left bank I have only 1 stud removed, the other 5 snapped off.
The right bank has 3 studs removed but they are all in a group. I'm not looking forward to this at all.
|
|
|
|
|
01-14-2018, 01:44 AM
|
#10
|
|
Registered User
Join Date: Mar 2013
Location: Scotland
Posts: 82
|
Quote:
Originally Posted by Gilles
It seems that you may have enough material to use a pair of vicegrips, but after soaking the studs for a couple of days with PBB and if you still get a stubborn stud, before risking snapping the remaining part off, you may want to use a butane small torch on the stud prior of the vicegrips.
Good luck!
|
No chance of vice grips working. These are very well seized in.
|
|
|
|
|
01-14-2018, 04:34 AM
|
#11
|
|
Registered User
Join Date: Mar 2013
Location: Scotland
Posts: 82
|
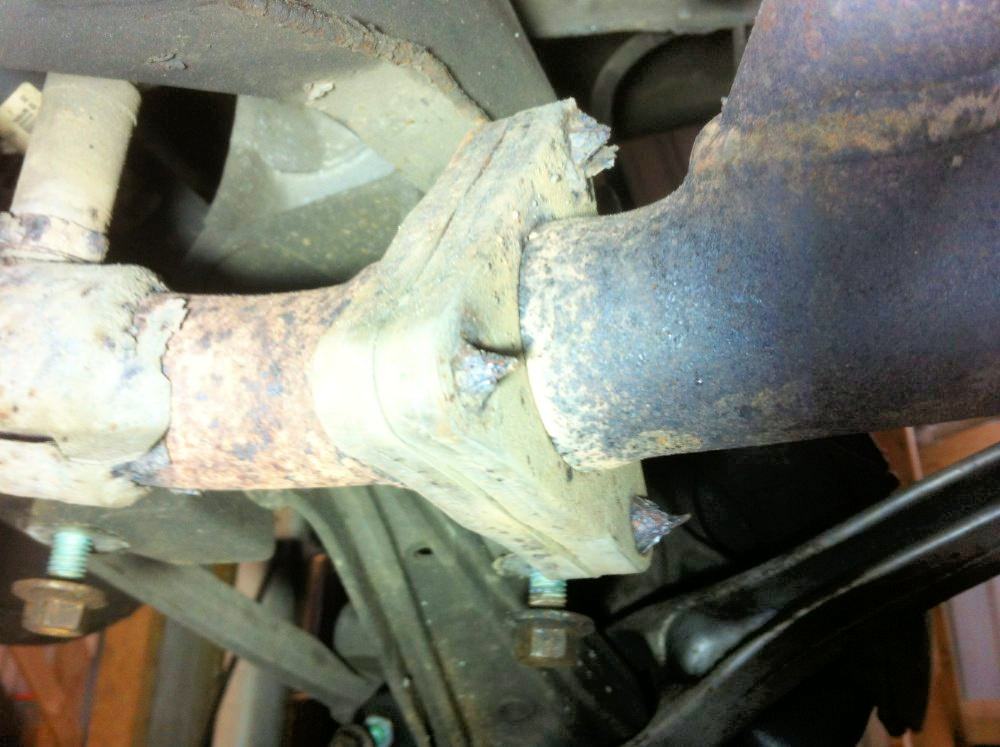
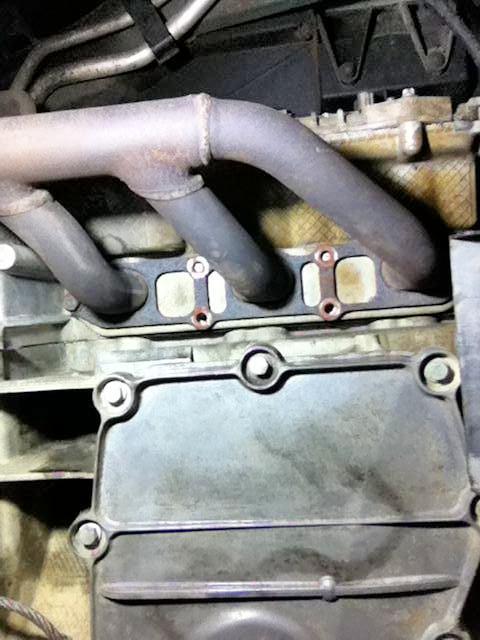
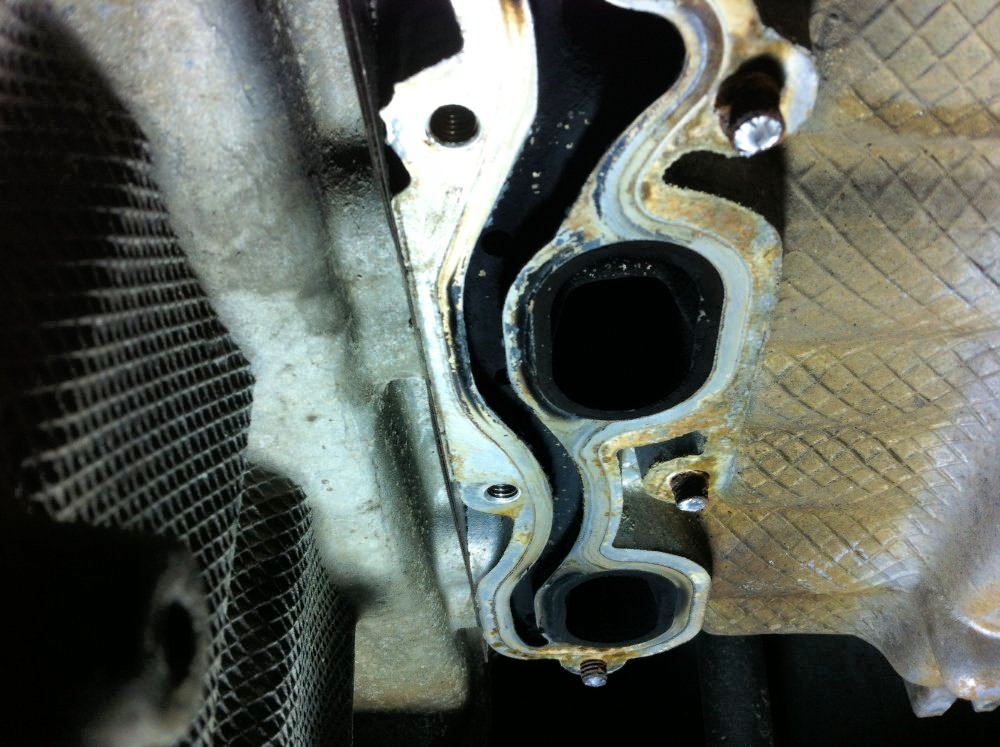
Here is a photo of the studs.
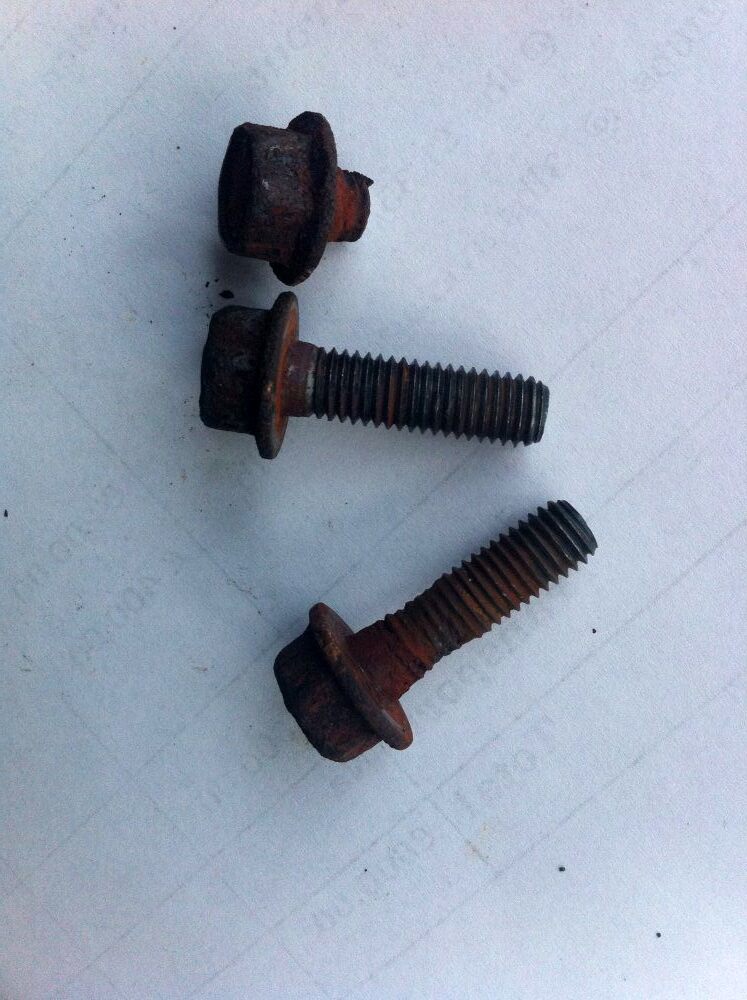
The middle one is in good shape and obviously came out without a hitch.
The left one is corroded about 5mm below the head but this one didn't snap..i think all the others were like this but did snap.
So I now realise I can't really carry on removing the gearbox as I need to support the engine with that removed and whatever I use will be in the way for removing the studs.
I could support the engine take the box out, fit new RMS/IMS and clutch, refit box and do the studs but if I can't get them out in the car I am going to have to take the engine out and remove the heads meaning I will most likely have to take the gearbox off again..the joys
Last edited by Troutman; 01-14-2018 at 04:38 AM.
|
|
|
|
|
01-14-2018, 06:57 AM
|
#12
|
|
Registered User
Join Date: Dec 2009
Location: Orange County, CA
Posts: 2,026
|
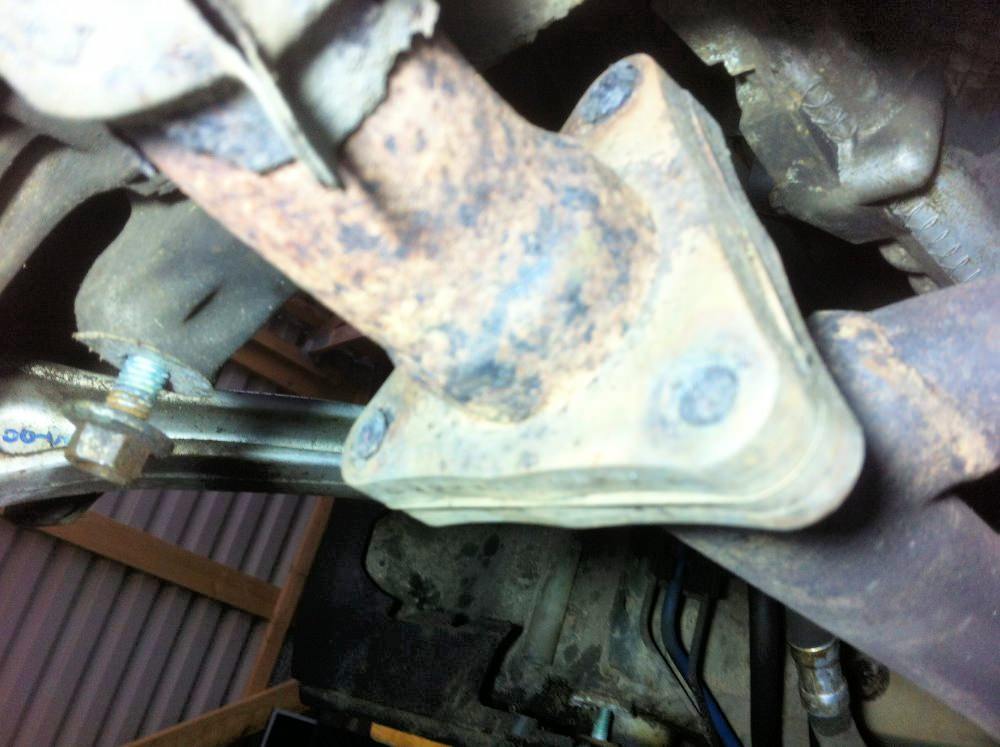
Troutman, this is how I secured the engine from above with the gearbox removed (to repair a leaking cam cover), replace the front engine mount, etc., it is not very elegant but actually works pretty well
Removing transmission but still rolling car around
|
|
|
|
|
01-14-2018, 10:19 AM
|
#13
|
|
Registered User
Join Date: Mar 2013
Location: Scotland
Posts: 82
|
Quote:
Originally Posted by Gilles
Troutman, this is how I secured the engine from above with the gearbox removed (to repair a leaking cam cover), replace the front engine mount, etc., it is not very elegant but actually works pretty well
Removing transmission but still rolling car around |
I've seen that before Gilles..I might try that, thanks.
I'm getting a little tool made to screw on to the broken off threads which will act as a drill guide and make sure my pilot hole is centred. I'll post a pick later this week when I get all the stuff to attempt this hideous job.
|
|
|
|
|
01-14-2018, 03:46 PM
|
#14
|
|
Registered User
Join Date: Oct 2013
Location: Vancouver, BC
Posts: 91
|
You're right, that jig won't work in your case. Too bad, but all is not lost.
I think I found you a solution. This one is about a quarter of the price and has excellent reviews.
It's a universal mini-jig that will enable you to get a perfectly centred pilot hole - absolutely critical for doing this job right.
https://www.amazon.com/OTC-Tools-6982DGS-Drilling-System/dp/B01A8Q3BCE
I hope this one works.
Good luck!
|
|
|
|
|
01-14-2018, 06:25 PM
|
#15
|
|
Porsche "Purist"
Join Date: Aug 2003
Location: Wisconsin
Posts: 2,123
|
I wonder if studs and copper nuts would be a proactive step to prevent this.
__________________
1998 Boxster with 7.8 DME, 2005 3.6 liter/325 hp, Variocam Plus, 996 Instrument panel
2001 Boxster original owner. I installed used motor at 89k.
1987 924S. 2002 996TT. PST-2
Owned and repaired Porsches since 1974. Porsche: It's not driving, it's therapy.
|
|
|
|
|
01-14-2018, 08:19 PM
|
#16
|
|
1999 base
Join Date: Dec 2011
Location: Coral Springs FL
Posts: 1,617
|
|
|
|
|
|
01-14-2018, 09:30 PM
|
#17
|
|
Registered User
Join Date: Mar 2013
Location: Scotland
Posts: 82
|
Quote:
Originally Posted by Meir
|
That is a great solution although not available in the UK and import/postage would make it too expensive..I am getting something similar made to screw on the broken studs, it'll have a 3mm hole drilled right through. Cost £7.
I ordered some PBB which again is not easily available in the UK . cost me £12 ($15) for a can. I read somewhere it's better than WD40 for penetrating the threads. They key here is to make sure you clean off all the corrosion where the stud enters the head to allow oil to go in. I'm going to heat them up too which might help draw it in.
Last edited by Troutman; 01-14-2018 at 10:56 PM.
Reason: forgotten something
|
|
|
|
|
01-15-2018, 05:59 AM
|
#18
|
|
Registered User
Join Date: Jul 2017
Location: Tucson AZ
Posts: 536
|
Quote:
Originally Posted by Troutman
That is a great solution although not available in the UK and import/postage would make it too expensive..I am getting something similar made to screw on the broken studs, it'll have a 3mm hole drilled right through. Cost £7.
I ordered some PBB which again is not easily available in the UK . cost me £12 ($15) for a can. I read somewhere it's better than WD40 for penetrating the threads. They key here is to make sure you clean off all the corrosion where the stud enters the head to allow oil to go in. I'm going to heat them up too which might help draw it in.
|
PB Blaster is okay, there are better penetrating oils. Mix atf and acetone 50/50 . I don't remember if your engine is out to the car. I would be tempted to attach the old exhaust gasket and weld a nut on to the stud remains--the heat helps break the bond between bolt and aluminum. Gotta be uber careful, tho. Or if you have ox/acetylene, just heat the stud and crank it out with vice grips.
I wouldn't use studs with copper nuts, copper gets soft under relatively low heat. I would use brass nuts instead. Toyota used to do this.
I don't think I'd try to drill and easy out them either. Very small studs, the danger is breaking off either the drill or the eazy out. Then you are truly screwed. Both are hardened and resist drilling. 
__________________
2001 Boxster
2007 Toyota Highlander
2003 New Beetle Convertible, Turbo, Tip 6 speed 
|
|
|
|
|
01-15-2018, 07:43 AM
|
#19
|
|
Registered User
Join Date: Mar 2013
Location: Scotland
Posts: 82
|
I already tried welding a nut on to one of the stumps but it snapped off so it's now flush with the head.
It was glowing red so got very hot and the weld held up but it still snapped.
I'm hoping using the left hand drill bits right down the centre might be enough to free them up. I can go up to 4.8mm before I touch the threads.
I have ordered some tapered stud removers with 1/2" drive end but these are a last resort after trying everything else. If they break off in there, and I think they will, i'll need to find another pair of heads or I break the car down for spares...that might be the best option.
In the UK mine is a 2 owner FPSH, Black/red leather 76Kmiles..worth about £5k.
I am going to have to spend about £2k on it in parts. IMSB/RMS/Clutch/Flywheel/Exhaust +misc
Ironic really in that it wouldn't be the actual IMSB that wrote the car off by destroying the engine but the process of trying to replace it!
|
|
|
|
|
01-15-2018, 08:59 AM
|
#20
|
|
Registered User
Join Date: Jul 2011
Location: Richmond, VA (The Fan)
Posts: 978
|
This happened to me too, I ordered every special tool I could find and ended up towing to a shop that handles these kinds of nightmares. They couldnt do it, I towed it to a machine shop and they jacked the car up leveled it to a drill Press with the head inverted and drilled them out and helicoiled it. :ah:
__________________
1997 Boxster 4.2L Audi V8 Bi-Turbo
2003 911 C2
NASA HPDE Instructor
|
|
|
|
 Posting Rules
|
You may not post new threads
You may not post replies
You may not post attachments
You may not edit your posts
HTML code is On
|
|
|
All times are GMT -8. The time now is 08:02 AM.
| |


 Boxster
 Cayman S
 Turbo
Turbo Christine
 Frank N Stein
 Ghost
Ghost boxster S
 Linear Mode


