02-08-2007, 06:22 PM
|
#1
|
Registered User
Join Date: Sep 2006
Location: chicago
Posts: 3,510
|
intake install step by step with pics and video
This is a how-to to install a intake system into your boxster.
this was done on a 98 2.5L 986.
Disclaimer: if you mess anything up with your car dont blame me, i was doing this on my own vehicle. if you follow these simple instructions you will be fine, but if something should happen and you mess up your car, remember its a porsche, so parts and labor is not cheap, so be carefull adound parts and vacum lines and hoses and anythign else that is in there that you have no idea what it is.
tools needed: pliers, screw drivers, wrench with couple diff. sizes (not sure of the sizes, trial and error), flashlight, patience, and some bandage just incase (i used one, theres some sharp edges there).
1. put your car in service position (see owners manual, or search to get this part done, shoudl take u few mins)
2. Disconnect the battery terminal
3. Remove the drivers side intake scoop. there is a phillips screw on top that holds it in place. the plastic grill is held in place with 2 fragile arms and you shold be careful when taking the grille ot.
4. Now you are ready to desnorkel/debaffle. once the grille is out you will see a tube that leads to the airbox. this is very simple, just grab it and pull it out. it will seem impossible when tried at the frist time, but just wiggle it around and pull hard, and it will come out. i suggest you put a old shirt or rag around the area so that you dont scratch your paint when pulling this part out.
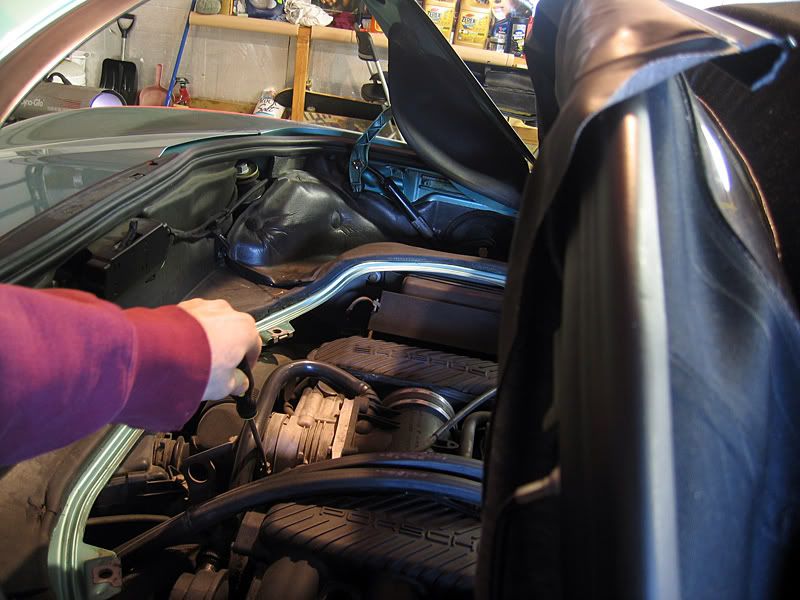
5. Now is the time to move to the top of the motor.
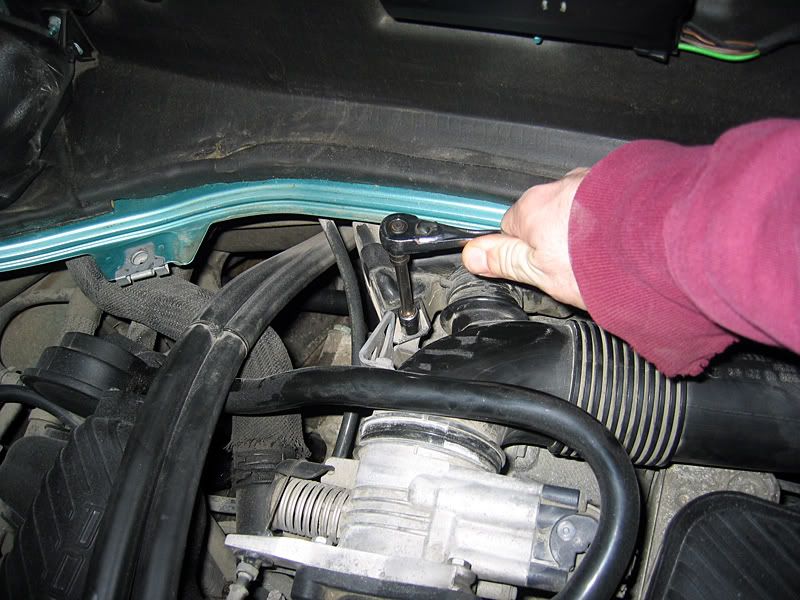
Remove the gold colored clamp that connects the plastic airbox tube to the throttle body
![](http://i143.photobucket.com/albums/r128/djomlas/IMG_12731.jpg)
and this is what it looks like taken off
![](http://i143.photobucket.com/albums/r128/djomlas/IMG_12742.jpg)
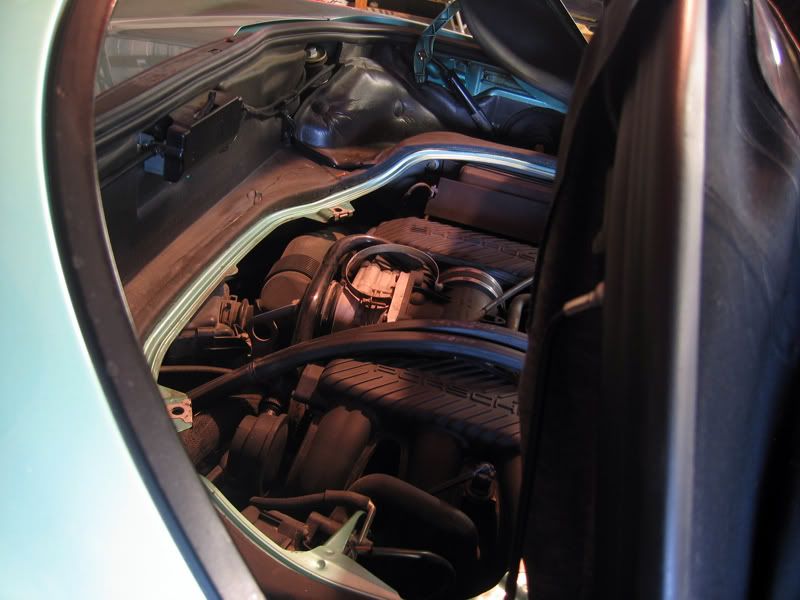
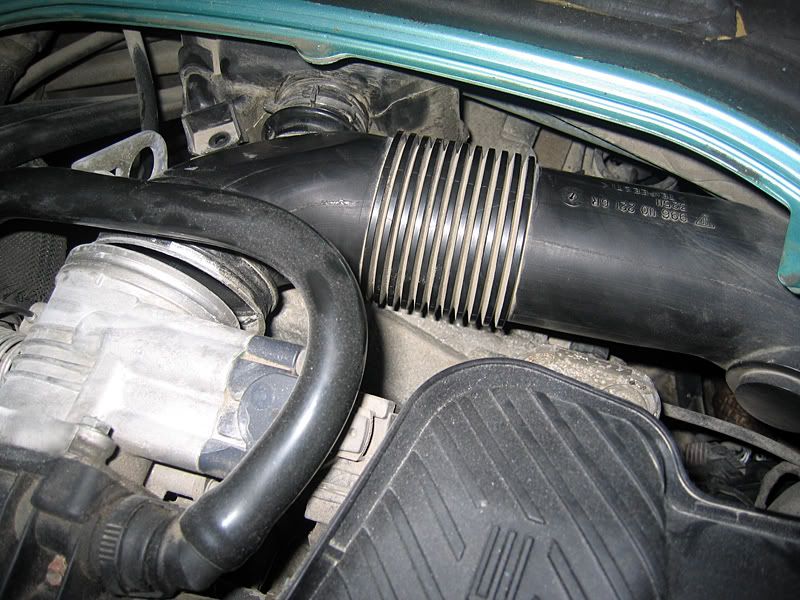
6. Now remove the same clamp from the other side of that large tube that is connected to the actual airbox where your filter is.
![](http://i143.photobucket.com/albums/r128/djomlas/IMG_12783.jpg)
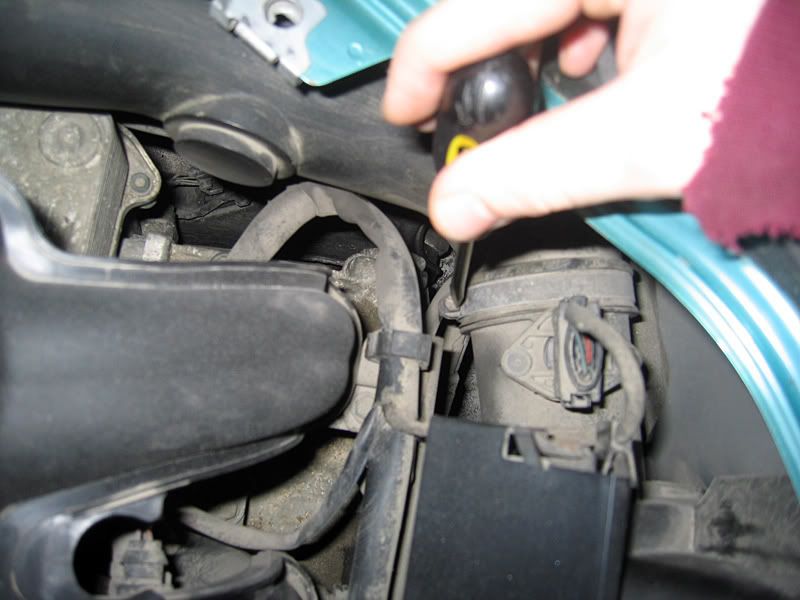
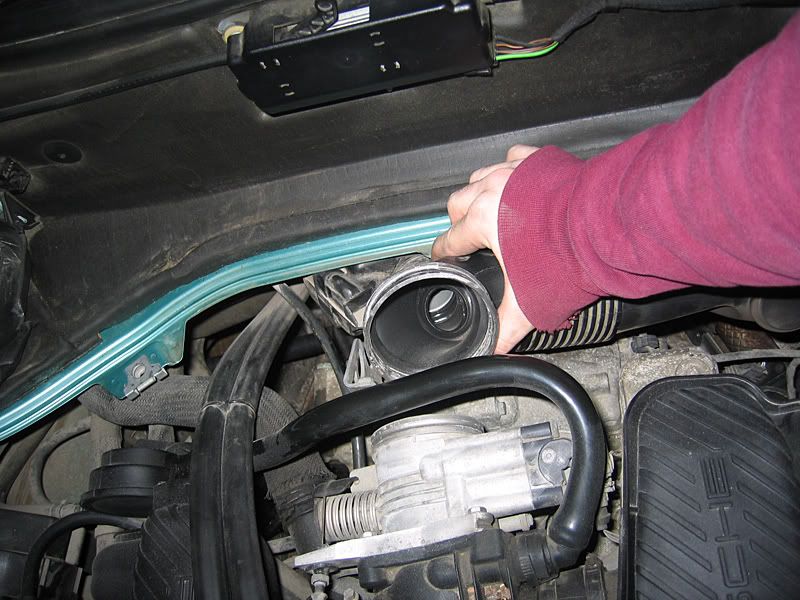
7. Unclamp the clamp that is holding the resonance baffle connected to the intake tube. looks very easy but its a little tricky. watch your fingers
![](http://i143.photobucket.com/albums/r128/djomlas/IMG_12794.jpg)
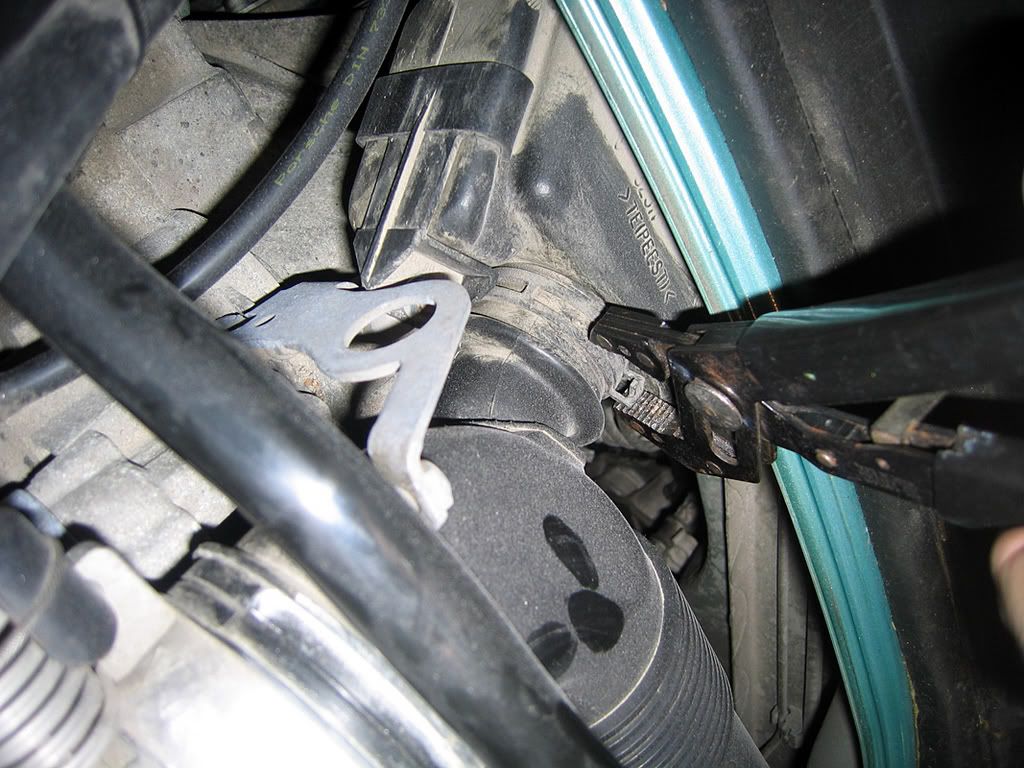
8.. unbolt the screw that is holding the baffle in place
![](http://i143.photobucket.com/albums/r128/djomlas/IMG_12815.jpg)
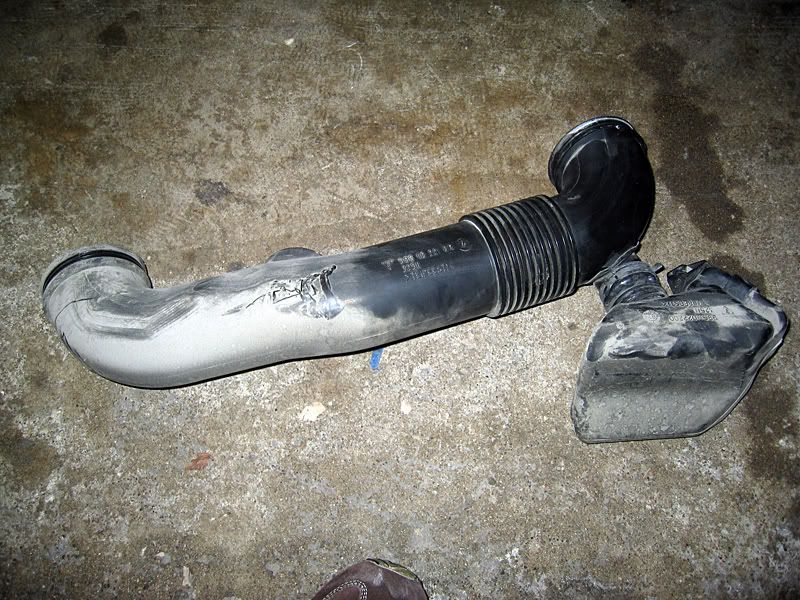
9. now remove the resonance babble and intake tube and put it aside.
__________________
http://i34.tinypic.com/157yslk.jpg
"I couldn't find the sports car of my dreams, so I built it myself." ~F. Porsche
Gemballa springs::litronics::Eurotech 18s(275/225)::B&M::MOMO wheel::
exhaust cutouts::EVOcoldair intake::OEM smoked tails & sidemarkers::
colormatched bumperettes::Top Speed Pro-1 exhaust::
my cardomain/pictures page
|
|
|
02-08-2007, 06:23 PM
|
#2
|
Registered User
Join Date: Sep 2006
Location: chicago
Posts: 3,510
|
10. This is what you are left with.
![](http://i143.photobucket.com/albums/r128/djomlas/IMG_12859.jpg)
the actuall airbox will now have to be removed. very tricky.
11. Unscrew the MAF sensor from the tube that is connected to the airbox. the screw looks funky and i didnt have that tool. i found a very small screw driver and it fit inbetween the edges and it came out.
12. Take the MAF off and clean it (this part is optional, but might as well while you are at it), and place it in the new housing on the intake tube.
![](http://i143.photobucket.com/albums/r128/djomlas/IMG_128610.jpg)
13. now comes the good ol' airbox. It is held in place with 3 bolts. you will see 2 of them, one is located underneath the car.
-one bolt is located on the side of the firewall. you will be able to see it, they are kind of a gold color.
-another bolt is above the MAF housing on the 1/4 panel side
-the third one is located underneath the car. jack up the driver side of the car, PLEASE BE CAREFUL LAYING UNDERNEATH YOUR CAR. use common sense, but once you get under the car you will see the airbox in the air and you will see the 3rd gold bolt holding down the airbox. i forgot to take a picture of this, but once you get underneath you will see the airbox and cant mistake it for anythign else. if you have another person helping you they can guide you to where it is if you are unsure(shake the airbox and you will see it shaking).
now you car wiggle the airbox around and it becomes clear very fast that you cant pull it out just like that.
( there were directions on how to remove the drivers side intake maniforl and throttle body and some lines just to get some space in there for it to come out)-if you would like these please let me know and i will post them)
- this is the way that i did it. if you try pulling it out you will see that the part of the airbox where the MF sensor was(little round tube sticking out) is preventing the whole airbox to come out.
i used pliers and broke of a few pieces of that part and sure enough the whole airbox assembly came out. you can use a saw to cut a perfect line so that you can reuse the airbox if you would like to go back to stock setting and somewho reassemble it back together but i woul dbe careful with a saw in the engine compartment <- this is just a suggestion.
then when you pull the airbox assembly out whit is what you are lft with:
![](http://i143.photobucket.com/albums/r128/djomlas/IMG_128711.jpg)
direct flow to the side intake
14. remove this bracket right next to the throttle body, this will be in the way of the tubing, set it aside
![](http://i143.photobucket.com/albums/r128/djomlas/IMG_128912.jpg)
this is what you will be looking at when the bracket is taken off
__________________
http://i34.tinypic.com/157yslk.jpg
"I couldn't find the sports car of my dreams, so I built it myself." ~F. Porsche
Gemballa springs::litronics::Eurotech 18s(275/225)::B&M::MOMO wheel::
exhaust cutouts::EVOcoldair intake::OEM smoked tails & sidemarkers::
colormatched bumperettes::Top Speed Pro-1 exhaust::
my cardomain/pictures page
|
|
|
02-08-2007, 06:24 PM
|
#3
|
Registered User
Join Date: Sep 2006
Location: chicago
Posts: 3,510
|
15. there are 2 couplers, use the small one and put it on the throttle body and put a supplied clamp on and tighten it good.
![](http://i143.photobucket.com/albums/r128/djomlas/IMG_129013.jpg)
this is what it will look like once secured
![](http://i143.photobucket.com/albums/r128/djomlas/IMG_129215.jpg)
16. there are also 2intake tubes. take the smaller part of the smaller tube and put it on the tube, put the clamp on but dont tighten it all the way to give yourself room for fine tuning(adjusting)
![](http://i143.photobucket.com/albums/r128/djomlas/IMG_129316.jpg)
17. now grab the larger tube(where MAF is not housed) and put a coupler on and 2 clamps on there so you can move them around and tighetn them
![](http://i143.photobucket.com/albums/r128/djomlas/IMG_129417.jpg)
18. The larger tube will have a arm and you will want to instert the 10mm bolt into the OEM location and tighetn it, but not all the way, connect the tubest together and clamp them, loosely again.
![](http://i143.photobucket.com/albums/r128/djomlas/IMG_129518.jpg)
19. Istall the cone filter and clamp it good with the supplied clamp to the end of the large tube (the only opening at this point)
![](http://i143.photobucket.com/albums/r128/djomlas/IMG_129619.jpg)
20. this is the overview of the engine compartment with everythign in place
![](http://i143.photobucket.com/albums/r128/djomlas/IMG_129720.jpg)
21. at this point you would want to tighten all the connections and clamps, make sure that the throttle cable is not moved anywhere, connect the MAF cable to the MAF, in my case i moved the J tube that was loose already, and just make sure that anything that you disconnected is connected back.
22. this picture shows the outside view with some extreme disposure to show the filter in place, so you really get all the air. i also installed grilles on both sides to prevent leaves and dirt com coming in.
![](http://i143.photobucket.com/albums/r128/djomlas/IMG_130321.jpg)
23. put everything back together and enjoy the new sound.
here is a quick video right after i put it in
CLICK HERE FOR VIDEO
*if i missed anything or of you see anythign that i missed please let me know so that i can edit it.
__________________
http://i34.tinypic.com/157yslk.jpg
"I couldn't find the sports car of my dreams, so I built it myself." ~F. Porsche
Gemballa springs::litronics::Eurotech 18s(275/225)::B&M::MOMO wheel::
exhaust cutouts::EVOcoldair intake::OEM smoked tails & sidemarkers::
colormatched bumperettes::Top Speed Pro-1 exhaust::
my cardomain/pictures page
Last edited by djomlas; 02-08-2007 at 08:14 PM.
|
|
|
02-08-2007, 06:30 PM
|
#4
|
Guest
|
Great job ![Smilie](http://www.986forum.com/forums/images/smilies/smile.gif) sounds great after 4k rpm
|
|
|
02-08-2007, 08:38 PM
|
#5
|
Guest
|
I would consider making some sort of heat sheild, even if it doesnt work (which it should) it will offer a little protection from dust in the engine compartment clogging the filter prematurely, because we all know it gets horribly dirty under there.
|
|
|
02-08-2007, 08:43 PM
|
#6
|
Registered User
Join Date: Sep 2006
Location: chicago
Posts: 3,510
|
o i know, im actually working on something
__________________
http://i34.tinypic.com/157yslk.jpg
"I couldn't find the sports car of my dreams, so I built it myself." ~F. Porsche
Gemballa springs::litronics::Eurotech 18s(275/225)::B&M::MOMO wheel::
exhaust cutouts::EVOcoldair intake::OEM smoked tails & sidemarkers::
colormatched bumperettes::Top Speed Pro-1 exhaust::
my cardomain/pictures page
|
|
|
02-08-2007, 09:45 PM
|
#7
|
Registered User
Join Date: Nov 2003
Location: Illinois
Posts: 3,033
|
Nice pics and write up Dj. It looks like the the intake would suck in a lot of hot engine compartment air are though. I wonder if it actually increases performance? I'm thinking it's more of a "sound" mod like an aftermarket muffler?
Last edited by Adam; 02-08-2007 at 09:55 PM.
|
|
|
02-08-2007, 10:42 PM
|
#8
|
Registered User
Join Date: Sep 2006
Location: chicago
Posts: 3,510
|
well on another forum i found data where they tested a 2.5 stock with just this, as is, and it actually did increase by 6hp.
so i bet w some kind of a shield it will be even better.
but the actual cone filter is right on the intake hole, so its getting a lot of fresh air, pretty much the first thing that it hits as it enters the compartment
__________________
http://i34.tinypic.com/157yslk.jpg
"I couldn't find the sports car of my dreams, so I built it myself." ~F. Porsche
Gemballa springs::litronics::Eurotech 18s(275/225)::B&M::MOMO wheel::
exhaust cutouts::EVOcoldair intake::OEM smoked tails & sidemarkers::
colormatched bumperettes::Top Speed Pro-1 exhaust::
my cardomain/pictures page
|
|
|
02-09-2007, 05:40 AM
|
#9
|
Registered User
Join Date: Nov 2006
Location: New York
Posts: 644
|
Hey dj,
Looks like you're on "full throttle" with you mods these days!! Nice job!
|
|
|
02-09-2007, 10:52 AM
|
#10
|
Registered User
Join Date: Sep 2006
Location: chicago
Posts: 3,510
|
hehehe, well thechnically the only noticeable mod that i did was the short shifter and now this.
all the other ones were appearance wise i think...
__________________
http://i34.tinypic.com/157yslk.jpg
"I couldn't find the sports car of my dreams, so I built it myself." ~F. Porsche
Gemballa springs::litronics::Eurotech 18s(275/225)::B&M::MOMO wheel::
exhaust cutouts::EVOcoldair intake::OEM smoked tails & sidemarkers::
colormatched bumperettes::Top Speed Pro-1 exhaust::
my cardomain/pictures page
|
|
|
02-09-2007, 11:16 AM
|
#11
|
Registered User
Join Date: Jan 2007
Location: Texas
Posts: 1,311
|
Quote:
Originally Posted by boggtown
I would consider making some sort of heat sheild, even if it doesnt work (which it should) it will offer a little protection from dust in the engine compartment clogging the filter prematurely, because we all know it gets horribly dirty under there.
|
Yes, what he said. I would fabricate some type of plastic airbox to keep that filter from getting so dirty. Maybe you could use pieces of the old one. By the way, if you go back inside there, you may want to change out the trotle body for one with a larger diameter. Here is what the wider T.B. looks like.
![](http://i5.photobucket.com/albums/y155/BlackandWhiteFlash/bxthrotl.jpg)
Might as well do it all the first time when you install the tubing. I'm sure someone else on here may have a post about one they installed.
Last edited by porsche986spyder; 02-09-2007 at 03:59 PM.
|
|
|
02-09-2007, 11:25 AM
|
#12
|
Registered User
Join Date: Jul 2006
Location: Where the Sewer Meets the Sea, CA. USA
Posts: 2,695
|
Quote:
Originally Posted by djomlas
o i know, im actually working on something ![Wink](http://www.986forum.com/forums/images/smilies/wink.gif)
|
IF someone were to loan you one heat sheild cover, you should send it to a carbon fiber company and have them fabricate you one useing the loaner as a template. You could even have them make you intake plumbing
|
|
|
02-09-2007, 08:09 PM
|
#13
|
Registered User
Join Date: Dec 2006
Location: Austin, TX
Posts: 939
|
Not sure I'll put an intake on my Box... but this DIY write up is, in one word:
NICE!
__________________
2001 Boxster - Grey on Grey
1969 911T Targa - 'Stinky'
http://www.zoto.com/frayadjacent/img...f27a-4a399.jpg <---- my car. ^ crap I post.
"The existence of the flamethrower is evidence that someone, somewhere once said 'I want to set those people over there on fire, but I don't want to have to walk over there to do it.'"
|
|
|
02-09-2007, 09:15 PM
|
#14
|
Registered User
Join Date: Apr 2006
Location: Seattle
Posts: 170
|
Nice job!
Where was this guide when I installed my EVO intake on Wednesday night?
The one difference with the EVO is that you use the stock air tube going to the throttle body. I'm not sure when they made that change, but they did. When I opened my box, I thought they forgot to send me some parts.
Even after unbolting the intake manifold, I still had to break the mounting tabs off to get it out. I didn't want to fight with it for too long so out came the cutters.
-David
|
|
|
02-10-2007, 06:38 AM
|
#15
|
Registered User
Join Date: Sep 2006
Location: chicago
Posts: 3,510
|
yea i know what u mean man, when i looked at the box and space around it iwas like damn.
but i did it actually pretty quick, just broke off parts of the little tube that the maf was sitting on and it came right out.
__________________
http://i34.tinypic.com/157yslk.jpg
"I couldn't find the sports car of my dreams, so I built it myself." ~F. Porsche
Gemballa springs::litronics::Eurotech 18s(275/225)::B&M::MOMO wheel::
exhaust cutouts::EVOcoldair intake::OEM smoked tails & sidemarkers::
colormatched bumperettes::Top Speed Pro-1 exhaust::
my cardomain/pictures page
|
|
|
02-13-2007, 09:36 PM
|
#16
|
Registered User
Join Date: Aug 2006
Location: Carnation, WA
Posts: 47
|
Great write up! I'm thinking about doing mine soon as well... and +1 on the heatshield, I think you would loose some power from the heat of the engine. Tupperware FTW! or sheet metal.
-Brian
|
|
|
02-14-2007, 02:49 PM
|
#17
|
Registered User
Join Date: Sep 2006
Location: chicago
Posts: 3,510
|
well they were all tested without the shield and showed increased power, so im not concerned about that.
but i do think that some more fab work will yield in some more cold air and repell some heat from the engine bay and protect the filter
__________________
http://i34.tinypic.com/157yslk.jpg
"I couldn't find the sports car of my dreams, so I built it myself." ~F. Porsche
Gemballa springs::litronics::Eurotech 18s(275/225)::B&M::MOMO wheel::
exhaust cutouts::EVOcoldair intake::OEM smoked tails & sidemarkers::
colormatched bumperettes::Top Speed Pro-1 exhaust::
my cardomain/pictures page
|
|
|
06-28-2011, 08:48 PM
|
#18
|
Registered User
Join Date: Apr 2009
Location: Australia
Posts: 328
|
If anyone is interested in doing this with Carbon, I can show you how to make it entirely out of carbon without sucking in hot air (sealed off from the engine bay, but open to the cold air intake opening)
Plus I think its probably about the same price as the EVO intake.
Sam
|
|
|
08-13-2011, 05:22 PM
|
#19
|
Registered User
Join Date: Jul 2010
Location: Oregon
Posts: 77
|
Quote:
Originally Posted by sparker
If anyone is interested in doing this with Carbon, I can show you how to make it entirely out of carbon without sucking in hot air (sealed off from the engine bay, but open to the cold air intake opening)
Plus I think its probably about the same price as the EVO intake.
Sam
|
I would be super interested into doing it myself Sparker. looks very good as well. about how much was the cost? thanks
|
|
|
08-14-2011, 04:02 PM
|
#20
|
Registered User
Join Date: Apr 2009
Location: Australia
Posts: 328
|
Its all quite cheap except the filter. Carbon pipe, carbon elbows, silicon hose and clamps - not more than $250. The filter is where you can spend a fortune....
Sam
__________________
Australian Carbon Fiber nut
|
|
|
Posting Rules
|
You may not post new threads
You may not post replies
You may not post attachments
You may not edit your posts
HTML code is On
|
|
|
All times are GMT -8. The time now is 08:36 AM.
| |