I installed a short shifter over the weekend. It took me about 1 hour to do the install. I think it will take 2-3 hours for a novice who hasn't done this before. It is best to have a buddy help you if available.
I have 13 photos but could only put 10 into the post apparently. So i cover steps 1 thru 8 and will add steps 9 and 10 to the thread once published.
Short Shifter Kit was purchased from Amazon.
PQYRACING PQY Short Shifter Quick Gear Shifter Kit Compatible with Porsche 911/996 Turbo AWD Boxster
I installed this kit into my 2000 Boxster S.
The kit was $60.99
Link:
https://www.amazon.com/gp/product/B07HG21BR6/ref=ppx_yo_dt_b_asin_title_o03_s00?ie=UTF8&psc=1
I did the install using the following steps.
Step 1
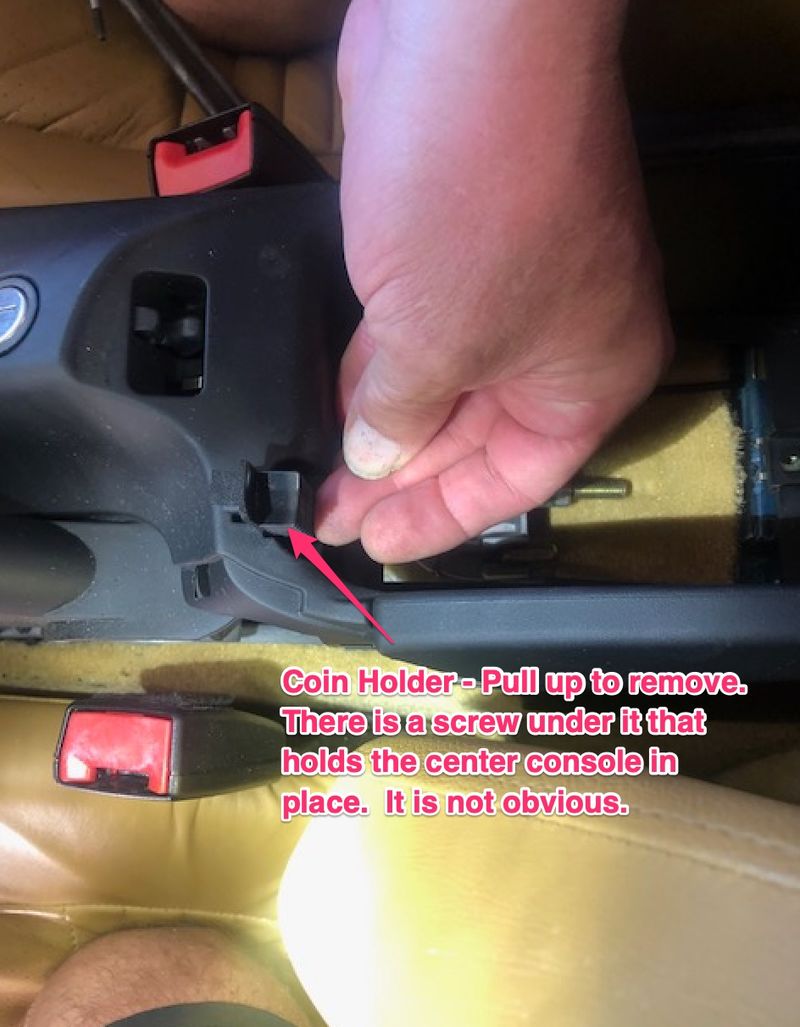
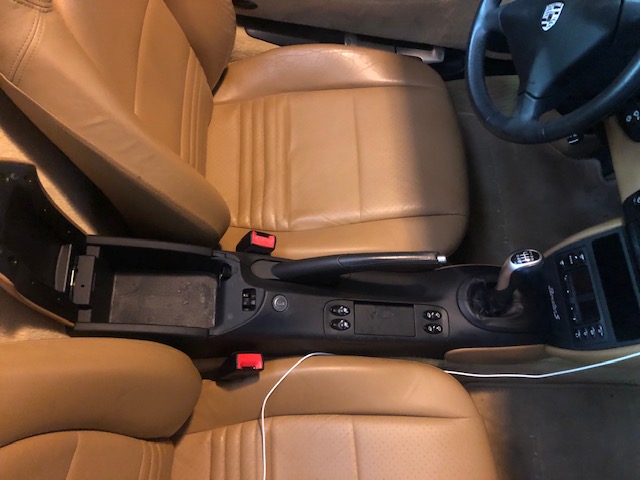
Remove Center Console. Unscrew and unplug. See photo.
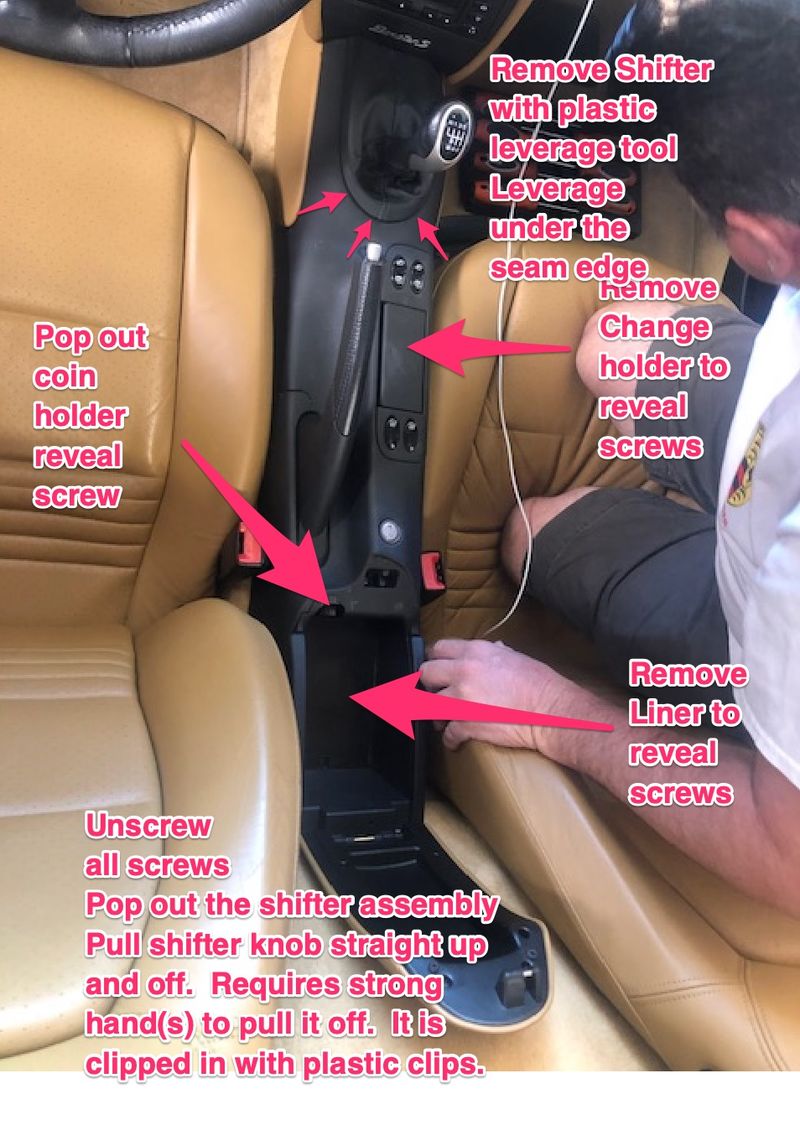
Also note that there is a key screw below the coin holder here.
Step 2
Remove Shifter Plastic Assembly with Stick
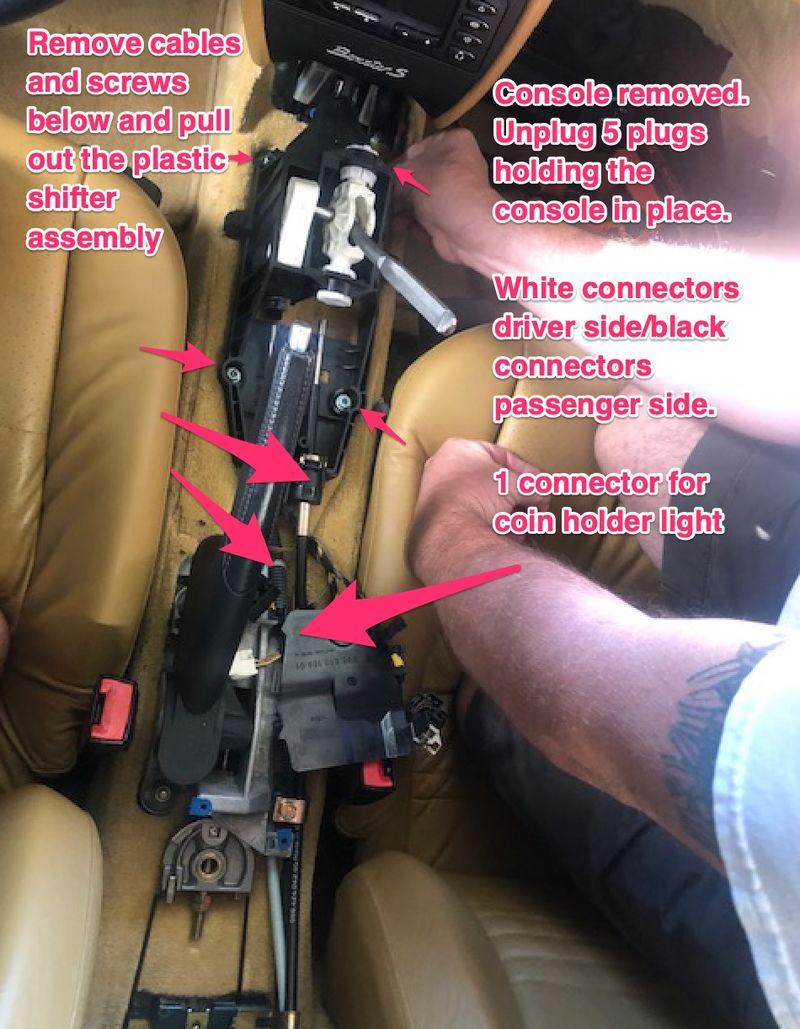
Step 3
Remove Stick
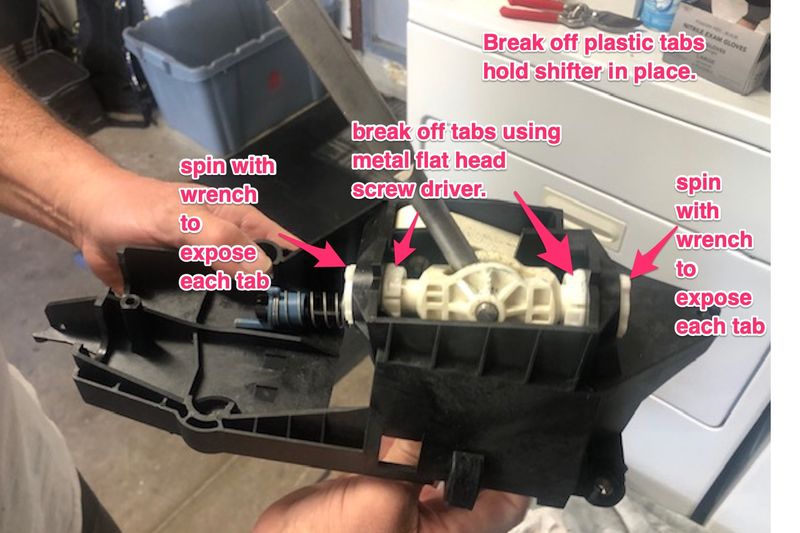
Step 4
More Stick Removal
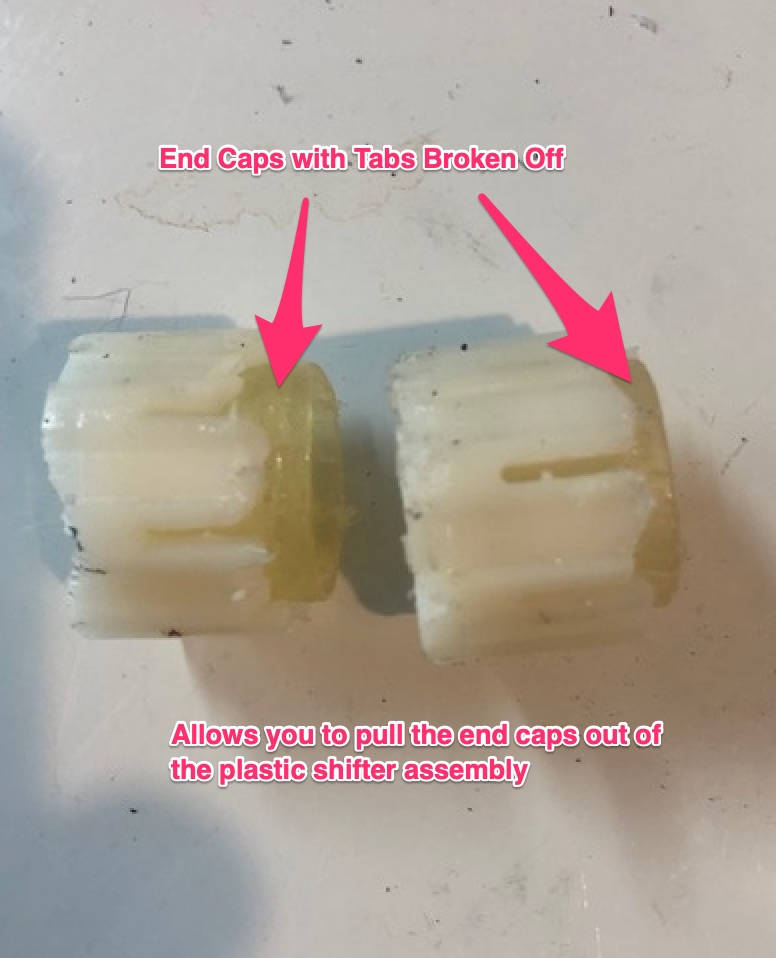
Break the plastic tabs off of the shifter end caps. See photos below. I used a metal flat head screw driver. You can also clip them if you have the right cutting equipment. Bottom line, the plastic end caps won't come out without breaking the tabs.
Photo after breaking tabs on end caps and pulling them out.
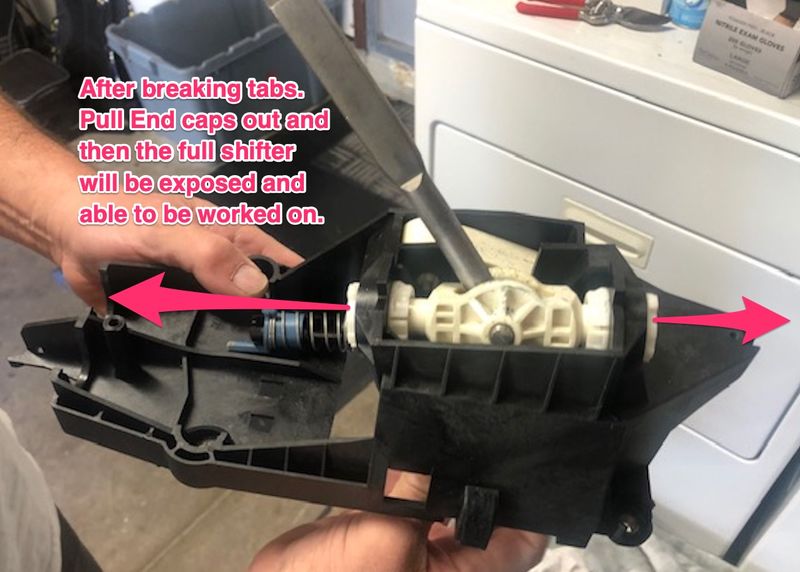
Photo of full assembly before pulling end caps out.
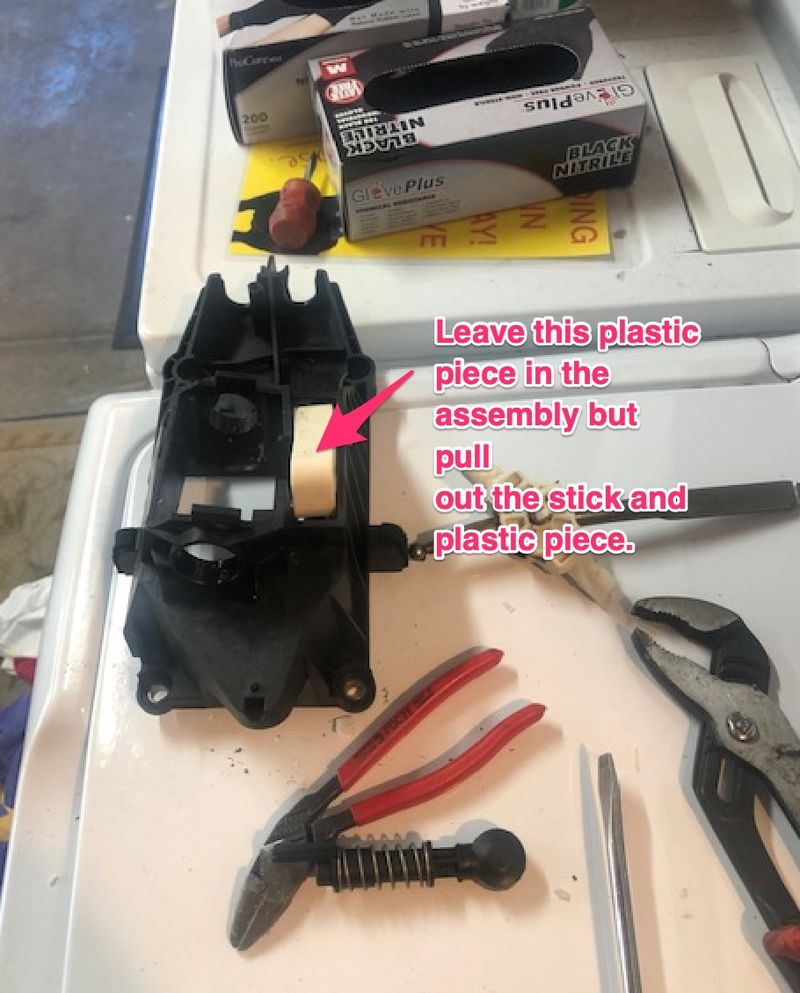
Step 5
Pull out stick and plastic piece.
Step 6
Install New Short Shifter into plastic assembly.
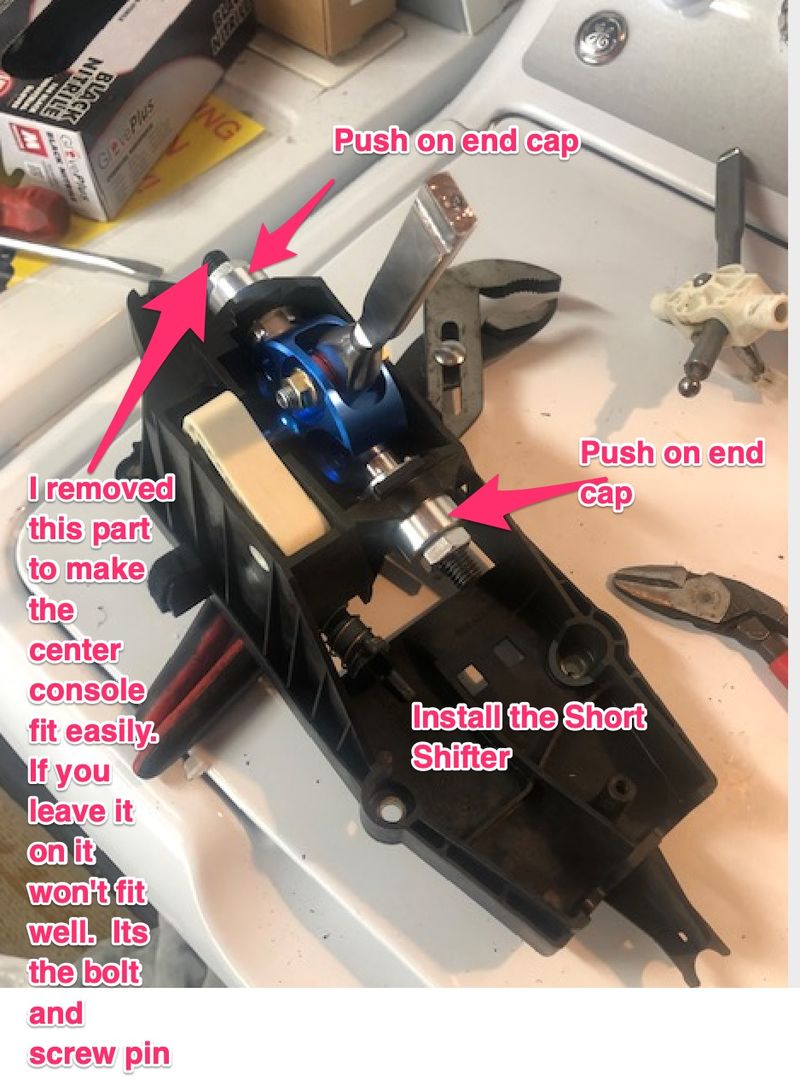
Step 7
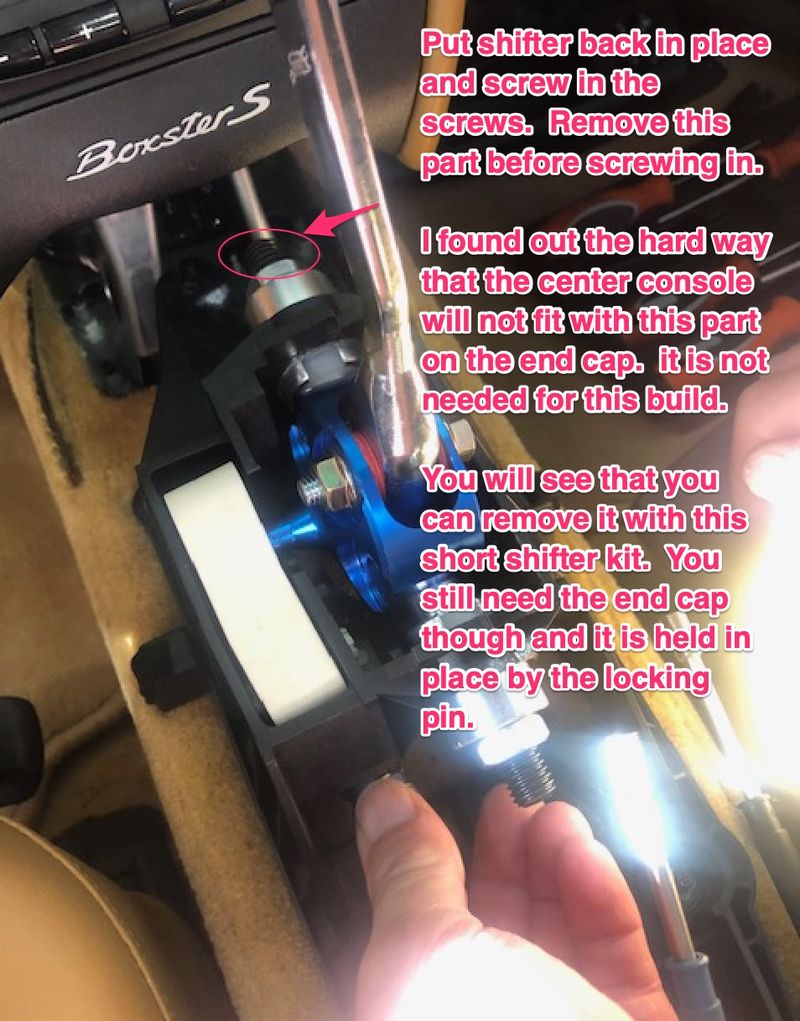
You will need to push the end caps on and install the locking pins. I had to remove the front bolt and nut that was hooked to the front end cap to fit the center console into place otherwise it would not fit. It doesn't have a mechanical play on the 2000 Boxster S so it is not needed. See photo...it will be self explanatory when you see the short shifter. Hopefully the below photo explains it a bit.
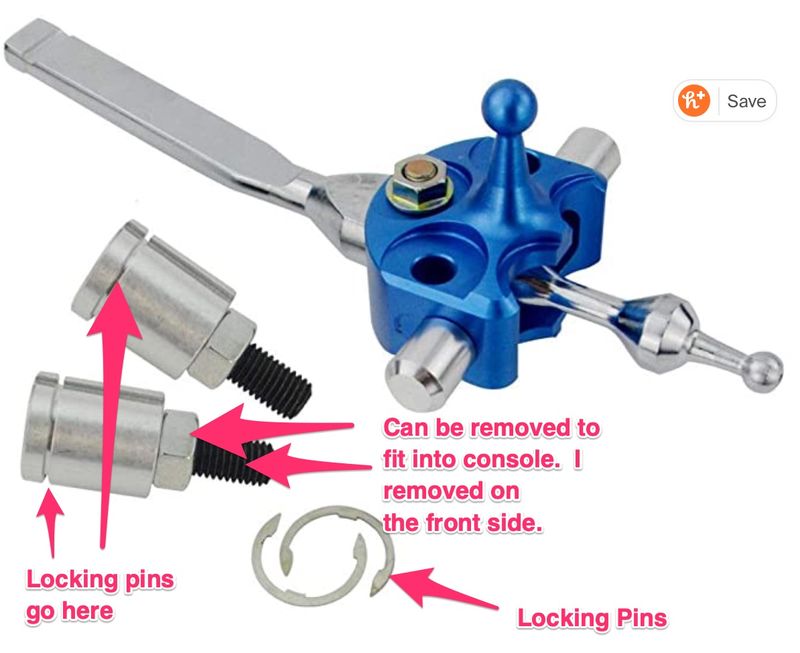
Step 8
Insert the locking pins in place to hold the end caps in place. I put the front locking pin with my hands and screw driver but had to use a wrench to squeeze the assembly in place so that I could put in the back locking pin. I squeezed the wrench and inserted the pin by hand. It went in about 30%. I used a rubber mallet and screw driver. I put the flat head of the screw driver against the top of the pin and hit the screw driver with the rubber mallet and it went into place. It might take two people to perform this maneuver.

I removed step 9 and step 10 and will add it to this thread once published.


 Hybrid Mode


