Go Back   986 Forum - The Community for Porsche Boxster & Cayman Owners > Porsche Boxster & Cayman Forums > DIY Project Guides

Post Reply
 
LinkBack Thread Tools Display Modes
Old 10-04-2018, 05:53 AM   #1
Registered User
 
steved0x's Avatar
 
Join Date: Dec 2012
Location: FL
Posts: 4,143
How to rebuild Tarett front camber plates

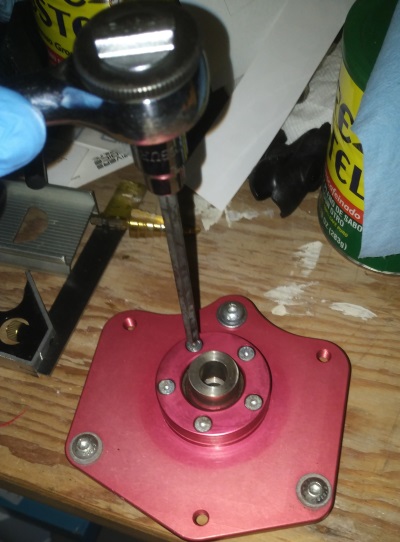
I recently got a set of used Tarett front camber plates and there was a decent amount of play in the spherical bearing, it was easy to move around (which isn't necessarily bad) but also there was play in the bearing (which is bad). I spoke with Ira at Tarett and he recommended that I install new spherical bearings into the plates. Turns out, it wasn't that expensive. So if you are thinking about getting an older set of camber plates but are worried that the bearings are worn out, they aren't that difficult or expensive to replace.

Taking out the old bearing

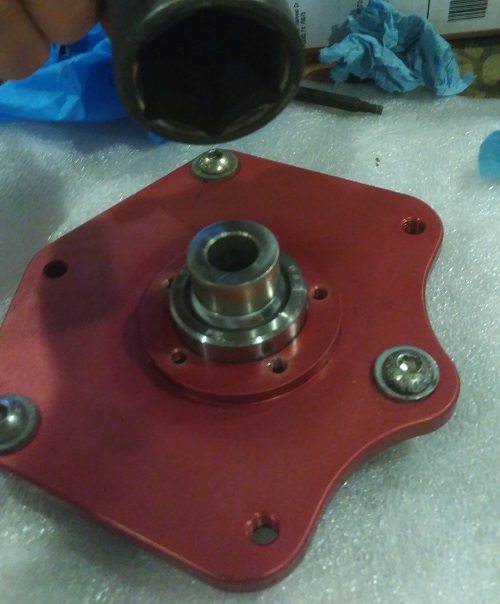
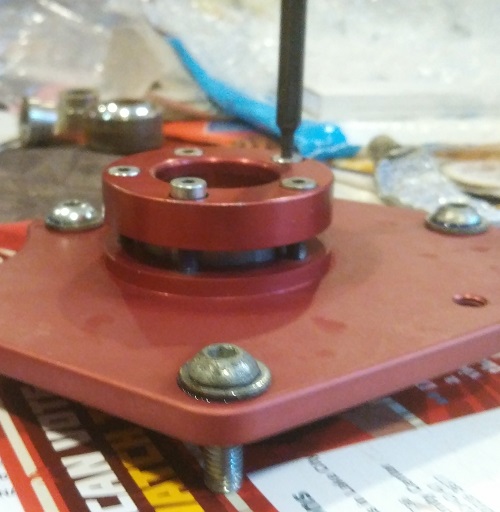
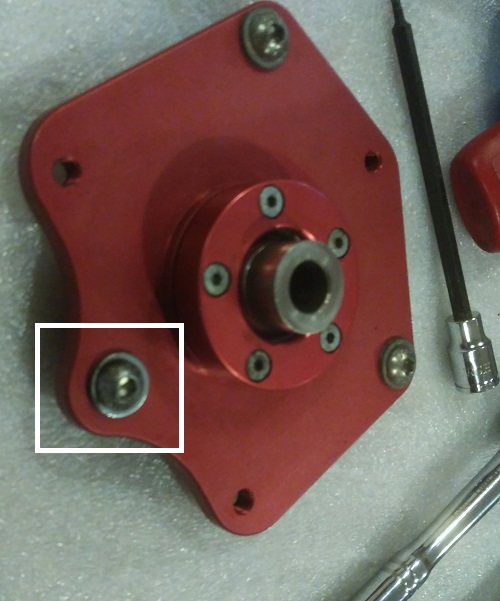
To take out the old bearing, first undo the 5 small screws, using a 3mm allen wrench. I tried using my small handheld set, but it didn't have enough torque, so I got out my socket set.


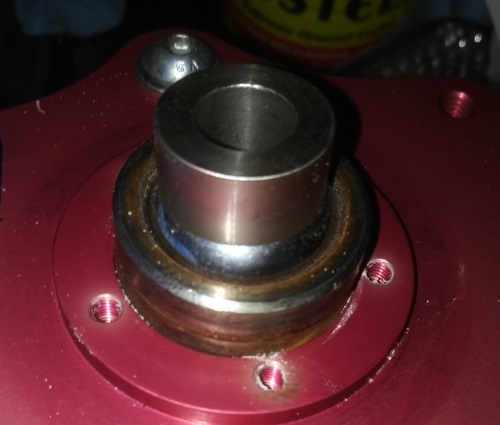
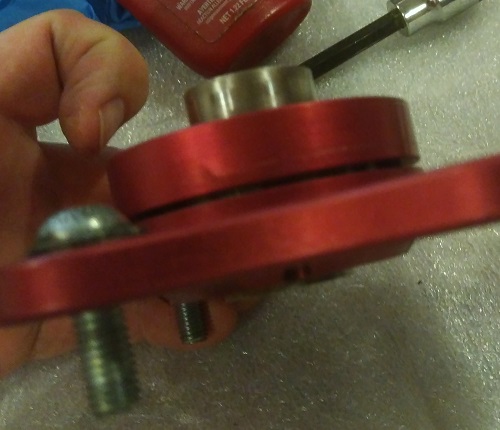
Once these are removed, the retaining cap can be removed. I was able to twist this off by hand, it shouldn't be on there too tight.


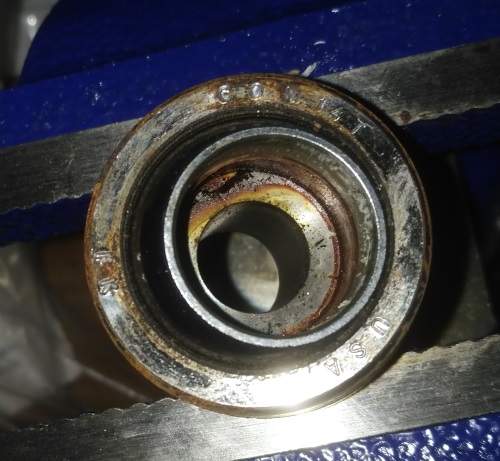
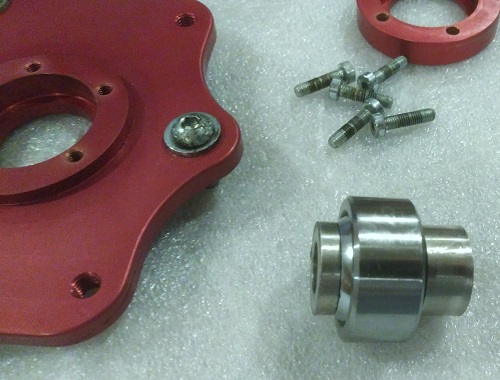
Here's a close up of the spherical bearing in the camber plate, with the retaining cap removed.


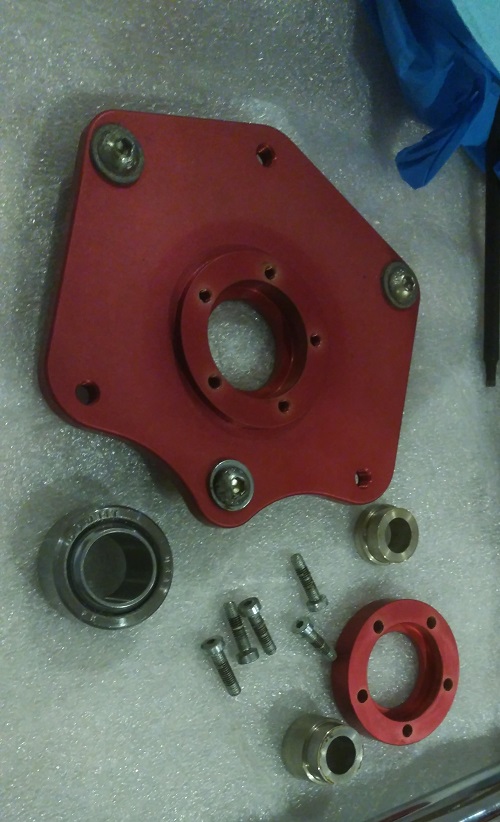
I was able to push this out using my thumb on one of the plates, and on the other one I had to tap it out with a punch and a rubber mallet. Once removed it looks like this.


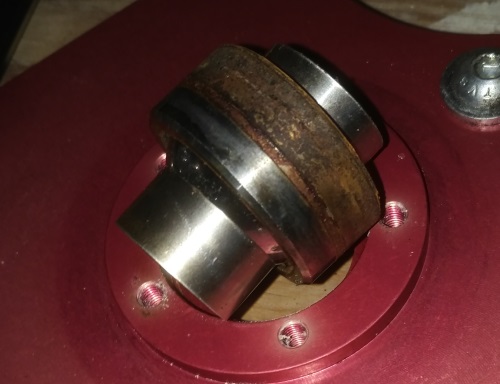
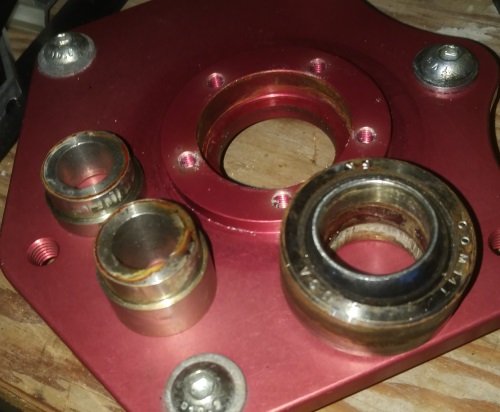
There are two spacers; one on each end of the bearing, that need to be removed. I tapped them off using a punch and a rubber mallet, there is a gap in between the spacers that you can put your punch on.


With one spacer removed, you can see the other one better.


Once both spacers are tapped off, it should look like this:
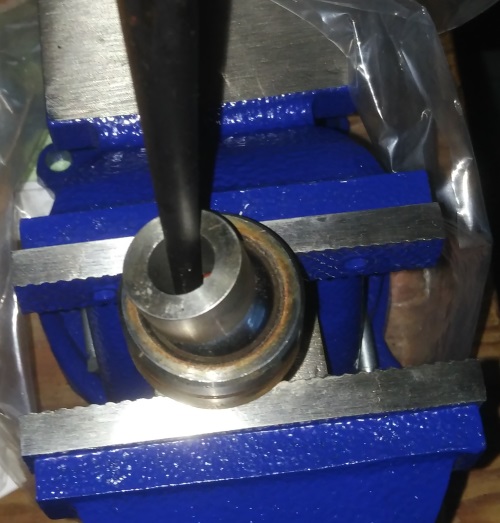


The bearing

Here is the bearing by itself, removed from the plate and with the two spacers removed.


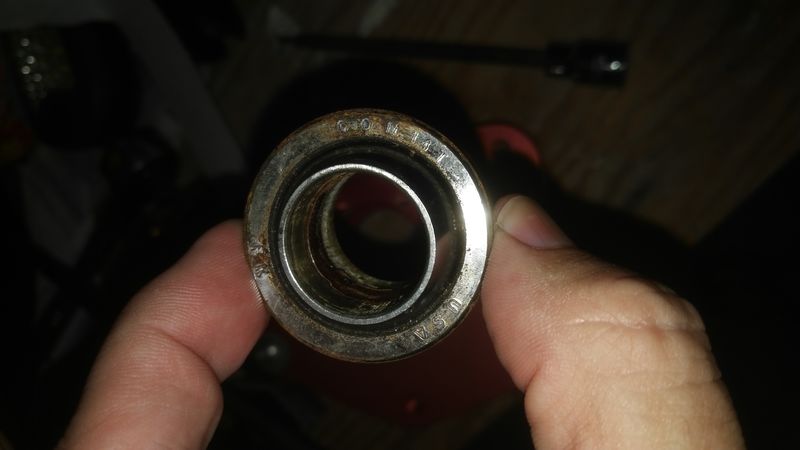
The markings on the bearing say FK USA COM14T

After talking with IRA and also the folks at FK, I have determined that the bearing is this one:

FK Bearings Commercial Series

The COM14 is the size, and T means it is teflon lined.

There are 3 torque specifications available for this bearing:

Torque Specs

The bearing used in the camber plates is the F1 spec.

These are on sale from places like summit racing under part number fkb-com14t-f1 for around $10.00

https://www.summitracing.com/parts/fkb-com14t-f1

I bought mine from Tarett for a few $$$ more for a couple of reasons, mainly that I wanted to be absolutely sure to get the right ones, and also I hadn't learned the information above before I ordered them. Ira is good people and has helped me a lot and given great customer service, so if he makes a few extra bucks on reselling a bearing, that is fine with me

They are supposed to get here in around a week (UPS ground from CA to FL) so when they do I will finish up this DIY.

steved0x is offline   Reply With Quote
Old 10-04-2018, 05:54 AM   #2
Registered User
 
steved0x's Avatar
 
Join Date: Dec 2012
Location: FL
Posts: 4,143
Reserved post # 2 for step 2 of the procedure when the parts get here

On the product page for these camber plates:

Front Monoball Camber Plate (pr), 996/997/986/987

There are two links:

I don't ever remember seeing that assembly drawing one before, but it contains information that helps with the rebuild process, such as the torque spec for the small screws that secure the retaining cap (45 inch/pounds with blue loctite)

They also seem to show a 2 part spacer for the bottom, where my unit has a single larger spacer for the bottom and a smaller spacer for the top. I don't know if it is because the plates I have are really old or what... Apparently when using these plates on a GT3 you need a smaller spacer on the bottom and so the two part spacer shown in the assembly diagram accommodates that.

I'll finish up this post when the parts get here

Last edited by steved0x; 10-04-2018 at 06:02 AM.
steved0x is offline   Reply With Quote
Old 11-06-2018, 10:22 AM   #3
Registered User
 
steved0x's Avatar
 
Join Date: Dec 2012
Location: FL
Posts: 4,143
Got my parts and put them back together, but didn't get around to this, it turned out to be such a simple procedure that I'm not sure it warranted a DIY thread...

New spherical bearing and camber plate parts disassembled


Spacers installed into the bearing with a little blue loctite to hold them


Bearing installed into the plate from the underside, I tapped it in with a big socket (34mm I think, whatever the axle nut socket size is)


To get the bearing retainer cap on, I used the 5 screws and worked around in an alternating pattern (like lug bolts). Each time I would take up the slack, and then give about half a turn or so. It was easy to do by hand, I didn't need to use a wrench, until the very end when I torqued them down to 45 inch/pounds.


When this cap is torqued down, there is still a small gap, around 1.5mm between the cap and the plate body


All done and ready for installation onto the strut. If you are using these with the OEM strut top thrust bearing (when using these with OE springs, PSS9, and similar) then this washer might hit that bearing, but if you loosen the bolt and move the washer as far outboard as it will go before tightening it back, it will clear.


steved0x is offline   Reply With Quote
Post Reply


Posting Rules
You may not post new threads
You may not post replies
You may not post attachments
You may not edit your posts

BB code is On
Smilies are On
[IMG] code is On
HTML code is On
Trackbacks are On
Pingbacks are On
Refbacks are On


All times are GMT -8. The time now is 06:45 PM.


Powered by vBulletin® Version 3.8.7
Copyright ©2000 - 2024, vBulletin Solutions, Inc.
Content Relevant URLs by vBSEO 3.6.0
Copyright 2024 Pelican Parts, LLC - Posts may be archived for display on the Pelican Parts Website -    DMCA Registered Agent Contact Page