 04-19-2014, 09:21 AM
|
#1
|
|
Registered User
Join Date: Jun 2012
Location: Bedford, TX
Posts: 2,755
|
Really came out nice Norm, excellent work 
__________________
______________________________________________
2001 Boxster S Lapis Blue
TS Cat Bypass Pipes and exhaust
iPad Mini Dash Install
DEPO Tail Lights
|

|

|
|
04-22-2014, 03:51 PM
|
#2
|
|
Registered User
Join Date: Jul 2007
Location: atlanta, ga
Posts: 91
|
Thank you Charles!!!
Here's a quick pic I took of my new headlights. They look better than I expected, and I can Finally see where I'm driving at night  charles, you were awesome to deal with, and worked miracles on those old headlights to get them to look like this. I feel a renewed love for my boxster now! I can't t say thank you enough!
-Richard Griffin 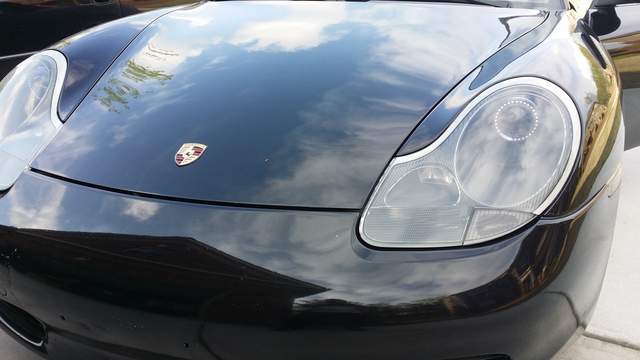
__________________
Richard Griffin
Atlanta GA
2001 blk/tan Boxster 18" turbo twist wheels
2003 gray/tan Navigator
|

|
|
|
04-22-2014, 11:42 PM
|
#3
|
|
Registered User
Join Date: Sep 2013
Location: Montreal, QC. (currently expat to Shanghai)
Posts: 3,249
|
Quote:
Originally Posted by rgriffin

Here's a quick pic I took of my new headlights. They look better than I expected, and I can Finally see where I'm driving at night charles, you were awesome to deal with, and worked miracles on those old headlights to get them to look like this. I feel a renewed love for my boxster now! I can't t say thank you enough!
-Richard Griffin |
Hi Richard
I didn't see the before and after but I can tell from your tone that you are very happy with what Chales did to them. I bet he added some UV protective coating to them as well. You couldn't have find better guy in the whole of the USA to restore those. Good on ya mate
The picture you took, that doesn't work tho sorry  Let's see the front-end of your car on a overcast day or at sunset. Nice weather coming so no excuse for not detailing that deep black Boxster before a photo shoot
Thanks for confirming again that Charles "is the man".
__________________
______________________________
'97 Boxster base model 2.5L, Guards Red/Tan leather, with a new but old Alpine am/fm radio.
|
|
|
|
|
04-22-2014, 11:59 PM
|
#4
|
|
Custom User Title Here
Join Date: Mar 2012
Location: Ft. Leonard Wood
Posts: 6,169
|
Quote:
Originally Posted by Nine8Six
Hi Richard
I didn't see the before and after but I can tell from your tone that you are very happy with what Chales did to them. I bet he added some UV protective coating to them as well. You couldn't have find better guy in the whole of the USA to restore those.
|
I'm actually still quite the amateur at lens restoration. The inside of the lens is no problem because there's no coating and I can polish them quite easily. However, the outer lens has the UV coating which is very hard to get through. I have yet to find a method of removing the UV layer without causing deep scratches that take hours to wet sand out.
I appreciate the compliments, but I still have a long way to go. The only reason I did Richards was because they were in such bad shape that I could do no wrong.
I'll keep at it, though 
Here's a before shot of Richards. I hope you don't mind.

__________________
https://youtube.com/@UnwindTimeVintageWatchMuseum
|
|
|
|
|
04-23-2014, 09:52 PM
|
#5
|
|
Registered User
Join Date: Nov 2010
Location: Long Island, NY
Posts: 296
|
Quote:
Originally Posted by particlewave
I'm actually still quite the amateur at lens restoration. The inside of the lens is no problem because there's no coating and I can polish them quite easily. However, the outer lens has the UV coating which is very hard to get through. I have yet to find a method of removing the UV layer without causing deep scratches that take hours to wet sand out.
I appreciate the compliments, but I still have a long way to go. The only reason I did Richards was because they were in such bad shape that I could do no wrong.
|
My lenses were almost as bad as Richard's. Followed Fred's advice. Wet sand with 1200 grit until no yellow stuff comes off anymore. I didn't have any finer grit sand paper lying around, but rubbing two pieces of 1200 grit together takes their edge off enough to mimic a finer grit. Sanded with those until I didn't see any deep scratches anymore. Then used the step pads of a Turtle Wax Headlight Restorer Kit for a while. Finally used the polishing stuff that comes with that kit on a buffer with modest speed. Used spare amounts of polisher and just kept at it until happy with the result. The whole process is about 2 to 3 hours per headlight.
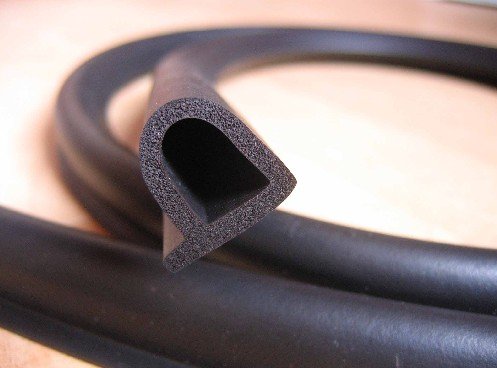
Btw, I see that Richard's rubber seals are as much turned into mush as mine. Any way to fix this?
Bbtw, what do you use for UV protection?
|
|
|
|
|
04-23-2014, 11:37 PM
|
#6
|
|
Registered User
Join Date: Sep 2013
Location: Montreal, QC. (currently expat to Shanghai)
Posts: 3,249
|
Quote:
Originally Posted by nieuwhzn
Btw, I see that Richard's rubber seals are as much turned into mush as mine. Any way to fix this?
|
I've retrofitted a Carrera a few months ago (3~4months) and use the below high density foam held by a few drops of rtv silicon. Still looking as new today. Not a perfect seal 'as rubber would do' but visually it is the same. Looks 100x times better than nothing at all or the old melted rubber anyway.
Not tested. I have no idea if this HD foam material will last "years" under heavy UV and sun heat. It is however definitely good to use as a quick replacement until you find a donor/oem rubber seal.
Everywhere on ebay in many sizes... $1 type item. DIY fun
__________________
______________________________
'97 Boxster base model 2.5L, Guards Red/Tan leather, with a new but old Alpine am/fm radio.
|
|
|
|
|
04-24-2014, 12:08 AM
|
#7
|
|
Custom User Title Here
Join Date: Mar 2012
Location: Ft. Leonard Wood
Posts: 6,169
|
Quote:
Originally Posted by nieuwhzn
My lenses were almost as bad as Richard's. Followed Fred's advice. Wet sand with 1200 grit until no yellow stuff comes off anymore. I didn't have any finer grit sand paper lying around, but rubbing two pieces of 1200 grit together takes their edge off enough to mimic a finer grit. Sanded with those until I didn't see any deep scratches anymore. Then used the step pads of a Turtle Wax Headlight Restorer Kit for a while. Finally used the polishing stuff that comes with that kit on a buffer with modest speed. Used spare amounts of polisher and just kept at it until happy with the result. The whole process is about 2 to 3 hours per headlight.
Btw, I see that Richard's rubber seals are as much turned into mush as mine. Any way to fix this?
Bbtw, what do you use for UV protection?
|
Opti-lens is good stuff...any clear coat with a good UV rating is better than nothing, though.
__________________
https://youtube.com/@UnwindTimeVintageWatchMuseum
|
|
|
|
|
04-23-2014, 08:45 AM
|
#8
|
|
Registered User
Join Date: Mar 2014
Location: DC
Posts: 22
|
Quote:
Originally Posted by rgriffin
They look better than I expected
|
ROTFLMAO. A bit of an understatement based on the before pictures! Classy acts you both are. Well done!
Time to start sending Particlewave worse and worse headlights. Maybe from the wrong car... I think I have some from an 1972 Opal Cadet. I'll tell him they are for an 02 Boxster and see what happens...
__________________
Martin
2002 Boxster S
2006 Cayman S
|
|
|
|
|
04-23-2014, 10:37 AM
|
#9
|
|
Custom User Title Here
Join Date: Mar 2012
Location: Ft. Leonard Wood
Posts: 6,169
|
Quote:
Originally Posted by N0tt0N
ROTFLMAO. A bit of an understatement based on the before pictures! Classy acts you both are. Well done!
Time to start sending Particlewave worse and worse headlights. Maybe from the wrong car... I think I have some from an 1972 Opal Cadet. I'll tell him they are for an 02 Boxster and see what happens...
|
Hahaha! Funny stuff...
Relays are in, guys

__________________
https://youtube.com/@UnwindTimeVintageWatchMuseum
|
|
|
|
|
04-23-2014, 10:47 AM
|
#10
|
|
Registered User
Join Date: Jun 2012
Location: Bedford, TX
Posts: 2,755
|
Quote:
Originally Posted by particlewave
Hahaha! Funny stuff...
Relays are in, guys |
Woo Hoo:dance:
__________________
______________________________________________
2001 Boxster S Lapis Blue
TS Cat Bypass Pipes and exhaust
iPad Mini Dash Install
DEPO Tail Lights
|
|
|
|
 Posting Rules
|
You may not post new threads
You may not post replies
You may not post attachments
You may not edit your posts
HTML code is On
|
|
|
All times are GMT -8. The time now is 08:09 AM.
| |


 2001 Boxster S
 Hybrid Mode


