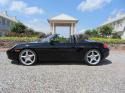
With the falling of autumn leaves fast approaching here on the East Coast, I decided that it was time to do something about providing some protection from the eventual blockage that the fall foliage might cause, to the oil cooler, AC condensers and radiators in the nose of my Boxster S (I have to believe what follows will work for any Porsche model with unprotected oil coolers, condensers and radiators situated behind the front bumper covers). Having earlier this season performed a thorough cleaning of the accumulation of leaves, pine needles and other road debris that the previous owners appear to have completely ignored, I wanted to ensure that no further buildup of leaves or other large debris blocks the flow of air through the cooling fins, necessitating removal of the front bumper, yet again.
Having picked up on an idea I saw on one of the Porsche web forums, I went to my local Home Depot and picked up a roll of black plastic gutter guard material. This plastic gutter guard has a diamond mesh pattern, with openings that will preclude the entry of pretty much any leaves and other large objects, helping prevent clogging the fins of the oil cooler, AC condensers and radiators. It comes in a 6 wide by 20 roll, and cost $1.87.
I know there are suppliers who sell mesh material thats made from metal, even stainless, specifically designed for this purpose, but I elected to go with the plastic mesh because I found it was easier to attach it to the bumper cover with the adhesive product I used, it has flexibility to allow some deformation if an object strikes it, and it will move with the bumper cover as it flexes.
Materials used:
- Roll of black plastic gutter guard
- Tube of 3M black weatherstrip adhesive
- Pair of small metal snips/shears
- Various objects to hold the plastic mesh in place while the adhesive dried (sockets, cans, wrenches, etc.)
So, without further ado, heres the process I followed for my Boxster, with photos along the way:
1) Remove front bumper cover per instructions outlined by Wayne Dempsey at his Pelican Parts webpage:
Pelican Technical Article: Boxster Front Bumper Removal - 986 / 987 Make sure and keep track of where all the various fasteners came from, as it can get confusing as to which fastener held what part in place.
2) If youve not done it, give the oil cooler, AC condensers and radiators a thorough cleaning. I combined a good vacuuming with the Shopvac, and the blower attachment to my air compressor to get small debris from between the fins. Youll want to partially detach the AC condensers from the front of each radiator to make sure you get any debris thats become trapped between the two. I found a goodly amount of debris trapped between both on each side.
3) I placed the front bumper cover on an old bath towel on my workbench, with the inside facing upwards. I supported both ends to keep the bumper cover from rocking back and forth while working on it.
4) Next, I rolled out a length of the gutter guard across one of the openings in the bumper cover, and cut a piece allowing for a generous overlap around the edges of the opening (youve got 20 of the stuff, so no need to skimp). The plastic mesh is of a fairly thick gauge, so I used a pair of metal snips to cut the mesh.
5) Once I had a piece of the plastic mesh cut, I positioned it over one of the grill openings, such that the mesh strip curved upwards toward me. You might argue that placing the strip of mesh with the inherent curvature away from me would be the better course of action, but I found positioning the mesh strip with the curvature facing upwards worked the best. Once I was happy with the positioning of the mesh strip, I placed various objects on it at various spots to get the mesh strip to touch the areas where I would be applying the adhesive. Since the mesh is plastic, too heavy an object will overly deform the mesh, so youll need to find that happy medium to get the mesh to lay just the way youd like it. I wasnt able to get the entire mesh strip to touch all the areas where I would be applying the adhesive, so I worked on a section at a time, moving my weights as one section dried, then on to another area.
6) I used the 3M weatherstrip adhesive for three reasons: it dries relatively quickly, itll stick to pretty much anything it touches, and it remains marginally flexible, even when dry. I applied the adhesive to the mesh and the underlying grill opening areas it was resting on, being careful to only squeeze out enough to ensure good coverage of the mesh and the attachment points on the grill opening, allowed it to dry, then moved my weights along the strip and repeated the process. Once I had a grill opening completely covered and adhered in place, I trimmed away the excess plastic mesh with the metal snips. Repeat this process for the remaining bumper cover openings and voila, your oil cooler, AC condensers and radiators should remain free of large debris for many happy miles of motoring.
Keep those revs up and your top down!


 Raven
Raven Bicycle
 Bicycle

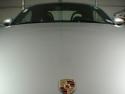
 boxster S

 "Bernie" - PONZI that 'made off' with my money!
 Hybrid Mode


