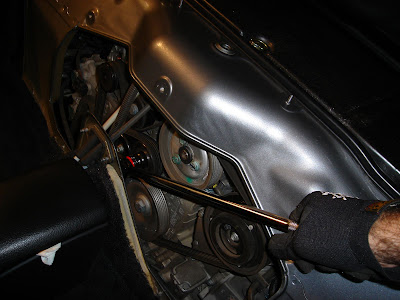
Use your 24mm socket and breaker bar to crank on the belt tensioner so you can remove the existing serpentine belt.
Get out your Porsche crank pulley removal tool, or be prepared to bust something out on the fly. You need to use the 24mm socket to loosen the bolt holding the crank pulley. It's tight.
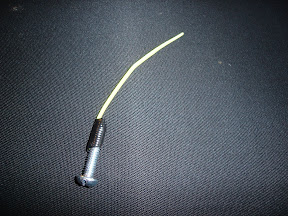
Since I didn't have the Porsche part, I made something out of a bolt, my floor jack handle, and some plumber's tape I had on my workbench by fishing the bolt up behind the OEM crank pulley, adding a couple of nuts, and creating a strap to attach the jack handle to the pulley... Hopefully the pics explain better than this text...
First, I fished the bolt up behind the factory pulley. I taped a zip tie to the bolt so I could pull it through the hole.
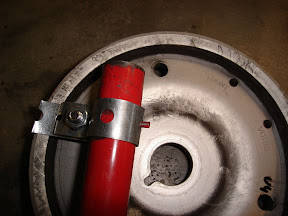
I used another nut to secure the plumber's tape to the factor pulley.
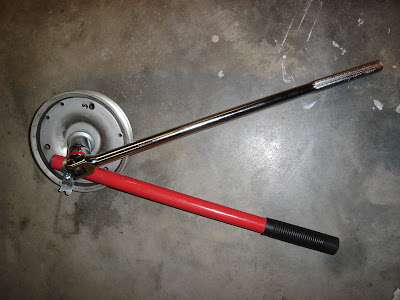
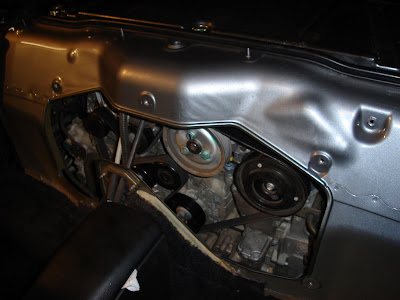
This image sort of depicts how I used the jack handle for leverage, and the socket on the crank pulley bolt as a fulcrum, to get the bolt loose. The jack handle is in the wrong place in this image - it should be ABOVE the socket (lefty-loosey), but you get the idea:
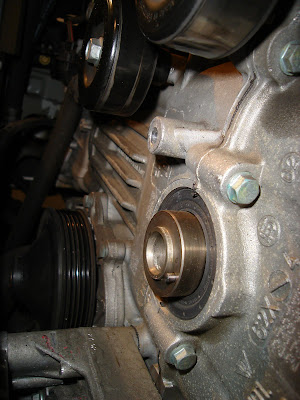
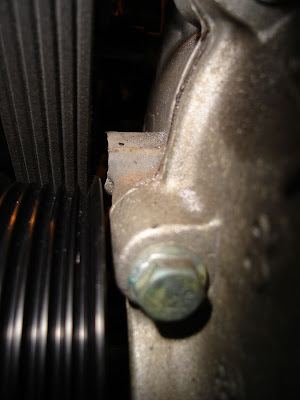
With the old pulley out of the way, it's time to cut down the boss to make room for the new UD pulley. You can see in this pic the material that needs to be removed. I took off about 3/8" to make the boss flush with the other protrusions on the engine case.
I started out using a dremel, but the best tool I had for this job turned out to be a small hack saw I picked up at Home Depot a while ago - it looks like a stout coping saw and works great for cutting at an angle.
Install the new pulley. EDIT: At least one other write up I found indicated that the crank pulley bolt is not reusable.
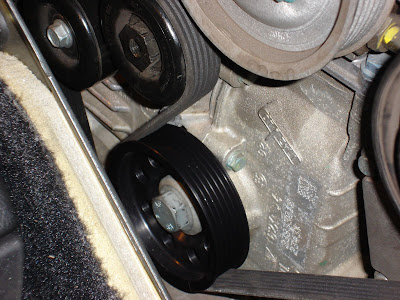
This image shows the clearance between the cut-down boss and the new pulley. Make sure you remove enough material so the boss does not interfere with the pulley...
I used a strap wrench on the new pulley so I could apply the requisite torque (i.e. I "tightened the snot out of it" per Jaay's instructions!).
Use a shop vac or other means to remove any shavings you created while cutting down the boss...
Install the new belt (refer to your Bentley to ensure you get the belt routed correctly!).
Once you have cranked everything down and triple-checked the belt routing, fire up the motor with the cover off to verify that things look right. Specifically, make sure the new pulley is flat and unobstructed.
Shut the engine down and perform one last snot-tight torquing on the crank pulley bolt.
That's it! This took me about 2 hours, including taking pictures, lashing together my ghetto pulley tool, and drinking several beers.


 Threaded Mode


