 12-08-2012, 10:19 PM
|
#1
|
|
Registered User
Join Date: Sep 2012
Location: Sydney
Posts: 347
|
Do It Yourself Brake Pad Change?
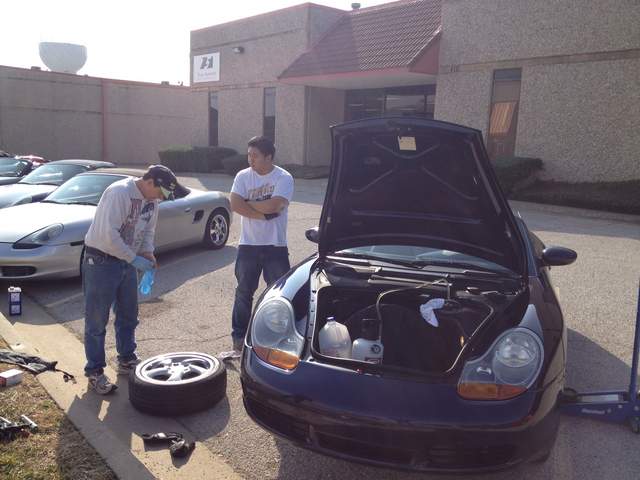
One of my front Brake Pads is gone and with the amount of money I have spent recently on new wheels and tires + Registration I really can't afford another expense for a while.
It will be a lot cheaper for me to buy the pads and do it myself but is it a hard job for someone who has minimum mechanical experience?

__________________
1998 Porsche Boxster 986 Convertible.
|

|

|
|
12-08-2012, 10:29 PM
|
#2
|
|
Registered User
Join Date: Dec 2007
Location: Seattle
Posts: 735
|
The hardest part will be jacking up the car and taking the wheels off, unless you have to do the rotors too.
Lots of DIY for this on many sites.
__________________
2000S Ocean Blue Metallic- 116K
3X Water Pump, Clear side markers, Crios Mod, Front engine mount, Flywheel, clutch, RMS, AOS, MAF, serpentine belt, power brake vacuum line, battery, 2X CV boots, Fuel filter, Oil filler tube, 3X ignition switch, 90K service, gas cap, Coolant tank
|
|
|
|
|
12-08-2012, 11:36 PM
|
#3
|
|
Registered User
Join Date: Apr 2012
Location: Riverside, CA
Posts: 1,666
|
Quote:
Originally Posted by More

One of my front Brake Pads is gone and with the amount of money I have spent recently on new wheels and tires + Registration I really can't afford another expense for a while.
It will be a lot cheaper for me to buy the pads and do it myself but is it a hard job for someone who has minimum mechanical experience?
|
Replacing the brake pads is one of the easiest things you can do.
Tools needed are Lug wrench from the spare to remove the tire, and a screw driver
to carefully push the pads away from the rotor, and needle nose pliers to remove the pins that holds the brake pad retainers off.
Once the wheel is off its probably 10 minutes or less to replace the brake pads.
If they are worn down to the brake sensors you may need to replace them as well. which adds maybe 1 or 2 minutes to the task.
So easy your 12 year old could do it!!!!
__________________
"It broke because it wants to be Upgraded  "
2012 Porsche Performance Driving School - SanDiego region
2001 Boxster S, Top Speed muffler, (Fred's) Mini Morimotto Projectors, Tarret UDP,
Short Shifter, Touch Screen Dual Din Radio, 03 4 Bow glass Top (DD & Auto-X since May 17,2012)
Last edited by jb92563; 12-08-2012 at 11:38 PM.
|
|
|
|
|
12-09-2012, 12:01 AM
|
#4
|
|
Registered User
Join Date: Sep 2012
Location: Sydney
Posts: 347
|
I read something about flooding the brakes afterwards?
What's that about??
__________________
1998 Porsche Boxster 986 Convertible.
|
|
|
|
|
12-09-2012, 12:09 AM
|
#5
|
|
Registered User
Join Date: Apr 2012
Location: Riverside, CA
Posts: 1,666
|
Quote:
Originally Posted by More
I read something about flooding the brakes afterwards?
What's that about??
|
Flushing the brake fluid is likely what you are referring to.
It basically bleeds the brakes until new brake fluid is in the lines.
I think the Manual says to flush every 3 years but racers do it much more often.
I use a "Power Bleeder" and it adds another couple minutes to the brake job.
I did a Youtube video to show how easy it is. You alternate brake fluid colors and it greatly simplifies the process.
Google "Brake Flush" and you will get plenty of hits.
The Boxster S has 2 bleed valves so you open one to do most of the flush and open the other for a second or 2 after and it will drain the old fluid as well.
Easy when using a Power Bleeder.
__________________
"It broke because it wants to be Upgraded "
2012 Porsche Performance Driving School - SanDiego region
2001 Boxster S, Top Speed muffler, (Fred's) Mini Morimotto Projectors, Tarret UDP,
Short Shifter, Touch Screen Dual Din Radio, 03 4 Bow glass Top (DD & Auto-X since May 17,2012)
Last edited by jb92563; 12-09-2012 at 12:12 AM.
|
|
|
|
|
12-09-2012, 12:13 AM
|
#6
|
|
Registered User
Join Date: Sep 2012
Location: Sydney
Posts: 347
|
Is the flush %100 necessary?
__________________
1998 Porsche Boxster 986 Convertible.
|
|
|
|
|
12-09-2012, 12:17 AM
|
#7
|
|
Registered User
Join Date: Apr 2012
Location: Riverside, CA
Posts: 1,666
|
Quote:
Originally Posted by More
Is the flush %100 necessary?
|
No, just every 3 years is fine, or if you have squishy brakes.
Brake fluid absorbs water which causes squishy brake feel, corrosion in the lines and pistons and the water lowers the boiling point which is dangerous when racing and really heating your brakes up.
__________________
"It broke because it wants to be Upgraded "
2012 Porsche Performance Driving School - SanDiego region
2001 Boxster S, Top Speed muffler, (Fred's) Mini Morimotto Projectors, Tarret UDP,
Short Shifter, Touch Screen Dual Din Radio, 03 4 Bow glass Top (DD & Auto-X since May 17,2012)
|
|
|
|
|
12-09-2012, 09:20 AM
|
#8
|
|
Registered User
Join Date: Jun 2012
Location: Bedford, TX
Posts: 2,755
|
Quote:
Originally Posted by More
Is the flush %100 necessary?
|
Several of us got together yesterday to flush ours. It was pretty obvious that mine had not been done in some time(I just bought it last summer). It would be worth it to do, just to know you have fresh fluid.

__________________
______________________________________________
2001 Boxster S Lapis Blue
TS Cat Bypass Pipes and exhaust
iPad Mini Dash Install
DEPO Tail Lights
|

|
|
|
09-03-2018, 06:57 PM
|
#9
|
|
Registered User
Join Date: Jan 2014
Location: New Jersey
Posts: 1,631
|
Quote:
Originally Posted by More
I read something about flooding the brakes afterwards?
What's that about??
|
If your pads are worn down and the brake fluid reservoir on the master cylinder has been topped up to compensate for the pad wear, when you push the caliper pistons back in to accommodate the new pads that will be much thicker, the extra brake fluid that will be going back into the reservoir may cause it to overflow, make a mess and possibly cause some paint damage (it did in the old days anyway). You need to keep and eye on the fluid level and maybe use a clean turkey baster to remove some from the reservoir if it gets up to the maximum full line. Not sure if any of the videos or links already posted mentioned the already. You may also need a 1 inch wide putty knife to free the pads from the backing plates that go into the caliper pistons and are glued together. That may only be on the S models and not the base cars.
Last edited by PaulE; 09-03-2018 at 07:00 PM.
|
|
|
|
|
12-09-2012, 12:47 PM
|
#10
|
|
Registered User
Join Date: Aug 2012
Location: Los Angeles
Posts: 124
|
Thinking of tackling the brakes myself, which I have never done before. One thing that is not clear to me is whether using some kind of anti-squeal grease (copper of whatever) is necessary and if so what do you use? Will a shop always use some or they just stuff the new pads in there?
|
|
|
|
|
12-09-2012, 10:32 PM
|
#11
|
|
Registered User
Join Date: Apr 2012
Location: Riverside, CA
Posts: 1,666
|
Quote:
Originally Posted by teleski
Thinking of tackling the brakes myself, which I have never done before. One thing that is not clear to me is whether using some kind of anti-squeal grease (copper of whatever) is necessary and if so what do you use? Will a shop always use some or they just stuff the new pads in there?
|
The pads I bought online had the squeal muffling pad on them already, so just drop them in place and all will be well.
Rotors are replaced when they get to the minimum thickness or get scored.
Scoring only occurs if you wear the pads down to the rivets or metal backink plate. but your sensors and brake light will come on before that happens if your sensors are still attached and working.
once the Wheel is off you remove 2 pins and the brake pad retainer is released and the pads come right out once you push the pistons in a bit.
Just yank the sensors out first with pliers.
__________________
"It broke because it wants to be Upgraded "
2012 Porsche Performance Driving School - SanDiego region
2001 Boxster S, Top Speed muffler, (Fred's) Mini Morimotto Projectors, Tarret UDP,
Short Shifter, Touch Screen Dual Din Radio, 03 4 Bow glass Top (DD & Auto-X since May 17,2012)
|
|
|
|
|
02-03-2013, 09:37 PM
|
#12
|
|
Usercpy
Join Date: Aug 2012
Posts: 205
|
__________________
http://www.flickr.com/photos/flickr_ching/
Last edited by ilikeching; 02-03-2013 at 10:02 PM.
|
|
|
|
|
12-09-2012, 08:17 AM
|
#13
|
|
Registered User
Join Date: Feb 2006
Location: Virginia
Posts: 1,755
|
Here's another article:
Pelican Technical Article: Replacing Boxster Brake Pads - 986 / 987
I used this along with the one on Pedro's site and it went smoothly.
__________________
2000 Arctic Silver/Black, Hard Top, On Board Computer
PNP Rear Speakers, HAES 6-Channel Amp, Avic Z140BH,
Painted Bumperettes, 2004 (OEM) Top, Homelink integrated in dash with Targa switch, 997 Shifter, Carrera Gauge Cluster with silver gauge faces, heated 997 adaptive sports seats, Litronics, silver console
|
|
|
|
|
09-02-2018, 05:58 PM
|
#14
|
|
Registered User
Join Date: Jul 2018
Location: Houston, TX, USA
Posts: 5
|

I cant remove my wheel lug bolts off with this factory socket wrench even if I step on it. Any recommendations?
|
|
|
|
|
09-02-2018, 06:41 PM
|
#15
|
|
Registered User
Join Date: Sep 2006
Location: Omaha
Posts: 2,959
|
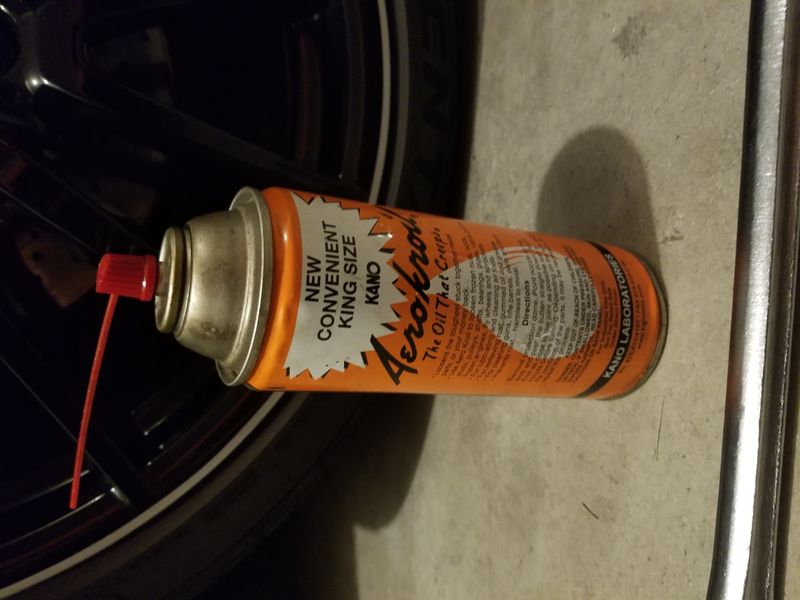
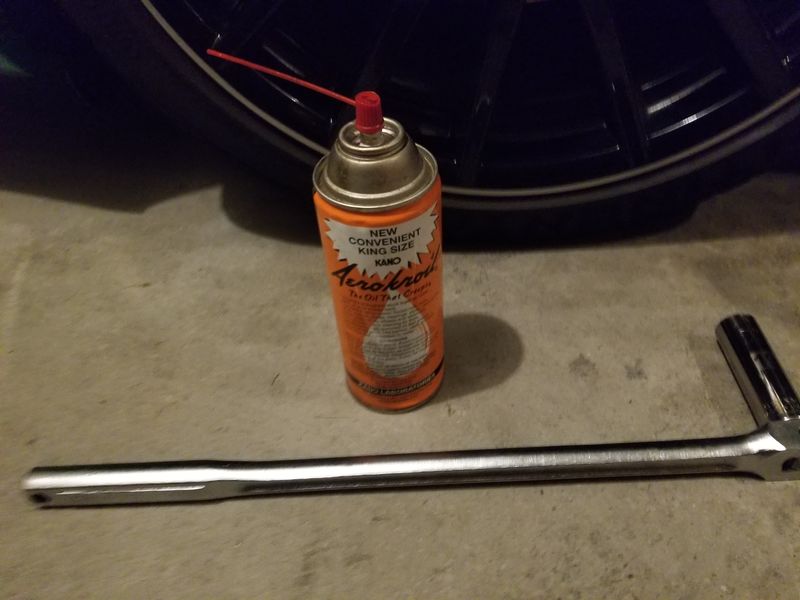
Get a can of Aerokroil and liberally spray it around the edges of your lug bolts. Let it sit / soak for 24 hrs. Then use a 19mm long socket on a breaker bar.
All of these items can be purchased at an auto parts store if you don't have them. Remember, it isn't a project unless you have to buy a new tool.
__________________
GPRPCA Chief Driving Instructor
2008 Boxster S Limited Edition #005
2008 Cayman S Sport - Signal Green
1989 928 S4 5 spd - black
|
|
|
|
|
09-02-2018, 08:44 PM
|
#16
|
|
Registered User
Join Date: May 2017
Location: West Mi
Posts: 164
|
A couple suggestions. Go to like a hf and pick up an electric impact. Handy thing to have. Second don't do what I did and put the pad in backwards. Always put the ware material against the disk 
|
|
|
|
|
09-04-2018, 09:11 PM
|
#17
|
|
Registered User
Join Date: Apr 2017
Location: Evanston, IL
Posts: 114
|
Car talk guys
[QUOTE=husker boxster;578547]Get a can of Aerokroil and liberally spray it around the edges of your lug bolts. Let it sit / soak for 24 hrs. Then use a 19mm long socket on a breaker bar.
All of these items can be purchased at an auto parts store if you don't have them. Remember, it isn't a project unless you have to buy a new tool.
#1) I once heard a Car Talk show where one brother said, "Remember, every project is an excuse to buy a new tool," and the other brother said, "Every project is an excuse to buy a WHOLE LINE OF TOOLS!"
#2) glad to see I'm not the only one reading every word of a 6 year old post.
|
|
|
|
|
09-04-2018, 10:03 PM
|
#18
|
|
Registered User
Join Date: Mar 2017
Location: Los Angeles
Posts: 356
|
You are correct about it not being a project without having to buy some tools!
I have just about everything ready to go for doing rear rotors, pads, flush, clutch bleed.
One thing I don't see mentioned are the brake dampers.
https://www.pelicanparts.com/catalog/SuperCat/1049/POR_1049_BRKPAD_pg3.htm#item13
Apparently there are two different sizes for each piston on each caliper.
I'm replacing the hardware as well, but wasn't sure about the dampers.
I bought them and will replace them as well, so everything is new.
This doesn't look too difficult at all.
The video below was quite helpful, too.
It's just odd that the dampers don't seem to be mentioned much.
Do people reuse them or not use them at all?
|
|
|
|
|
09-05-2018, 07:06 AM
|
#19
|
|
Registered User
Join Date: Jan 2014
Location: New Jersey
Posts: 1,631
|
You can never be too rich, too thin or have too many tools!
I was talking about brake pad dampers in my earlier post, I didn't know that's what they are called. They are different on the S model front brakes, both on one sheet of something and they go deep into the caliper pistons and are glued onto the back of the pads. They look like this -
https://www.pelicanparts.com/catalog/SuperCat/1052/POR_1052_BRKPAD_pg3.htm#item13
Quote:
Originally Posted by robdelorenzo
You are correct about it not being a project without having to buy some tools!
I have just about everything ready to go for doing rear rotors, pads, flush, clutch bleed.
One thing I don't see mentioned are the brake dampers.
https://www.pelicanparts.com/catalog/SuperCat/1049/POR_1049_BRKPAD_pg3.htm#item13
Apparently there are two different sizes for each piston on each caliper.
I'm replacing the hardware as well, but wasn't sure about the dampers.
I bought them and will replace them as well, so everything is new.
This doesn't look too difficult at all.
The video below was quite helpful, too.
It's just odd that the dampers don't seem to be mentioned much.
Do people reuse them or not use them at all? |
|
|
|
|
|
09-03-2018, 05:31 AM
|
#20
|
|
Registered User
Join Date: Jul 2005
Location: MA
Posts: 885
|
Htown - slip a piece of pipe over the red handle for extra leverage and re-orient it 180* so you can pull UP with your legs - Think doing squats at the gym.
__________________
98 Arena Red 986
|
|
|
|
 Posting Rules
|
You may not post new threads
You may not post replies
You may not post attachments
You may not edit your posts
HTML code is On
|
|
|
All times are GMT -8. The time now is 01:27 PM.
| |


 2001 Boxster S
 986 Boxster
 Hybrid Mode


