 09-07-2019, 02:33 PM
|
#1
|
|
Registered User
Join Date: Feb 2019
Location: Kernersville, NC
Posts: 294
|
Got the new GT3 style bumper on the car finally. Whew. Created a DIY for it as well. Check it out if you're interested in doing something like this:
https://youtu.be/lyVFm4E8A1A
__________________
1998 Boxster
2015 BMW M4 Dinan Stage 3
2016 BMW S1000XR
2015 Ninja 300
|

|

|
|
09-07-2019, 04:03 PM
|
#2
|
|
Registered User
Join Date: Jul 2019
Location: Carolinas
Posts: 108
|
Wired up the Alpine head unit with a new amp. Wired up a enclosed pioneer sub behind the passenger seat and ran wire's to add the rear speakers ( already ordered). Totally bypassed the stock amp but built a harness from a old amp so no cutting wires. Pain to route everything but boy does it sound better. Had already upgraded to the Alpine ILX-650 and door and dash speakers.
|
|
|
|
|
09-07-2019, 10:29 PM
|
#3
|
|
Registered User
Join Date: Jul 2019
Location: Finland
Posts: 345
|
Chabged a passenger side (right side) door lock due to non-operating window switch when openin the door - same time swapped broken light bulbs on both doors interior lights. Thanks to Pelican and other forum members for the great info of the change details.
|

|
|
|
09-08-2019, 04:28 AM
|
#4
|
|
Registered User
Join Date: Apr 2017
Location: Indiana
Posts: 1,510
|
After losing an ill fitting aftermarket side vent at speed I decided to go with a more dependable option. Don't really care for the 03 vent style so I did a little altering to an older style side vent.
Picked up a set of these on Ebay $29 a side. If you don't see your color ask. 2 days after I bought the white ones the same seller posted a mint set of red ones.

Removed collar and cut off slats:

Added mesh to collar and painted the vent red. Dont have to worry about fit anymore.
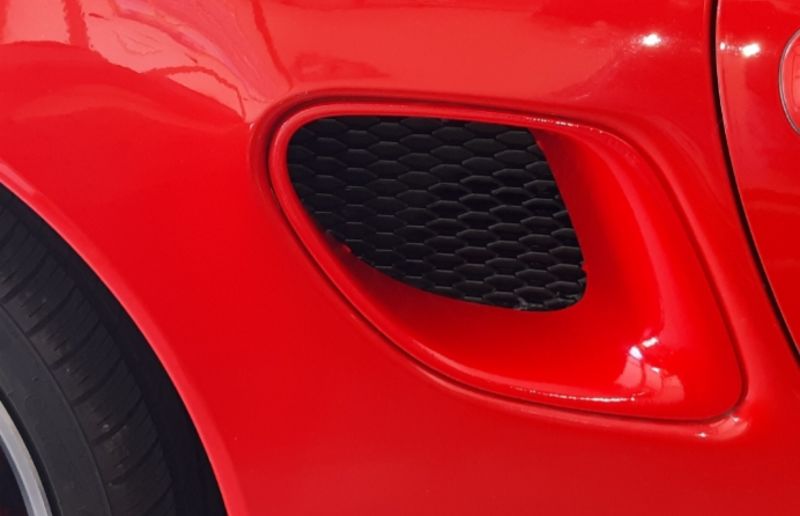

Last edited by JBauer; 09-08-2019 at 07:02 AM.
|
|
|
|
|
09-08-2019, 08:34 AM
|
#5
|
|
Registered User
Join Date: Oct 2008
Location: O.C. CA
Posts: 3,709
|
Quote:
Originally Posted by JBauer

After losing an ill fitting aftermarket side vent at speed I decided to go with a more dependable option. Don't really care for the 03 vent style so I did a little altering to an older style side vent.
Picked up a set of these on Ebay $29 a side. If you don't see your color ask. 2 days after I bought the white ones the same seller posted a mint set of red ones.
Removed collar and cut off slats:
Added mesh to collar and painted the vent red. Dont have to worry about fit anymore.
|
2003 air intake has the best air flow to the engine.
__________________
OE engine rebuilt,3.6 litre LN Engineering billet sleeves,triple row IMSB,LN rods. Deep sump oil pan with DT40 oil.
|
|
|
|
|
09-08-2019, 02:32 PM
|
#6
|
|
Registered User
Join Date: Apr 2017
Location: Indiana
Posts: 1,510
|
Quote:
Originally Posted by BYprodriver
2003 air intake has the best air flow to the engine.
|
Ya the hole is slightly larger, more squared off. Has fins tho. 😉
|
|
|
|
|
09-09-2019, 08:44 PM
|
#7
|
|
ISSIMI
Join Date: Apr 2017
Location: Bay Area CA
Posts: 144
|
Quote:
Originally Posted by BYprodriver
2003 air intake has the best air flow to the engine.
|
Has this been proven with a aero wind tunnel test? I have my vents set up with the mesh but was thinking of picking up a 03/04 set
|
|
|
|
|
09-08-2019, 05:46 AM
|
#8
|
|
Registered User
Join Date: Feb 2015
Location: QC
Posts: 415
|
^^^^
Looks great. Might have to do that this winter.
|
|
|
|
|
09-08-2019, 07:30 AM
|
#9
|
|
Registered User
Join Date: Aug 2019
Location: Spokane, WA
Posts: 61
|

I decided to pull the plugs and roll the engine over. Pretty certain I found the cylinder with the issue. Definitely going for the swap at this point!
|
|
|
|
|
09-08-2019, 07:57 AM
|
#10
|
|
Artist, 986S tinkerer
Join Date: Aug 2013
Location: Montreal, Canada
Posts: 1,821
|
Quote:
Originally Posted by outsidetheboxster
I decided to pull the plugs and roll the engine over. Pretty certain I found the cylinder with the issue. Definitely going for the swap at this point! |
Eeew, not pretty!
__________________
James now has: 2008 987S 6 speed
Crashed: 2010 987.2 pdk in speed yellow! 
Sold to a cool racer chick: 2004 986 S
YouTube channel: the PORSCHE as seen by NewArt
www.youtube.com/channel/UCohdrH2xHTklM1thxk0KKOQ?
|
|
|
|
|
09-08-2019, 08:37 AM
|
#11
|
|
Registered User
Join Date: Aug 2019
Posts: 31
|
Odd Projects Completed Today
Replace Side Mirror
It had prior damage and then I added to the problem.


__________________
My current projects.
1964 Corvette Frame Off Restoration
1/2 way done
1960 Austin Healey Bugeye Sprite Rotisserie Restoration
90% complete in the final stages
|
|
|
|
|
09-08-2019, 08:42 AM
|
#12
|
|
Registered User
Join Date: Aug 2019
Posts: 31
|
Hardtop Hardware Kit Installation
At $104 it hurt for the hex head bolts and spin locks.
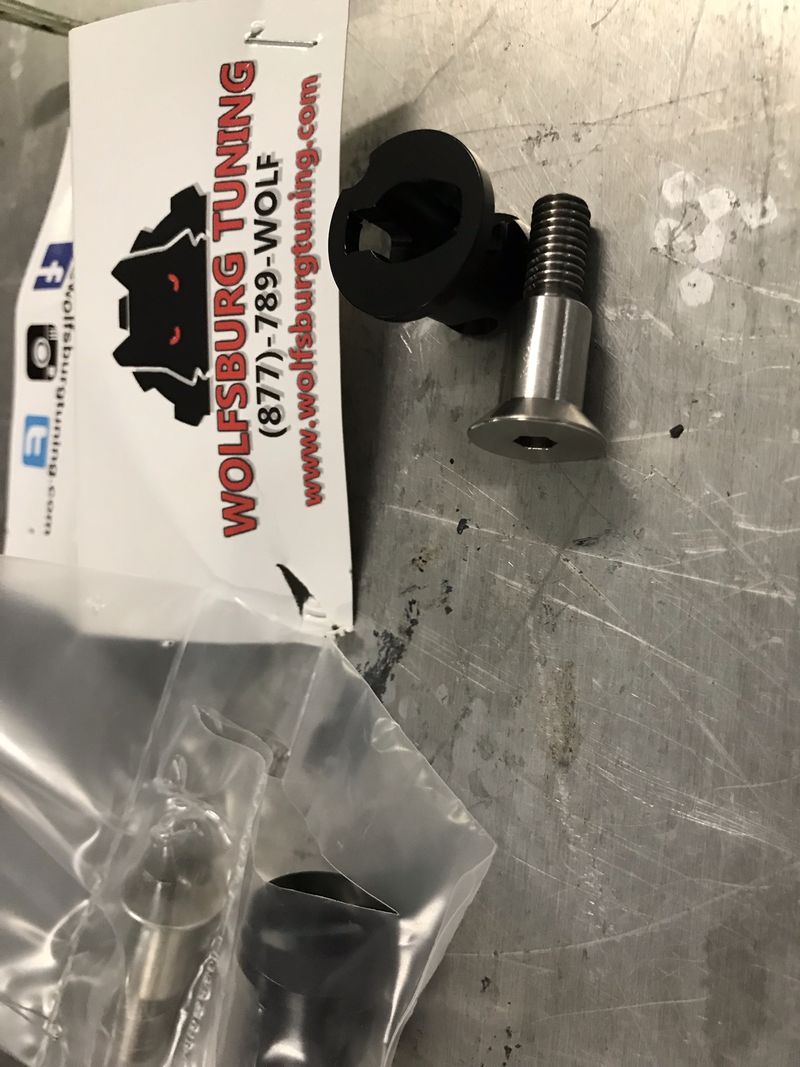
The parts were well made and the instruction video from them were very helpful.
__________________
My current projects.
1964 Corvette Frame Off Restoration
1/2 way done
1960 Austin Healey Bugeye Sprite Rotisserie Restoration
90% complete in the final stages
|
|
|
|
|
09-11-2019, 06:13 AM
|
#13
|
|
Pathological Tinkerer
Join Date: Mar 2017
Location: Utah
Posts: 197
|
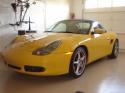
Painted buddies 987 S...

|
|
|
|
|
09-13-2019, 01:19 PM
|
#14
|
|
Registered User
Join Date: Jan 2019
Location: PA
Posts: 1,724
|
In late July, my wife attended the ARPCA driver education course. I didn't participate, because we couldn't both run DE and share the same car. So, since the car was "technically" for her, I can wait until next year.
We got the prints today! Here are shots of the prints:


|
|
|
|
|
09-13-2019, 05:10 PM
|
#15
|
|
Registered User
Join Date: Jul 2017
Location: Tucson AZ
Posts: 536
|
Quote:
Originally Posted by piper6909
In late July, my wife attended the ARPCA driver education course. I didn't participate, because we couldn't both run DE and share the same car. So, since the car was "technically" for her, I can wait until next year.
We got the prints today! Here are shots of the prints:
|
Very nice!
__________________
2001 Boxster
2007 Toyota Highlander
2003 New Beetle Convertible, Turbo, Tip 6 speed 
|
|
|
|
|
09-13-2019, 08:27 PM
|
#16
|
|
Registered User
Join Date: Jan 2019
Location: PA
Posts: 1,724
|
Quote:
Originally Posted by Brian in Tucson
Very nice!
|
Thanks, Brian! Good luck with your project!
|
|
|
|
|
09-13-2019, 05:09 PM
|
#17
|
|
Registered User
Join Date: Jul 2017
Location: Tucson AZ
Posts: 536
|
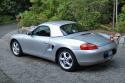
Today is the end of triple digits here in Tucson this year. Whew! Gonna start getting my Box back among the living this weekend. Our limited work season is ending, it's the heat, not the dry air.
Gotta finish the aos change, put the right bank of injectors back on the fuel rail and into the right hand manifold, get the vacuum sorted, and put the various stuff back on the motor. Hope the random misfire clears up. Can't drive til it passes smog. Been way too hot! Our project season is here! Like to get it reliable enough for a cross country road trip, other wise it's the Highlander next summer.
__________________
2001 Boxster
2007 Toyota Highlander
2003 New Beetle Convertible, Turbo, Tip 6 speed
Last edited by Brian in Tucson; 09-13-2019 at 05:17 PM.
|
|
|
|
|
09-24-2019, 02:23 PM
|
#18
|
|
Registered User
Join Date: Oct 2017
Location: Seattle area
Posts: 174
|
Just put the Hardtop back on as the rainy season has returned to the PNW.
|
|
|
|
|
09-28-2019, 08:14 AM
|
#19
|
|
2002 2.7 Boxster in green
Join Date: Sep 2019
Location: Somerset UK
Posts: 102
|
fitted a K&N air filter
replaced a broken venturi pipe
started to install a double din android head unit (tut to follow in the near future)

|
|
|
|
|
09-15-2019, 12:18 PM
|
#20
|
|
1998 Boxster Silver/Red
Join Date: Sep 2017
Location: 92262
Posts: 3,086
|
I tackled the stainless braided brake lines, flushed and bled the system, and installed new Brembo caliper decals.
Yesterday I sprayed penetrant several times on the hose ends and the bleeder valves. This morning... went at it.
Using the special wrench, flared?, the fittings came undone quite nicely... didn't need to use a wrench on the soft line nut... on any of the brakes.
The stainless fitted nicely... snugged everything up... began flushing. I had picked up a liter of Pentosin SuperDot. When I arrived at the driver's side I noticed the bleeder container was very low (no air)... so went and purchased another liter. Finished the front driver.
Inspected all the fittings and noticed a couple of drips of fluid. Not getting to confident... I snugged up the fittings and all was good.
I started the car...pumped the brakes a number of times. Shut it off.
I went around everything again... 8 nipples... and did another, quick, bleed.
When I got to the front driver side I see a puddle of brake fluid. Flashlight reveals I failed to completely snug up the inside nipple. Snugged her... all good.
Cleaned everything up... installed the decals... washed the wheels front and back... installed.. torqued... test drive... all good.
Took me 6 hours including two trips to the auto parts store... washing the wheels... ummmmm... and ****************ing around. Just the brake flush/bleed next time? Likely take me just a couple hours or less. Now...
I installed in the clear line between the cap and the motive tank a valve. Yes... I filled the motive with the fluid... I didn't do it dry (this time). Anyhow... so I close the valve... and removed the cap. While there was fluid in the line between the valve and the cap... nothing dripped out.
I lay the motive tank on the ground... keeping the cap higher, just in case. I cleaned up towels... put away some tools... and decided I'd attend to the motive setup. Anyhow...
For whatever stupid reason... I'm holding the motive cap with line attached in one hand and with the other... I open the valve. Yeah...
So frickin braker fluid starts squirting out of the cap... I'm like, "Whaa... Howwww..." and then a moment later I close the valve. Huge DUH. lol. Fluid squirted onto some tools in the chest... the concrete floor... the wood shelf... freaking mess. Just a few ounces, but clean up took a few. I learned what not to do next time.
During my short test drive I noticed no huge difference in braking. I don't know when last the fluid was changed... I do now.
Just a share. Have a great day!
__________________
1998 Porsche Boxster
|
|
|
|
 Posting Rules
|
You may not post new threads
You may not post replies
You may not post attachments
You may not edit your posts
HTML code is On
|
|
|
All times are GMT -8. The time now is 01:11 PM.
| |


 Mean Motor Scooter
 1998 Porsche Boxster
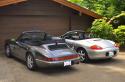 1991 Porsche Carrera 4
 Hybrid Mode


