 10-20-2012, 06:08 AM
|
#21
|
|
Homeboy981
Join Date: Jan 2012
Location: Sherman, TX
Posts: 663
|
Is the Factory Sport Interior paint not very thick?
The reason I ask is that it seems your factory paint is getting awfully chipped up. Mine, and maybe it's new, is like the outside paint
.it IS TOUGH! I can stick my thumbnail to it but it does not go in. Must be all those clear coats! It has a shiny finish like the exterior. The factory paint looks almost like a matte finish? And rough, no rough here
.just smooooth and shiny! Maybe it IS time to re-furb that interior!
__________________
2002 Porsche Boxtser S - Silver & Chrome - Died from IMS failure AFTER IMS was replaced!
|

|

|
|
10-20-2012, 02:24 PM
|
#22
|
|
Registered User
Join Date: Jan 2008
Location: Pittsburgh
Posts: 143
|
Homeboy, the factory sport design interior paint is much different from yours. From the factory it is a textured finish with a matte look to it. It is not shiny like yours or the outside finish. The original finish was not very durable and chipped and scratched pretty easily. My repainted finish is tougher than the original. Papasmurf, I did not repaint all of my sport design interior parts, but only the console, ashtray and those covers at the top of the interior door pull. My radio surround and instrument surround, as well as the door pocket covers were in good shape so I left them alone. I cannot tell the difference in color between what I redid and the original. The only difference is that my repaint is slightly more textured than the original finish. I believe that a few more coats of clear would have made the repainted parts feel identical to the originals. I too had been considering painting the parts in arctic silver or seal gray, but am glad I was able to find a matching spray paint to the original as the sport design interior looks pretty good once you get used to it.
|
|
|
|
|
07-11-2014, 06:19 AM
|
#23
|
|
Registered User
Join Date: Jan 2009
Location: pa
Posts: 423
|
i used duplicator volkswagon oem paint. its a very good match, better than the aluminum engine which is more of a gray metallic.
|
|
|
|
|
09-12-2017, 04:33 AM
|
#24
|
|
Registered User
Join Date: Apr 2017
Location: Indiana
Posts: 1,512
|
Testors #1830 diamond dust paint
I think its perfect. One coat, no clear coat. 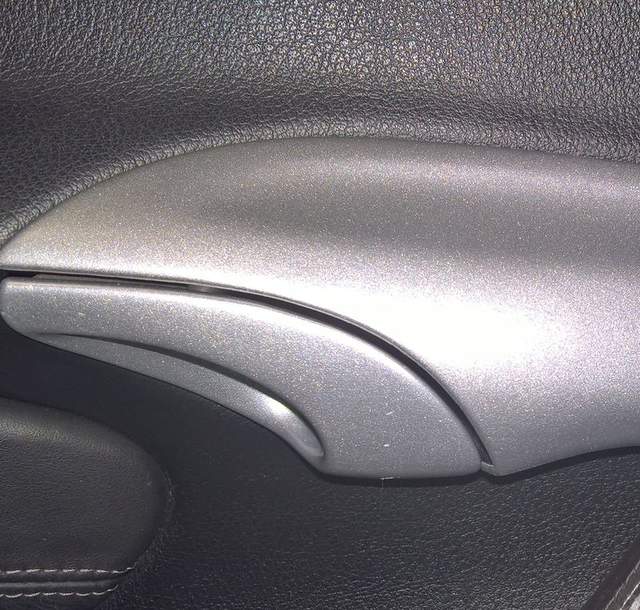
��
|
|
|
|
|
09-12-2017, 04:34 AM
|
#25
|
|
Registered User
Join Date: Apr 2017
Location: Indiana
Posts: 1,512
|
Testors #1830 diamond dust paint
Sorry duplicate
|
|
|
|
|
09-12-2017, 07:05 AM
|
#26
|
|
Registered User
Join Date: Jul 2014
Location: Valparaiso, IN
Posts: 190
|
jbauer, how did you apply the Testors paint? Spray? Brush? Looks perfect!
Larry (the Bald Eagle)
|
|
|
|
|
09-12-2017, 09:05 AM
|
#27
|
|
Registered User
Join Date: Apr 2017
Location: Indiana
Posts: 1,512
|
Quote:
Originally Posted by Bald Eagle

jbauer, how did you apply the Testors paint? Spray? Brush? Looks perfect!
Larry (the Bald Eagle)
|
Spray can. Very easy to use. Matches perfectly. Just don't clearcoat it. It will change the shade. I tested one and had to do it over. Got it from Amazon, $5 a can.
It comes in a mini-me can though. LOL 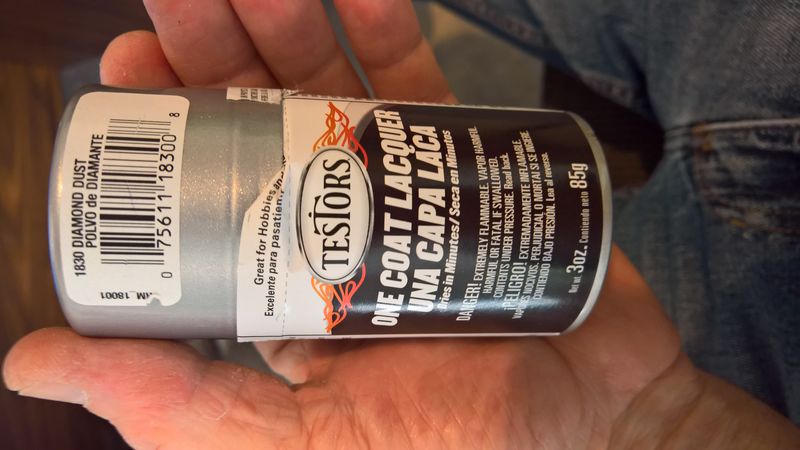
Last edited by JBauer; 09-12-2017 at 09:37 AM.
|
|
|
|
|
09-12-2017, 02:37 PM
|
#28
|
|
Registered User
Join Date: Jul 2014
Location: Valparaiso, IN
Posts: 190
|
Thanks, will order some today. Where in Indiana are you, I'm in Valparaiso.
Larry (the bald eagle)
|
|
|
|
|
09-12-2017, 02:54 PM
|
#29
|
|
Registered User
Join Date: Jul 2005
Location: ga
Posts: 115
|
I ordered arctic silver and clear coat from paintscratch.com and it turned out really well. Conversely I didnt he same using rain forest green metallic and it came out several shades darker than my exterior paint. Not sure why at this point.
Sent from my iPhone using Tapatalk
__________________
2000 Black 996 Aero, 2001 Forest Green Boxster S, 94 Midnight Blue 968 Cab, 1980 Pongee Beige 911SC Weissach Edition, 2004 BMW R1200CLC
|
|
|
|
|
09-12-2017, 04:28 PM
|
#30
|
|
Registered User
Join Date: Apr 2017
Location: Indiana
Posts: 1,512
|
Quote:
Originally Posted by Bald Eagle
Thanks, will order some today. Where in Indiana are you, I'm in Valparaiso.
Larry (the bald eagle)
|
I live in Terre Haute . Make sure you post some pics.
|
|
|
|
|
09-16-2017, 07:26 AM
|
#31
|
|
Registered User
Join Date: Apr 2017
Location: Indiana
Posts: 1,512
|
Quote:
Originally Posted by Bald Eagle
Thanks, will order some today. Where in Indiana are you, I'm in Valparaiso.
Larry (the bald eagle)
|
A tip I just learned. If you spray over black. It takes several coats. Everything I've painted before was already, the wrong shade of silver. Considering how small these cans are Id recommend painting the part with a compatible generic silver first. When I did that one coat covers and you can conserve the Testors.
|
|
|
|
|
09-16-2017, 08:49 AM
|
#32
|
|
Registered User
Join Date: Apr 2017
Location: Indiana
Posts: 1,512
|
😀
|
|
|
|
|
04-19-2018, 04:27 PM
|
#33
|
|
Registered User
Join Date: Jul 2017
Location: Provo Utah
Posts: 31
|
Hey JBauer,
thanks for the testors paint idea. I am getting prepped to do this project myself and just had a few questions about the paint.
For all the pieces you did, did you use only 1 of those small testors spray can? Also, do you feel that, that pain matches the arctic silver color?
Thanks!
|
|
|
|
|
04-19-2018, 05:25 PM
|
#34
|
|
Registered User
Join Date: Apr 2017
Location: Indiana
Posts: 1,512
|
Quote:
Originally Posted by drewmarc
Hey JBauer,
thanks for the testors paint idea. I am getting prepped to do this project myself and just had a few questions about the paint.
For all the pieces you did, did you use only 1 of those small testors spray can? Also, do you feel that, that pain matches the arctic silver color?
Thanks!
|
I'm not sure about whether it matches Artic silver or not. I dont have anything to compare it to. It's a match for the factory painted glove box handle and the inside door handles. I think I used 4 cans. Make sure you place them in warm water before using bring the metalic out.
|
|
|
|
|
07-27-2019, 05:36 PM
|
#35
|
|
Registered User
Join Date: Sep 2008
Location: Florida
Posts: 2,497
|
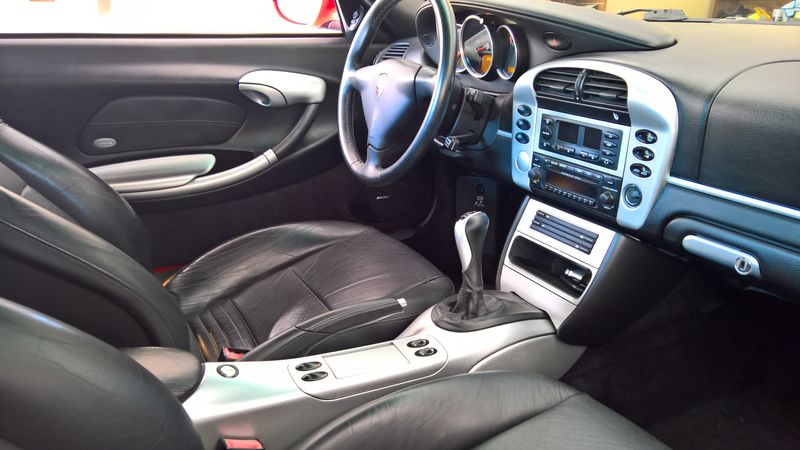
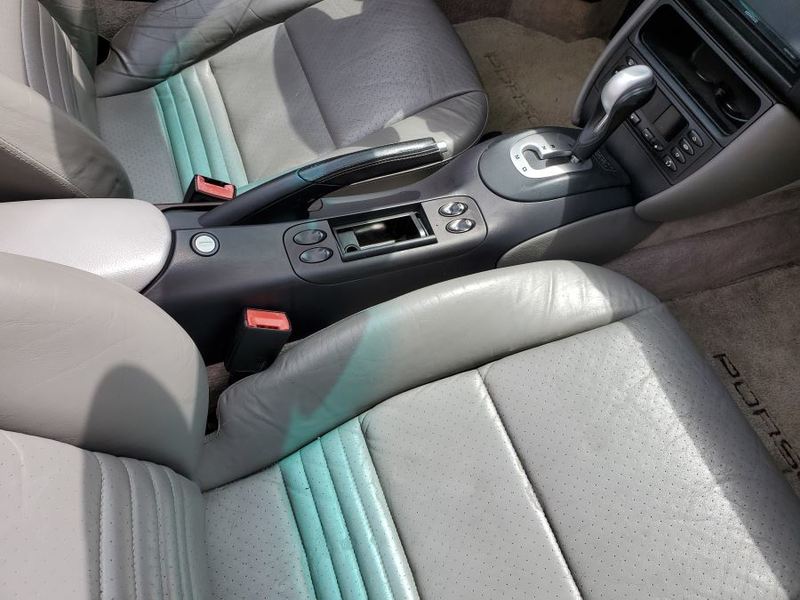
I'm 'in the process' right now of painting the console and trim. This thread has been a great help as I decided to use the Testors paint as well.
I stripped and painted a couple of the console pieces to see how I liked it before tackling the entire console. So far so good! I'm happy with the color and have not added a clear coat based on the comments above.
One question, The silver feels a bit rough to the touch (looks great). I know this is suppose to be a one coat paint but I wonder if I should wet sand and respray or find a clear to get a smoother finish.
Suggestions welcome!
|
|
|
|
|
07-27-2019, 06:04 PM
|
#36
|
|
Registered User
Join Date: Jan 2019
Location: PA
Posts: 1,726
|
Personally, I decided against painting. Paint will scratch just as easily as the Porsche finish. I stripped the original finish and made a concoction of RITMore plastic dye and Acetone to make it a uniform black color. So far I'm very pleased with the look.
Before:

After:
|

|
|
|
07-27-2019, 07:06 PM
|
#37
|
|
Registered User
Join Date: Sep 2008
Location: Florida
Posts: 2,497
|
Looks great! first I've heard of anyone using dye. Very nice.
|
|
|
|
|
07-28-2019, 12:40 AM
|
#38
|
|
Registered User
Join Date: Jun 2018
Location: San Antonio, Texas
Posts: 81
|
This is a great thread, Ive also had this one saved for quite some time. I need to tackle this job one day, I just have such poor luck with painting. https://rennlist.com/forums/996-forum/740354-alumalook-spray-paint.html
Shawn
__________________
-1999 Boxster 3.4L swap/NHP Headers/Fabspeed maxflow/ Coilovers/GT3 arms/adj. rear toe links/Tarret front and rear bar/UIDS/UAOS
-2002 911 Turbo -JRZ RS Pro/GMG swaybars/RSS/Billet k16s/ Markski turbo inlet pipe, tune, 3 exhaust, intercoolers/GT3 seats w/red GT3 belts/CCW classics
|
|
|
|
|
07-28-2019, 03:40 PM
|
#39
|
|
Registered User
Join Date: Jan 2019
Location: PA
Posts: 1,726
|
Quote:
Originally Posted by dghii
Looks great! first I've heard of anyone using dye. Very nice.
|
Thanks. I had to mix in a little acetone to make it infuse into to the plastic better. The tricky part is to NOT use too much acetone that it will melt your plastic's texture. I got the idea to use acetone from this site:
https://frontstreet.media/2016/07/13/tech-plastic-dyeing-the-permanent-solution-and-alternative-to-painting/
Rit DyeMore and Acetone was the trick. I didn't boil it, and I didn't add water. I just added a few drops of acetone at a time to the bottle of dye until I got the result I wanted. I used paper towels to apply the dye very liberally, then let the wet pieces dry in the sun for about 1/2 hour. IIRC, when they dried they looked like they had a weird matte finish. I washed them off with water to get rid of the dried powdery residue, and once they dried they came out like you see in the pic.
I think I ended up adding a total of 15 drops of acetone to the bottle of dye before the dye took.
Last edited by piper6909; 07-28-2019 at 07:08 PM.
|
|
|
|
|
09-05-2020, 01:15 PM
|
#40
|
|
Registered User
Join Date: Jul 2014
Location: Valparaiso, IN
Posts: 190
|
I'm very curious about this. This thread is now 9 years old. I'm curious whether Testors or Plastic dip or anything else has held up to the ravages of time. Does "clear" over either work to extend the paint or does it decay over time.
Larry (the Bald Eagle)
|
|
|
|
 Posting Rules
|
You may not post new threads
You may not post replies
You may not post attachments
You may not edit your posts
HTML code is On
|
|
|
All times are GMT -8. The time now is 01:48 AM.
| |


 "Bernie" - PONZI that 'made off' with my money!
 Linear Mode


