 04-18-2007, 09:51 AM
|
#1
|
|
Registered User
Join Date: Jul 2004
Location: Houston, Texas
Posts: 7,243
|
Removing rear bumper
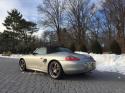
Anyone have any instructions with pix as to how to remove the rear bumper?
I'd like to do this and get my rear diffusers put on right myself. The existing holes don't line up with the diffusers and using some of them that do kinda line up don't place it where I want it.
|

|

|
|
04-18-2007, 03:24 PM
|
#2
|
|
Registered User
Join Date: Mar 2006
Location: Houston
Posts: 116
|
Randall,
Beats me!
You may need to ask Hans.
I can't imagine it would be all that difficult, especially since some
feel compelled to remove them just for a muffler swap.
I'll be glad to lend a hand anytime as well.
Did you check on the forums at renntech.org? There is a wealth
of information there that is more technical, in general, than here.
Toodles...
- Mark
|
|
|
|
|
04-18-2007, 03:47 PM
|
#3
|
|
Registered User
Join Date: May 2006
Location: Annapolis Maryland
Posts: 1,528
|
Randall,
I have it on CD in a PDF. I'm a computer idiot, so I can't figure out how to separate the bumper portion from the whole chapter. It's a big file, but if your connection speed can handle it, I can try to send it to you.
Last edited by Grizzly; 04-18-2007 at 03:54 PM.
|
|
|
|
|
04-18-2007, 06:01 PM
|
#4
|
|
Registered User
Join Date: Sep 2006
Location: Florida
Posts: 327
|
I wanna know to. Somebody post up. Jim is bound to know. He's the porsche tech. god on this forum haha
|
|
|
|
|
04-19-2007, 10:32 AM
|
#5
|
|
Registered User
Join Date: Sep 2006
Location: Florida
Posts: 327
|
Btt ^^^^^^^^
|
|
|
|
|
04-19-2007, 10:39 AM
|
#6
|
|
Registered User
Join Date: Jul 2004
Location: Houston, Texas
Posts: 7,243
|
I have the repair manual in PDF form too... but the diagram plus the instructions are really hard to understand. I might have my mechanic pull it for me and we put those on together!
|
|
|
|
|
04-19-2007, 12:56 PM
|
#7
|
|
07 Carrera S Cab
Join Date: Nov 2005
Location: New Jersey
Posts: 2,273
|
I've removed my rear bumper before to install a sports exhaust. To remove the bumper, first remove the bumperettes by removing them with an allen key in the hole below each bumperette. Then, remove all the screws underneath the bottom side of the bumper. I think there are 6 in total along the bottom, plus one on each side located inside each rear wheel well. The final screws holding the bumper cover on are located on top of the bumper cover, but those can only be accessed by removing the rear spoiler.
To do this, just manually raise the rear spoiler, push out the plastic pop rivets located in the black metal portion of the spoiler (you'll be able to retreive and reuse these once you remove the spoiler frame, as they drop into the frame), and pop off the painted top portion of the spoiler. After removing the painted top portion of the spoiler, you will be able to look down the hollow black metal frame of the spoiler and see two hex bolts. Remove these, and you'll be able to pull out the metal frame, which then gives you access to the screws holding the top of the bumper cover. Once this is done, the bumper cover is free, but remember to disconnect the electrical wire that connects to the license plate bulbs before fully pulling out the bumper cover.
Tip: When putting spoiler back on, tighten the hex bolts that secure the black metal frame of the spoiler while the spoiler is in the fully retracted position. If you secure the bolts with the spoiler up, when you retract the spoiler, it will end up sitting a bit too high from the bumper, and it will look like there's a gap between the spoiler and the bumper when the spoiler is in the down position. Ask me how I know this? 
__________________
Current: 07 Carrera S Cab in Midnight Blue
Previous: 01 Boxster in Arctic Silver, 86 944 in Guards Red
Last edited by Boxtaboy; 04-19-2007 at 01:42 PM.
|
|
|
|
|
04-19-2007, 01:29 PM
|
#8
|
|
Registered User
Join Date: Jul 2004
Location: Houston, Texas
Posts: 7,243
|
May God bless you for these logical instructions. Much better than the German who translated the stuff I have on hand!
|
|
|
|
|
04-19-2007, 01:43 PM
|
#9
|
|
07 Carrera S Cab
Join Date: Nov 2005
Location: New Jersey
Posts: 2,273
|
Quote:
|
Originally Posted by RandallNeighbour
May God bless you for these logical instructions. Much better than the German who translated the stuff I have on hand!
|
No problem, and good luck!
...oh, and don't forget to reconnect the wire to the license plate bulb before putting the bumper cover back as well. Ask me how I know this too! 
__________________
Current: 07 Carrera S Cab in Midnight Blue
Previous: 01 Boxster in Arctic Silver, 86 944 in Guards Red
Last edited by Boxtaboy; 04-19-2007 at 01:50 PM.
|
|
|
|
|
04-19-2007, 02:40 PM
|
#10
|
|
Registered User
Join Date: Sep 2006
Location: Florida
Posts: 327
|
This is gonna sound ridiculous...How do you manually raise the spoiler?
|
|
|
|
|
04-19-2007, 02:44 PM
|
#11
|
|
07 Carrera S Cab
Join Date: Nov 2005
Location: New Jersey
Posts: 2,273
|
Quote:
|
Originally Posted by pompous
This is gonna sound ridiculous...How do you manually raise the spoiler?
|
With the car turned on and at idle (or just twist the ignition key until the dash lights come on), look down at your fuse box cover near the dead pedal. There is a little rocker switch there. Press the upper part of the rocker switch, and the spoiler will raise. To put it down, keep the lower part of the rocker switch pressed for about 3 seconds, and it will retract.
__________________
Current: 07 Carrera S Cab in Midnight Blue
Previous: 01 Boxster in Arctic Silver, 86 944 in Guards Red
|
|
|
|
|
04-20-2007, 06:34 AM
|
#12
|
|
Registered User
Join Date: Dec 2006
Location: Mahomet Illinois
Posts: 4
|
Rear diffuser installation
Hi Randall,
I have purchased the same diffusers as you have and after trying to intall them with the bumper on the car I finally decided that this was not going to work as my hands were way too large to work in that confined space...I considered removing the bumper cover but after studying the way the cover lip and the lip of the heat shield come into play to secure the sheet metal screws for the diffuser it appeared that this was going to require a good deal of effort to replace all of that in one assembled piece...I decided to try something different that is to drill out the diffuser holes and attach it from underneath. I drilled through the three existing holes first with a very small bit to avoid chipping the diffuser and then came back the other way with a larger bit to make the hole large enough to allow the head of a small sheet metal screw to pass through...the idea being that you now screw the sheet metal screw from the bottom and pass through the threaded nut enbedded in the diffuser..use a screw that is narrower then the threads in the nut so you are not useing the threads but rather using the nut as the stopping point for the screw head to snug up the diffuser...worked fine and diffuser is nice and tight no gaps or rattles. now you are thinking what about the holes in the diffuser? This was the part I took a chance with thinking if it turns out looking like crap I throw away and am out a couple of hundred dollars, not the end of the world..but since the holes are not visible from underneath the only one you deal with is the hole in the neck of the diffuser closest to the tail pipe...If you look at the angle that the hole makes on the visible side of this piece it actually is a semi-circular opening which I touched up with a dab of touch up paint and you would think it looks like a machined little hole that appears as though is should be there...the holes underneath the diffuser are totally out of sight unless you get on your back and look at them from underneath the car...so I didn't try to plug them just left them alone.....one final advantage of this alternative installation method is if the diffuser ever gets chipped from road stones you can unscew it in about 5minutes repaint and reinstall in same time frame avoiding the job of removing the bumper cover and heat shield etc.....food for thought so good luck with your installation whichever method you decide to choose.....
|
|
|
|
 Posting Rules
|
You may not post new threads
You may not post replies
You may not post attachments
You may not edit your posts
HTML code is On
|
|
|
All times are GMT -8. The time now is 03:33 AM.
| |


 2001 Porsche Boxster
 2007 Carrera S Cabriolet
 Linear Mode


