Greetings Boxster friends!
My name is John and I'm addicted to projects~

I have been around the Porsche scene for a bit now mostly working with 911's & 944's, and currently work for a small restoration shop in Marietta, GA called Check Point Auto. I recently finished my last side project so I need a new one to keep me from getting fat and lazy... If any of you are into older air-cooled cars you know that the Porsche market has gone completely nuts and finding good classic project cars for a good price these days is just about impossible!
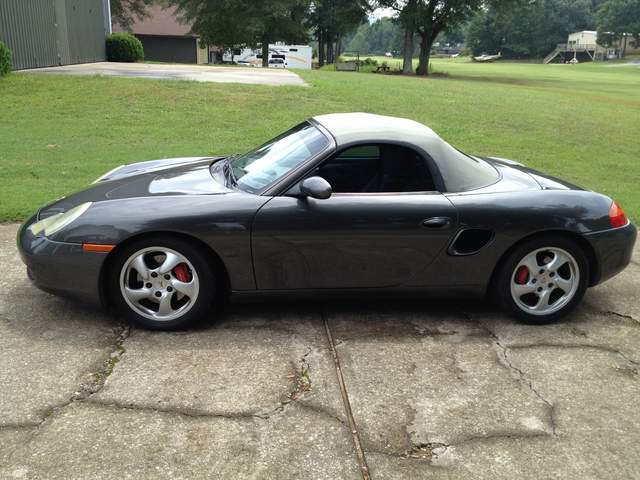
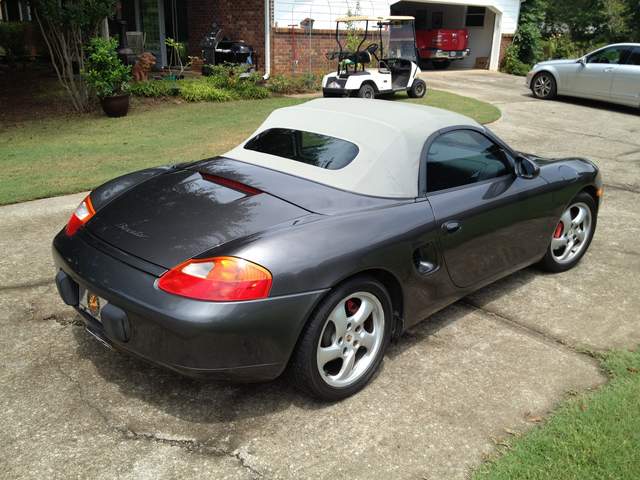
So I was surfing the auction sites, Copart actually on this one and came across a Nice little 2000 Porsche Boxster S that had "Mechanical Damage". Right up my alley, i'm not a bodywork guy. Well this one appeared to be in good overall condition, Grey/grey and a bit of a sleeper as it didn't have a Boxster "S" badge on the back... (Now that I have it not so much a sleeper as it has a 2 FT long "BOXSTER S" sticker on the spoiler, oops

)
I always liked the Boxster but personally think the 2.5 has no guts whatsoever and the 3.2 is merely adequate at 250~HP...Project wheels set in motion!!
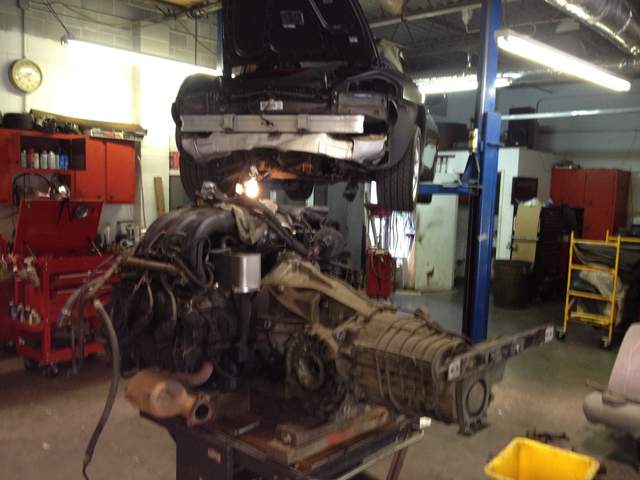
I got the car, coolant was a bit oily but oil looked OK and so I fired it hoping for the best and... Fired right up! No crazy IMS noise or anything, so far so good! Car appeared to have a new water pump and t-stat so I was hoping a new oil cooler would take care of everything, put it on and ran it for a few days only to find that now not only was there oil in the coolant, but coolant getting into the oil

WAH WAH WAHHHHHH
So I figured it probably needs a head gasket at minimum, probably a cylinder head and who knows what else... i've been doing this long enough to know it can be a very slippery slope!!
Needless to say I'm not very excited about fixing the motor that is in it, so I think we should make it better
BEGIN PROJECT BOXSTER LS376-480!!! Unlike some people while being fairly mechanically inclined I am no rocket scientist and would prefer not to reinvent the wheel - I'll just use someone else's!! If all goes well I plan to use the car as somewhat of a shop demo car with the possibility of doing these conversions for customers in the future... While I'm sure you could probably do this conversion cobbling parts together and buying used stuff that's just not my style - that being said, here's the plan!
I have ordered a Renegade Hybrids conversion kit with all optional parts... in reality I'm not sure why they list this stuff as optional unless you are building a race car, but whatever~
Power will be supplied by a LS376-480HP GM Crate motor with Hot Cam! IMHO this is the only way to go, shopping around I can get the whole power plant with new harness, gas pedal and a few other bit I need for about $8,000. Not cheap but consider buying a used LS1, rebuilding it, adding more HP etc. you will still be in it for $5-6K... plus with the crate motor I get a 2 year warranty!!
Factoring in the car, the conversion kit, the new motor, fabricating an exhaust and a few extra parts I have set a budget of $20,000 for the whole project which will likely go over because I will probably upgrade some other bits along the way but that's a pretty solid number.
Well the kit should be here in about 3 weeks so I have gone ahead and pulled the 3.2 from the Boxster and am looking forward to sharing this project with you all!
Sorry for the long winded introduction!!!
John


 Threaded Mode


