 08-08-2025, 07:11 PM
|
#101
|
|
Registered User
Join Date: Jul 2019
Location: Charleston
Posts: 571
|
Quote:
Originally Posted by Outkasted

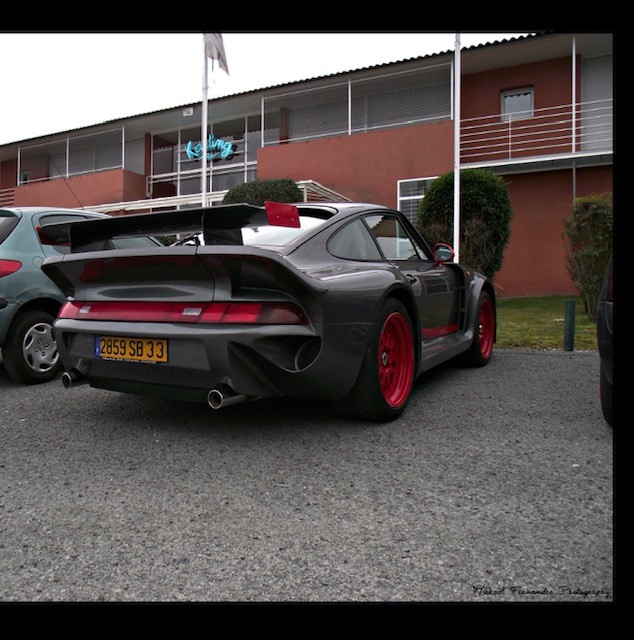
I am thinking of redoing my rear end to look similar to this. Do you think the bumper should be tucked or sticking out past the side?
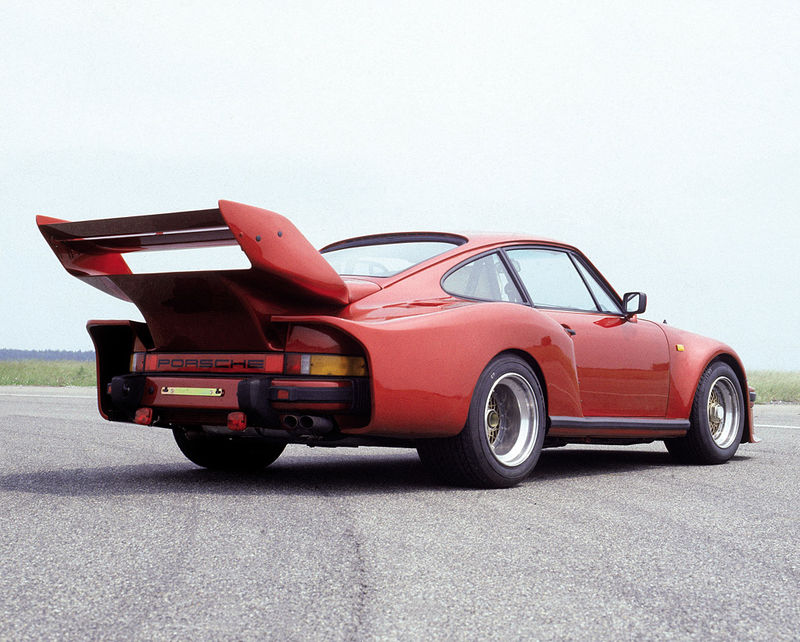 |
Those bumpers are so different from ours. Its hard to say. My knee jerk reaction is tucked in.
__________________
'99 supercharged 4.3 chevy Boxsterado
'98 PP13B powered "RX986"
This hairdresser only cuts mullets
|

|

|
|
08-12-2025, 12:15 PM
|
#102
|
|
Registered User
Join Date: Jun 2021
Location: Maryland
Posts: 184
|
Thanks. I am leaning towards tucked also but I will post up once I make more progress
__________________
Supercar dreams on dollar menu budget
|

|
|
|
08-25-2025, 05:41 AM
|
#103
|
|
Registered User
Join Date: Jun 2021
Location: Maryland
Posts: 184
|
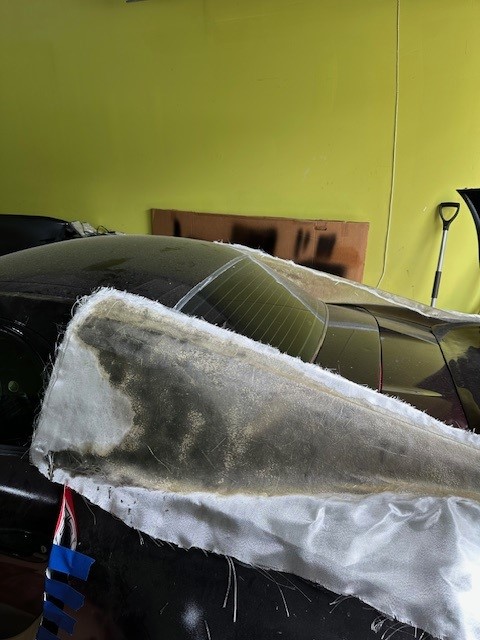
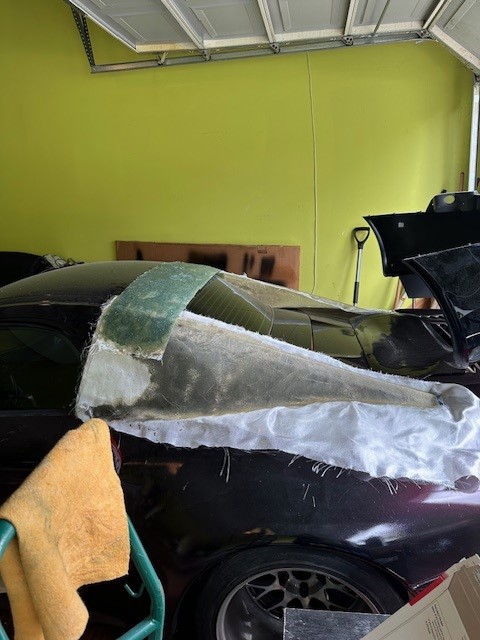
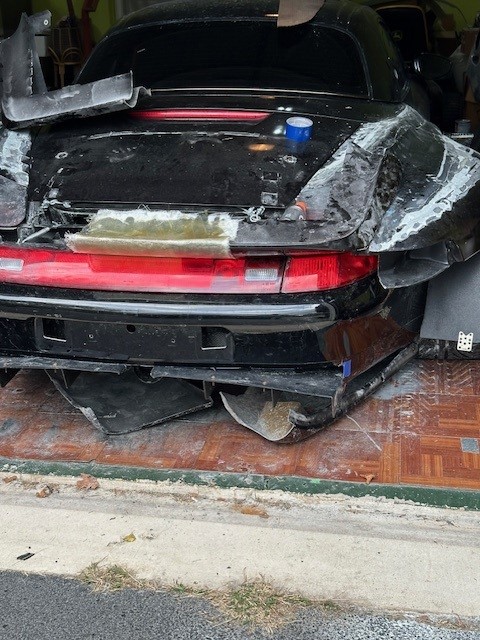
Bringing this idea back. Made a bit of progress but curious about the top. Would like opinions if you think it is better to mold the side pieces directly to the hardtop or incorporate the top strip linking the side pieces together.
__________________
Supercar dreams on dollar menu budget
|
|
|
|
|
09-17-2025, 08:17 AM
|
#104
|
|
Registered User
Join Date: Jun 2021
Location: Maryland
Posts: 184
|
__________________
Supercar dreams on dollar menu budget
|
|
|
|
|
09-17-2025, 10:36 AM
|
#105
|
|
Registered User
Join Date: Jul 2019
Location: Charleston
Posts: 571
|
The sunk in tail lights look good.
Nobody is gonna mistake your car from some other 986 thats for sure!! 
__________________
'99 supercharged 4.3 chevy Boxsterado
'98 PP13B powered "RX986"
This hairdresser only cuts mullets
|
|
|
|
|
09-17-2025, 10:51 AM
|
#106
|
|
Registered User
Join Date: Sep 2018
Location: Illinois
Posts: 330
|
For an enhanced throwback esthetic, ditch the wing!
__________________
A cynic is a man who, when he smells flowers, looks around for a coffin.
-H. L. Mencken
|
|
|
|
|
09-18-2025, 04:52 AM
|
#107
|
|
Registered User
Join Date: Jun 2021
Location: Maryland
Posts: 184
|
I plan to finish the back without the wing and see how i feel before adding a wing. Plus it wont be the exact same wing i had before if i do put a wing on it.
Qingdao, same can be said for your RX7 build. No one is going to guess that started as a 986.
__________________
Supercar dreams on dollar menu budget
|
|
|
|
|
01-13-2026, 03:55 AM
|
#108
|
|
Registered User
Join Date: Jun 2021
Location: Maryland
Posts: 184
|
Looking at Qingdao progress, I found motivation to get started again. I am not a body or paint guy by trade but i think she is coming along. Going to practice my paint color this weekend, hopefully.
__________________
Supercar dreams on dollar menu budget
Last edited by Outkasted; 01-13-2026 at 03:58 AM.
|
|
|
|
|
01-14-2026, 03:28 PM
|
#109
|
|
Registered User
Join Date: Jul 2019
Location: Charleston
Posts: 571
|
Glad to be an inspiration.
Are you gonna make the trunk accessible? I know you had mentioned wanting to keep it accessible when you were picking out your spoiler.
Maybe you could make those pieces completely. Then cut out the section that interferes with trunk operations, and glass those to the trunk. I've seen similar things done with wide body kits that interfere with doors.
__________________
'99 supercharged 4.3 chevy Boxsterado
'98 PP13B powered "RX986"
This hairdresser only cuts mullets
|
|
|
|
|
01-15-2026, 03:58 AM
|
#110
|
|
Registered User
Join Date: Jun 2021
Location: Maryland
Posts: 184
|
I don't use the trunk at all anyway but everything covering the trunk is removable so I can still gain access. A couple of quick release bolts and i can pop the side and bottom pieces off to open the trunk. I was trying to think ahead as the ecu and airbox live in the trunk.
__________________
Supercar dreams on dollar menu budget
|
|
|
|
|
03-17-2026, 06:11 AM
|
#111
|
|
Registered User
Join Date: Jun 2021
Location: Maryland
Posts: 184
|
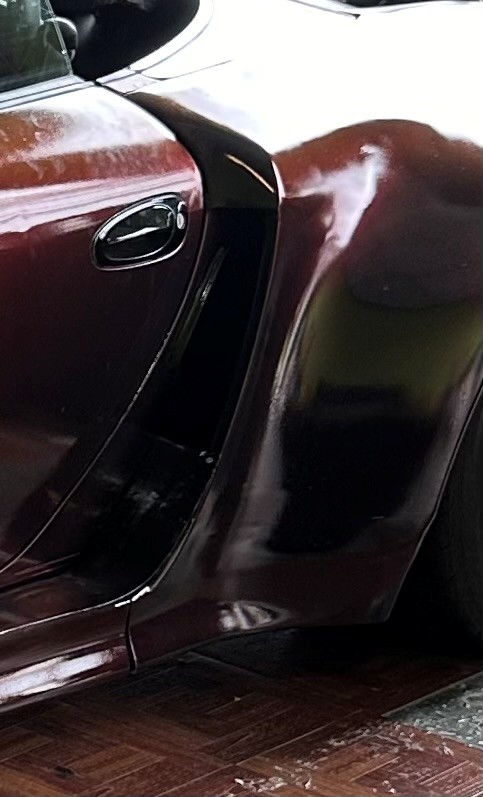
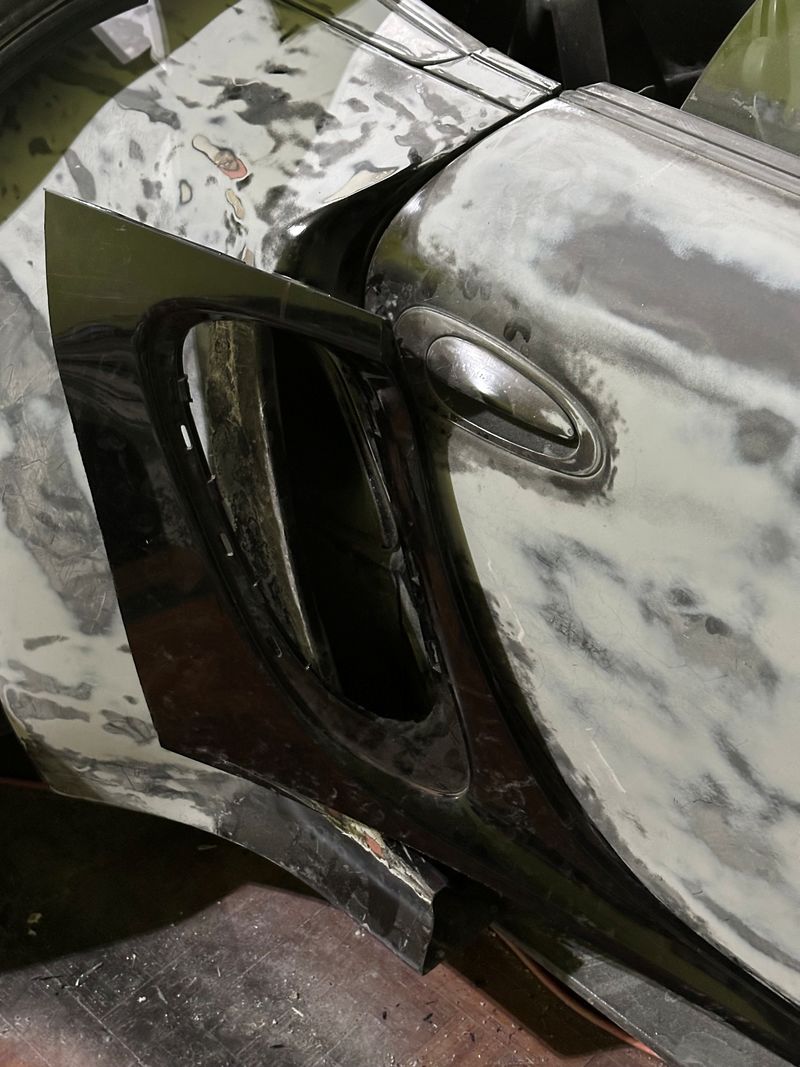
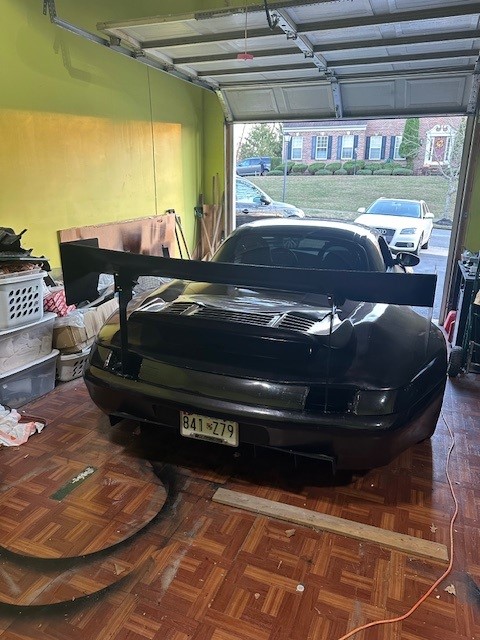
I may never finish this project if i keep changing things. I never did like the side vents, always thought it could use a better flow than what i did. First pic is what it looked like second pic is what i am trying to finish lol
__________________
Supercar dreams on dollar menu budget
|
|
|
|
|
03-18-2026, 10:48 AM
|
#112
|
|
Registered User
Join Date: Jul 2019
Location: Charleston
Posts: 571
|
Where did the new side vents come from? They match the door line of the 986, but they look like something I'd see on a 987.
__________________
'99 supercharged 4.3 chevy Boxsterado
'98 PP13B powered "RX986"
This hairdresser only cuts mullets
|
|
|
|
|
03-19-2026, 04:33 AM
|
#113
|
|
Registered User
Join Date: Jun 2021
Location: Maryland
Posts: 184
|
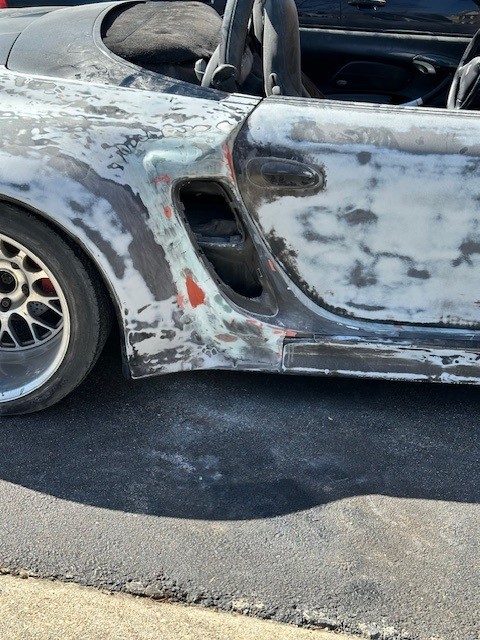
Good eye, the vents are from a Boxster 718 I cut them down to fit the area. A few more tweaks and they should flow pretty well.
__________________
Supercar dreams on dollar menu budget
|
|
|
|
|
03-23-2026, 03:54 AM
|
#114
|
|
Registered User
Join Date: Jun 2021
Location: Maryland
Posts: 184
|
I got them set to the point I like it. I couldn't make the vents completely blend into the body because i would have lost part of the way fender sits and I didn't want to do that. Now I just need to repeat it on the other side. lol

__________________
Supercar dreams on dollar menu budget
|
|
|
|
|
03-24-2026, 10:46 AM
|
#115
|
|
Registered User
Join Date: Jul 2019
Location: Charleston
Posts: 571
|
Lay a coat of 2k primer on it. Its hard to see what a finished product will look like when its at this stage. That was the advice that was given to me when I was at this point.
Looks better than before though, keep it up.
__________________
'99 supercharged 4.3 chevy Boxsterado
'98 PP13B powered "RX986"
This hairdresser only cuts mullets
|
|
|
|
|
04-21-2026, 06:45 AM
|
#116
|
|
Registered User
Join Date: Jun 2021
Location: Maryland
Posts: 184
|
So i finally got it good enough to paint and boy did i have problems. Solvent pop and runs all over the place. I am not sure how you get worse as you go but my first paint job was so much better than this one. Couldn't get any pics to show the carnage but I will snap a few before i attempt to fix all my issues.
__________________
Supercar dreams on dollar menu budget
|
|
|
|
|
04-22-2026, 10:40 AM
|
#117
|
|
Registered User
Join Date: Jul 2019
Location: Charleston
Posts: 571
|
Primer compatibility issues?
Don't let the runs scare you away from globing on the clear. Remember its easier to fix a run than it is to fix a light spot. 
__________________
'99 supercharged 4.3 chevy Boxsterado
'98 PP13B powered "RX986"
This hairdresser only cuts mullets
|
|
|
|
|
04-23-2026, 04:17 AM
|
#118
|
|
Registered User
Join Date: Jun 2021
Location: Maryland
Posts: 184
|
The weird thing is i used the same products i used for the last paint job. Primer, sealer, base and clear, all same brand. The runs don't bother me as much as the fisheyes and solvent pop. Worst part is the reaction didn't happen until i after i shot the clear. I think it is mostly salvageable, but I am out of base color so now i have to order more and wait to fix it correctly.
__________________
Supercar dreams on dollar menu budget
|
|
|
|
|
05-06-2026, 05:12 AM
|
#119
|
|
Registered User
Join Date: Jun 2021
Location: Maryland
Posts: 184
|
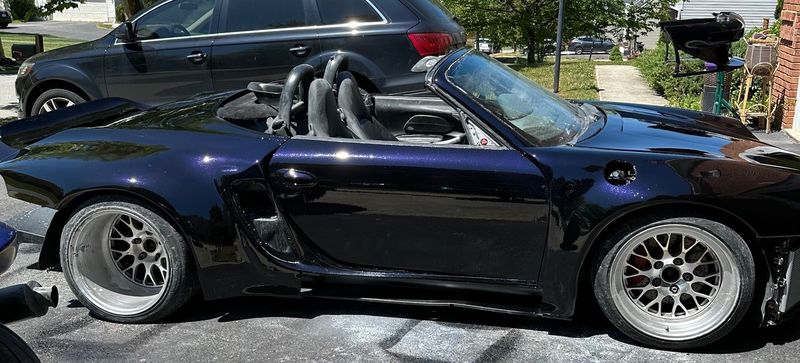
ok so I have learned "cut and buff" is a skill i do not have. I tried it and failed, had to lay more clear to fix my mistakes. This paint job is for sure a 5 footer, I have dust in my clear and not sure how I am going to fix it. May have to pay someone to do a proper cut and buff or just live with it. lol

__________________
Supercar dreams on dollar menu budget
|
|
|
|
|
05-11-2026, 01:34 PM
|
#120
|
|
Registered User
Join Date: Jul 2019
Location: Charleston
Posts: 571
|
Get a paint depth gauge. I got one from Amazon for like $20. The cheap ones (like mine) are not extremely accurate, but they give you a lot of "sight". That way you can cut down without worry of hitting base.
Most clear paint I lay is like 10 or more mils thick. I like to glob it on so I can cut it down and polish. Is it right to glob clear on??? IDK it works. 
__________________
'99 supercharged 4.3 chevy Boxsterado
'98 PP13B powered "RX986"
This hairdresser only cuts mullets
|
|
|
|
 Posting Rules
|
You may not post new threads
You may not post replies
You may not post attachments
You may not edit your posts
HTML code is Off
|
|
|
All times are GMT -8. The time now is 03:35 PM.
| |


 Linear Mode


