How to check and replace the ignition coils & spark plugs. My step by step video is here:
https://youtu.be/H25qLssQNxg
All my other how to guides are here:
https://www.youtube.com/c/roadandracetv
R&R
An ignition coil is an induction coil that transform the low voltage from the battery to the high voltage needed for the spark plugs. On the Boxster these are exposed to the elements so its prudent to check them for hairline cracks. As its very little additional effort and because spark plugs are cheap Ill replace all six whilst Im there.
Car used Porsche Boxster S 2001 986
Ignition coils Beru ZS177 / Porsche 996 602 102 00
Spark plugs Beru 14FGR-6KQU
Cowling - 10mm socket
Coil - 5mm hex male
Spark plugs - 16mm deep socket
Torque spark plugs to 30Nm
New Coils - e11 star socket
Heres a summary of what well be doing:
Disable ignition
Remove plastic cowling
Remove ignition coils
Check coils
Remove spark plugs
Check plugs
Fit new spark plugs and ignition coils
Replace plastic cowling
And re-enable ignition
Here are the Tools and Parts youll need
Socket set
Extendable Magnet
6 new ignition coils
And 6 new spark plugs
1. So safety first well disable the ignition system as that reduces the risk of any electrical shock. Open the boot, pull back the carpet and slide out the relay box. Pull out the ignition relay as shown.
2. Raise the car and remove the rear wheels. Click the Suggestion box at the top to see my How To guides from Series 1.
3. Remove the plastic cowling. Its held on with two 10mm nuts.
4. Here are the first 3 ignition coils.
5. We need to remove the electrical connection to the coil so pull back the plastic shroud and unclip the connector.
6. Using a ratchet and 5 mil hex bit unscrew both screws. Access is a bit tight on the top screw so youll need a small ratchet.
7. Pull out the coil.
8. Inspect the coil and replace if there are any cracks. Some like this one are hairline and hard to spot. Some, like this, are more obvious. On my 15 year old Boxster all 6 coils had cracks - 4 with hairline cracks and 2 with larger cracks.
9. Now, using a 16mm deep socket remove the spark plug. If the plug doesnt come out inside the socket then use a magnet to grab it. You can also use the magnet if the socket comes off the ratchet.
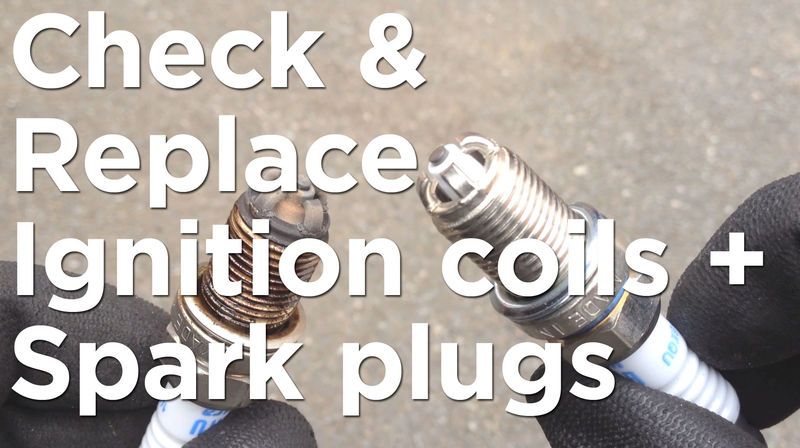
10. Heres a new spark plug next to the old one. You can see a small amount of build up on the plug.
11. Insert the new plug and torque to 30 Nm.
12. Insert the new coil, screw in both screws and attach the electrical connector back. The new coils use different screws. These are e11 star type.
13. Repeat on the remaining 5 coils and spark plugs.
14. Once finished replace the plastic cowlings, pop the ignition relay back in, push the relay box back and re-fit the carpet.
15. Finally, put the wheels back on, lower the car and go for a test drive.


 1998 Porsche Boxster
 Something like if yours look like this then you're long past where you should have replaced them! LOL

 Hybrid Mode


