Go Back   986 Forum - The Community for Porsche Boxster & Cayman Owners > Porsche Boxster & Cayman Forums > DIY Project Guides

Post Reply
 
LinkBack Thread Tools Display Modes
Old 03-02-2013, 07:28 PM   #1
Registered User
 
AKnowles's Avatar
 
Join Date: Nov 2012
Location: Southern, CA
Posts: 460
Headlight Restoration

My litronic headlights that i bought form eBay arrived, but then needed two things:

1) An amberectomy. Completed that with a butane powered soldering iron with a wedge shapped cutter. Pretty easy. Took less than 45 minutes form start to finish.

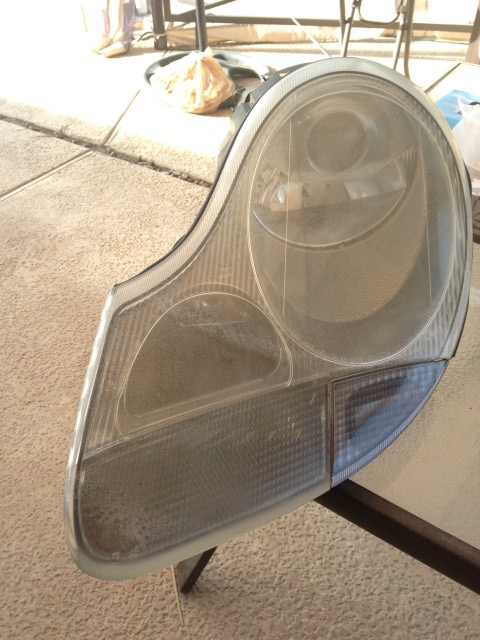
2) Restoration of the headlights. Some wear and tear due to age, but the rest is somehting else again. It is not pitting, but appears to be an overspray of some type. When I rub my finger over it I can feel it. Here's a picture of the light with a close up of the overspray.


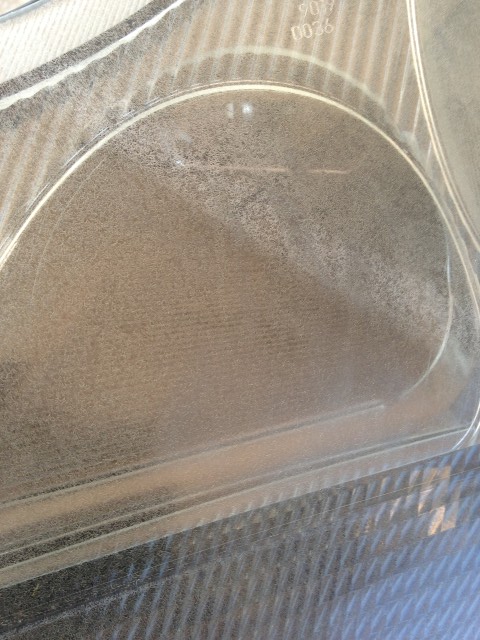
Close up of area with overspray. It's the white curved area. There is also overspray or pitting like this on the bottom and left hand edge too where the blinker is located..


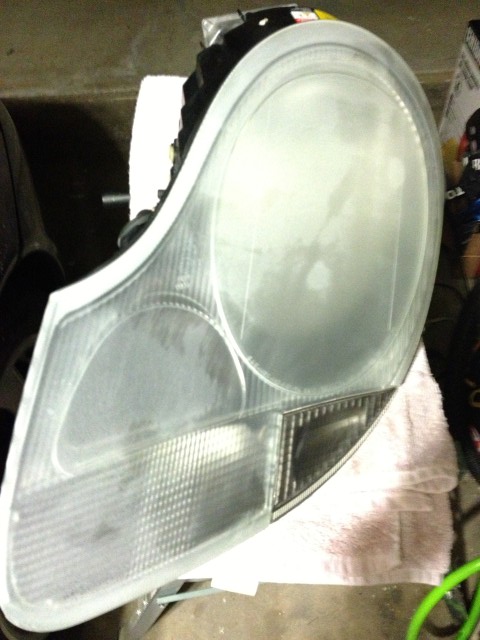
Here's what is looks like aftyer hitting it with a pneumatic orbital sander with 400 grit sandpaper. All wet sanded. FWIW: I tried it with the manual method first. No joy. There was a coating on it in some palces that could not be cut through without a LOT of effort and sanding that was not possible with the sponge sanding block provided.


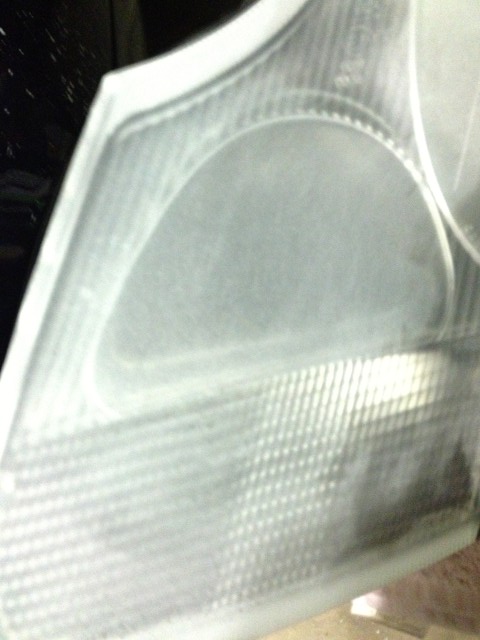
Close up of overspray area.


Also, for those with an interest, the restoration kit is by mequires. I bought it because I did not want to use electric power tools, but I had no idea this was going to be so difficult to cut through the gunk on it.

Tomorrow I will wet sand it with 600, 1000, then 3000 and start the polishing with the Plastix polishing compound. I'll post pics of the finished results then. As it is taking so long to restore the headlights, I'll probably have to wait until next week to actually install them. Oh well, on the good side I guess that leaves me time to buy some silver turn signal lights and my clear side markers should be in by then too.

__________________
1999 Boxster Zenith Blue Metallic/Savanna Beige
AKnowles is offline   Reply With Quote
Old 03-02-2013, 10:23 PM   #2
Registered User
 
nieuwhzn's Avatar
 
Join Date: Nov 2010
Location: Long Island, NY
Posts: 296
Garage
i don't think that's overspray. I had the same thing when I bought my Boxster. No idea what is causing, local differences in the plastic? Used a 3-step headlight restorer kit from Turtle, came out fine. I only see some slight pitting still. If I ever have time I'll just sand off a bit more a re-polish.
nieuwhzn is offline   Reply With Quote
Old 03-03-2013, 12:47 PM   #3
Registered User
 
AKnowles's Avatar
 
Join Date: Nov 2012
Location: Southern, CA
Posts: 460
This is what it loks like after polishing and adding the UV protectant ...


Overspray (?) area ...


I'm on to the next one now. FWIW, there is still some plastic crazing. Meaning, if you look closely at the plastic you can see a puzzle type pattern in the plastic. It does not appear to be on the surface though. I do wish I could get to the interior just to wipe it down too though.
__________________
1999 Boxster Zenith Blue Metallic/Savanna Beige
AKnowles is offline   Reply With Quote
Old 07-15-2013, 05:09 PM   #4
Registered User
 
Join Date: Jun 2013
Location: Honolulu, HI
Posts: 135
Send a message via Yahoo to Chard
awesome, looks WAY better than when you started.
__________________
Present:
'08 e90 335i, '00 986 S

Past:
'99.5 B5 A4 1.8tqms, '02 e46 m3 convertible
Chard is offline   Reply With Quote
Old 07-22-2013, 10:44 AM   #5
Registered User
 
woodsman's Avatar
 
Join Date: Feb 2013
Location: Land of naught
Posts: 1,302
It's probably a primer with a catalyst ( a hardener), a high quality product that someone used carelessly. Either way your approach makes sense. I can't tell from the picture of the finished lens whether it's clear now. Are you happy with it?
__________________
Death is certain, life is not.
woodsman is offline   Reply With Quote
Old 07-22-2013, 11:00 AM   #6
Custom User Title Here
 
particlewave's Avatar
 
Join Date: Mar 2012
Location: Ft. Leonard Wood
Posts: 6,163
Garage
Quote:
Originally Posted by AKnowles View Post
there is still some plastic crazing. Meaning, if you look closely at the plastic you can see a puzzle type pattern in the plastic. It does not appear to be on the surface though. I do wish I could get to the interior just to wipe it down too though.
FYI: crazing in polymers is perfectly normal and though it may not be pretty, it actually makes it stronger. The "cracks" are just that; micro fissures. Does not affect the integrity of the polymer, just looks weird
__________________
https://youtube.com/@UnwindTimeVintageWatchMuseum

Last edited by particlewave; 07-25-2013 at 10:30 PM.
particlewave is offline   Reply With Quote
Old 07-24-2013, 11:30 AM   #7
Registered User
 
woodsman's Avatar
 
Join Date: Feb 2013
Location: Land of naught
Posts: 1,302
Quote:
Originally Posted by particlewave View Post
FYI: crazing in polymers is perfectly normal and though it may not be pretty, it actually makes it stronger. The "cracks" are just that; micro fissures. Does not affect the integrity of the polymer, just looks weird
so are these fissures only on the surface? and, what do you do to get rid of them?
__________________
Death is certain, life is not.
woodsman is offline   Reply With Quote
Old 07-24-2013, 02:54 PM   #8
Custom User Title Here
 
particlewave's Avatar
 
Join Date: Mar 2012
Location: Ft. Leonard Wood
Posts: 6,163
Garage
They are internal and there is no way to get rid of them, other than having new lenses made.

Polymer crazing(from Wikipedia)

Quote:
Crazing occurs in polymers, because the material is held together by a combination of weaker Van der Waals forces and stronger covalent bonds. Sufficient local stress overcomes the Van der Waals force, allowing a narrow gap. Once the slack is taken out of backbone chain, covalent bonds holding the chain together hinder further widening of the gap. The gaps in a craze are microscopic in size. Crazes can be seen because light reflects off the surfaces of the gaps. The gaps are bridged by fine filament called fibrils, which are molecules of the stretched backbone chain. The fibrils are only a few nanometers in diameter, and cannot be seen with a light microscope, but are visible with an electron microscope.

A craze is different from a crack in that it cannot be felt on the surface and it can continue to support a load. Furthermore, the process of craze growth prior to cracking absorbs fracture energy and effectively increases the fracture toughness of a polymer. The initial energy absorption per square meter in a craze region has been found to be up to several hundred times that of the uncrazed region, but quickly decreases and levels off. Crazes form at highly stressed regions associated with scratches, flaws, stress concentrations and molecular inhomogeneities. Crazes generally propagate perpendicular to the applied tension. Crazing occurs mostly in amorphous, brittle polymers like polystyrene (PS), acrylic (PMMA), and polycarbonate; it is typified by a whitening of the crazed region. The white colour is caused by light-scattering from the crazes.
__________________
https://youtube.com/@UnwindTimeVintageWatchMuseum
particlewave is offline   Reply With Quote
Old 07-25-2013, 04:20 PM   #9
Registered User
 
woodsman's Avatar
 
Join Date: Feb 2013
Location: Land of naught
Posts: 1,302
holy chit ! That's detailed and complex Particlewave thanks
__________________
Death is certain, life is not.
woodsman is offline   Reply With Quote
Old 07-25-2013, 07:48 PM   #10
Moderator
 
Join Date: Feb 2012
Location: DFW
Posts: 782
Garage
That "pitting / overspray" is probably caused by a very strong solvent getting on the plastic lenses, and judging from the pattern like it came out of a spray can. I caused that same over-spray by getting carb & choke cleaner on the lens. Nasty stuff, had to sand and polish the lens for quite a while.
Kenny Boxster is offline   Reply With Quote
Old 07-27-2013, 04:02 PM   #11
Registered User
 
AKnowles's Avatar
 
Join Date: Nov 2012
Location: Southern, CA
Posts: 460
Keeny, I suppose it is possible, but the same pattern was on both lenses. In fact, I need to resand the passer side one as I didn't sand it enough to give it the same clear elns effect as the drivers side. The good news on both though is the cleaning seems to be holding up quite well.

My only problem to date is alignment. The passenger side is poiting too close to the center. When I adjust it the adjuster nut only moves it so far to teh outside and then it starts to move back inside. I think I need to adjust the tray at this point to fix the alignment issue.

PS: Thanks for all the information on this subject. I had no idea about the crazing either.

__________________
1999 Boxster Zenith Blue Metallic/Savanna Beige
AKnowles is offline   Reply With Quote
Post Reply


Thread Tools
Display Modes

Posting Rules
You may not post new threads
You may not post replies
You may not post attachments
You may not edit your posts

BB code is On
Smilies are On
[IMG] code is On
HTML code is On
Trackbacks are On
Pingbacks are On
Refbacks are On


All times are GMT -8. The time now is 05:27 AM.


Powered by vBulletin® Version 3.8.7
Copyright ©2000 - 2024, vBulletin Solutions, Inc.
Content Relevant URLs by vBSEO 3.6.0
Copyright 2024 Pelican Parts, LLC - Posts may be archived for display on the Pelican Parts Website -    DMCA Registered Agent Contact Page