 05-26-2017, 02:07 PM
|
#3441
|
|
Toppy
Join Date: Apr 2014
Location: Dorchester, ON, Canada
Posts: 144
|
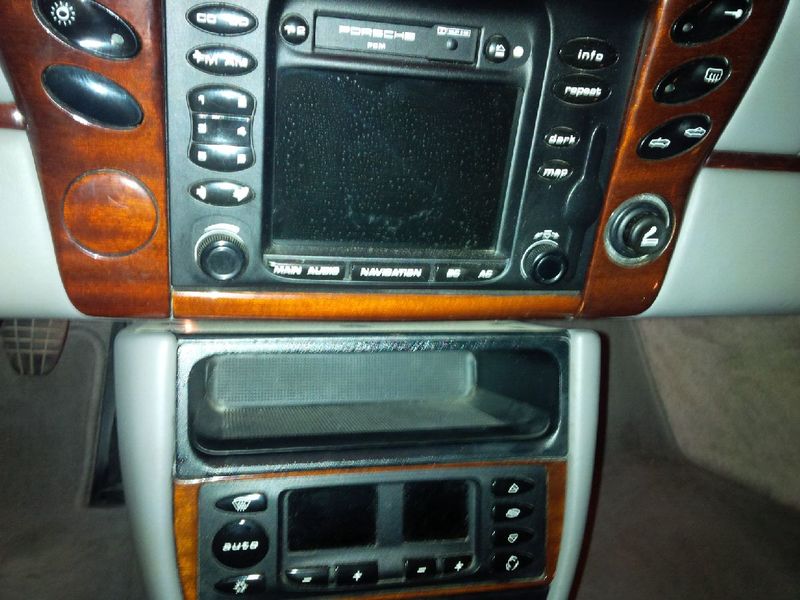
l just pulled out the nav cd player and installed a cubby in slot 3 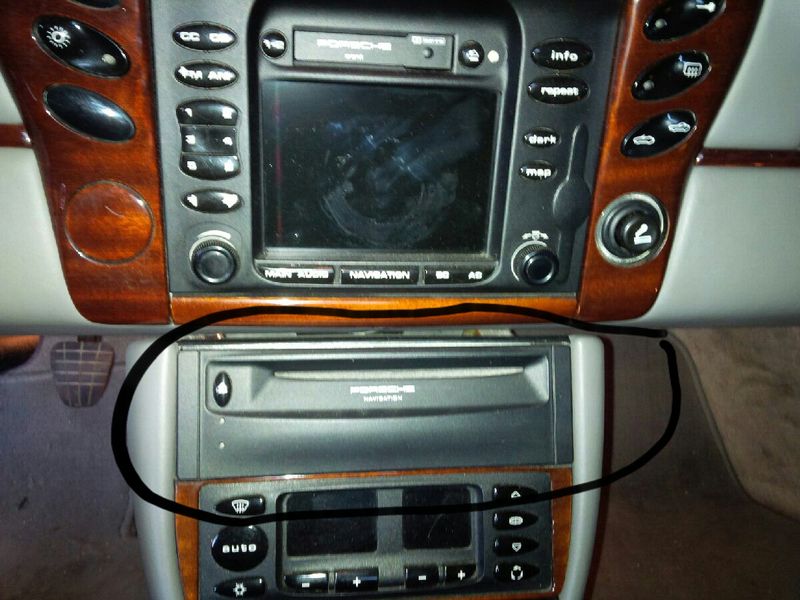
__________________
1999 Boxster
Arena Red/Graphite Grey Interior/Black 03 Top/550 All Red Tail Lights
|

|

|
|
05-26-2017, 02:39 PM
|
#3442
|
|
Registered User
Join Date: Jun 2014
Location: Oregon
Posts: 455
|
I tried Meguires Water Spot remover, and must say it does work! Get ready for a workout, but nice results. Yay, the joys of a dark blue car! (Worth it.)
__________________
'04 Midnight Blue Metallic 986
|
|
|
|
|
05-27-2017, 02:32 AM
|
#3443
|
|
Registered User
Join Date: Oct 2016
Location: Orangeville, Ontario, Canada
Posts: 229
|
Quote:
Originally Posted by oldskool73

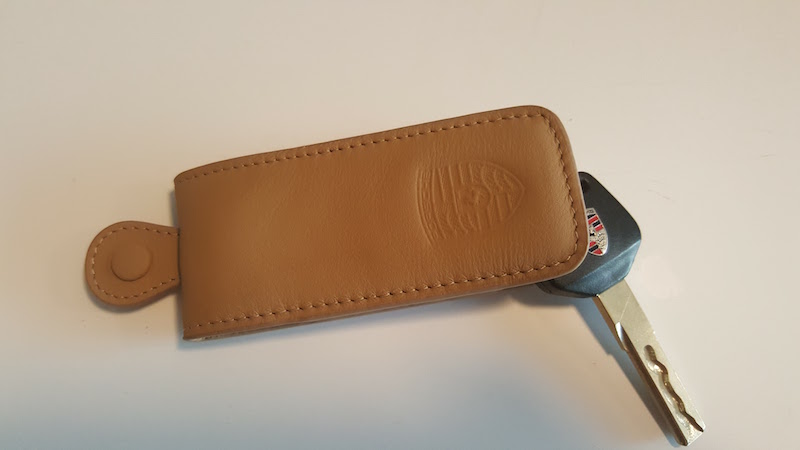
Here's my 'from China' key holder too, bit over engineered but looks nice...
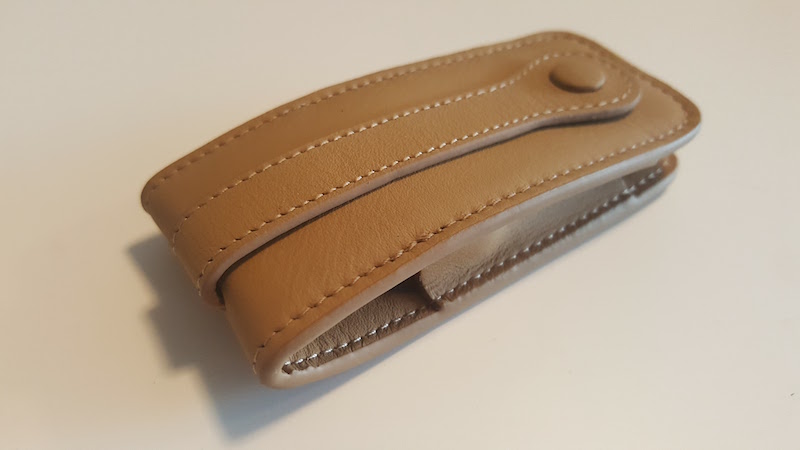 |
Oh, I like that...didn't see that one.
Sent from my iPad using Tapatalk
|
|
|
|
|
05-27-2017, 03:04 AM
|
#3444
|
|
Registered User
Join Date: Jan 2014
Location: Albuquerque, NM
Posts: 503
|
Replaced my Ignition switch in hopes my voltage drain dies and replace my crank sensor with a 987/997 sensor. Love it! Got my car back.
Oh and rolled the fenders.
|
|
|
|
|
05-27-2017, 10:36 AM
|
#3445
|
|
Registered User
Join Date: Oct 2016
Location: Orangeville, Ontario, Canada
Posts: 229
|
Out with the old, in with the (waterproof) new...
 
Sent from my iPad using Tapatalk
|
|
|
|
|
05-27-2017, 01:42 PM
|
#3446
|
|
Registered User
Join Date: Jan 2014
Location: New Jersey
Posts: 1,631
|
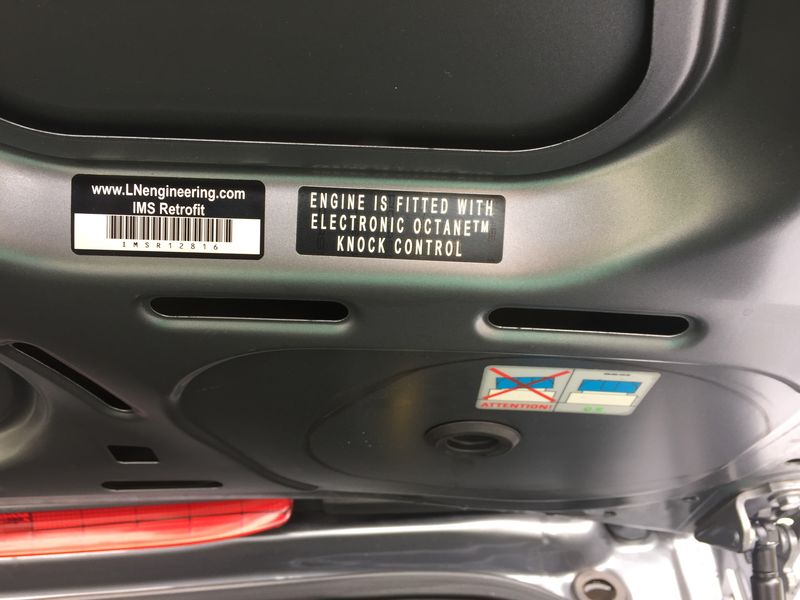
I picked up my Boxster S from my shop Thursday afternoon. Had my leaking water pump replaced, oil changed and brake fluid flushed. They also added a Mantis deep sump and stainless steel flexible brake lines and installed the underdrive pulley I had bought late last year. This is the first time I drove the car since I had the ROW M030 suspension kit installed in January and had my 18 inch wheels on. It definitely feels tighter with the ROW M030 and the 18 inch wheels than it does with 17 inch wheels. The brake pedal also feels firmer with the stainless steel lines, but that may just be psychological and not real. As for the under drive pulley, the engine seems to rev a tiny bit faster, but again that may be in my head.
Today I washed the car. Going around and washing door jambs and trunk edges, I noticed that my car does in fact have the LN Engineering IMSB upgrade sticker. I knew I had the single row pro installed, but never knew to look for the sticker until I read about it here!
Next week is HPDE at New Jersey Motorsports Park Thunderbolt, looking forward to it!
|
|
|
|
|
05-28-2017, 06:23 PM
|
#3447
|
|
Registered User
Join Date: Oct 2016
Location: Orangeville, Ontario, Canada
Posts: 229
|
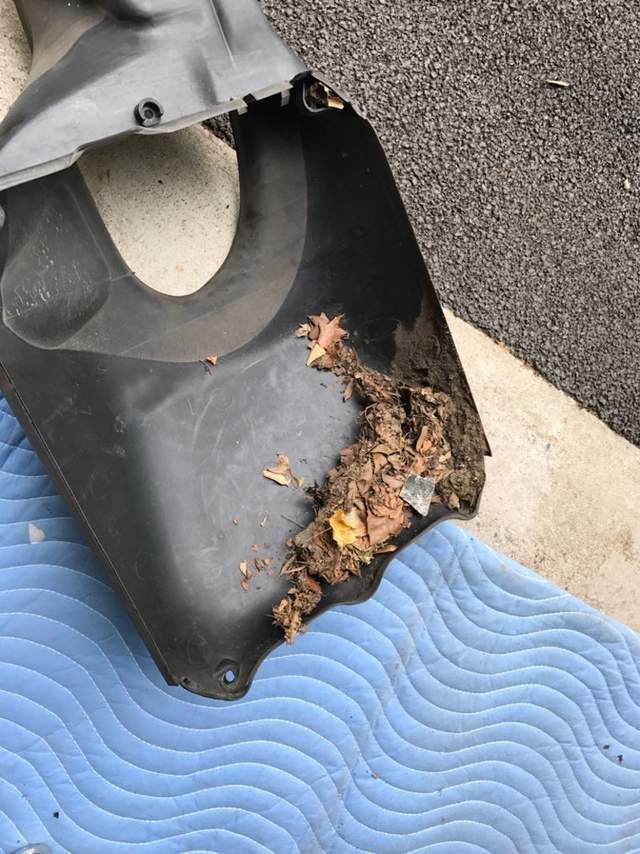
Cleaned the MAF sensor, the throttle body and the idle control valve. Car is running like a champ now, however looks like an AOS will be in my future. Some small residue in the manifolds.
Sent from my iPad using Tapatalk
|
|
|
|
|
05-28-2017, 08:41 PM
|
#3448
|
|
Registered User
Join Date: Feb 2017
Location: North Eastern US
Posts: 646
|
Lot's of stuff this WE!
Confirmed that my measurements were correct and the QJ7000 is compatible with the 986:
Installed the LNE spin-on oil filter adapter, magnetic drain plug and ss300 filter mag along with an oil change.
Installed new Stabilus frunck and trunk struts.
Replaced wheel lock studs with 50mm standard wheel studs.
Learned that my 986 is a great vacuum cleaner (cigarette butts, really???  )

Next up - cleaning the condensers and radiators, then fabricating intake grills using Custom Car Grills 77% flow black powder coated honeycomb grill stock.
Stay tuned!
__________________
Rgds, Fred
#317 550 Spyder Anniversary Edition 2004 Boxster S, 3.8L Flat Six Innovations engine, PSS9s, etc, etc . . .
The contents of my posts are for entertainment only. As confirmed by my many motor sports fails, I am not qualified to give product endorsements or mechanical advice 
|
|
|
|
|
05-28-2017, 09:44 PM
|
#3449
|
|
There Is No Substitute.
Join Date: May 2007
Location: West Coast
Posts: 3,253
|
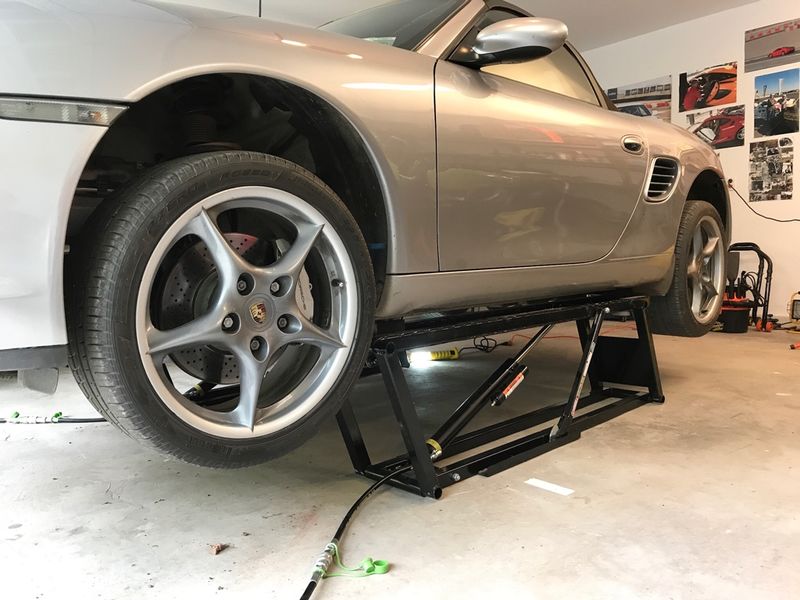
Wrapped up a quick service on a family member's new to them Volvo C30 this morning, then started on my 986. I removed my hardtop for the summer, checked all my fluids, ran a quick check with the Durametric, cleaned/checked all drain points, cleaned and conditioned every inch of rubber with Gummi Pfledge. Then I replaced the gummy seal on my passenger side headlight with a spare one from my old amber headlights, and conditioned both headlight seals with an ample amount of Gummi Pfledge. The seals looked and felt like new after being cleaned and conditioned, I may start doing this more often to try and avoid them going bad.
Then I installed a mid-strut bar I picked up almost 2 years ago, and had almost forgotten about. Pretty straight forward installation, which was lucky since I was not able to find any instructions on how to install it anywhere online. I did manage to find a torque setting for the bolts of 24-26 ft/lbs. I got it mounted without any modifications to the surrounding insulation, and tightened the bar up and the bolts down on the helm joints. Tomorrow I'm going to do an oil change, check my suspension, put my summer rims on, and now that I see that picture clean the carpet. 


__________________
1999 Ocean Blue Metallic Boxster - blueboxster.com
|
|
|
|
|
05-29-2017, 03:33 PM
|
#3450
|
|
Registered User
Join Date: Feb 2017
Location: North Eastern US
Posts: 646
|
Radiator grills
Made the templates, cut the CCG grills and fitted to the nose. The CCG grills are high quality, very sturdy (power coated aluminum alloy) and they flow 77% of the air vs wide open (which is very good for a relatively dense mesh, BTW). CCG is one of the few places I've found that actually have specs for their grill material. YMMV, but good stuff for me.
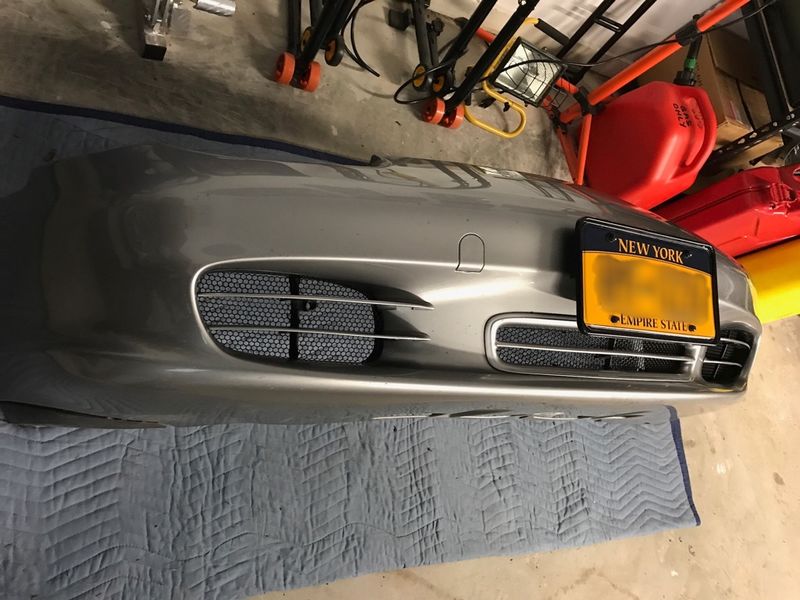
Here's a pic before I snipped the zip ties so the placement can be seen:
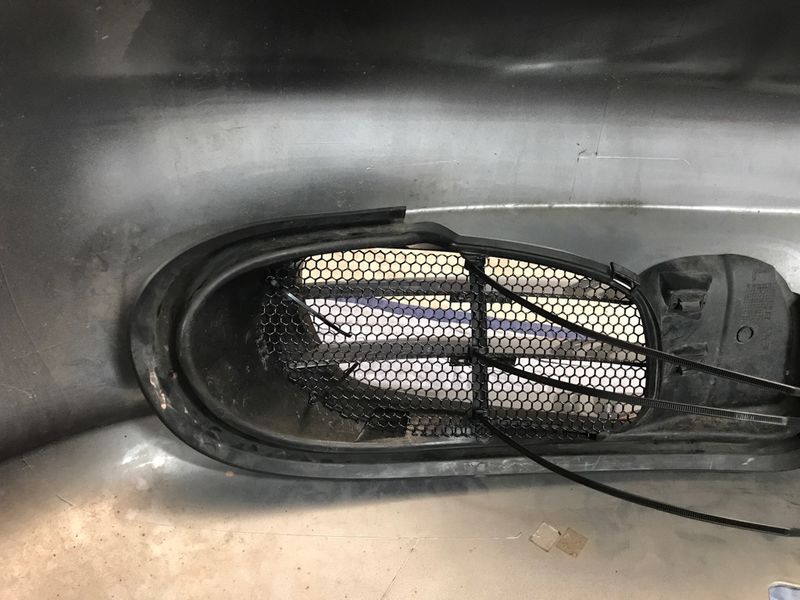
I made sure that there is no interference for the ducting:
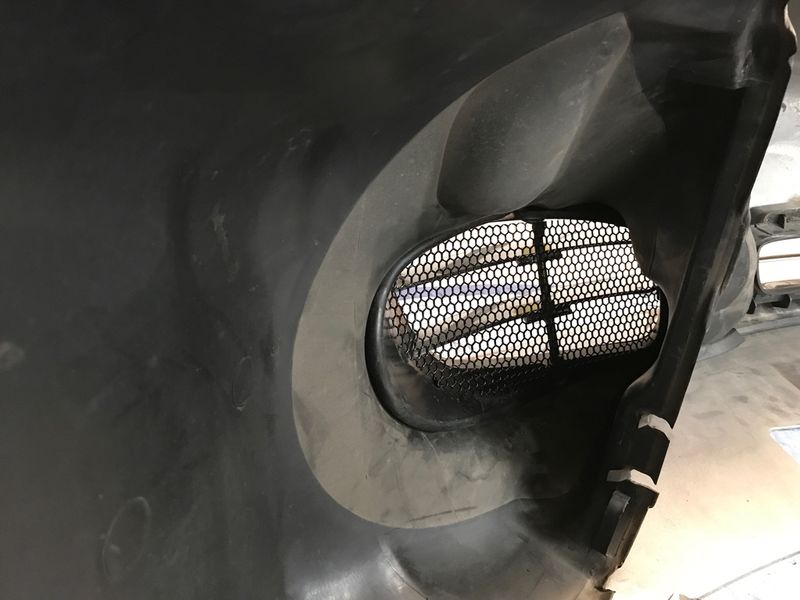
Next up - finish cleaning the radiators / condensers and button it up. Then on installing the immobilizer in the waterproof case.
__________________
Rgds, Fred
#317 550 Spyder Anniversary Edition 2004 Boxster S, 3.8L Flat Six Innovations engine, PSS9s, etc, etc . . .
The contents of my posts are for entertainment only. As confirmed by my many motor sports fails, I am not qualified to give product endorsements or mechanical advice
Last edited by Oldcarguy; 05-30-2017 at 05:20 AM.
|
|
|
|
|
05-29-2017, 03:57 PM
|
#3451
|
|
Racer Boy
Join Date: Sep 2015
Location: Seattle, WA
Posts: 946
|
My 145K mile 2002 has the worst headlights I've seen on any Porsche. Very cloudy and yellow, and the lenses themselves have several burnt spots on them. I've tried sanding them and doing all the chemical treatments, but no luck, they were just too far gone. So I finally sprang for new ones!
I purchased these from a vendor on Amazon, and they were less expensive than any others that I could find when you factored in the free shipping.
The difference is amazing! I am no longer embarrassed when I see another Porsche!
I'll get rid of the amber triangle lenses. I ordered some clear triangles when I ordered the headlights, but they won't arrive for another few days.
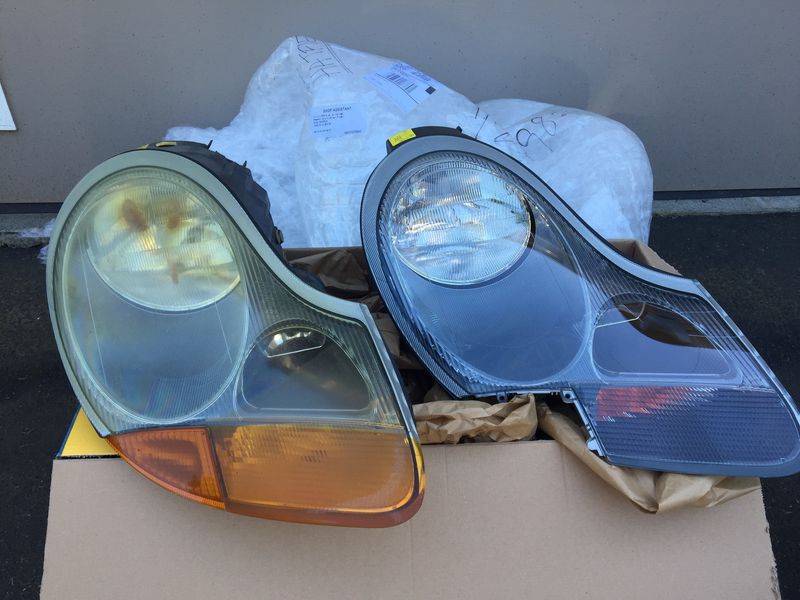
Old on the left, new on the right.
|
|
|
|
|
05-29-2017, 03:58 PM
|
#3452
|
|
Registered User
Join Date: Dec 2016
Location: New York
Posts: 89
|
Hi Fred - Thanks for the info on CCG grill material. Looking forward to picking this up and doing the same. Also watched your Vimeo video. Great stuff and thanks for sharing!
Joe
__________________
2002 Boxster 2.7 Lapis Blue
|
|
|
|
|
05-29-2017, 06:30 PM
|
#3453
|
|
Registered User
Join Date: Sep 2016
Location: Stow, MA
Posts: 918
|
HPDE at Thompson
Did my first HPDE at Thompson Autosports Park in Connecticut.
A lot of fun and a great learning experience.
The video was shot with a helmet mounted GoPro Hero 5 Session.
https://youtu.be/Z2zrr7MiHME
__________________
2004 Boxster S Silver - FUNTOY
2002 Boxster Base Guardsy Red - FUNBOX
1987 Caterham Super 7 1700 Supersprint
2009 Mercedes Benz CLK 350 convertible
1941 Dodge Luxury Liner Coupe
|
|
|
|
|
05-29-2017, 07:52 PM
|
#3454
|
|
Registered User
Join Date: Feb 2017
Location: North Eastern US
Posts: 646
|
Quote:
Originally Posted by jrgill
Hi Fred - Thanks for the info on CCG grill material. Looking forward to picking this up and doing the same. Also watched your Vimeo video. Great stuff and thanks for sharing!
Joe
|
Hi Joe, You're welcome! Thanks for the comment on our Vimeo video. Didi and I are really fortunate to share a common interest in participating in motorsports activities.
The CCG material worked out really well for me. Looking forward to seeing your results.
__________________
Rgds, Fred
#317 550 Spyder Anniversary Edition 2004 Boxster S, 3.8L Flat Six Innovations engine, PSS9s, etc, etc . . .
The contents of my posts are for entertainment only. As confirmed by my many motor sports fails, I am not qualified to give product endorsements or mechanical advice
|
|
|
|
|
05-30-2017, 07:13 AM
|
#3455
|
|
Registered User
Join Date: Nov 2006
Location: In the garage...
Posts: 1,739
|
Solid job there [another] oldcarguy 
Incidentally, "flow" rate will actually be higher than 77%. The 77% rate is amount of stagnant fill with mesh versus wide open. The flow rate could be a bit lower than wide open but won't drop anywhere near theoretical 23% based on amount of fill the mesh provides.
I did similar (IIRC rated at 80% fill) 5-6 years back on my 997 C2S. Even after numerous HPDEs in 95F hazy, hot, and humid weather w/ 30+ min sessions, only effect has been easier cleaning of condensers & rads... No to mention, I haven't had to replace one AC condensers since installing mesh either - wish I'd done after I lost first one years ago... Bottom line, I have experienced ZERO negative impact to cooling efficiency/capabilities (as nay-sayers to this mod will try and proclaim).
Good luck 
Quote:
Originally Posted by Oldcarguy
Made the templates, cut the CCG grills and fitted to the nose. The CCG grills are high quality, very sturdy (power coated aluminum alloy) and they flow 77% of the air vs wide open (which is very good for a relatively dense mesh, BTW). CCG is one of the few places I've found that actually have specs for their grill material. YMMV, but good stuff for me.
Here's a pic before I snipped the zip ties so the placement can be seen:
I made sure that there is no interference for the ducting:
Next up - finish cleaning the radiators / condensers and button it up. Then on installing the immobilizer in the waterproof case. |
__________________
"Cool Prius!" - Nobody
|
|
|
|
|
05-30-2017, 10:19 AM
|
#3456
|
|
Registered User
Join Date: Feb 2016
Location: SE USA
Posts: 324
|
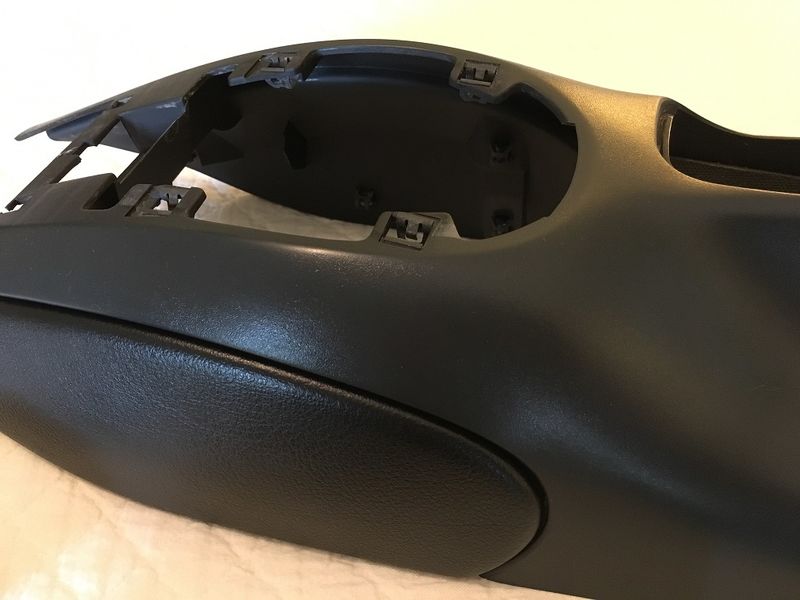
Trim
Well, I couldn't take it any longer. The sticky, scratch if you look at it coating on the interior was driving me nuts. I had already covered the door flaps, handle release covers, seat hinge covers and trim pieces for the back of the console in leather. I did not want to do that for the console as I didn't have enough leather anyway.
Ultimately I decided to use the same nano-covering (C-Quartz) I did on the door thresholds which has held up really well. So...with a long three day weekend, why not. I stripped all of the coating off with hot water, alcohol and a lot of green scrubbing pads. Once cleaned it leaves a nice textured surface although it is a bit plasticky. However, no more sticky and it's very scratch resistant. 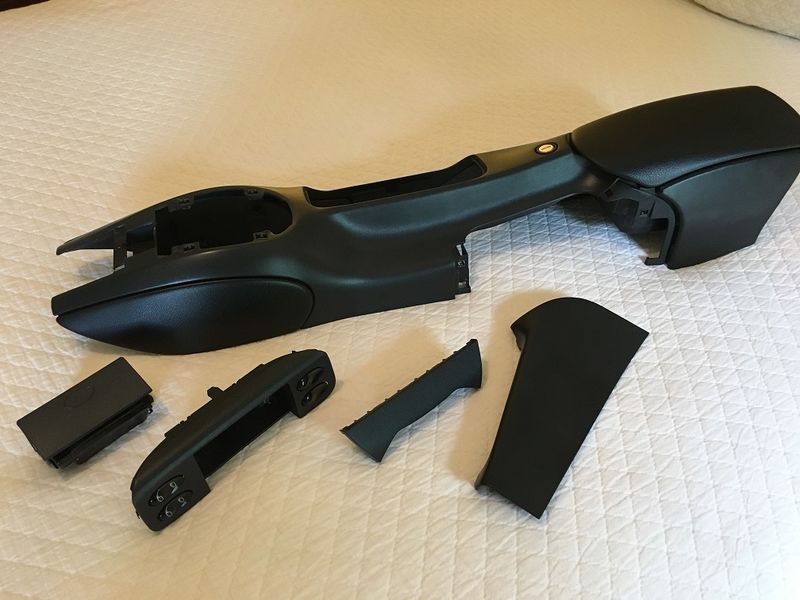
|
|
|
|
|
05-30-2017, 10:27 AM
|
#3457
|
|
Registered User
Join Date: Jul 2012
Location: New Hope, PA
Posts: 191
|
Quote:
Originally Posted by Jgkram
Well, I couldn't take it any longer. The sticky, scratch if you look at it coating on the interior was driving me nuts. I had already covered the door flaps, handle release covers, seat hinge covers and trim pieces for the back of the console in leather. I did not want to do that for the console as I didn't have enough leather anyway.
Ultimately I decided to use the same nano-covering (C-Quartz) I did on the door thresholds which has held up really well. So...with a long three day weekend, why not. I stripped all of the coating off with hot water, alcohol and a lot of green scrubbing pads. Once cleaned it leaves a nice textured surface although it is a bit plasticky. However, no more sticky and it's very scratch resistant.
|
Looks sooo much better! When you covered the other bits with leather, how did you glue it down? I'm about to do my door pockets.
Sent from my iPad using Tapatalk Pro
__________________
'01 986S
07 GT3
'80 911SC Weissach Edition (Sold)
11 958 S
https://dergarage.com
|
|
|
|
|
05-30-2017, 10:55 AM
|
#3458
|
|
Registered User
Join Date: Feb 2016
Location: SE USA
Posts: 324
|
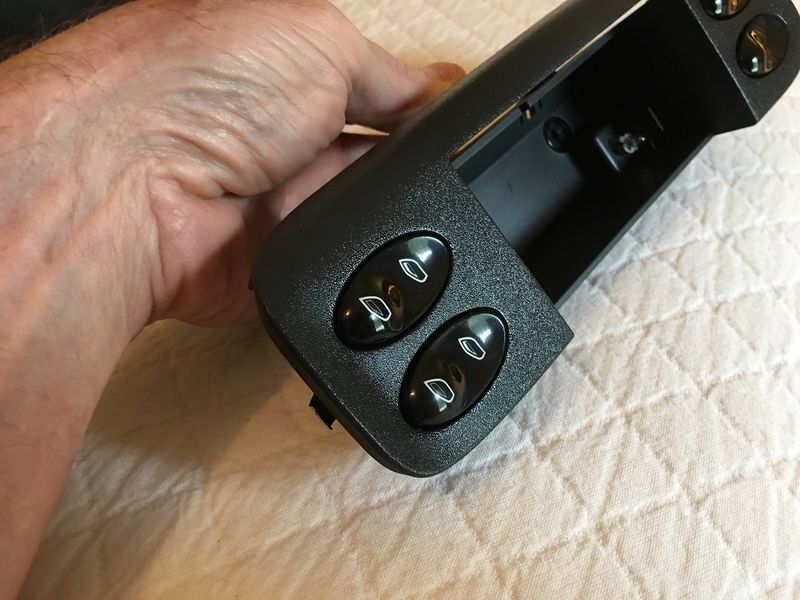
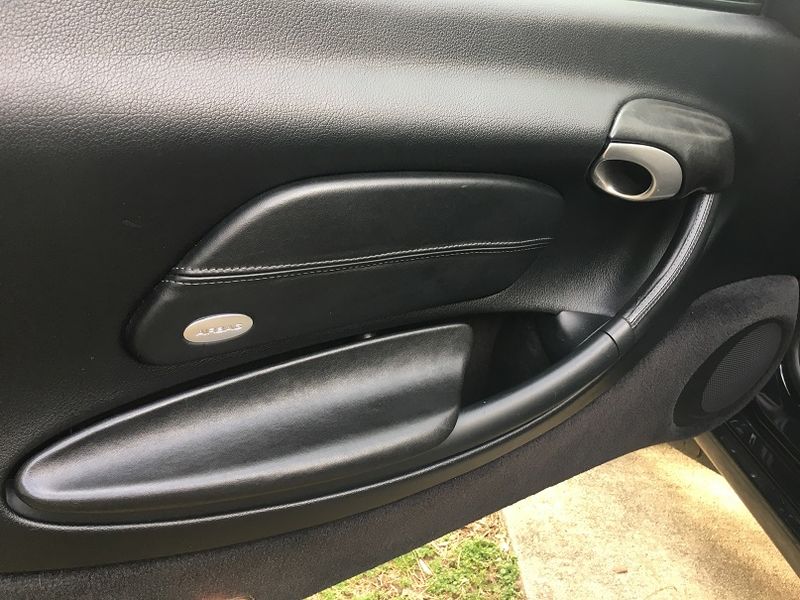
Leather Trim
CBRacerX,
I just bought a lambskin leather jacket from the thrift store for $5. I used the standard contact cement in the small brown colored bottle from Lowes/Home Depot. I di not use any felt or backing but just cleaned the pieces the same was as the console and then carefully covered. Photos attached and very pleased with results. 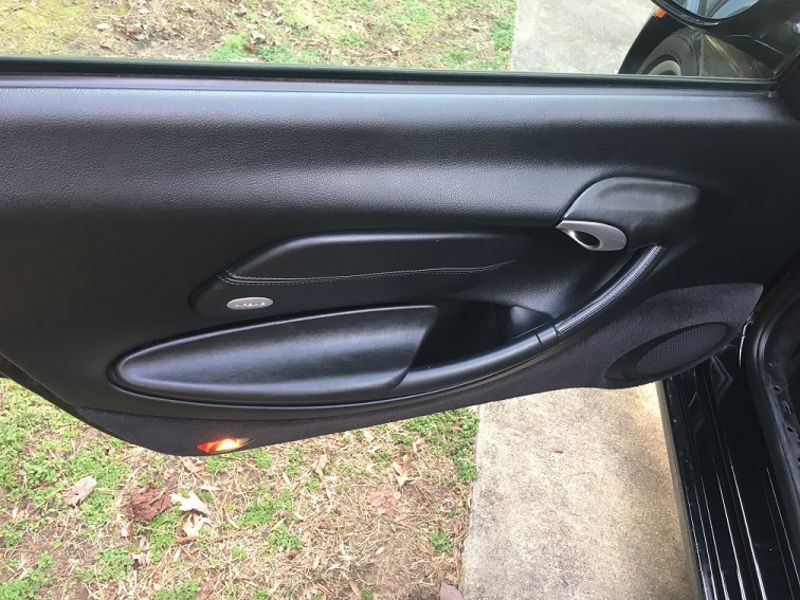

|
|
|
|
|
05-30-2017, 11:21 AM
|
#3459
|
|
Registered User
Join Date: Jul 2014
Location: Valparaiso, IN
Posts: 190
|
Went to my friend's home and had a nice conversation while he replaced the passenger side window regulator. Now it goes up... and it goes down... no noise! I owe him!!!
|
|
|
|
|
05-30-2017, 11:31 AM
|
#3460
|
|
Registered User
Join Date: Aug 2015
Location: Stockholm, Sweden
Posts: 282
|
|
|
|
|
 Posting Rules
|
You may not post new threads
You may not post replies
You may not post attachments
You may not edit your posts
HTML code is On
|
|
|
All times are GMT -8. The time now is 10:55 PM.
| |


 1997 Porsche Boxster
 2001 Porsche Boxster S
 Porscha
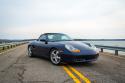 Boxster 2.7
 2002
2002  FunToy


 Linear Mode


