 10-31-2021, 01:04 PM
|
#1
|
|
Registered User
Join Date: Aug 2013
Location: Gibraltar
Posts: 91
|
 Notech 986 Cayman project build
Hello gents,
I have got a second Porsche Boxster, lapis blue 986S 3.2L year 2000 saved for a few years awaiting for the big moment to shine 
I have got it from my neighbour in south of Spain, very cheap as it was sitting for a couple of years on open air parking.
I would look at the car from time to time and the rear roof glass had collapsed and car got rain during winter months. Would start but idle erratically, immobilizer dead on all functions apart starting the car, battery would drain flat in a day. Car was permanently exported from UK so paperwork had to be sorted as well.
I have asked him one day, would he like to sell the car and we agreed on a fair price.
I have fixed the idle with new MAF.
Battery drain was caused by an electrical short of not one but two aftermarket anti-theft devices placed under the carpets/dash with old batteries.
I tried to re-solder few immobilizer path but wasn't able to restore its full functionality. It would some time switch on the ambient light, sometime not, and no central lock functionality over the dashboard button or remote key. At the end I have replaced it with another unit and re-coded with original ECU from a guy in Germany.
I have also stitched the roof glass back but canvas give up with few straps and cracks over the time. It also appeared the roof mechanism has snapped the cable and gears.
Last edited by notech; 10-31-2021 at 01:56 PM.
|

|

|
|
10-31-2021, 01:09 PM
|
#2
|
|
Registered User
Join Date: Aug 2013
Location: Gibraltar
Posts: 91
|
So time goes by and I'm starting to collect parts for a Cayman based 986 with a glance to 718 GT4 parts, this includes:
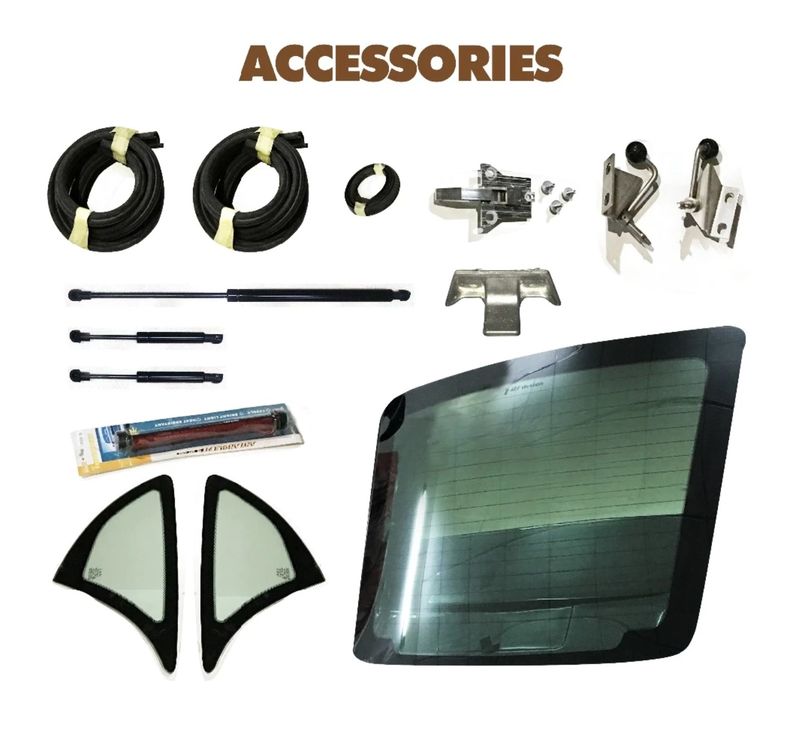
The Cayman style Z-top Zeintop for Porsche 986 with its accessories

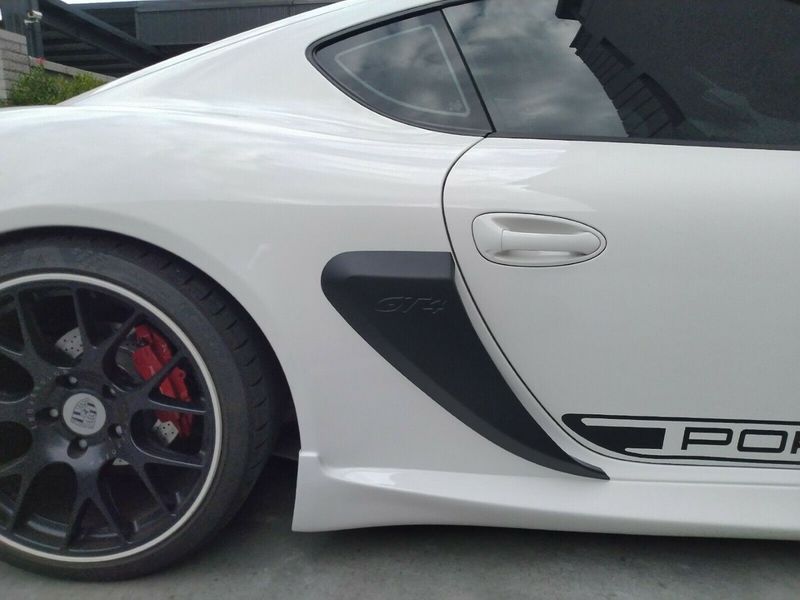
Cayman 718 GT4 side scoops
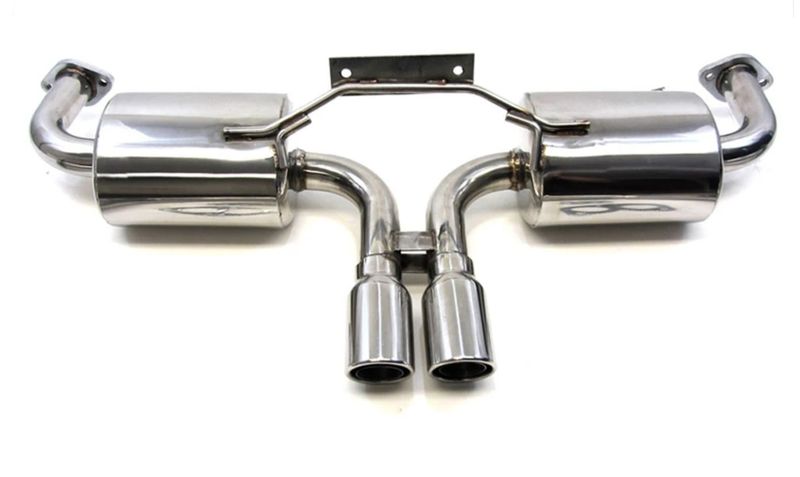
Manzo exhaust manifolds and muffler
Also Tarett UDP, Joe Toth's rear spoiler, PD1 Front bumper and side skirts, 987 Airbox and throttle body, 996 Plenum
Last edited by notech; 10-31-2021 at 03:14 PM.
|
|
|
|
|
10-31-2021, 01:12 PM
|
#3
|
|
Registered User
Join Date: Aug 2013
Location: Gibraltar
Posts: 91
|
Mechanicals:
You can observe the airbox being cut and prepared to be fitted in the car.
Exhaust manifolds and muffler are also being fitted. It was no joy, all bolts we're corroded and snapped on engine side and catback. Lambdas were also impossible to remove.
A careful mastery with the gas torch allowed to remove the bits. I have used another pair of cats that are in better shape.
At the same time 21 years old squeeky arms and links have been replaced, a new AC lines gasket and AC fan resistors (Aircon would leak and not engage fans, overcharging the system).
Last edited by notech; 10-31-2021 at 02:14 PM.
|
|
|
|
|
10-31-2021, 01:13 PM
|
#4
|
|
Registered User
Join Date: Aug 2013
Location: Gibraltar
Posts: 91
|
Steering wheel:
While the car in the air, we can removed the steering the scuffed steering wheel and re-stitch it with alcantara leather.
(I was able to restore it with a paint corrector and fixer but wasn't completely satisfied with the result).
Notice the red stitch, it would later be matched with red seat belts.
Last edited by notech; 10-31-2021 at 02:20 PM.
|
|
|
|
|
10-31-2021, 01:14 PM
|
#5
|
|
Registered User
Join Date: Aug 2013
Location: Gibraltar
Posts: 91
|
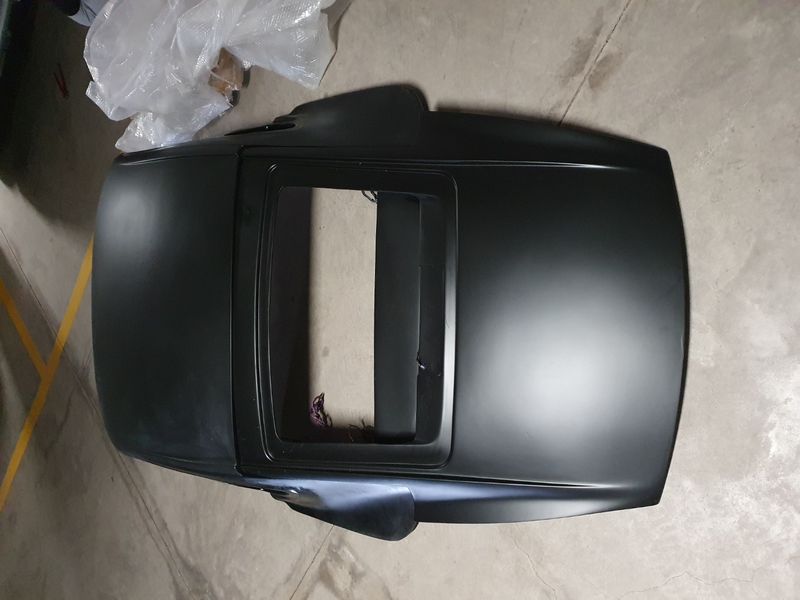
Preparation:
Disassembly begins, while you should keep you original canvas roof in place, I have opted for a complete removal, as this car will be a happy permanent Cayman (the Cayman style roof will be glued)
Removal of the original roof, motors etc.. saves about 30KG while the Z-top should weight about 40-50KG (more on that later).
First fit in, it will be later attached and sanded down.
Last edited by notech; 10-31-2021 at 02:29 PM.
|
|
|
|
|
10-31-2021, 01:16 PM
|
#6
|
|
Registered User
Join Date: Aug 2013
Location: Gibraltar
Posts: 91
|
Sanding and filling:
The Z-top is finally attached to the body with a filler and sanded.
Notice the side air intake width is being increased to accommodate the Cayman 718 GT4 side scoops (the GT4 engraving is filled and sanded away).
Also the original 986 side intakes are kept but the fins are removed for better air flow. Snorkel is also deleted.
Last edited by notech; 10-31-2021 at 02:37 PM.
|
|
|
|
|
10-31-2021, 01:17 PM
|
#7
|
|
Registered User
Join Date: Aug 2013
Location: Gibraltar
Posts: 91
|
Side skirts installation:
The side skirts are being installed. For some reason they were shorter that the car lenght (maybe the car has grown with so much rain?  )
Ultimately they have been cut and expand to fit.
Last edited by notech; 10-31-2021 at 02:40 PM.
|
|
|
|
|
10-31-2021, 01:18 PM
|
#8
|
|
Registered User
Join Date: Aug 2013
Location: Gibraltar
Posts: 91
|
Painting finally:
Porsche Miami Blue, what a vibrant colour living by the sea side!
Last edited by notech; 10-31-2021 at 02:43 PM.
|
|
|
|
|
10-31-2021, 01:19 PM
|
#9
|
|
Registered User
Join Date: Aug 2013
Location: Gibraltar
Posts: 91
|
Bumper paint, fit and stickers:
The PD1 bumper is being painted and fit to the car, also an electromagnetic parking sensor is being fit behind the bumper.
Porsche 911R vinyl stripes are also applied.
Last edited by notech; 10-31-2021 at 03:11 PM.
|
|
|
|
|
10-31-2021, 01:21 PM
|
#10
|
|
Registered User
Join Date: Aug 2013
Location: Gibraltar
Posts: 91
|
Wheels and spoiler:
The car came with the original BBS 18" two piece sport design wheels, they will be fixed for oxidation and painted in gloss black.
The Cayman 718 carbon fibre spoiler is also being fit, it has three adjustments for downforce.
Last edited by notech; 10-31-2021 at 03:17 PM.
|
|
|
|
|
10-31-2021, 01:23 PM
|
#11
|
|
Registered User
Join Date: Aug 2013
Location: Gibraltar
Posts: 91
|
The windows:
Unfortunately the side glasses didn't come with correct shape, also the rear glass would touch the liner which would needs to be shaved off.
I have opted for a polycarbonate replacement, this is custom fit and saves some weight.
Last edited by notech; 10-31-2021 at 03:12 PM.
|
|
|
|
|
10-31-2021, 01:24 PM
|
#12
|
|
Registered User
Join Date: Aug 2013
Location: Gibraltar
Posts: 91
|
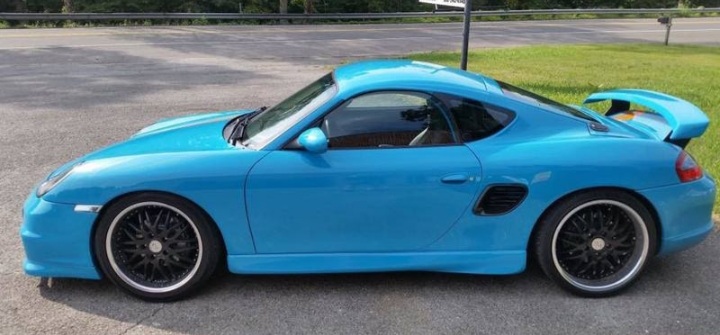
Final results!
A long planned and awaited project comes to its conclusion with few small details left to be fixed here and there.
A personal interpretation to what a Cayman would have looked like if it was based on 986 platform An ECU tune has also raised some HP and torque and enabled the full potential of the new intake and exhaust.
A sure eye catcher, kids love to point at it!
Last edited by notech; 10-31-2021 at 03:19 PM.
|
|
|
|
|
10-31-2021, 02:42 PM
|
#13
|
|
WALDMEISTER
Join Date: Sep 2013
Location: Germany
Posts: 1,381
|
SUBSCRIBED!
I see that you are still uploading pics, I was wondering already :-D
__________________
Original Owner | PORSCHE Boxster 2.7L (MY01) | Seal Gray
|
|
|
|
|
11-06-2021, 02:30 PM
|
#14
|
|
Registered User
Join Date: Sep 2017
Posts: 85
|
Beautiful, well done sir
|
|
|
|
|
11-08-2021, 09:33 PM
|
#15
|
|
Registered User
Join Date: Jan 2021
Location: Coquitlam, BC Canada
Posts: 36
|
Nicely done!
Sent from my SM-G781W using Tapatalk
|
|
|
|
|
11-29-2021, 05:53 PM
|
#16
|
|
Registered User
Join Date: Apr 2017
Location: Indiana
Posts: 1,512
|
Nice looking! How did you attach the top to the car? Not trying to be a downer but this was done on a miami blue 986 several years ago and it didnt end well. The body and top flex cracked all the filler around where the top was attached, front and rear. I have a Z-top so I'm not being a jerk. How do stop this from happening on yours? The car I'm speaking of. 👇
|
|
|
|
|
11-30-2021, 11:35 AM
|
#17
|
|
1998 Boxster Silver/Red
Join Date: Sep 2017
Location: 92262
Posts: 3,105
|
Great from start to finish!
Gonna need larger pictures, though. 
__________________
1998 Porsche Boxster
|
|
|
|
|
12-02-2021, 10:56 PM
|
#18
|
|
ISSIMI
Join Date: Apr 2017
Location: Bay Area CA
Posts: 144
|
[QUOTE=JBauer;643694]Nice looking! How did you attach the top to the car? Not trying to be a downer but this was done on a miami blue 986 several years ago and it didnt end well. The body and top flex cracked all the filler around where the top was attached, front and rear. I have a Z-top so I'm not being a jerk. How do stop this from happening on yours? The car I'm speaking of. ��
Thought it was neat when i first saw the panel gaps being filled but then immediately thought of this. Probably need a metal top and weld it on. Then it'll actually be functional.
|
|
|
|
|
01-07-2022, 03:14 AM
|
#19
|
|
Registered User
Join Date: Aug 2013
Location: Gibraltar
Posts: 91
|
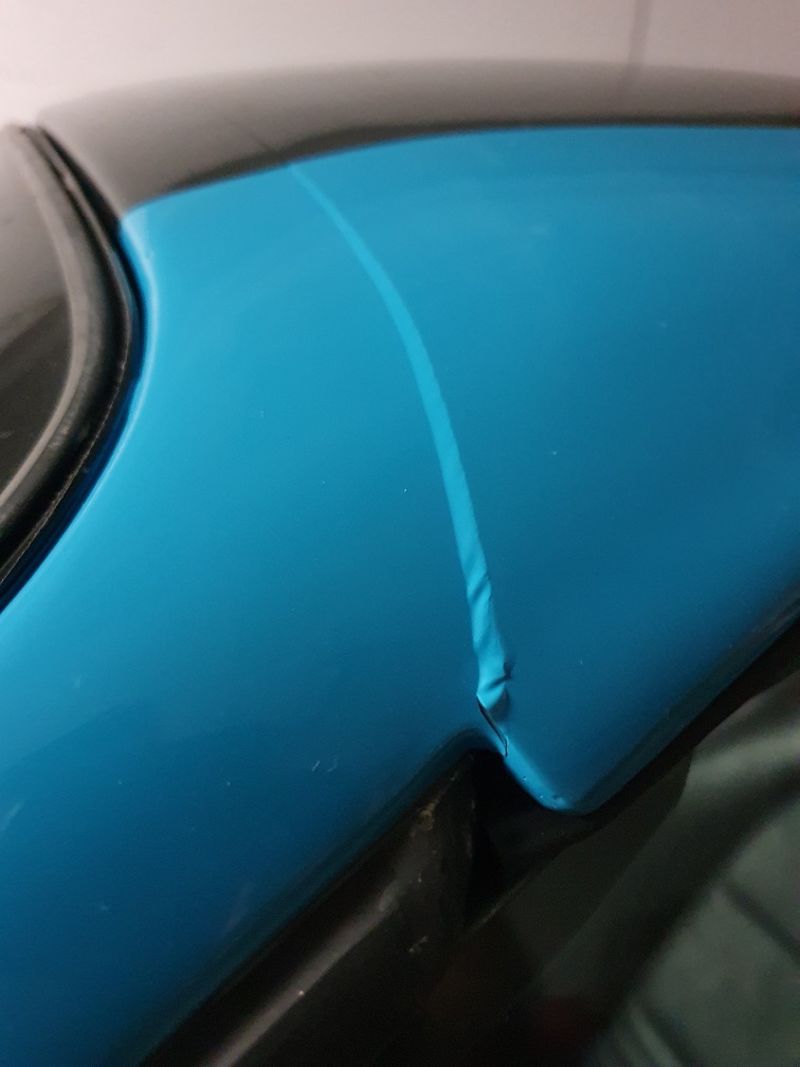
Good spot guys, the top has been painted 3 times
September 2021
In this instance expansion foam and filler was used to bond the two parts.
The connection between top and windshield developed cracks the next day and the connection between rear-side body and the top sized and left some marks.
October 2021
In this instance some industrial glue was used to bond the two parts.
The connection between top and windshield developed cracks the next two weeks on one side and the connection between rear-side body also only one side left thin hair marks.
November 2021
In this instance an epoxy glue used for wakeboards was used to bond the two parts.
Two months later (and 3000KM) included bumpy roads, there is no sign of imperfections.
If you're interested, I can ask the shop for exact epoxy details.

|
|
|
|
 Posting Rules
|
You may not post new threads
You may not post replies
You may not post attachments
You may not edit your posts
HTML code is Off
|
|
|
All times are GMT -8. The time now is 08:12 AM.
| |


 986 S
986 S 986 S
986 S SLK
SLK "GRAY"
 Linear Mode


