Hi guys, so I picked up this green 2001 Boxster 2 months ago as a project car. It was forest green, not my color at all but I was going to paint it so didn't care. I wanted to build a (Sport Classic Gray colorcode=63A) like the 2010 911 that came out a few years ago. Here are my upgrades all done by me. Just wanted to share some of the things you can do easily to this car.
-Add Xenon Litronic headlamps -yes, truely plug & play nothing to it.
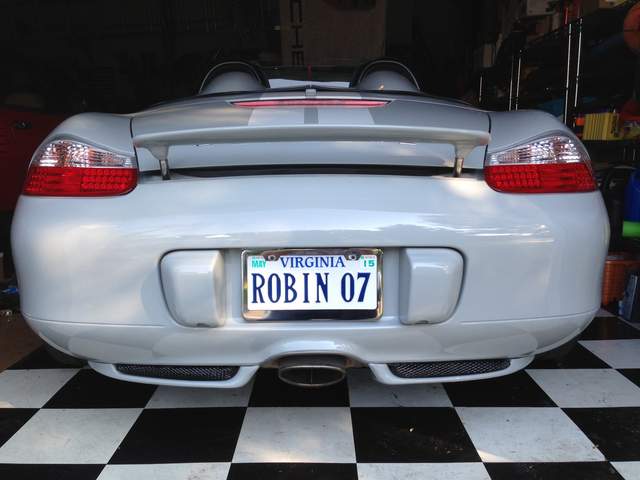
-Add GT3 spoiler, just remove the stock, measure and drill 2 holes on the new spoiler
-Add clear lens sure does take off years to the 2001, looks modern, fresh, and updated
-Add a rear diffuser gives it a more aggressive look
-Add LEDs, screw on to front grille but you will need to remove the front bumper to do this, pretty easy. Tap the side marker lines and it will work and use your oem knob to control it.
-Add Mesh behide your grille adds detail and beauty and keeps insects and leaves out
-Add vinyl racing stripes, tape down the middle, clean and spray soapy water on car and adhesive backing, slide in place and squeegee the water out.
-Add a new shift knob is very easy, clips holds it in console, pull straight up oem, add new knob, secure with the lil screw and snap back in.
-Add racing pedals, remove rubber shoes, drill holes to the pegs and secure with screws
-Add a Speedster hump sure changes the look of the car as well, almost like a 996 cabrio but with a 2 seater look to it.
-Add LED license plate bulbs -brighter and way cooler than oem
-Add an EZ-lip front spoiler trim to size, peel and stick, no drilling required and looks amazing
Hope you found this helpful, good luck on your projects!
Cheers


 ROBIN
ROBIN 2001 Boxster Sport Classic


 Threaded Mode


