Go Back   986 Forum - The Community for Porsche Boxster & Cayman Owners > Porsche Boxster & Cayman Forums > Performance and Technical Chat

Post Reply
 
LinkBack Thread Tools Display Modes
Old 12-03-2017, 07:49 PM   #1
Registered User
 
steved0x's Avatar
 
Join Date: Dec 2012
Location: FL
Posts: 4,144
The specs are broad and you could be way off side to side and still be within those specs.

For stock street suspension, a good alignment for sporty handling and daily driving and even tire wear might be:

Front: -.5 camber per side, toe .08 degree toe in per side, .16 degree total
Rear: -1.5 camber per side, toe .08 toe in per side, .16 total

Toe in provides stability but that small amount doesn't appreciably affect inner tire wear.

For more sporty handling, go -1.0 in front (or max you can get, and 0 toe)

Tell them to get both sides the same, that plus not too much toe will have the greatest benefit to your tire wear.

Stock suspension your range in front is around 0 to -1 camber and around -1.3/1.4 to -1.9 in the back., maybe less to keep the rear toe in line.

What are your driving and tire wear goals?
steved0x is offline   Reply With Quote
Old 12-05-2017, 03:40 AM   #2
Beginner
 
Jamesp's Avatar
 
Join Date: Mar 2013
Location: Houston
Posts: 1,659
Garage
Quote:
Originally Posted by steved0x View Post
The specs are broad and you could be way off side to side and still be within those specs.

For stock street suspension, a good alignment for sporty handling and daily driving and even tire wear might be:

Front: -.5 camber per side, toe .08 degree toe in per side, .16 degree total
Rear: -1.5 camber per side, toe .08 toe in per side, .16 total

Toe in provides stability but that small amount doesn't appreciably affect inner tire wear.

For more sporty handling, go -1.0 in front (or max you can get, and 0 toe)

Tell them to get both sides the same, that plus not too much toe will have the greatest benefit to your tire wear.

Stock suspension your range in front is around 0 to -1 camber and around -1.3/1.4 to -1.9 in the back., maybe less to keep the rear toe in line.

What are your driving and tire wear goals?
Thanks for the information on the alignment specification. City driving, longer tire life so it will be minimum Camber and toe.
__________________
2003 S manual
Jamesp is offline   Reply With Quote
Old 12-12-2017, 04:34 PM   #3
Beginner
 
Jamesp's Avatar
 
Join Date: Mar 2013
Location: Houston
Posts: 1,659
Garage
My evil plan is coming together. :dance:

__________________
2003 S manual
Jamesp is offline   Reply With Quote
Old 12-12-2017, 05:38 PM   #4
Registered User
 
steved0x's Avatar
 
Join Date: Dec 2012
Location: FL
Posts: 4,144
Quote:
Originally Posted by Jamesp View Post
My evil plan is coming together. :dance:

Awesome, I don't have a good local place to go to anymore, 1 guy quit, and the other place I go too left a rear tie rod loose last time and mangled the nuts by using pliers instead of the proper sized wrench, and did it wrong last time and didn't follow my instructions and had to redo the backs, and then my steering wheel wasn't straight. I would really like to get equipped to do my own...
steved0x is offline   Reply With Quote
Old 12-12-2017, 06:21 PM   #5
Beginner
 
Jamesp's Avatar
 
Join Date: Mar 2013
Location: Houston
Posts: 1,659
Garage
Metal from Home Depot.

Jig is accurate to 0.38 mm across the rim touch points. I'll dial it in closer tomorrow.


__________________
2003 S manual
Jamesp is offline   Reply With Quote
Old 12-12-2017, 08:08 PM   #6
Registered User
 
Join Date: Sep 2017
Location: SF Bay Area
Posts: 114
Garage
James, that is pretty cool setup. Please post a pic of the finished product. I would love to make that for my garage.
Steelepuls is offline   Reply With Quote
Old 12-16-2017, 11:32 AM   #7
Beginner
 
Jamesp's Avatar
 
Join Date: Mar 2013
Location: Houston
Posts: 1,659
Garage
A drill press, hack saw, Dremel tool, and various files were used to work the metal. The bars were checked against each other for straightness and the straightest faces were used as the datum for the pins. It's hard to see, but the ends of the bars are plasti-dipped. Here are the parts for the alignment jig:


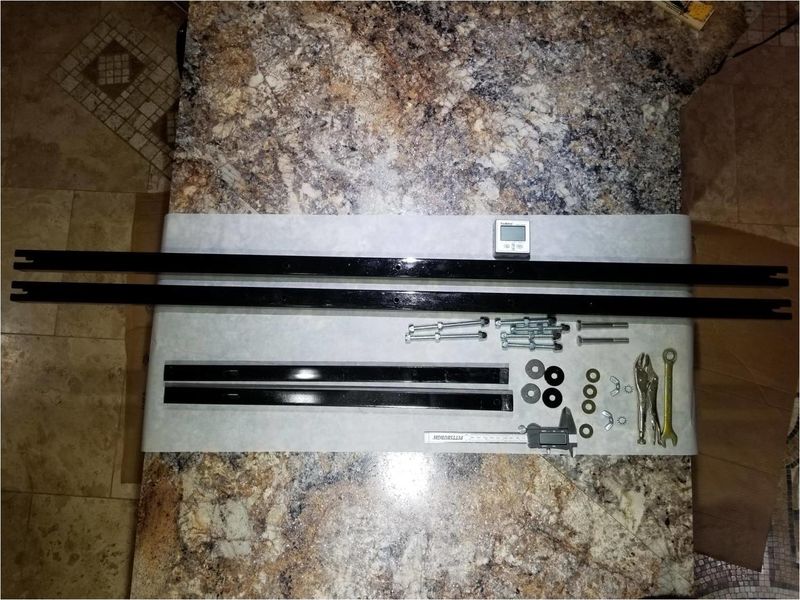
Here the jig getting dialed in. The distance between the flat surface of the countertop and the bottom of the jig is the critical measurement. Here it's dialed in to 0.0010.


0.0040 as the worst delta between standoff posts allowed, really just because that's close and it is difficult to get closer than 4 thousandths. Not bad for working on the kitchen counter.

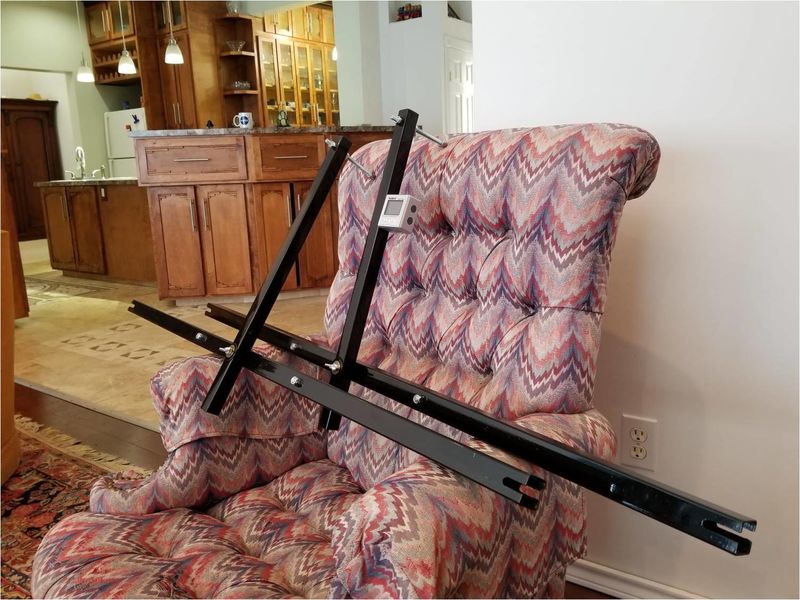
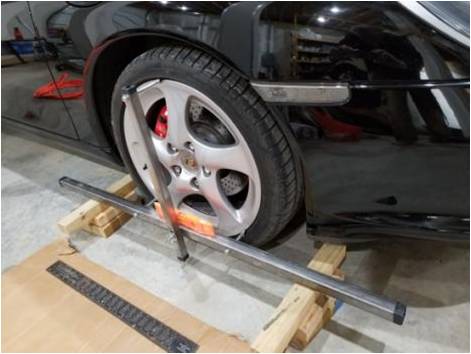
Here are the finished jigs ready for installation onto the car. The box stuck on the side of the jig is a digital level, it may not be trustworthy though, seems like it goes in 0.15 degree increments.


I also bought 2 new tape measures with the tick marks labeled down to the 8ths to make reading the measurements easy.
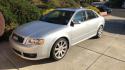
__________________
2003 S manual

Last edited by Jamesp; 12-16-2017 at 01:30 PM.
Jamesp is offline   Reply With Quote
Post Reply


Thread Tools
Display Modes

Posting Rules
You may not post new threads
You may not post replies
You may not post attachments
You may not edit your posts

BB code is On
Smilies are On
[IMG] code is On
HTML code is On
Trackbacks are On
Pingbacks are On
Refbacks are On


All times are GMT -8. The time now is 08:29 PM.


Powered by vBulletin® Version 3.8.7
Copyright ©2000 - 2025, vBulletin Solutions, Inc.
Content Relevant URLs by vBSEO 3.6.0
Copyright 2025 Pelican Parts, LLC - Posts may be archived for display on the Pelican Parts Website -    DMCA Registered Agent Contact Page