 08-22-2014, 01:04 PM
|
#1
|
|
Registered User
Join Date: Aug 2014
Location: Los Angeles
Posts: 3
|
Easy, cheap radar detector hard-wire to Boxster headliner
Parts needed:
-radar detector
-window mount (remove the suction cups)
-'hardwire kit' ('Direct Wire Power Cord for XXXXX', Amazon $10.95) for your particular radar detector
-Add-a-circuit fuse coupler ('ATO ATC Add-A-Circuit kit' Amazon $3)
-roll of double-sided 'mounting tape' or similar.
-nut & bolt & 2 washers.
This takes half an hour and costs under $20.
1.
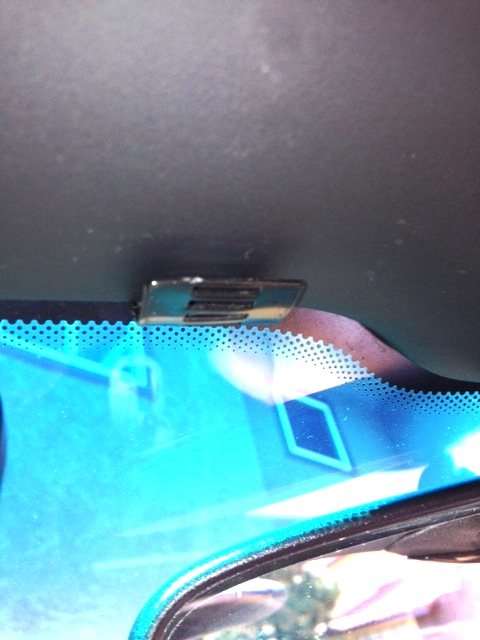
Bend the window mount as required in a vice or with pliers. Use a cloth so it doesn't chip the paint like I did. By carefully pulling on the plastic headliner slightly you'll be able to slip the 'mount' end directly under the headliner with a slight bit of play. You'll figure out the bend angle this way.[/SIZE]
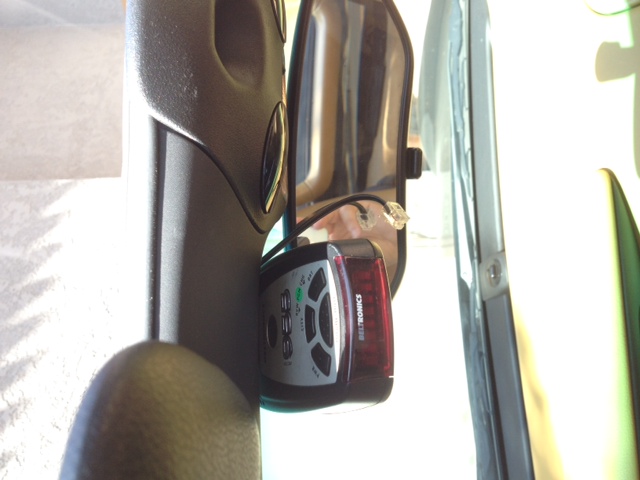
 Here it is with the radar detector attached. It is actually much more flush and 'invisible' than it looks like in this picture due to the angle.
 Once it's the correct angle wrap a piece of double-sided mounting tape around the end to be inserted. Again, carefully pull back the headliner and place it. The mounting tape takes up all the extra space and the mount should now be in place, firm and tight.
2.
Run the length of wire (starting from the detector side obviously) up between the headliner and the top of the window. It's fairly snug, but wrap small pieces of double-sided foam tape around the wire at intervals to keep it in place and out of view.
Bring the wire all the way down the driver's side window on the inside then down to the fusebox.
3.
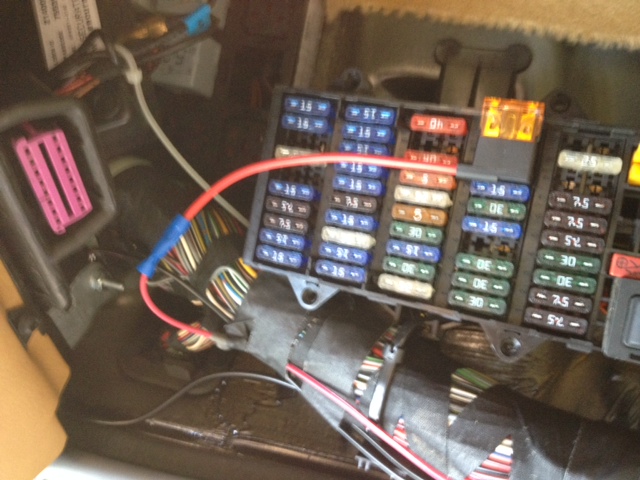
Take off the fusebox cover and unscrew the plastic valence around the fusebox (4 philips screws). Gently pull the entire piece off a small area of carpet is part of the whole piece, as per the image below.

4.
Connect the end of the 'Direct Wire Power Cord' that you just ran down from the window to the 'Add-A-Circuit' wire.
4.
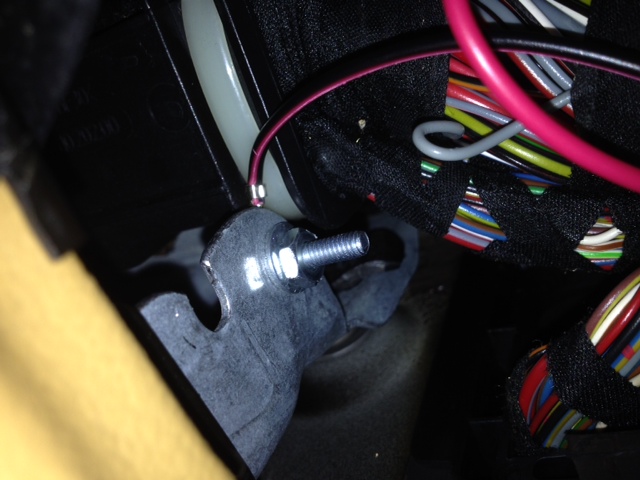
Find the ground. There is a very easy ground point directly above the fuse panel, slightly to the left if you're looking directly at it. There's actually a hole which is perfect for a nut and bolt. Snuggly connect the ground wire portion of the 'Direct Wire Power Cord to it.
5. Feeding the 'Add-a-Circuit' through the top opening of the fuse valence / panel, re-install it with the 4 screws.
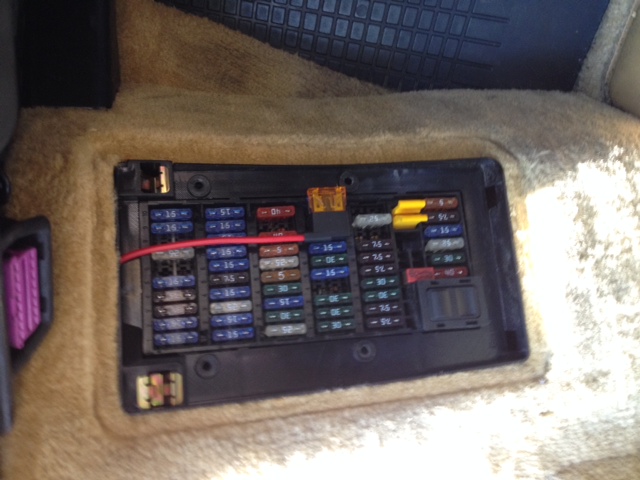 6. Place the 'Add-A-Circuit' fuse coupler into ROW D, COLUMN 8, which is the radio. The fuse slot closest to the panel when installed is the original fuse location, so plug in the original radio fuse there. Add a 3A fuse (provided in the kit) to the second slot. That is the radar detector fuse.
Plug it in, and off you go.
Disclaimer- I am not a mechanic or electrical expert. This worked for me, but if you see any issues, shortcuts, or potential problems with the way this was installed please feel free to let me know and I'll update it accordingly.

|

|

|


 Threaded Mode


